Fairfield Button-up Sew-Along: Day 4 - Create a Custom Fit (Part 2)
Today we’re talking about specialized fit issues. Not everyone will come across these issues when fitting their mock-up, but if you happen to do so, you will likely find that it is difficult to find the solution by performing a quick Google search! There are two problems when Googling these fit issues: 1. They can be labelled a variety of names and can often be solved using a variety of manners. 2. There simply isn’t much written on fitting men’s button-up shirts on sewing blogs (at least I can’t find much!).
This post will give you my preferred solutions and suggestions and will also refer you to other resources that may contain different solutions altogether; that way you can choose the approach that works best for you.
Adjusting the Neck Size
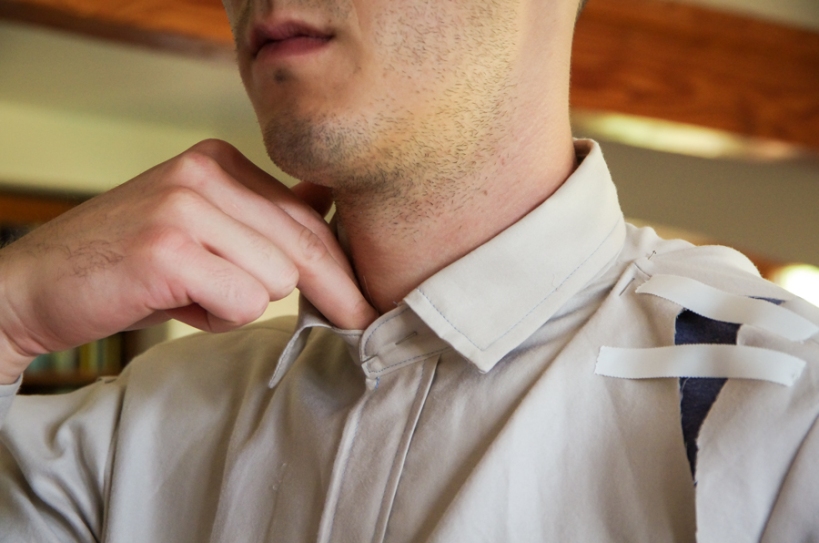
When choosing a size for the Fairfield Button-up, I recommend choosing based on the body measurement chart (specifically the chest circumference) and then adjusting the neck to fit the wearer. We measured the neck size two sew-along posts ago and can now confirm how the neck fits by examining the mock-up. As you can see in the photo above, Matt can fit two fingers between the collar stand and his neck comfortably. I consider this to be the correct size – any tighter and the collar stand would become uncomfortable, any looser and it would gape.
Solution:
To change the fit of the neckline on the mock up (before transferring changes to the paper pattern), I find it best to work without the collar and collar stand. Remove these if you sewed them on or sew a mock-up without attaching these pieces to the neckline. Stay-stitch around the neckline seam line and then clip up to the neckline through the seam allowance so that the seam allowance does not interfere with the fit.
Before making any changes to the neckline, measure the exact circumference of the neckline along the stay-stitching – measure from one finished edge to the other.
Make the neckline tighter:
Cut a strip of your muslin fabric on the bias. Wrap it around the neckline to fill in where the neckline gapes. The raw bias edge will be your new seam line.
Make the neckline looser:
Draw a new seam line at the base of the neck. Take off the mock-up and stay-stitch using your pencil marking as a guide. Clip through the seam allowance up to this new seam line and try the mock-up back on your wearer.
Make changes to the paper pattern:
Measure the length of the new seam line on the mock-up with your measuring tape. Compare this measurement to the original measurement. Draw the new neckline on the paper pattern so that it measures the same as the mock-up.
Now that your neckline has a new measurement, you will need to choose the collar stand and collar size that suit it – the pieces intended for your size will now be too short or long. Here is a tricky little way of finding a new collar stand size without any pattern manipulation: Find the difference between the old and new neckline measurements. Select the collar stand size that is also that much smaller or larger than your original neckline.
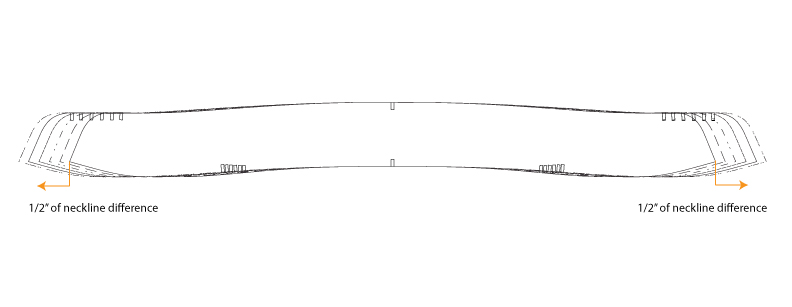
For instance, if I were sewing a size XS and I needed to enlarge the neckline 1″: I would measure outwards from the tip of the size XS collar stand 1/2″ in each direction which would bring me to approximately size L. I can adjust for any discrepancies of 1/8″ or so by making the neckline 1/8″ larger to fit the collar stand or by shaving 1/8″ off of the stand itself. I would then select the collar size L to match the new collar stand.
Resources:
Tasia of Sewaholic does a great job explaining how to enlarge your collar pieces to match your new neckline (this is a good approach if you don’t have the option to choose the next size up or down from a graded pattern).
Adjusting the Shoulder Slope

A common fit problem for shirts and bodices is the slope of the shoulders – chances are the wearer’s shoulders do not perfectly match the way that the pattern slopes.
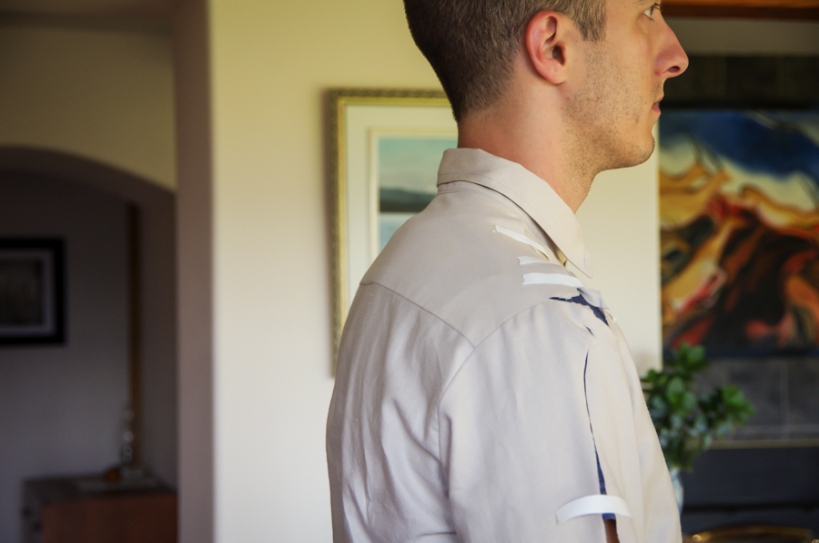
If you notice strain radiating from the center front in the upper chest and from the shoulder’s widest point (as you can see in the photo above), then the wearer’s shoulders are likely more square than the pattern. The mock-up will likely feel too tight across the upper chest. In the photo we had Matt put his hand behind his back and pull the shirt downwards to exaggerate this problem and make the radiating lines more obvious.
If you notice pooling loose fabric just below the shoulder across the front and possibly the back, this is likely because the wearer’s shoulders slope more than the pattern. The mock-up will appear too loose across the upper chest.
Solution:
Change the slope of the shoulder seam to match the wearer. In the photo below I’ve cut along the shoulder seam and part of the armhole to show you how the strain lines disappear when more room is given for the square corner of the shoulder bone. I didn’t tape thoroughly enough to properly show you that the gap tapers towards the neckline – woops! If the wearer’s shoulders were sloped more than the pattern you would need to overlap the muslin fabric rather than spreading it open.

To replicate this adjustment on the pattern, measure the amount that you have spread or overlapped the muslin. Draw in your seam lines and then angle the shoulder seam higher or lower to match the muslin measurement.
Now that you’ve changed your shoulder seam you will need to fix the armhole so that it remains the same size and shape as it was before your adjustment. Raise or lower the armhole at the armpit the same measurement that you raised or lowered the shoulder. Draw the armhole curve to match its original shape and length as closely as possible.
Addressing Rounded Shoulders
Also referred to as: Slumping Posture, Forward Shoulders, or, when referring to fit issues on women, the fairly offensive ‘Dowager’s Hump’.

This fit problem features many names, probably because poor posture is quite common. Many of us tend to slump forward slightly. If the problem is only slight, you probably don’t need to adjust your pattern. If the problem is fairly pronounced (as it has always been for Matt), you might be pleasantly surprised to find that fitting the garment to the curve will make your posture look far less rounded! I have heard stories about older women with very pronounced humps that are almost unnoticeable due to the careful way in which they fit their blouses.
Some people like to adjust for rounded shoulders by changing the shoulder seam position to angle forward to match the shoulders. This removes fabric that pools in the upper chest and gives a little bit more room across the upper back. This might be a good solution for you but the solution I have witnessed while taking a couple of fitting classes seems more suitable for Matt (though I haven’t actually tried this adjustment on him yet). The location of the most curved or protruding area of the back can differ hugely from person to person. The ‘hump’ can be located at the base of the neck, across the shoulder blades (as it is for Matt) or anywhere in between.
For Matt, the strain in the mock up is caused just as much by his spine curving towards the neck as it is by his shoulders curving forward. In Matt’s case there are two curves to deal with: a horizontal curve (shoulders curving forward) and a vertical curve (neck sloping forward).
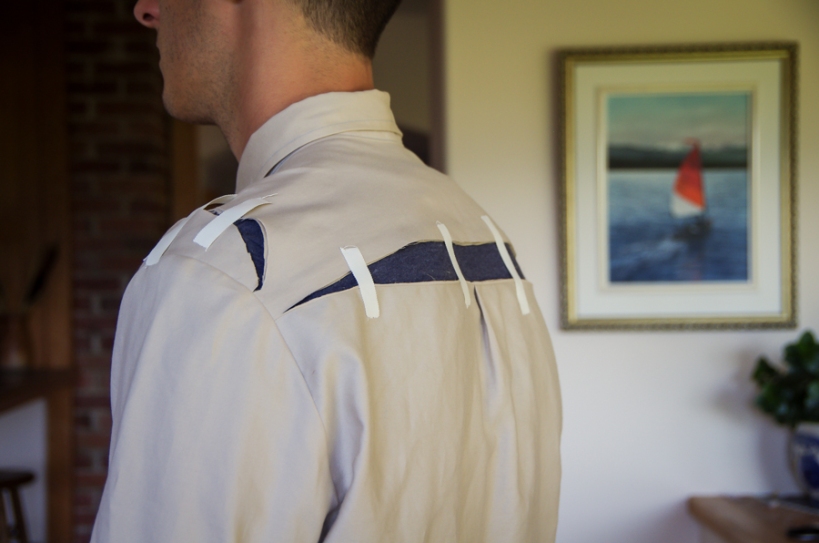
While the strain noticeable in the muslin may make you think that the back is wider than the garment and you just need to add width, you will find, when you cut across the strained area, that the strain does not disappear until you let the muslin gape open. It is necessary to add extra length to accommodate for the vertical direction of the curve.
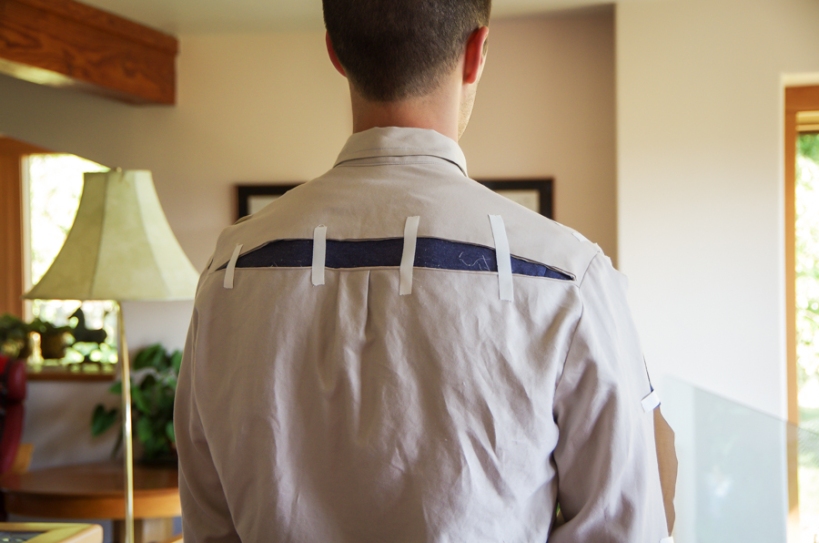
Luckily, a garment that already has a seam line across the back (a yoke), is quite easy to adjust! You can add length to the shirt along the horizontal yoke seam. You can add width to accommodate the shoulders curving forward by adding a center back seam to the yoke only. This vertical seam also gives you a fun chance to play with stripes or plaids (you can create a snazzy chevron effect by cutting each of the yoke halves on the bias). By the way, ignore the slash across the shoulder in the photo below – this was made for a fit adjustment in our last post and does not correspond to the rounded shoulder adjustment.
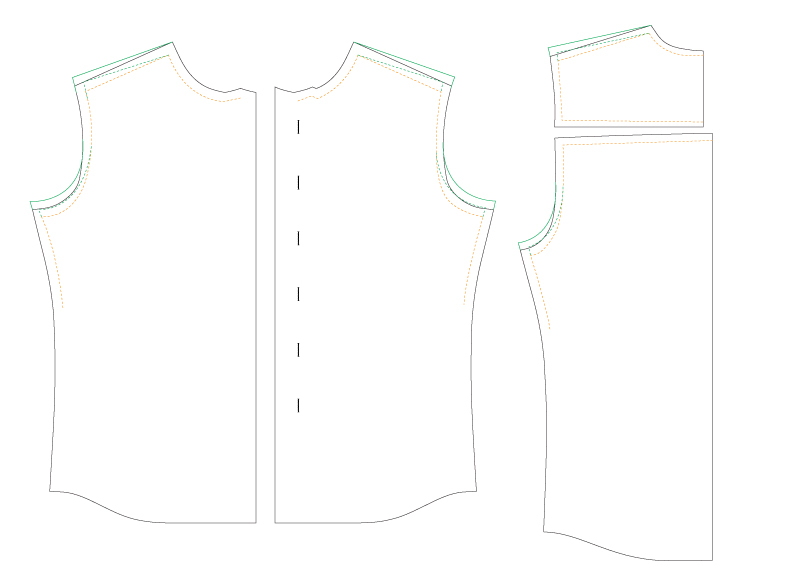
Here are the pattern adjustments that you will need to make to echo the slashes you made in your mock up if the wearer has a similar curve to Matt:

Resources:
Adjusting only the shoulder seam placement – tutorial by Maria Denmark
Adjusting for a dowager’s hump (various ways) – article by Sandra Kelly
The Dowager’s Hump adjustment in action by Mainely Dad (with a center back seam rather than a yoke – this allows you to see the finished shape we are attempting to create).
Whew! I had been looking forward to fitting our shirts because slashing a mock-up to bits has a certain destructive appeal (at least for me lol) and I enjoy this tactile and visual approach to fitting after spending most of my time manipulating patterns on the computer…but I must admit, mulling over the fitting possibilities has a been a bit of a sewing mojo destroyer! Don’t let fitting overwhelm you. Just pick as many adjustments as you feel you can achieve and save the rest for future garments – your shirt will still fit better than most shirts off of the store rack! It can be all too easy to get mired in the need to over fit but we won’t do that! We’ll charge ahead and cut into our fabric tomorrow!