

Eager to learn more?
Sift through our pattern hacks, sewing technique tutorals and guest blog posts by selecting from the filter below-left.
Tutorials
How to Assemble a PDF Pattern

We have received several emails lately from people who are excited to get sewing but are unsure of how to best assemble their PDF patterns.
Here is a clear guide for anyone who is new to working with our digital patterns!
Download and Open the Pattern
When you purchase a Thread Theory PDF sewing pattern, a download link will appear on your computer screen. The same download link will also be sent to the email address that you entered during the checkout process. Click either of these download links to save the pattern folder to your computer.

The pattern folder will likely be saved to your Downloads file. Find it straight away (before you forget where it has been saved!) and move it to a location on your computer where you will be able to find it in the future - perhaps in your Documents folder.
The pattern folder is a zipped folder - this means that multiple files have been compressed into one tidy folder so that they take up less space. To unzip the folder with a Windows computer, right-click and select Extract All. To unzip the folder with a Mac, option-click and select Extract All. To access the files from an iPad, you will need the iZip app to unzip the folder.
Examine the Files
Within each PDF pattern folder, you will find several PDF files. You will need a PDF reader installed on your computer to view and print these files. Many computers will have this reader already but if you do not, you can download the free Adobe Acrobat Reader software here.
- Read Me First - Read this first! This is a small introduction on how to assemble the Print at Home pattern. You don't need to print this but it is important to read it and refer to the page layout chart when you are taping together your pattern.
- Instructions - You can either print these off or you can keep them on your laptop or tablet to refer to while you are sewing.
- Print at Home (depending on the pattern, there may be one or several of these) - The rest of this tutorial will explain how to print and work with the Print at Home pattern.
- Projector Grid - This file will be useful to you if you work with a projector at home (rather than printing off your pattern). The pattern has been overlaid with a handy 1" grid.
- Print Shop - Roll Feed - If you prefer to avoid taping or don't own a printer, give this file to your local print shop. Specify that the file must be printed without scaling - the pattern pieces need to be full sized. The Roll Feed file is designed to work with 36" wide wide format printers. These are commonly found throughout North America.
- Print Shop - A0 - This file can be sent to print shops that print on A0 size paper. Depending on the pattern you are using, you will likely need to tape one or two sheets together (for instance, a trouser leg is longer than one sheet of A0 paper and so it will be spread over two pages). A0 printers are common in Europe and Australia. As with the Roll Feed print option, make sure to specify that you would like the file printed full size (without scaling).
Print at Home
Let's talk more about using the Print at Home file. This option is very convenient - you can purchase a pattern and get started with the sewing process immediately! There is no need to wait for the pattern to ship to you or for the print shop to print your file. All of our Print at Home files come with a "layers" option as well, so you can select and print out ONLY the size that you need! The entire process is in your control.
While Print at Home PDF patterns offers advantages, there are also disadvantages too (depending on your perspective). Our Print at Home files are designed to print on Letter or A4-sized paper. This means that you will need to tape or glue together many small sheets of paper to prepare your pattern. This is a time-consuming process. Some people dislike doing this and others (myself included) find this to be relaxing and even meditative. I like to spend the assembly time contemplating my fabric and design choices. Assembling the pattern allows me to familiarize myself with the pattern pieces - it has become part of my creative sewing process!

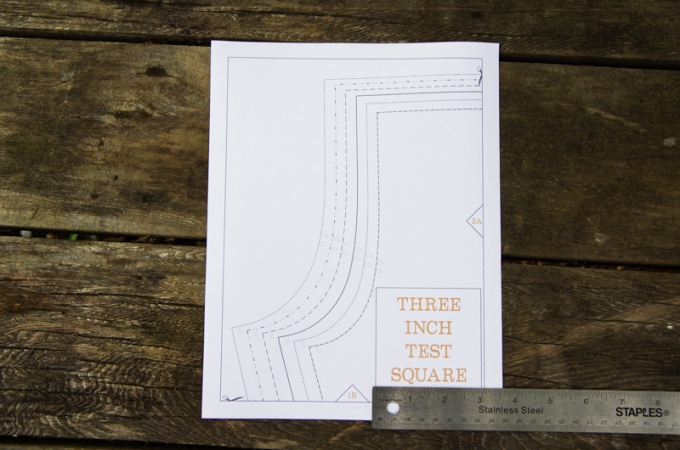
To print the pages, open up your Read Me First document. This page of instruction will tell you what page you will find the 3" test square.
Choosing Size Layers

Open your Print at Home file in Adobe Acrobat PDF Reader. On the left-hand tool bar there will be several icons. Click on the last icon that resembles stacks of papers, this is where you will find the size layers.

You will see each layer is labeled by size and has a small box with an eyeball icon on the left-hand side. By clicking on the eyeball icon you can make a layer become invisible or visible. Always make sure that the "Layer 1" or "Pages" layer is visible, this layer holds all the markings to tape your pages together. Also, always make sure that the "Labels" layer is visible as this layer holds all the pattern piece labels.
Now you are ready to print your pages!

Select File > Print and your printer dialogue box will open. Every dialogue box is slightly different (based on your printer's software) but it will include the same basic options:
- Printer Scaling: Ensure that 'scaling' is off so that your pattern pieces print at their full size. Printers tend to default to scaling so that the text or images fit nicely on a page of paper - we don't want this when printing a sewing pattern! To turn off scaling you will likely need to deselect "Fit to Page" or "Scale to Fit" (depending on your printer software) and select "Actual Size" instead. Ensure that Scaling is at 100%.
- Page Size: Underneath where you have just selected "Actual Size", you will see a check box labelled "Choose paper source by PDF page size" (or something very similar). Make sure this is left un-checked. If this box is checked, your printer may detect the wrong page size and, as a result, it will cut off either the top and bottom or right and left sides of the page.
- Orientation: Most printers have the following options: Auto, Portrait or Landscape. Ensure Auto is selected as the margins will not print correctly if the other two options are selected instead.
- Single Sided: Also, if your printer has the ability to print double sided pages, make sure that your printer is set to "Single Side" printing...don't print double sided! You will likely find this option in Properties.
- Econo Mode: If you would like to save ink/toner and paper, you can often find an "EconoMode" or "Draft Quality" printer setting that allows you to print with less ink. You will likely find this option under Properties > Paper/Quality. You can also replace the regular paper in your printer with recycled paper. I like to save up any paper that I have used (but only printed on one side) rather than throwing it in the recycling bin. That way I can print my PDF pattern on the unused side of the paper!
Print the page with the test square first by selecting the page mentioned in the Read Me First document. Measure the test square with a ruler. It should measure exactly 3". If it does not, your printer still has scaling turned on. Don't print the rest of the pattern until the square measures 3".
Print the rest of the pattern by printing all pages. If you like, you can number each page in the blank margin so that the pages are easy to keep in order even if they get knocked to the ground by a mischievous cat (speaking from experience...).
Assemble the Print At Home Pages
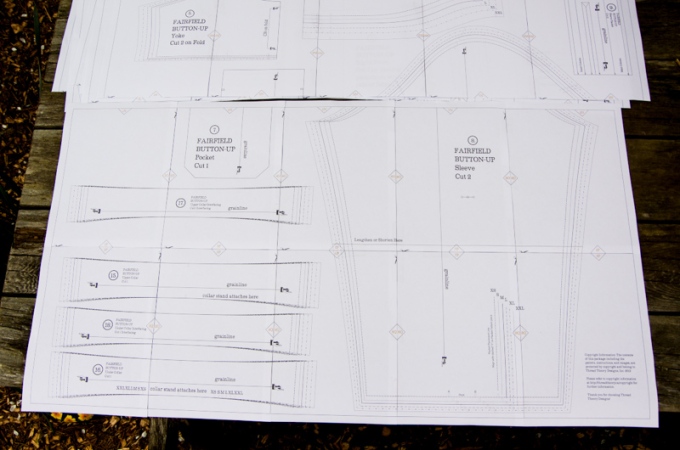
The pages are like tiles that need to be assembled into a single rectangle before you cut out your pattern pieces. Often times, people that are new to working with PDF patterns try to assemble each pattern piece individually. It is actually less time consuming and more accurate to tile all of the pages so that you are left with one large page - after which you can cut out your pattern pieces.

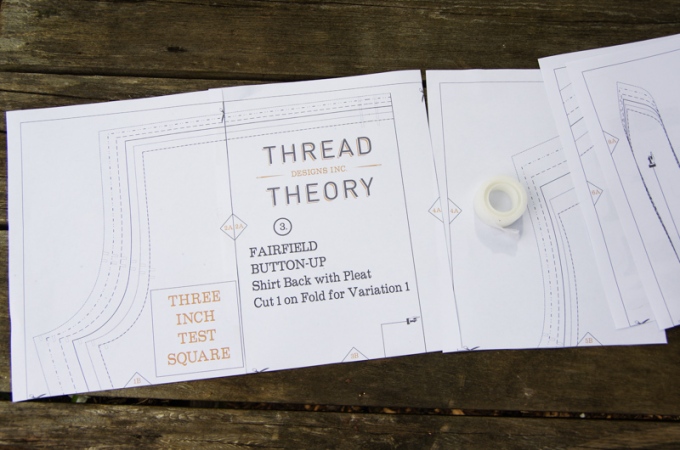
Begin by trimming the right and bottom margins off of each page. We include scissor markings on every margin that needs to be trimmed. Trim on the outside of the black border.
Assemble the pages one row at a time. It is most accurate to assemble each row and then join the rows together. It is a common mistake to try to assemble a PDF pattern one page at a time left to right, top to bottom - this can lead to frustration because any inaccuracies in taping will grow larger by the time you get to the bottom right corner. Assembling in rows is much easier and it doesn't take up so much space on your table or floor!
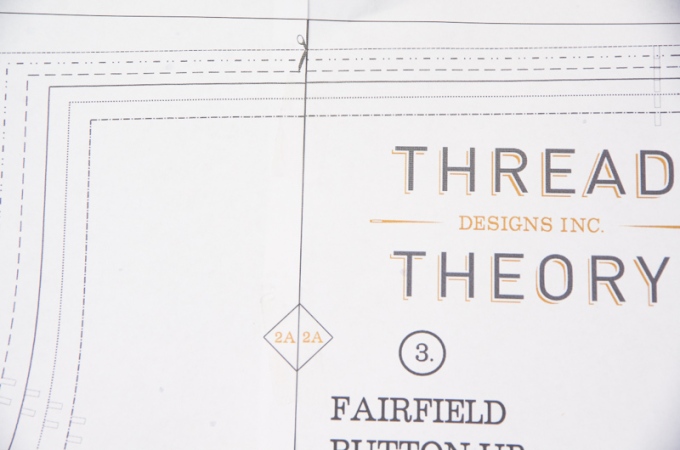
You can use glue or tape (or both) to attach each page together. Place the pages so that the remaining margin overlaps underneath the next page. The two triangles featuring a number and letter will match together to create a diamond. Spread glue along the entire margin or place a piece of tape or two on each pattern piece.
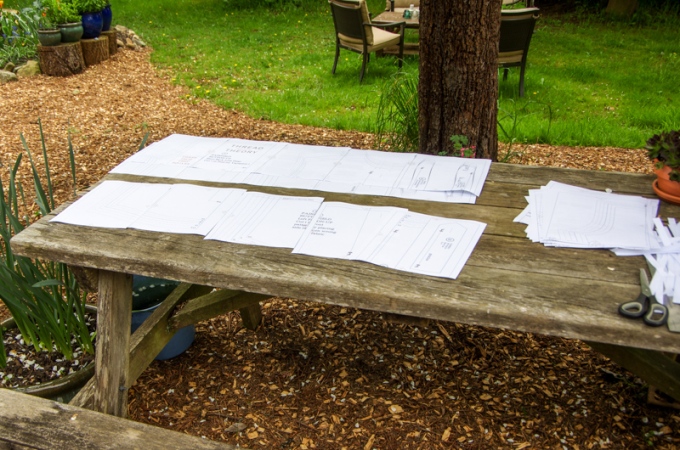
Once all of your rows are assembled, you can tape or glue them together to create one large rectangle. If you are lacking in floor or table space you can tape together two or three rows and then cut out any whole pattern pieces roughly.
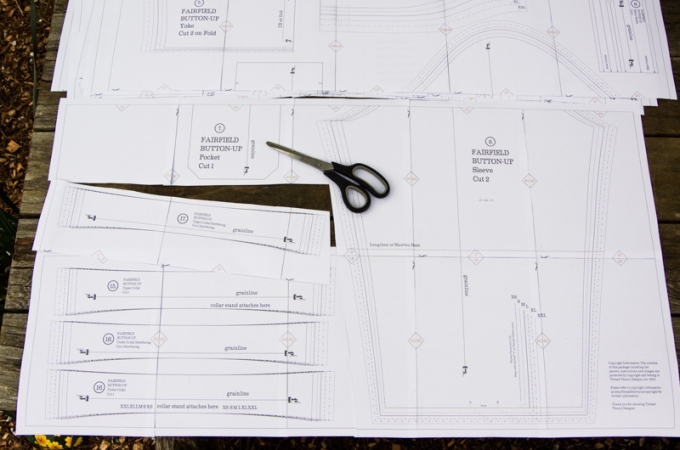
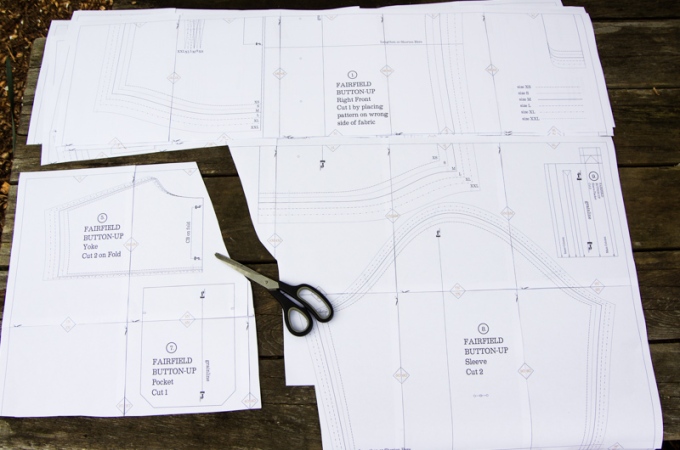
Continue to tape two or three rows at a time until all pattern pieces are cut out. You will be left with a manageable pile of pattern pieces to trim carefully. I use this method on my dining room table and my outdoor picnic table - it's very handy because it means I don't have to crawl around on my hands and knees around a big rectangle of paper on the floor!

Use and Store the Pattern
You can also leave the entire rectangle assembled and trace out the pattern in the size that you need. This way you can roll up the rectangle and store it as a complete 'master' pattern so it is ready to use when you want to sew a different size or variation of the same pattern. Alternatively, you can just print out and assemble the pattern any time you need a new copy - that is one of the best aspects of using a PDF pattern!
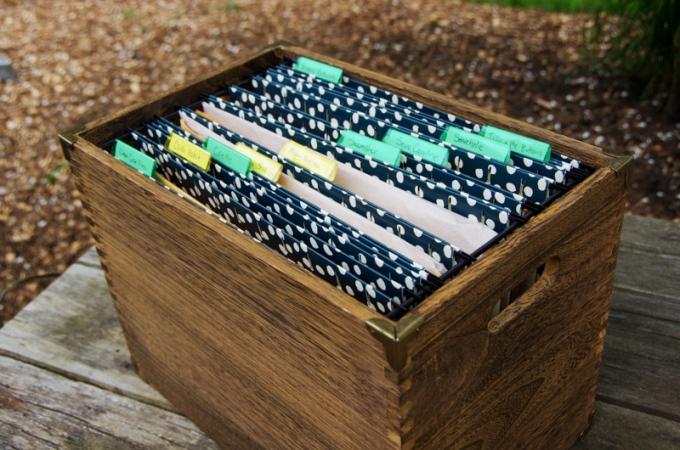
There are many ways that you can store your printed PDF patterns - you can roll them up with an elastic or ribbon or you can fold them up and put them in an envelope or in a plastic insert within a binder.
If you fold your pattern pieces, flatten them out before using them again by putting an iron on low heat with no steam. Use a pressing cloth underneath and on top of the pattern piece (so that you don't melt the tape or transfer the printer ink to your ironing board or iron) and press gently.
This is how I store my PDFs - I love being able to rifle through my pattern selection!
If you have any unanswered questions about working with PDF patterns, please have a look at our FAQ page or email me (Morgan) at info@threadtheory.ca. I would be happy to help you out!