Sew-along with us!

Perhaps you'd like some company while you sew? We've sewn up each of our patterns and photographed each step along the way. Find the pattern you're after in the filter drop down below left.

Carmanah Sweater Sew-Along: Day 1 - Yokes and Pockets

Welcome to the Carmanah Sweater Sew-Along! I'm so glad you're joining us as we sew both variation 1 and 2 of the pattern. We're diving right into the sewing steps for this sew-along but if you need some extra assistance choosing your materials, please have a look at our Finlayson Sew-Along where we discuss suitable sweater material choices in detail (all of which would work great for this pattern too!).

Interfacing

Let's begin our sweater by interfacing all applicable pieces. When adding interfacing to a knit fabric, here are a few tips to ensure success:
1. Use a pressing cloth so you don't accidentally get interfacing glue on your iron
2. Do not move your iron side to side, instead, place it down onto the pressing cloth, hold it for 10 seconds, and then lift it up before applying the iron to the next area. This prevents the weight of the iron from stretching out the knit fabric or breaking the small strips of interfacing.
No matter the variation you have chosen you will need to interface the center front of the sweater to stabilize the fabric in preparation for adding the zipper later. The partial zip variation requires this interfacing only on the Front Yoke. The full zip variation requires it on the Front Yoke and Front Body pieces.
Next, let's add interfacing to the collar or hood pieces. The collar needs interfacing only on the short ends as this is where the zipper will extend to:
The hood needs interfacing along the short straight edges as this is where the zipper will extend to:
You will also be adding grommets to the hood to prepare for a drawstring. Grommets can easily pull off of stretchy knit fabric so it's important to remove any stretch in this area by appling a 2" square of interfacing:

Pockets

Ok, our pieces have been interfaced, now we can get sewing! We are going to begin with the kangaroo pockets. The sewing process is the same for the the full zip and partial zip variations with the only difference being that the pocket is split in half by the zipper for the full zip variation.
Begin finishing the pocket opening edges. These are the angled edges that will be folded under to make the pocket hem later. I like to finish these with twill tape as this serves multiple purposes - it stabilizes the hem so it is less likely to bag out over time, it makes the pocket edge harder wearing which will allow the sweater to last longer, and it adds an attractive high end feel and appearance to the sweater. You can use regular twill tape or experiment with decorative ribbon (velvet ribbon in a coordination color to the main sweater feels very nice against the hands!).
Place the twill tape on the right side of the pocket opening so it is only half on the fabric. Stitch in place. Next, flip your pocket so you are looking at the wrong side of the material and fold over the pocket opening/twill tape. The hem should be 5/8". Press crisply and then stitch this hem secure 1/8" from the inner edge of the twill tape (the left edge of the twill tape in the picture below):
From the right side of the garment, your pocket will look like the photo below. Note that the sharp angle at the bottom of hem should line up with the pocket edge...it looks like it got a bit askew here! Not to worry though as this will be fixed when we finish the remaining edges of the pocket.
Once you've finished both pocket openings, it's time to press under the remaining edges of the pocket 5/8". If you're sewing the full zip variation leave the straight center front edge of each pocket unfinished as this is where the zipper will run.
Our pockets are done and we can now add them to our sweater front! Align the pocket with the placement markings on your sweater (I like to mark my placement markings with a pin or a small bartack with needle and thread). Pin the pocket (or pockets) thoroughly in place so they don't shift while you topstitch.
To topstitch the quarter zip variation, first, stitch 1/8" from the edge along the pocket top. Next, start at the bottom of one angled pocket opening and edgestitch along the side, bottom and other side of the kangaroo pocket.
If you are sewing the full zip variation, the process for adding the two pockets is quite similar to the quarter zip variation but we will need to pin the two pockets in place to each sweater front and then do a single stretch of stitching that starts at the top of the pocket opening, goes across the top of the pocket, down center front, across the bottom of the pocket and up to the bottom of the pocket opening:
For added strength (on both variations) you can do a tight zig zag or buttonhole stitch to bartack the top and bottom of the pocket openings in place. This is a great idea if you place your hands in your pockets often as this is a common point of strain that could tear your pocket fabric!

Yokes

Pockets are now done and we can move onto the front and back yokes. Let's begin with the front yoke. Both the quarter and full zip variations have the same yoke pieces but the finishing for each variation is slightly different to prepare for the two different zipper lenghts.

For both variations we must first attach the yoke front and back at the shoulder seams. Pin all yoke pieces right sides together and stitch using a 5/8" seam allowance. Press the allowances open and then stabilize the shoulder by edgestitching through the yoke and seam allowance material on each side of the shoulder seam. Alternatively you could simply serge the shoulder seam.

This is also a good point to staystitch around the neckline to prevent it stretching out during the rest of the sewing process. Staystitch with a short stitch length just shy of 5/8" from the raw edge of the neckline.

Now we can add the back yoke to the back of the sweater. There are several ways we could do this depending on your seam finishing preferences. You could simply serge the seam as pictured below:
Or you could add twill tape to finish the seam allowance as you'll see in the photos for the front yoke momentarily (scroll down now to see the process or skip ahead to adding the front yoke first so you can learn the steps of applying twill tape to apply them to your back yoke after).
If you are sewing the quarter zip you will need to press under the center front yoke seam allowances 5/8" before attaching the yokes to your sweater front. Next, line up the yokes and front with right sides together. The center front pressed edges will form a gap at the middle. Align the finished yoke edges with the placement markings on the sweater front. If you are struggling to align them exactly (your gap is smaller or larger), please don't worry! It just means your zipper tape will be more or less visible when you apply your zipper later accordingly. Just make sure that your gap is considerably narrower than the zipper tape you have chosen.
If you are sewing the full zip, do not turn under the center front of your yoke pieces. This will be done later when you apply the zipper! Instead, simply place the yoke and sweater fronts with right sides together and stitch using a 5/8" seam allowance.
To finish the yoke seams with twill tape instead of a serger, lay the twill tape on your work surface, place your sweater front (wrong side down) on top of the twill tape so that the twill tape covers the seam and extends down onto the sweater front at least 1/8". Place the yoke on top of the sweater front with wrong sides together if you havent already.
You can see in the photo below that Adrianna is applying twill tape after sewing the yoke and front together. This is different than recommended in our instructions but certainly works too!
Stitch along the seam line so that the yoke, front and twill tape are all stitched together.
Press the seam so that the twill tape and seam allowances extend up towards the yoke. Trim the seam allowances so they are narrower than the twill tape - you can now cover them entirely with the twill tape. Edgestitch along the top edge of the twill tape using the straight edge of the tape as a guide to keep your stitching nice and neat:
From the right side of the garment, here is what your stitching will look like. The distance from the seam will vary depending on the width of twill tape that you used:
In our next post we proceed with the collar or hood. See you then!
February 16, 2024
Carmanah Sew-Along: Day 2 - Hood and Collar

Carmanah Sew-Along: Day 2 - Hood and Collar

Today we will create our hood or collar for the Carmanah Sweater! Let's begin with the hood:

Hood or Collar Assembly

Add buttonholes or grommets to hood front to ready it for a drawstring. If you are working with a very unstable knit (loosely knit or very stretchy) I highly recommend doing a test buttonhole or grommet on a scrap of material. You may find that one layer of interfacing is not enough to stabilize this area and that the grommet will easily pop off. To further stabilize you could add a thicker or even woven style of interfacing or layer an extra square of woven material (quilting cotton for example on the wrong side of the hood when you apply the grommet.
Next, let's sew the hood panels together. The hood is made of three panels - two sides and a center rectangle. Begin by placing one hood and the cetner panel right sides togehter. Pin so that the long curve of the hood bends to match the long straight edge of the center panel. Stitch using a 5/8" seam allowance. You don't need to finish this seam allowance as the hood is lined but if you are using a serger for your seams it will look finished anyways, as per the photo below.
Add the second side of the hood to the other long straight side of the center panel. Trim the seam allowances if necessary to reduce bulk and press the seam allowances towards the hood sides. Lastly, topstitch along the hood sides 1/8" from the seam to create a tidy finish.
Now we repeat the same process with the lining pieces. Instead of pressing the trimmed seam allowances towards the sides, instead press them towards the center panel. This will reduce bulk when the hood and lining are sewn together.
Next, let's assemble the hood facing. Sew together the narrow straight edges of the facing with right sides together and a 5/8" seam allowance. Press open.
Attach the facing to the hood lining by pining the facing and lining right sides together along the hood front. You will need to attach the longest edge of the facing (the convex curve) to the longest edge of the hood opening (the concave curve). It will feel a bit awkward when you match these opposing curves together but with lots of pins and care to place the facing seam centered between the hood seams, it will work!
Stitch using a 5/8" seam allowance and trim the seam allowances, especially along the sharpest curve. Press the seam allowances towards the lining.
At this point we need to prepare the bottom of the hood lining so it is ready to be added to the sweater later. You can either press under the bottom seam allowance 5/8" or apply twill tape for fancy neckline finish. To apply twill tape you will need to place your tape on top of the right side of the hood lining. Position it so that it is mostly on the hood and only extends 1/8" over the seamline. Stitch along the seamline 1/8" from the bottom of the twill tape edge.
Press the twill tape down over the seam allowance.
The hood is now assembled and ready for our next sewing steps. Let's do the same process to prepare the collar option! First pick one of your collar pieces to be the lining (the contrast fabric piece if you've decided to do contrast for the inner collar).
Turn under the bottom 5/8" seam allowance or apply twill tape as we did for the hood lining above. With the right side of your collar lining facing up, place the twill tape on top of the collar. Position it so that it is mostly on the collar and only extends 1/8" over the seamline. Stitch along the seamline 1/8" from the bottom of the twill tape edge. Press the twill tape down over the seam allowance as pictured below:

Add Collar or Hood to Sweater

It's time to add our hood or collar to our sweater!
If you're sewing the quarter zip you will need to temporarily unfold the pressed center front seam allowances along the yoke. Try to keep those pressed lines visible for use in future steps (if you accidentally smooth them out, you can repress them later at 5/8".
 Place the hood or collar and sweater with right sides together. Align the raw neckline edge. Note that the raw collar or hood center front edges will align with the raw center front edges of the yoke. Pin thoroughly. Stitch around the entire neckline at 5/8" and press the seam allowance towards the hood or collar. You can trim and grade the seam allowance to reduce bulk if needed. Grading is when you trim one seam allowance shorter than the other. It will be sandwiched in between the collar/hood and collar/hood lining soon.
If sewing the quarter zip repress the center front to include the collar seam allowance:
Thanks for following along! See you next post!
February 16, 2024
Carmanah Sew-Along: Day 3 - Main Seams and Cuffs

Carmanah Sew-Along: Day 3 - Main Seams and Cuffs

Sleeves and Side Seams

Let's dive right into the main seams today! First, begin with the sleeves:
Align the sweater and ones sleeve right sides together. Make sure that you have the right sleeve matched to the right armhole. You can tell which is the front portion of the sleeve because there is a single notch and the back portion of the sleeve has a double notch - these notches both match up to the sweater body. Pin along the armscye thoroughly to match the two opposing curves together. Stitch using a 5/8" seam allowance and finish the seams as per your preference (you can see the seam is serged below):
Once you've repeated this process with the second skeeve and pressed the seam allowances towards the body of the sweater you are welcome to edgestitch through the body and seam allowance for a decorative stitch that keeps the seam allowance in place (not pictured here).
Now it's time to sew up the sleeve and side seams in one go. Fold one sleeve in half lengthwise and match the raw edges. Pin all along the length of the sleeve and body seams. When you stitch this seam, make sure the armhole seam allowance is sitting nicely at the underam. Stitch using a 5/8" seam allowance and again finish as per your preference. You can press the seam allowances open or to the back depending on the seam finish that you chose.

Cuffs and Hem Band

Ok, let's add the sleeve cuffs to finish them! Fold the cuffs in half with wrong sides together so that the notches match. Stitch along the notched edge using a 5/8" seam allowance and press the seam open (no need to finish this seam allowance, we just did here because we were serging our seams rather than stitching them first with a sewing machine.
Flip the cuffs right side out and press the seam. Now fold the cuffs in half horizontally so that the raw edges match. Press the folded edge.
To add the cuff to the sweater, first ensure the sweater is inside out. Place one cuff into the sleeve end so that right sides are together. Stretch the cuff so it fits the sweater and pin thoroughly. Sew around the entire loop using a 5/8" seam allowance and then finish the seam as desired.
Press the seam allowance towards the sweater and then repeat with the second cuff. The sleeves are done!
Now we will do the same process for the hem band. The hem band finishing differs depending on which version you are making.
If you are sewing the Full Zip version, place the front and back hem bands with right sides together and stitch at the side seams using a 5/8" seam allowance. Press the seam open.
If you are sewing the Partial Zip variation you will need to make a loop with your hem band just as we did with the cuffs.
For both variations, fold the hem band in half horizontally with right sides together and press along the fold (again, just like we did with the cuffs).
To apply the hem band for the Full Zip variation, simply place the raw edges of the band matched with the bottom edge of the opened out sweater. Line up the seams of the hem band with the seams of the sweater and stretch the hem band to match the length of the sweater. Stitch using a 5/8" seam allowance from center front to center front.
To apply the hem band for the Partial Zip variation, align the hem band and sweater with right sides together and raw edges matching. Make sure the hem band seam is lined up with one of the side seams.
Stretch the hem band to match the sweater and stitch using a 5/8" seam allowance. Finish the seam allowance as desired and press the seam allowance towards the sweater.
The sweater just needs the finishing details now!
February 16, 2024
Carmanah Sew-Along: Day 4 - Zipper and Finishing Details

Carmanah Sew-Along: Day 4 - Zipper and Finishing Details

Today's the last day of the Carmanah Sweater Sew-Along! Let's begin by adding the zipper.

Zipper

First, for both variations, create a chin guard by placing the two small chin guard pieces with right sides together. Stitch along the curved edge using a 1/4" seam allowance.
Flip right side out and press. Finish the straight edge (which temporarily appears concave in the photo below) as desired.
Ok, let's move on to adding the zipper itself. You'll notice in the instruction booklet that we've added a comprehensive selection of Zipper Installation Tips directly before the zipper installation steps. These are well worth a read as adding a zipper to a knit project can be a bit tricky (since it's mixing the woven zipper tape with the stretchy knit). You'll also likely need to customize the length of the zipper and this section shows you how.
The photos below detail how to add the full zipper. First, begin by placing the zipper along the sweater front so that the bottom stopper is aligned with the bottom edge of the zipper. It's helpful to mark several points on the zipper tape so you can use them to align the zipper for sewing - just as we would use notches when matching together two pieces of fabric:
You can see Adrianna marked 'notches' on the zipper tape whereever there was a seam on the garment. The more markings the better as this will ensure your two zipper halves are applied so they match up exactly!
At this point, if it is necessary to shorten the top of the zipper to match the top edge of the sweater, you can follow the instructions in the Zipper Installation Tips! Note that the zipper stop should be positioned so it is 5/8" below the raw edge of the collar or hood.
Also note that within the instruction booklet I direct you to add the chin guard to your zipper at this point. In the photo below Adrianna chose to add it slightly later in the sewing process.
To further ease the zipper sewing process, you can add narrow double sided tape (the kind that dissolves in the wash and is made for this purpose) to the zipper tape so that the zipper stays precisely placed on the fabric (really helpful to prevent the fabric from stretching as you sew!).
Place the zipper halves so that the right side of the zipper is aligned with the right side of the sweater. Double check that you are using the correct half of the zipper!
Stitch quite close to the zipper teeth using a zipper foot. You can see in the photo below Adrianna began her stitching several inches from the top of the zipper to allow her to add the chin guard afterwards.  Once you are done stitching you can trim the extra zipper tape off the top of the zipper (if you haven't done so already) but be sure to leave enough tape (1/4") above the zipper stop to prevent the zipper stop from falling off!
You can now add the chin guard (if you haven't already as per the instructions) by sandwiching the zipper tape between the two halfs. Stitch it in place and onto the sweater all in one go (still using that zipper foot).
To add the zipper to the partial zip variation, the sewing process is much simpler!
Apply the zipper guard by basting it onto the zipper. Place the whole zipper under the sweater front so the zipper stop is just visible above the yoke seam line. If you are using a longer zipper, you can optionally let it extend below the yoke seamline...the yoke seamline will just become the zipper stop!
Stitch down one side of the zipper, across the yoke seamline, and then up the other side of the zipper.

Hood or Collar Lining

Our zippers are done and it's time to finish the inner hood or collar!
If you are sewing the hooded variation, begin by placing the hood and hood lining/facing unit with right sides together. When aligning these pieces, make sure that the center front seam allowance of the sweater is folded outwards - this way the zipper teeth are facign in towards the sweater and you are lining up the centre front raw edge of the hood and the sweater.
If you have twill tape at the bottom of your lining, allow the twill tape to extend beyond the neckline seam. If you chose to press under the bottom edge of the lining instead, make sure that the pressed edge matches or extends just 1/8" below the neckline seam. Pin all edges thoroughly.
Sew up the center front, aroung the long curve of the hood and down the other center front. Leave the bottom unsewn at this point.
Trim the seam allowances if needed to reduce bulk and flip the hood right side out. Press along the edges. The only edge left unfinished is the bottom of the hood lining. We will proceed with that edge momentarily, but first, here are some photos of finishing the collar lining:
In the same manner that we just added the hood, place the collar and collar lining with right sides together. Ensure that the raw edges of center front are aligned (the zipper tape is flipped so that the teeth are pointing towards the sweater).
Sew up one center front, across the top of the collar, and down the other center front. Trim the seam allowances as needed and flip right side out. Press the collar edges and corners.
Ok, now we are ready to finish the bottom edge of the collar or hood! Within the instruction booklet we offer two options: 1. Folding under the raw edge and stitching by hand or machine. 2. Applying twill tape.
If you folded under the lining seam allowance, you can now pin the folded edge to extend just 1/8" below the neckline of the sweater. Handstitch these layers together OR baste by hand or with large machine stitches and then, from the right side of the sweater, stitch in the ditch to secure the lining to the neckline. Stitching in the ditch is where you carefully stitch right on the seam so your finished stitching isn't visible from the outside of the garment.
To finish your neckline with twill tape, you will notice that the twill tape extends below the neckline:
In the photos above you can see the neckline seam allowances below the twill tape. Before we attache the bottom edge of the twill tape, it can help to attach the neckline and lining seam allowances together so that the lining doesn't want shift in the following steps.
To attach the two seam allowances, pinch them together:
Baste or otherwise stitch these seam allowances together by moving the rest of the garment out of the way and just stitching the seam allowance layers. Adrianna used her serger here but you can use a basting stitch or regular machine stitch. You'll notice you can't get close to either zipper. That's ok! Just sew the bulk of the allowances together.
Now we just need to fold the twill tape over the allowances (trim the allowances if needed). and sew the bottom of the twill tape in place.
Since the seam allowances have been secured together, you can guarantee that the twill tape will sit evenly over the neckline seamline. Simply sew 1/8" from the bottom of the twill tape. You will see that your stitching looks very straight and attractive on the right side of the garment afterwards:
Now that the neckline is done we can proceed with the final details!
For the full zip variation, secure the zipper tape to the sweater by folding it back over the raw center front edges:
Topstitch the zipper tape in place - you can do this from the right side of the garment by stitching 1/4" from the zipper teeth or you can do it from the wrong side of the garment by edgestitching 1/8" from the edge of the zipper tape.
For the quarter zip variation, finish the sweater by topstitching along the center front and and top edge of the collar 1/4" from the edge. This will match the topstitching that you already applied to the zipper on the sweater body.
If you are doing the collar variation, you are now finished! Way to go! If you're sewing the hooded variation there is only one more step:

Drawstring

For the hooded variation, we must now prepare the channel for the drawstring. First, ensure the lining and facing are nicely positioned by pinning through all layers along this seam.
Stitch in the ditch of the lining/facing seam through all hood layers.
Use a safety pin or purpose made tool to thread the drawstring through the channel.
Finish the strawstring by attaching toggles if desired and knotting the drawstring ends (or adding drawstring end caps or beads).
And now your Carmanah Sweater is complete! May it spend many years making it's wearer cozy and warm!
February 16, 2024
Grading the Sayward Raglan Up or Down for a Perfect Fit

Grading the Sayward Raglan Up or Down for a Perfect Fit

Today, as a special addition to the Sayward Raglan Sew-along, we have a guest post from talented sewist and fellow Canadian, Gillian!
Gillian tested the Sayward for us and has also been a source of sewing and blogging inspiration for me for many years now!  I particularly love Gillian’s thoughtful blog post analysing the indie sewing pattern community and her dad’s recent post about sewing an under quilt for hammock camping – Gillian helped her dad tackle this big project.  Their resulting blog post brought back a lot of memories featuring the two camping hammocks Matt and I sewed together a couple of years ago!  We filled one of our under quilts with llama insulation – you can view our first hammock by scrolling down part way through this blog post.
Thank you, Gillian, for sharing your experience with the Sayward Raglan and for teaching us how to easily extend the size range!

Hi! I’m Gillian from Crafting A Rainbow, and today I’m going to talk about what to do when a pattern is just a little too big or small!

I jumped for joy when Thread Theory asked me to test the new Sayward Raglan pattern – finally, a classic but fashionable design that would work for my husband! The options out there for plus-size menswear are just awful, and I’m so glad that Thread Theory has stepped in to fill that gap.

Once I saw the size chart though, I realised that my husband is just out of the 4x size range. No problem though! It’s simple to grade a basic pattern like this up or down a size, and today I’m going to show you how.

You will need:

Let’s start grading! 

There are many ways to grade up a pattern. For a simple knit pattern like the Sayward, I’m going to show you a straightforward method that will give a good result going up or down 1 or 2 sizes without too much fuss. If you want a more precise method for more complex patterns, I recommend this Craftsy class!

Step 1: Measurements! 

Take measurements, and compare them to the size chart. The key thing here is to look at how many inches you’ll want to add or subtract to make the pattern fit!

In this case, I want the chest and shoulders to be about one size bigger, which means I’ll want to make the sleeves one size bigger too so that the seams match up nicely. In the waist and hip, I need to add an average of 6″ of ease. If I was adding that much to a children’s pattern, I would worry about distorting the proportions, but on a shirt for a big guy, it won’t be a problem.

At this point, you’ll also want to pay attention to height, and any fit preferences like extra length, shorter sleeves, etc.

Step 2: Grading up or down a size!

It’s time to lay out your pattern and start adjusting! The process is the same if you are grading up or down.

Essentially, we are going to continue the grading rule for the existing sizes to create a smaller or larger size. The way the existing sizes are nested will be our guide for how much to add or subtract!

In red, I’m grading the shoulders and sleeves up one size. I look at the distance between size 3x and 4x, and draw a new line the same distance out to create a 5x. In blue, I’m grading down to an XXS.

The process is the same for the front, back, and neckband. Pay attention to when the nested pattern lines get closer together or further apart along a curve!

3. Adding or Subtracting Ease

If one part of the shirt needs more or less ease, like the arms or torso, you may want to do more than just grade up or down the existing proportions.

For example, I only needed to grade the top part of the shirt up 1 size, but I want to add about 6″ of width from the underarm down. That means I need to add about 1 1/2″ to the front and back side seams.

To add ease, I straightened out the side seam, and simple drew a straight line down from the underarm to add more width. You could do the same in reverse to make the shirt slimmer.

(Side note: As a plus-size women, I often make similar adjustments for my pear-shaped figure. I might add a wedge to the side seam or centre front/back which results in a fun, swingy shape. For a traditionally masculine fit though, I chose to keep the side seams in this shirt straight and vertical. In sewing there are so many ways to approach each adjustment, so just keep the wearer’s preferences in mind!)

This is the point to adjust things like height, sleeve length, or neckline! For my version, I’m going to add 3″ in length and 2″ to the sleeve length because my husband prefers that look.

4. True the Seams

The final step whenever you adjust a pattern is to cut it out and make sure that all the seams still match up nicely.

Compare the front and back to each other to make sure the shoulders, side seam and length are identical on both pattern pieces. This is basically your chance to catch any errors, like adding more to the front than the back! Lay the curved raglan seam over the front and back pieces and “walk” them together to make sure the seam lines match. (Remember that the seam allowance is 5/8″, so that is where the length needs to match!)

I added a 1/2″ wedge to the sleeve side seams to help balance the extra width I added to the torso of the shirt, and I’ll ease any extra width as I sew. With a knit pattern, a few millimetres here or there won’t matter!

5. Sew! 

If you have made significant changes to the pattern, it is always a good ideas to sew a quick trial version in cheep fabric. I made my tester version in slightly-sheer turquoise crinkle knit, which you can imagine was quite a look! Once you know your adjustments are right, then sew it up in nice fabric.

Here’s the finished Sayward Raglan!

We are both really happy with it! Raglan sleeves are new for him, but I think they look great. He likes the neckline and length, but wants another inch on the sleeves next time. I’m pleased with the fit in the torso – not too tight, but also not too baggy.

The great thing about a basic tee like this is you can perfect that pattern to reflect the wearer’s preferred fit and style. Jamie is an avid Fantastic Four fan (that’s an FF tattoo on his arm, and on my leg too), so he chose the team colours of royal blue and black. The fabric is a 95% cotton/5% spandex blend, which was a pleasure to sew!

And here’s how he’ll often wear it – layered with his “battle vest” covered in the nerdiest patches and pins!


So there you have it – the Sayward Raglan graded out to a 5x, and tailored to the wearer’s taste!

Once you’ve used this method a few times, you may find you don’t need to use a ruler and draw out your adjustments. I tend to grade up or down on the fly as I cut the paper pattern, or as I’m cutting out fabric. It just depends on your comfort level with grading and sewing knits!

Do you grade patterns up or down for yourself or others? It’s a useful skill for getting the most out of patterns, either as children grow, or to make one pattern work for many different figures! I’d love to hear how you approach grading, or if this tutorial works for you!


Coming up later today, we will actually sew the Sayward…perhaps the quickest part of this sew-along!  See you later!

October 12, 2023
Jutland Sew-Along: Extra - Adding a Gusset and Removable Knee Pads

Jutland Sew-Along: Extra - Adding a Gusset and Removable Knee Pads

Today we’re going to talk about creating removable knee pads and we will be adding a gusset to the Jutland Pants!  I’m adding both of these features to the heavy work pants I’m making for my Uncle.  My inspiration is the brand of pants my Uncle likes to wear (Kühl) which always include a gusset.

Creating Removable Knee Pads

Let’s start with the easiest job today – I’ll show you how I’ve altered the knee patches to create pockets for knee pads!  You can use these to insert store-bought knee pads or you can simply add some padding of your choice.  I bought some foam alternative from my local fabric store which is really just a lofty synthetic batting.  I cut two rectangles the size of the knee patch minus seam allowances.

IMGP2488-2
To make the knee patches into pockets I bound the top edge and then pressed it under 5/8″.  If your fabric isn’t overly bulky you could fold the raw edge under instead of binding it.  I avoided this because I didn’t want to add that much bulk to my side and inseams.  I finished this edge by top stitching and edge stitching along the fold.

IMGP2506-2IMGP2504-2

Next, I added the velcro to the top edge of the knee patch and stitched it in place using a rectangular stitch pattern as pictured above.

IMGP2507-2

I folded under the bottom edge of the knee patch and pressed as directed in the instructions.  I Placed the knee patch on the pant leg so that the finished edges matched the provided notches.  I marked where matching velcro needed to be added to the pant leg and removed the knee patch.  I stitched the velcro on to the pant leg.

IMGP2521-2

To finish my knee pad pocket, I pinned the knee patch back in place and basted within the seam allowances along the side seam and inseam.  I top stitched and edge stitched along the bottom horizontal edge.

Remember to leave the top edge free of stitching!  You now have a pocket to which knee pads may be added and removed while the pants are worn or washed.

That was a pretty easy way to warm up…so now lets move on to a little pattern drafting!  Let’s create a gusset:

What is a gusset?

Let’s talk a little about what a gusset is and what purpose it serves.  A gusset is a diamond or triangular piece of fabric that is inserted into a garment.  This piece of material can be added for several entirely different reasons:

Gusset underarm

(Photo of underarm gusset from blog Reves Mecanique)

  • To add room and flexibility:  A gusset can be added to the underarm of a tight woven dress as in the tutorial on Gertie’s Blog For Better Sewing or to the crotch of jeans such as the famous “Chuck Norris Jeans” to add width without loosing structure and a close fit.

Chuck Norris

(Photo of advert from Chris’s Invincible Super-Blog)

  • To prevent seam allowances from creating bulk: A gusset can be used to prevent many seams from meeting in one area.  Lulu Lemon’s ABC (anti ball crushing) Pants, designed to be all-purpose trousers for active men, use a gusset to prevent the Centre Back, Centre Front, and both inseams from meeting at one point.  When a person is crouched or sitting smooth fabric will press against them rather than a big mash of seams.  You can see a review of the pants complete with a look at the shape of the gusset in this YouTube video.

gusset

  • To add strength: A gusset is a good way to add strength at high stress points.  The diamond or triangular shape disperses the stress to it’s various points rather than allowing the stress to concentrate at the one area where all the seams join.  The All American Clothing Company provides two photos and a description explaining how the stress is dispersed when sitting.
  • To save fabric: The use of gussets on plus size pants is quite common as a fabric saving measure during manufacturing.  Adding a gusset, as you will see in the tutorial below, causes the crotch curve on the pants Front and Back pieces to be considerably reduced.  This makes them far easier to place side by side on fabric as they are much more rectangular in shape and narrower than classic pants pattern pieces.

How to Draft a Gusset

For my Uncle’s pants, I decided to create a gusset that does not add a lot of extra room in the crotch since this was not necessary for the pants to fit him well.  I mostly just want to disperse stress and add a little bit of flexibility.  Since this is the case, it was necessary for me to remove fabric from the pants Front and Back before adding it by sewing in a gusset.

Gusset Tutorial-01

Since the Jutland Pants include seam allowance, it is a good idea to mark all the seam lines on the pattern before beginning any pattern alterations.  When altering the pattern, only work on the actual pattern and don’t work within the seam allowances.

  1. Once all seam allowances are marked, draw in the desired shape and size of your gusset.  My shape is indicated by the orange shading.  I created a gusset that was 4″ along the inseam and then is larger in the back of the pants than the front.  I made mine small enough (I hope!) that it won’t be visible when the pants are worn because the entire gusset will be hidden in the crotch.
  2. Now that the actual gusset area is marked, you need to add new seam allowances to the pants before cutting the gusset area off of the pattern pieces.  You can see the new seam allowances indicated with black lines.  Remember, they are being added to the pants pattern so they will cut into the gusset shape that you just drew.  I connected this new seam allowance with the existing inseam seam allowance and the crotch curve seam allowance.
    Gusset Tutorial-02
  3. Trace the two gusset pattern pieces onto new paper (using tracing paper or by holding the pattern piece up to a window and tracing with regular paper on top of it).  Remember that the gusset shape is the orange shaded area.
  4. Once your gusset pattern pieces are recorded (NOT before!) you are ready to cut into the Jutland Pants Front and Back.  Cut along the new seam allowances that you created.  Your Pants Front and Back pieces are now complete.Gusset Tutorial-03
  5. Above is a diagram explaining how the gusset elements that you traced onto new paper merge to become the actual pattern piece.  You will see that the shapes don’t fit together perfectly to create a diamond (the skinny slivers have a gap in the centre as you can see in diagram one).  This is okay – by adjusting the shape slightly you will be adding a little more room and thus flexibility into your pants.  You can either trace around the rough diamond shape to create a pointed diamond or you can round the corners as I have for what I hope will be a more pleasing gusset shape reminiscent of the Lulu Lemon ABC gusset.  If you would like to cut your gusset on the fold, you can do so (as in diagram 3) because it is symmetrical!  Oh…and don’t forget to add seam allowances to your gusset pattern piece!

I will be covering how to add the gusset into the Jutland Pants on Friday when I show you how to sew the Fly and Waistband (that’ll be a big post!).  This is because it is easiest to change the order of construction when adding a gusset.  In the Jutland instructions the fly is constructed near the end of the pants sewing process (so you can work up the confidence for that step!) but, for my Uncle’s pair of pants with a gusset, I will construct the fly and crotch seam first, add in the gusset and then sew the side and inseams.

In the meantime, come back tomorrow for a free pocket embroidery template and a screwdriver pocket template!

October 11, 2023
Jutland Sew-along: Extra - Customizing the Pockets

Jutland Sew-along: Extra - Customizing the Pockets

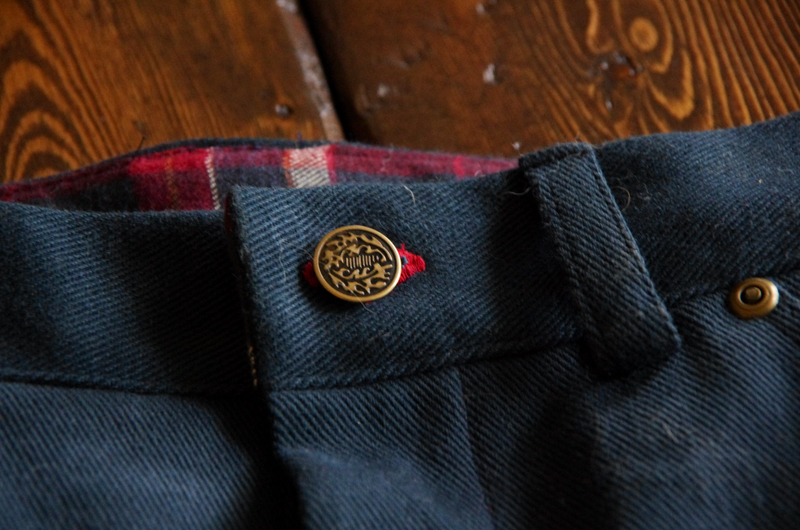
For today’s sew-along post, let’s talk about pocket customization!

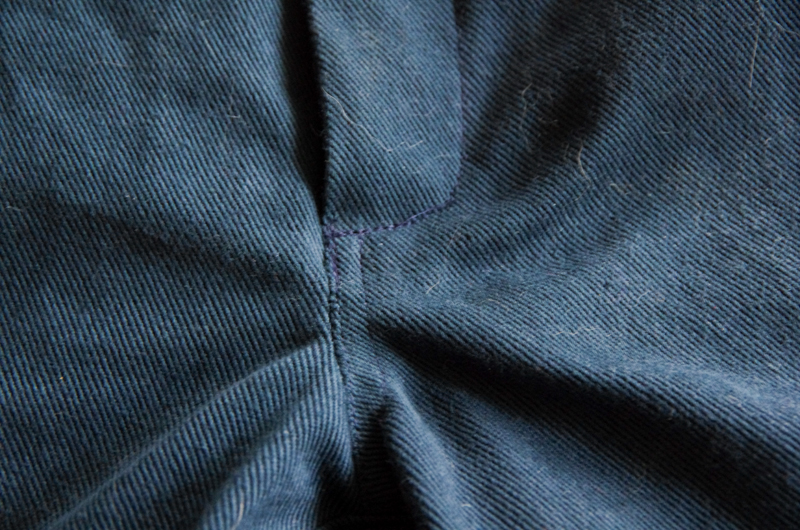
Mountain Pocket Top Stitching Design

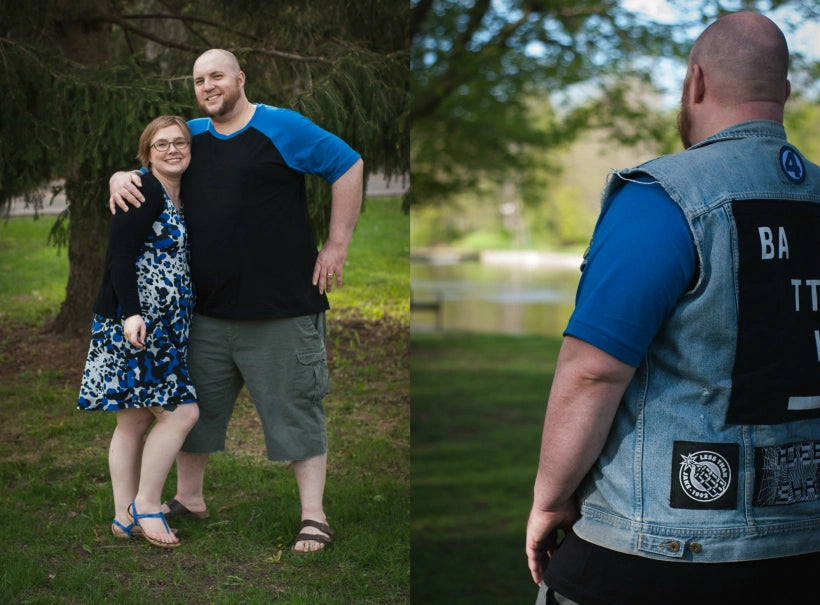
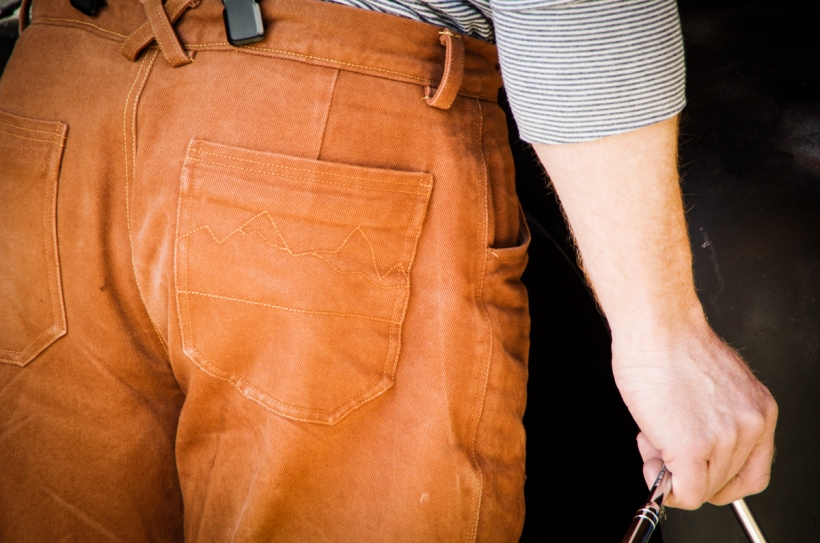
First off, due to popular demand, Matt and I have created a template so that you can re-create the mountain top stitching that I added to the Jutland Pants from our photoshoot.

Resized-8

To use the pocket template, open it in your browser and print it full size.  The template is the largest patch pocket size.  Place the pocket template over your pocket fabric.  Trace the design with a tracing wheel or mark relevant points with pins and then ‘connect the dots’ by free hand drawing between each pin.

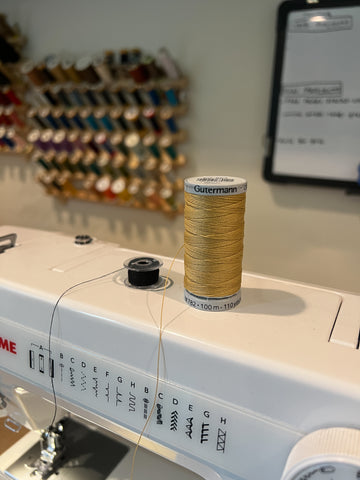
I used jean-weight top stitching thread for my pockets but if you would rather use regular polyester thread, you can create a more subtly visible design or you can stitch over your design two or three times to make the design more pronounced.  You could even use two or three different colors of thread as you re-trace the design to create a bit of depth and visual interest!  I only added this stitching to the right hand pocket so that the pants were asymmetrical – but you can do whatever you wish (or create your own design!).

Creating a Screw Driver Pocket

Variation Two of the Jutland Pants includes two slim cargo pockets with flaps that feature velcro closures.  These can be handy for carrying small items such as screws, nails or even dog poop bags :P.  I designed them so that they would not look bulky and hang off the pant legs awkwardly (as I find some cargo pockets are prone to).

(Various pant leg pocket styles on Kühl Pants.  Click on each image to see a larger version.)

While symmetrical cargo pockets are pretty standard on this style of pants, don’t let this limit you!  Why not create your own pockets perfectly suited to the wearer’s needs? Replace one cargo pocket with a welt cell phone pocket, a zipped pocket, a large pleated patch pocket, or, as I am about to show you, a long screw driver pocket!

This pocket is very long and large enough to hold screw drivers deep within the pocket so they don’t slip out.  If you would like to create a shallower pocket so that it ends well before knee level, simply slice off the bottom of the pocket template.

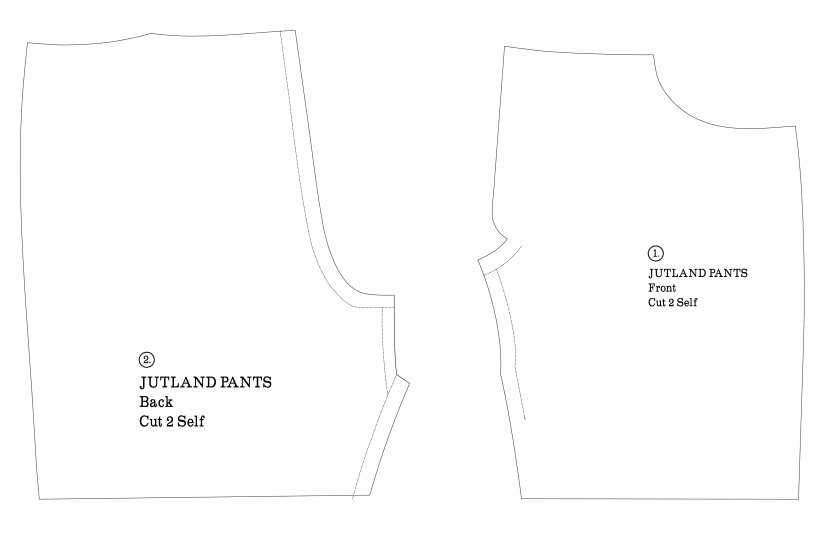
To use the screw driver pocket template, download it and print it at full size.  This template does not include seam allowances but it is graded for all pant sizes so first, to prepare your pattern piece, cut out your desired size and add seam allowances to all edges.

IMGP2523

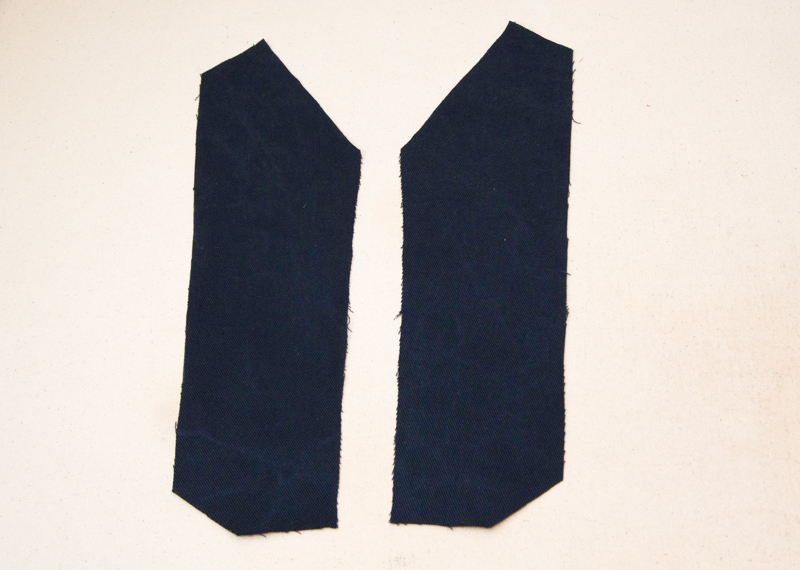
Cut two pocket pieces from your fabric.  The pocket is double layered for strength and ease of construction.  If you would like to reduce bulk you could cut one pocket from your self fabric and one from your thinner lining fabric.

The pocket sits on the back leg of the pants so you will need to construct the pocket and stitch it to the pant leg before stitching the side seam.  Note that this is long before you add the cargo pockets as directed in the instruction booklet (the cargo pockets are top stitched in place over the completed side seams).  You will also need to add the screwdriver pocket before adding the back patch pockets.

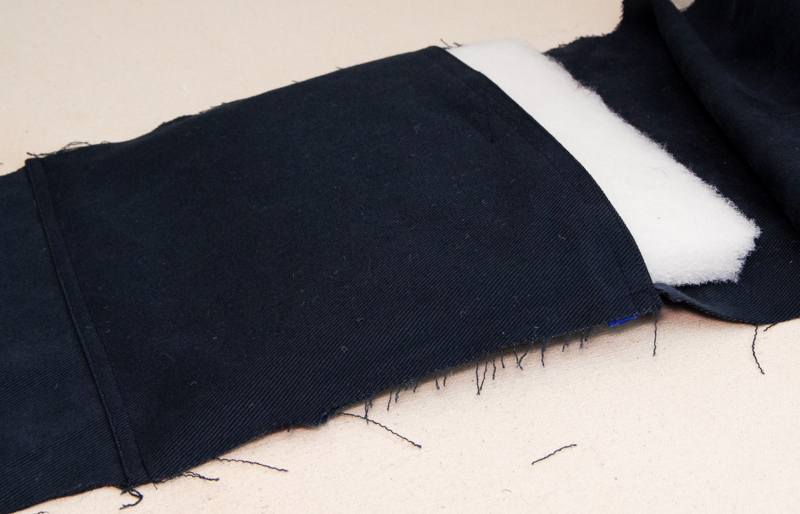
Okay, time to sew the pocket!

Stitching lines

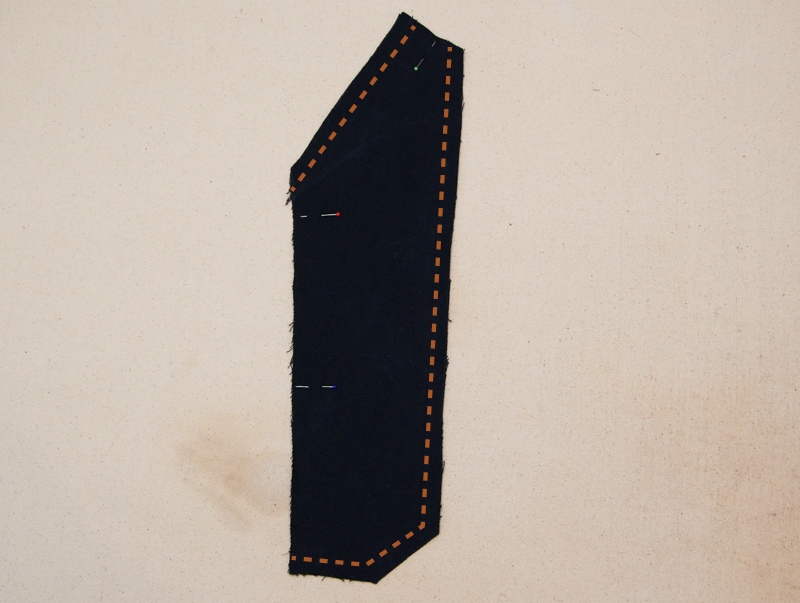
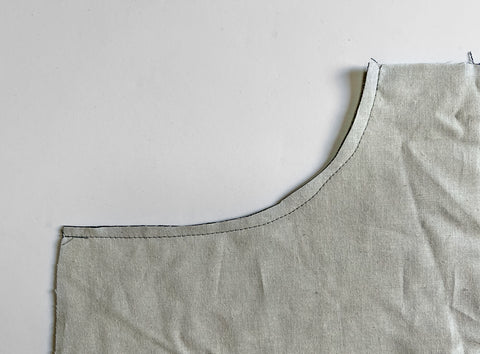
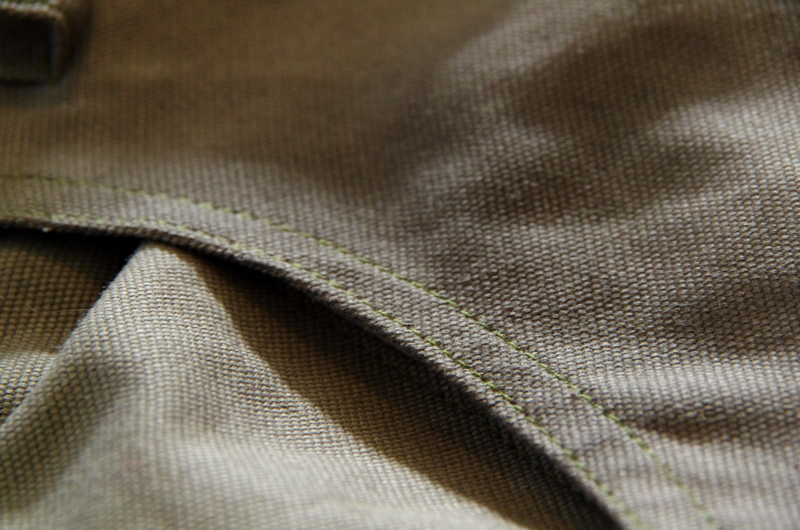
  1. With right sides together, pin the two pocket layers together.  Stitch along the pocket opening, the back edge and the bottom edges of the pocket (the areas indicated with an orange stitching line in the image above).  Do not stitch along the remaining pocket edges.IMGP2538
  2. Trim and grade the seam allowances to reduce bulk.
    IMGP2541
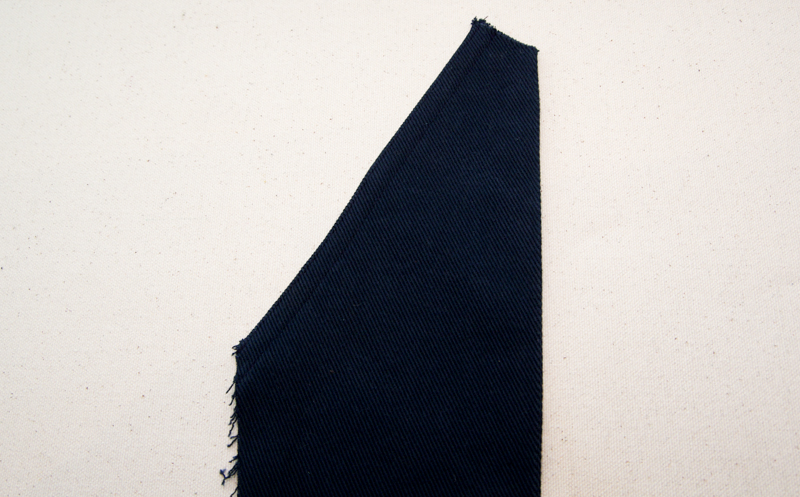
  3. Flip the pocket so right sides are out and press flat.  Top stitch and edge stitch along the pocket opening.IMGP2545
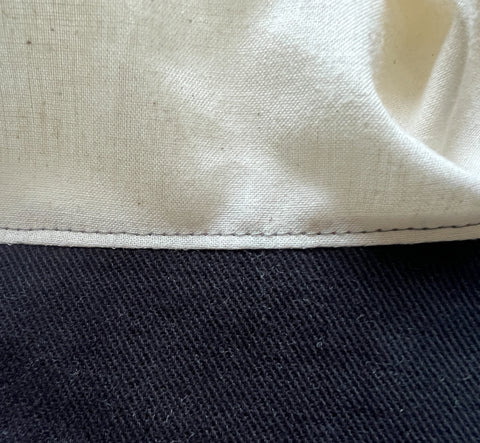
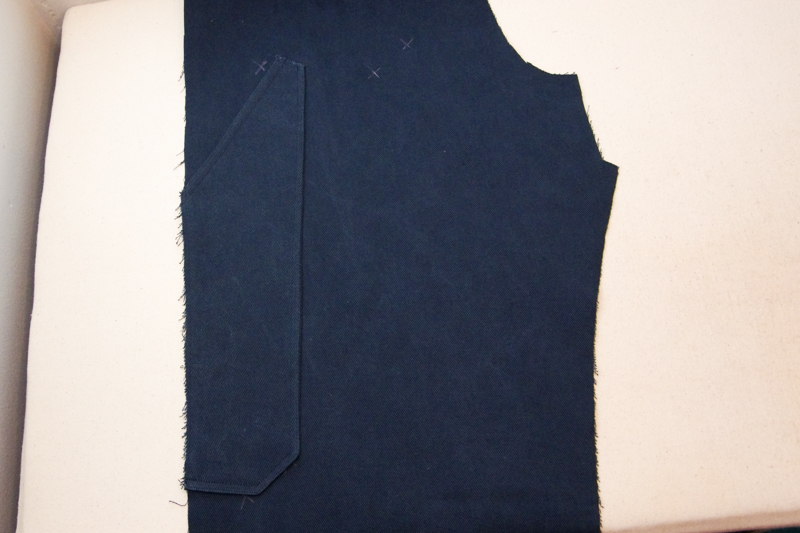
  4. Pin the pocket to the pant leg so that the raw pocket side lines up with the pant side seam, the pocket bottom lines up with the cargo pocket placement dots, and the top edge overlaps patch pocket placement marking.  Baste along the raw edges within the seam allowance.  Top stitch and edge stitch along the finished edges.IMGP2546
  5. Continue constructing the pants as directed – add the back patch pocket so it overlaps the top edge of the screwdriver pocket.  Stitch the side seams.  Note that the layers of the screw driver pocket and the knee patches will possibly create too much bulk to create flat fell seams.  You can simply stitch the seam and then create faux flat fell seams by pressing the seam allowances to the back and then top stitching and edge stitching the seam allowances in place.
October 11, 2023
Jutland Sew-Along: Extra - Adding Strengthening Details and Otter Wax

Jutland Sew-Along: Extra - Adding Strengthening Details and Otter Wax

IMGP2804

I’ve finished my two pairs of Jutland Pants for the Jutland Sew-Along!  The finishing touches were lots of fun – I really enjoyed transforming Matt’s regular pair of canvas Jutlands into ‘waxed designer trousers’ with Otter Wax :P.  He’s been waiting in eager anticipation for these pants and I think they’ll be getting a lot of wear!

Today I’ll share some of my thoughts on rivets and strengthening details with you and I will show you a detailed step by step of my Otter Wax application process.

Strengthening Details

Let’s start with a few stitching techniques that you might not find suggested in most trouser pattern instruction booklets (but that can be easily added to any pair of trousers even after they are finished!):

  1. The side seam edge stitching:  Press both seam allowance towards the back and edge stitch through all layers.  This will prevent pants from ripping or stretching out after heavy front pocket use.IMGP2809
  2. The fly ‘bartack':  On this pair I’ve just back stitched excessively at the end of my faux flat fell seam.  You could also do a narrow zig zag stitch (i.e. a buttonhole stitch) for a very professional detail.IMGP2807
  3. The faux flat fell seat seam:  This is much easier than stitching a real flat fell seam along the crotch of the pants and it allows you to position or even clip the seam allowances at the base of the fly so that both the seam allowances and the fly sit flat.IMGP2813

Otter Wax Application

IMGP2770

(Before Waxing)

This is how Matt’s Jutland Pants looked before I added Otter Wax or a button.IMGP2775

I decided to apply Otter Wax to Matt’s Jutlands before attaching the jeans buttons and rivets because I figured the metal hardware would be tricky to wax around and I didn’t want to fill the rivets with pools of wax by accident!  All the same, if you wanted to wax a finished pair of jeans or trousers, you could trim a small chunk of wax off of the bar and use it to get into tight areas.  You could also melt any excess wax off of the rivets and button by using a hair dryer.  For this pair of pants I ended up using 1 1/2 bars to create one medium-heavy coat of wax.

Otter Wax recommends rubbing the wax into the fabric and then simply leaving the garment to cure for 48 hours.  I like to speed up the process considerably and also add a couple layers of wax by pairing the heat caused by friction with the heat of a hair dryer.  Here is the technique that I’ve grown accustomed to:

IMGP2776

Prep an area of fabric by heating it with a hair dryer.  I work on one section at a time when waxing a large project – you can even leave the project partially finished for days on end and come back to it when you have a few spare minutes.  Even though the finished area will have cured, you can simply wax the remaining area and you won’t be able to notice where you left off once the whole garment has cured.

IMGP2778

Hold the area taught with one hand and rub the wax on with the other hand.

IMGP2786
Rub until enough wax has transferred onto the material to fill the weave of the fabric (this is just a suggestion – you can make your coat of wax as thin or as thick as you would like to create a variety of appearances and levels of water resistance!).

IMGP2787

Heat the waxed area with a hair dryer and rub the partially melted wax into the fabric.  I really like how deeply the wax sinks into the fabric when it is melted like this.  The fabric becomes stiffer and the final product feels very dry (and in no way sticky).  You’ll notice that skipping the hair dryer and simply leaving the garment to cure by laying it flat to ‘air dry’ will create a different effect – the wax sits closer to the surface of the fabric and fills any divets caused by the weave of the fibers to create a fabric with less/different texture.

IMGP2789

Continue this process until the entire garment is waxed!  Here are the pants at the half-way point – you can see the very different texture created by the wax:

IMGP2793

Here are the finished pants:

IMGP2794
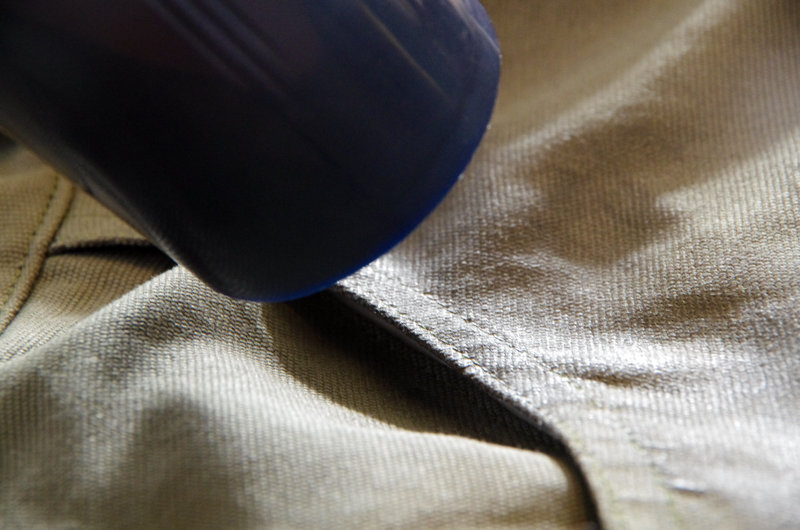
At this point, you could leave it to cure even further than it has or you could proceed to add a second coat of wax.  Sometimes I like to wait a few days to make sure the project is fully and completely cured before adding a thin ‘touch-up’ coat.  This way I can make sure the project is fully water resistant without getting carried away with my second coat and wasting a bunch of wax.

Now that Matt’s Jutland Pants are waxed, they need to be cared for differently than a regular pair of pants.  They can’t be put in the wash of course, because the warm water and soap would remove the wax!  Instead, the waxed pants need to be brushed with a stiff bristle brush to remove dirt.  They can also be placed in the freezer overnight to kill any bacteria and remove any smell (put them in a ziploc bag so they don’t take on whatever smell your freezer might have…mmm frozen soup and lasagna jeans).  If this all sounds a bit weird and maybe a little unhygienic to you, not to worry!  You could carry out this method of cleaning for as long as you can stand and then periodically hand wash the pants by turning them inside out and washing in cold water with a delicate soap designed for hand washing.  Keep in mind that this will likely remove at least a little bit of your wax coating so it is a good idea to keep a bar of Otter Wax on hand to touch up your pants after you’ve hand washed them.  Either that, or you can embrace the gradual wearing of your waxed pants – you’ll notice that as the wax wears off it has greatly assisted in the creation of the coveted worn creases that denim enthusiasts strive for!

There is a considerable history/group of enthusiasts attached to the practice of waxing pants.  Here are a few intriguing links to immerse you in the crazy world of waxed jeans!

  • Heather Lou mentions last year’s waxed jeans craze in her Ginger Jeans Sew-Along post about personalizing your jeans.
  • A YouTube video demostrating how to wax jeans using Otter Wax – so relevant!
  • A post on waxing a variety of fabrics and a discussion of waxed garments from a practical rather than ‘fashion-statement’ standpoint – I linked to this great post when we first launched Otter Wax in our store.
  • A discussion about the various techniques suggested for cleaning waxed jeans on Fashionista.

 Rivet Application Tips:

Once I finished waxing Matt’s Jutlands, I added rivets to both pairs of pants.  Here are some tips to accompany Matt’srivet application tutorial.  Keep in mind that, unlike Matt, I’m not very skilled at wielding a hammer so these tips are catered towards people who might be hesitant about using woodworking tools in the sewing room:

IMGP2798

  • I find the only way I can successfully and strongly apply rivets is to use a very solid metal backing when hammering them in place.  Without the backing my rivets don’t grip very tightly and sometimes fall off after a while.  With the backing, they are SUPER strong.  We use this scrap piece of metal (you can find similar pieces at junk yards, scrap metal stores, or even at hardware stores which often have metal chunks sold as though they were a ‘cutting board’ to use during metal work projects).  Alternatively, you can use the fiddly little metal backers that are often sold with snap and rivet kits in the sewing store.  If you plan to make lots of pants featuring rivets, I highly recommend getting yourself a nice solid and heavy piece of metal – it works WAY better!IMGP2811
  • While Matt warns not to hammer too hard when applying your rivets and jeans buttons for fear of tearing through the metal (especially when attaching jeans buttons), I found I had to hammer harder than I was expecting.  That being said, start by hammering your first rivet gently, pause and see if you can pull the rivet apart, and if you can, increase the strength of your hammering gradually until there is no way you can separate the two rivet pieces.  It’s better to air on the side of caution than destroy your little rivet with excessive force!IMGP2818
  • Be creative with your rivet placement to create ‘designer’ pants.  I tend to skip change pockets altogether (and have not included a pattern piece for this tiny little pocket with the Jutland Pants pattern) because big manly fingers have such trouble accessing anything placed in that pocket so it just goes unused.  We didn’t want to limit you when using our Jeans & Pants Essential Notions Kit so we included six rivets – enough to secure a change pocket and the two front pockets just as you would find on classic denim jeans.  You can use these six rivets anywhere you like though!  I decided to apply six rivets to my uncle’s back pockets to make them SUPER strong :)

Thank you for joining in on our Jutland Sew-Along!  I hope you’ve had time to finish any pairs you intended as Christmas presents.  I’ll be posting my two pairs of finished pants next week and would love to feature yours on our blog if you have a chance to email or post photos!  Email us at info@threadtheory.ca or #JutlandPants.

October 11, 2023
Jutland Pants Sew-along: Day 1 - Materials

Jutland Pants Sew-along: Day 1 - Materials

Welcome to the Jutland Work Pants Sew-along! I (Adrianna) look forward to guiding you through creating your pants! Depending on the variation you choose, the supplies you need will differ slightly. You also have several fabric options, whether you want your pants to be more rugged, casual, or athletic. Let's begin by examining some useful tools.

Valuable Tools to have on hand:

  • Tailor's Clapper: A tailor's clapper is a great tool to add to your sewing space or you can improvise with materials you have on hand (Morgan's grandmother used to run freshly steamed seams over the edge of her sewing table to flatten them further). The clapper helps to set seams when pressing to give a nice flat finish. You can also use the clapper on bulky seam areas to flatten the fabric to get under your presser foot more easily. 

  • Seam Jumper: The seam-jumper or Jean-a-ma-jig tool is crucial to sewing over bulky seams on a home sewing machine, even heavy-duty machines. The Jean-a-ma-jig helps to raise the presser foot when stitching so it doesn't get caught on a seam ridge. You can also improvise with a thick piece of cardboard or other sturdy material cut to the necessary shape.


Notions

  • 1/2" - 1" (1.3 - 2.5 cm) diameter button (jeans button or sewn on).
  • 6" (15 cm) zipper, preferably metal. 


  • Thread: You will need regular polyester thread (which is stronger than cotton) . Choose something to match the color of your fabric. You may also want optional thicker topstitching thread in a matching or pleasing contrasting color. You could try Gutermann Extra Strong Thread, which is less thick than topstitching thread.  This allows you to skip the hassle of re-threading the machine each time you need to topstitch as it can be used for seams and topstitching.  My machine is never pleased when sewing with thick thread (it binds up when I backstitch), so I prefer to switch back and forth to ensure that my seams are strong and backstitched securely before I topstitch them. If using topstitching thread, it is essential to only use topstitching thread on the needle side of your machine and regular thread in the bobbin. Most machines do not handle topstitching thread in the bobbin.


  • Variation 2: Hook and Loop (Velcro) for the cargo pockets

  • Optional: If you are wanting the rugged look of waxed canvas but haven't sourced a factory-waxed material, you can apply Otterwax or similar fabric wax to canvas fabrics to make them water resistant.
  • Optional: Rivets for a more rugged look.

Okay, let's move on to discussing our actual fabric options! As you'll see, the Jutland Pants are a very versatile design with the choice of fabric dictating whether the end result is suitable for activewear, workwear, or a casual daily wardrobe.

FABRIC

  • Variation 1: Trouser weight wovens (light to medium weight) such as twill, corduroy, wool blends, denim, and gabardine.

Corduroy from Black Bird Fabrics


8oz Cotton Twill from Merchant & Mills

  • Variation 2: Trouser weight wovens similar to Variation 1 or materials suited to the intended use of the pants. For example, choose water-resistant cotton or synthetic blends designed for active wear (such as Ripstop) if creating hiking or mountain biking pants.

Ripstop from Fabric Wholesale Direct

  • Both Variations: Pocket linings such as broadcloth, quilting cotton, or other substantial, tightly woven cotton or cotton blends.
  • Optional Lining: Choose a lightweight material suited to the intended purpose of the pants. For example, choose a cozy flannel material if you are sewing work pants for winter construction. If you are sewing waterproof hiking pants, choose a lightweight mesh or cotton that will be comfortable against the skin and wick away sweat. 

Flannel Shirting from Black Bird Fabrics


  • Lightweight Woven Fusible Interfacing: You will need lightweight interfacing for the facing, waistband, fly, and optional cargo pocket flap pieces. Choose a lightweight woven or knit fusible interfacing. Depending on the sturdiness and thickness of the fabric you use for your pants, you might not want any additional stiffness from interfacing. Choose a lightweight woven or knit interfacing to reinforce the fabric without adding stiffness.
Lightweight Woven Fusible Interfacing from Core Fabrics


Fabric Sources

Canada

Fabrications Ottawa is a great online shop with a stock of Cone Mills US-made S-gene denim in multiple weights! 

Blackbird Fabrics - an online shop just across the water from me!  Caroline often has an excellent selection of denim in stock and occasionally gets in a supply of coveted Cone Mills.

Core Fabrics - Heather-Lou is known for her excellent women's jeans patterns.  She stocks jean-making kits, including all the notions you need and high-quality denim.  They often sell out fast, but you might be in luck snagging a non-stretch fabric kit since these are less in demand than the stretch denim needed for her Ginger Jeans pattern.

Simplifi Fabric - An online shop focused on organic and ecologically friendly fabrics!  They have a great selection of denim and canvas.

USA

Stylemaker Fabrics - An organized selection of denim in various weights and amounts of stretch.

Britex Fabrics - They have a few well-priced Japanese selvage denim worth a peruse!

Bolt Fabric Boutique - They have a range of canvas, denim, twill, and water-resistant fabrics that are always stocked. 

Fancy Tiger Crafts - An excellent array of denim from various manufacturers - all well-labeled so you can compare the differences.  I like the US-made bull denim choices in particular.  Bull denim is dyed after weaving to produce a uniform color (whereas regular denim features an indigo warp thread and white weft thread).

Harts Fabric - A comprehensive selection of quite affordably priced denim.  I especially like the look of the wide denimwhich would save a lot of fabric when cutting out men's larger sizes.

UK

Merchant & Mills - An extensive range of high-end denim very suitable for men's jeans - you might like to make a mock-up first due to the price point of these quality fabrics!

Empress Mills - Some very affordable denim in a variety of weights.  A great way to test out a pair of jeans without a considerable investment!

Croft Mill - Another selection of affordable denim and some interesting choices, including prints, pre-washed, broken twill weave, extra wide, etc.


Preparations

Before we continue with the sew-along, make sure to pre-wash your fabric. 

You do not need to wash your fabric if you are using a pre-treated or specialty outerwear fabric, such as water-resistant canvas. Instead, follow the fabric care guides for your fabric.

October 11, 2023
Jutland Pants Sew-along: Day 2 - Choosing a Size & Fit Options

Jutland Pants Sew-along: Day 2 - Choosing a Size & Fit Options

Today, for the Jutland Sew-Along, we are talking about fit. When deciding which size to sew up, we recommend comparing the measurements of your body and a ready-to-wear garment that fits you well to our measurement charts. Here is a tutorial on how to measure a ready-to-wear pair of pants. Note the differences in the Jutland Pants' ease, rise, and inseam length to your RTW garment and body measurements. 
  
  
Here is a chart to refer to once you've created your first muslin/wearable mock-up of the Jutland Pants (or any other men's pants pattern). Please look at the numbered areas in the diagram below and treat them like a checklist. Are there any strange drag lines or folds of fabric visible?


Usually... Horizontal Lines and Folds = The pants are too tight somewhere
Vertical Lines and Folds = The pants are too loose somewhere
  
  
1. Fitting problem: Large Stomach (resulting in a big difference between the natural and trouser waist measurements). 
  
What it looks like: Buckling and tight waistband while seat and legs fit nicely
  
Potential Solution: Add width to the waist area, blending to the hip at the side seams of the front and back pattern pieces. Make sure to increase the waistband length by the same amount you've added to the pants. 
  
  
2. Fitting problem: Curved or Straight Hips
  
What it looks like: Actual hips are more curved than pants - horizontal lines (representing tension) stretch across the fly area. Actual hips are straighter than pants - vertical lines (fabric folds) along side seams in the hip area. Fabric can be easily pinched away from the hips.
  
Potential Solution: Adjust the side seam lines on the front and back pieces. Make the side seam lines more curvy or straight, depending on your ideal fit. NOTE: The Jutland Pants pattern was drafted to have straighter seams and leg shape. 
  
Here is a tutorial on blending between sizes for our Jedediah Pants. You can apply the same techniques for the Jutland Pants pattern pieces.


3. Fitting problem: Muscular Thighs 
  
What it looks like: Horizontal strain lines in the thigh area. Even if the fit problem isn't pronounced enough to make many strain lines, the wearer will notice little mobility in their pants (when they try to lift their legs to go upstairs in particular).
  
Potential Solution: Add width to legs in thigh area - from crotch to knee level. Adjust the side seam, inseam, front, and back in equal amounts. 
  
  
4. Fitting problem: Long or Short Legs 
  
What it looks like: Pants usually fit at the waist but are too long or too short at the hem.
  
Potential Solution: Fix this BEFORE cutting out your fabric so that the shape of the legs is not altered (by cutting off fabric before hemming). Do this by shortening or lengthening the pattern pieces using the "lengthen or shorten here" lines. See this tutorial on how to do this!
Note: The inseam lengths of the front and back pattern pieces are intentionally different. When sewn together, the pieces must be eased in the thigh area. This creates a good fit as the fabric wraps around the inner thigh. When adjusting the length of the pattern pieces, adjust each leg the same amount rather than make them the same size. 
  
  
5. Fitting problem: Strain Across Hip and Thigh Area 
  
What it looks like: Horizontal strain lines present across the hips and thighs—misshapen pockets (pulled due to strain). The waistband fits, and the leg width is suitable, so choosing a larger size wouldn't be a solution. 
  
Potential Solution: Analyze where the pants seem most tight and analyze the body shape. Are the person's hips curved? Is the person's bottom rounded? Do they have large thighs? If you are fitting a muslin, try releasing specific seams (the Center Back Seam or the Side Seam) over the strained areas. Whichever released seam erases the horizontal strain lines indicate the area to be adjusted. Refer to Fitting Problems 2, 3, 6 and 8. 


6. Fitting problem: Round or Flat Buttocks
  
What it looks like: Round Buttocks - Horizontal strain lines are present across the hips, side seam is possibly misshapen due to tightness. The Center Back seam is likely curved inwards to match the body's curve (i.e., a wedgie!)
  
Flat Buttock - Vertical fabric dimples and folds are present on the Pants Back. Excessive fabric is pooling at the side seams. The pants seat looks baggy and unflattering. 
  
Potential Solution: Perform a "Large or Small Seat Adjustment" to add or remove room in the seat area. Don't worry; it's simple! Here are some excellent tutorial links from Seamwork and Closet Core patterns. 


7. Fitting problem: Waistband Gapes
  
What it looks like: The top of the waistband gapes outwards while the seat and legs of the pants fit well. 
  
Potential Solution: A person's waist and hip measurement differs from the proportions the pattern is drafted for. Shorten the waistband to suit the person's measurements and taper the pants slightly by increasing the width of any darts and grading in the side seams. See our Grading Between Sizes tutorial!
  
  
8. Fitting problem: Wedgie Effect
  
What it looks like: The Pants curve at the center back seam inwards. They feel tight as though constantly threatening to "wedgie" the wearer!
  
Potential Solution: Add room to the Pants Back and change the shape of the crotch curve. Refer to the "Large or Small Seat Adjustment" tutorial. If the tightness feels like it extends along the entire curve (as opposed to only high on the buttocks), refer to Fitting Problem 9.  
  
  
9. Fitting problem: Crotch Curve Too Short or Too Long
  
What it looks like: Crotch Curve Too Short - There is not enough room in the pants. The waistband is likely dragging downwards. The crotch feels too tight along the entire curve.
  
Crotch Curve Too Long - There is too much room in the pants. The crotch appears proportionally too low and baggy, as though the pants are worn on the hips. 
  
Potential Solution: Change the shape of the crotch curve to suit the body shape. Draw a different crotch curve that is either steeper or shallower. Make minor adjustments - a little goes a long way! Use a curved ruler for the best results. If the wearer is only rounded on the back (large buttocks and flat stomach), add length to only the Pants Back crotch curve. 
  
  
10. Fitting problem: Muscular Calves
  
What it looks like: There is not enough room below the knees of the pant legs (sometimes the case with tapered pants). Horizontal lines stretch across the pants over the calves. The pant legs continuously ride up throughout the day.
  
Potential Solution: Reduce the taper of the pant leg from the knee to the hem.
  
October 11, 2023
Jutland Pants Sew-along: Day 3- Assemble Front Legs

Jutland Pants Sew-along: Day 3- Assemble Front Legs

We will assemble the front legs in today's portion of the Jutland Pants Sew Along. You will need your front leg pieces, front pocket linings, and facing pieces, and for Variation 2, the front knee patch pieces.
  
  
Prepare Front Pieces
  
We will start by applying interfacing to the wrong side of the left front piece (as if you were wearing them) on the fly extension. Cut a strip of interfacing about 1" to 1.5" (2.5 - 3.8cm) wide and apply it to the wrong side of the fly extension, following the manufacturer's instructions. Trim away the excess interfacing that is not attached to the fabric. 
  
  
Assemble Front Pockets
  
Staystitch 5/8" (1.5 cm) from the curved edge around the front pocket facing pieces. These staystitching lines will be helpful when turning the fabric under in later steps. This also gives you a guide on where to clip to.


Clip notches into the seam allowances to the staystitching line. Be very careful not to clip into or past the staystitching lines. Cutting notches into the seam allowances reduces bulk when they are turned under.
  
Press the seam allowances to the wrong side of the fabric, following the curve of the staystitching lines. Turn the fabric towards the wrong side so you can't see the staystitching lines from the front - or you can remove the stitching if it is still noticeable. 
  
Match the facing pieces to the pocket linings. The wrong side of the pocket facing will match the right side of the pocket lining. Pin in place, aligning the raw edges and ensuring the pocket facing is flat. 


Stitch the facing to the pocket lining by edgestitching along the curved edge of the pocket facing. 
If you want your stitches to be more visible or pop, use a contrast color or topstitching thread for all visible stitching!


I will now be referring to the "right side of the pocket lining" as the side with the pocket facing attached. 
  
With the right sides together, match one front pocket lining piece to one front leg piece along the curved pocket opening edge. Pin in place, aligning the raw edges.


Stitch together at 5/8" (1.5 cm).
  
  
Trim and grade the seam allowances, making the pocket lining seam allowance slightly narrower.


Make small clips into both seam allowances perpendicular to the stitch line. No need to over-clip, clip every 1" (2.5 cm) or so. 


Fold the pocket lining away from the stitch line. Understitch along the pocket lining, catching the seam allowances underneath. Understitching helps keep the seam allowances in place while also helping to create a smooth curve when pressing the pocket lining to the wrong side of the front leg. 


Turn the pocket lining to the wrong side of the front leg and neatly press the pocket opening. For a professional finish, turn the seam slightly to the wrong side. This will help to prevent the pocket lining from showing from the right side. 


To finish the curved pocket edge, topstitch 3/8" (1 cm) away from the curved edge and then edgestitch at 1/8" (3 mm). 


We will now be finishing the pocket lining with a French seam along the bottom of the pocket. 
First, fold the pocket along the vertical notches so the wrong sides are together, and the two layers along the curved bottom edge are lined up. Pin.
  
  
Stitch from the folded edge to the side seam using a 3/8" (1 cm) seam allowance.
  
  
Next, trim both seam allowance edges to be 1/8" (3 mm) wide.


Flip the pocket around so that the right sides are together. Neatly turn the corner and press along the curved seam. Stitch along the curved edge again, using a 1/4" (6 mm) seam allowance to enclose the raw edges. Now you have a tidy French seamed pocket!
  
  
Align the top and side edges of the pocket bag and front leg. Baste along the top and side edges to keep the pocket positioned correctly.


Variation 2: Front Knee Patch
  
Here, I will show you how to add knee patch reinforcement to the front legs. If you would like to create functional knee patches where you can add and remove knee pads, here are two different ways to achieve that! Here is a tutorial on how to make your own knee patches from batting, and here is a tutorial on how to use store-bought knee pads. 
  
Fold under the top and bottom edges of the knee patch pieces at 5/8" (1.5 cm). 


Match the wrong side of the knee patch to the right side of the front leg. Align the notches and raw edges along the inseam and side seam. Ensure the knee patch is nice and flat against the front leg and pin in place.


Along the top and bottom edges of the knee patch, edgestitch 1/8" (1 cm) from the folded edge and then topstitch 3/8" (3 mm) from the folded edge through all layers. 
Baste along the inseam and side seam edges. 
  
October 11, 2023
Jutland Pants Sew-along: Day 4- Assemble the Back Legs

Jutland Pants Sew-along: Day 4- Assemble the Back Legs

Today's sew-along will focus on the Jutland Pants Variation 2 Patch Pockets. Here is a tutorial on how to create the Variation 1 Welt Pockets. And here is an extra post including printable pattern pieces to customize the shape and topstitching of your pockets.
To sew the pockets as per the instructions, follow the sew-along below: 
  
  Assemble Back Patch Pockets 
  
Serge, bind, or zig-zag the top edges of the patch pocket pieces.


Fold the top of the pocket along the notched fold line so that the right sides of the fabric are together.
Stitch the corners down at 5/8" (1.5 cm) through all layers. 


Trim the seam allowances to 1/4" (6 mm). 
  
  
Flip the sewn part of the pocket right sides out. Use a point turner to push out the corners and press.
Fold under the remaining seam allowance edges at 5/8" (1.5 cm).
Press carefully so that the pocket appears crisp and square. 
  
  
Stitch down the top of the pocket. 
  
  
Make Back Darts
  
Sew the small shaping dart on the Pant Back by bringing the fabric to meet at the notches and sewing from the notches to the marked point. Instead of backstitching at the mark point, sew off the fabric and leave two strings long enough to hand tie a knot. This will eliminate any potential puckering at the dart point. 


Press dart towards center back.
  
  
Attach Back Patch Pockets
  
Match the wrong side of one back patch pocket to the right side of one back leg, aligning the corners of the pocket with the markings on the back leg. Pin in place.


Edgestitch 1/8" (3 mm) from the pocket edge around the pocket through all layers. Backstitch thoroughly at each top corner. Then, topstitch 3/8" (1 cm) away from the pocket edge. 
  
  
Variation 2: Reinforced Back Hem
  
Fold the top edge of the Hem Reinforcement pieces to the wrong side at 5/8" (1.5 cm) and neatly press. 
Match the wrong sides of the reinforcement pieces to the right sides of the back leg hem. Align the top folded edge of the reinforcement with the notches on the back leg. Align the side notches of the reinforcement with the notches on the back leg. 
  
Edgestitch 1/8" (3 mm) from the top folded edge of the reinforcement piece. Then, topstitch 3/8" (1 cm) from the folded edge. Baste the reinforcement pieces in place along the three raw edges (sides and hem). 
  
October 11, 2023