Camas Blouse Sew-Along: Day 8 - Sew the Blouse Placket
Today we’re sewing the Camas placket. This is unquestionably the trickiest part of the Camas Blouse sewing process, but don’t worry, it isn’t that hard! It is just a little bit finicky and it is a slow process in comparison to the very fast sewing steps that preceded it.
Preparing your Placket
The instruction booklet tells you to interface all placket pieces with interfacing suitable for knits (it usually stretches in one direction slightly and is quite light weight). I have suggested you interface all pieces because this will make these narrow, fiddly pieces less likely to curl up or stretch out of shape. Interfacing them will cause the knit fabric to behave more like woven fabric.
Depending on your fabric choice, you can listen to my instructions or you are welcome to disregard them! Here are a few scenarios for you so that you can see what I mean:
- You are sewing with a thin jersey fabric whose raw edges roll up considerably. You hope to sew functioning buttonholes on your placket. In this case it would be best to interface all placket pieces if you are a tad uncomfortable working with knit fabrics. If you are an old hand at working with knits you could interface one set of placket pieces and leave the other set free of interfacing. This will reduce bulk and rigidity slightly so that your placket flows with the rest of the garment more readily.
- You are sewing with a thick interlock fabric whose edges stay nice and flat. You would like to close your blouse front permanently by sewing decorative buttons on through all layers. In this case you could easily sew the placket with only one set of interfaced pieces or you could even sew it with no interfacing. At least one layer of interfacing will help to prevent the narrow placket pieces from stretching and rippling as you sew them to the blouse front.
- You are sewing a with a very stable woven fabric such as cotton (as I am for this sew along). Go ahead and skip the interfacing if you don’t have any on hand! Keep in mind though that your buttonholes might be a little bit misshapen or your machine might have troubles creating them – you know the button hole capabilities of your machine so use your judgement here. If you machine often gives you troubles when sewing buttonholes, at least one layer of light interfacing will likely help you out!
I chose to skip interfacing altogether for this Camas Blouse just to test it out. The Camas I am sewing has been lengthened to become a dress so I wanted to ensure my placket is not very rigid and bulky since it is so long and prominent at the front of the dress.
Assembling your Placket
I am going to show you two ways to assemble to placket – the first is how I illustrated in the instruction booklet. The second approach requires fewer steps but results in a slightly less tidy garment (on the inside). You can choose which method you prefer or even try out both!
Method 1:
Place the neckline placket on your work surface with right side facing you. Lay out your placket pieces on top of it with wrong sides facing you. Line up the shoulder seams and pin.
Stitch the shoulder seams using a 5/8″ seam allowance and a straight stitch. Press these seams open. Once you have stitched both sets of plackets you can trim one of the seam allowances to 3/8″ if you like to reduce bulk (so that both seam allowance raw edges don’t end at the same point and create a ridge).

Now it is time to sew the placket to your blouse. This can be a little counter intuitive due to the curved shaping of the neckline – pin carefully and even baste the entire seam if you are unsure you have the placket positioned correctly! I’ve attempted to explain the process in a very different way than I did in the instruction booklet so that those who are confused by the instruction booklet can clarify things by reading this post and vice versa.
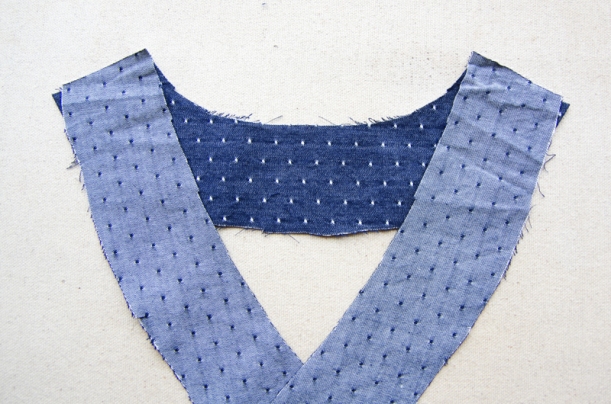
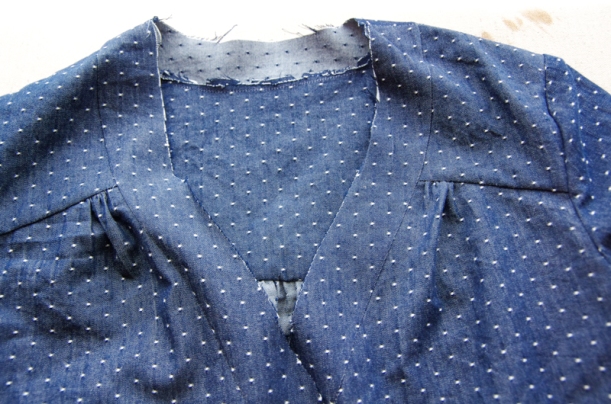
Place the placket on your work surface with right sides up so that the neckline placket looks like a frown (see the photo above). You will be sewing the blouse neckline to the longest side of this curve (the top of the frown).
Drape the placket over the blouse and match the shoulder seams. You can see in the bottom right of the photo above that the placket curves away from centre front (this is the part that some people find counter intuitive). The blouse curves in a convex fashion and the placket curves in a concave fashion.
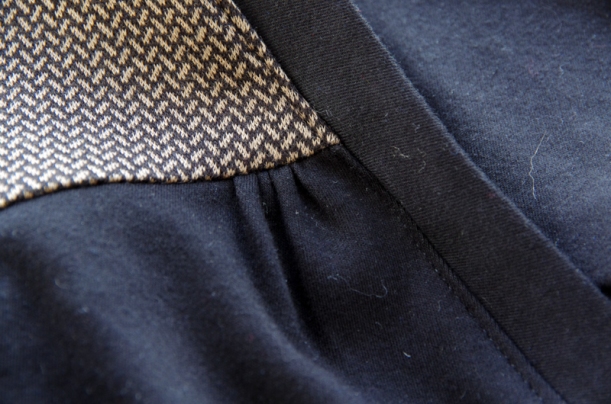
Pin the placket to the blouse with right sides together. Make sure to match the shoulder seams and center back. The placket will extend 5/8″ beyond the blouse hem.

Sew the placket to the blouse with a 5/8″ seam allowance. It is a great idea to break the seam into two sections by starting at the centre back and sewing in either direction. This way you are less likely to stretch the placket out of shape.

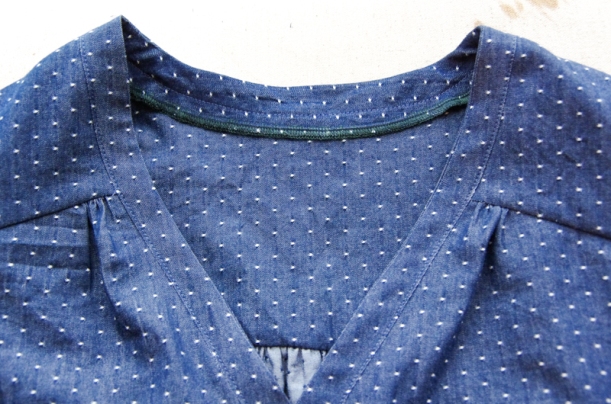
Now that your placket is attached, here comes the most important step to create a smooth, professional looking placket without too much bulk! Trim, trim, trim!

Grade the seam allowances by trimming one to 1/4″ and the other to 3/8″. Along the curved sections (the back of the neckline and the curve at center front), clip the seam allowances by making small triangles. This will help the seam to curve smoothly. If you are using a very delicate knit fabric or a loosely knit fabric, you might not want to trim or clip so thoroughly since this could cause runs in the fabric. If you are using a dense knit or a woven fabric, trim and clip to your hearts content!
Press the seam allowances towards the placket.
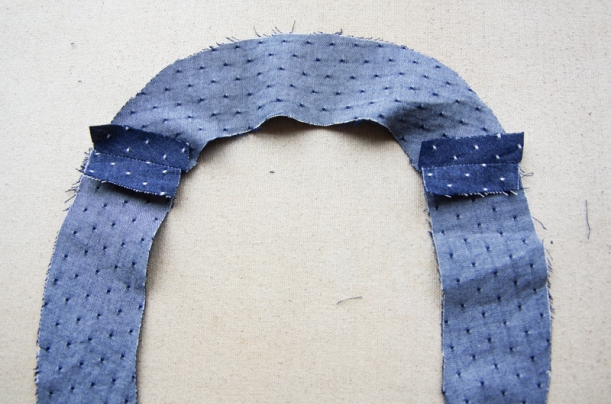
Now you can assemble the second set of placket pieces in the same manner as the first. Finish the long outer edge (the same edge that you sewed to the blouse when you assembled the first placket) by using a serger, rayon seam tape or a zig zag stitch. I’ve used a serger in the photo below and I’ve marvelled at a Camas Blouse the my mother in law created using rayon seam tape for this step. She matched the seam tape with the floral print – it looked so pretty!

Pin the inner placket to the outer placket. Match shoulder seams and the center back. This placket will also extend 5/8″ below the blouse hem.

Starting at center back, stitch in either direction using a straight stitch and a 5/8″ seam allowance. When you get to the hem, make a right angle turn and stitch across the entire width of the placket.

For best results, trim and clip this set of seam allowances in the same way that you trimmed the first. If you like, this is a great seam to understitch to ensure that the inner placket presses towards the inside of the blouse easily.

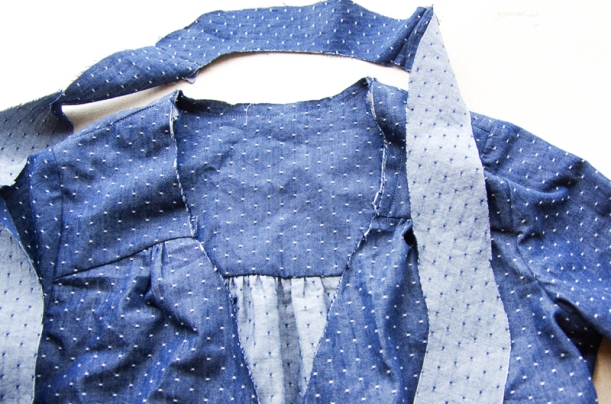
Your placket is beginning to look very finished! We just need to stitch it in place now.

Pin the under placket in place to prevent any shifting before you sew your topstitching.

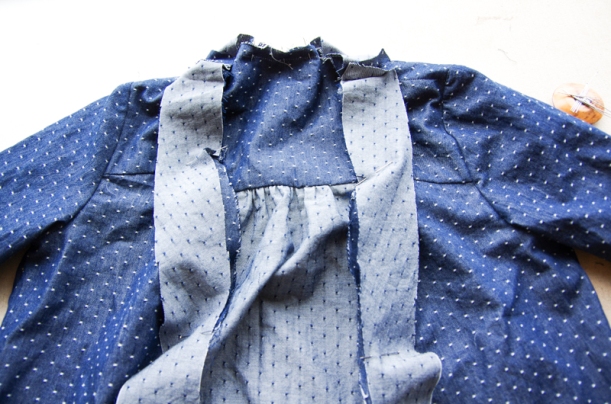
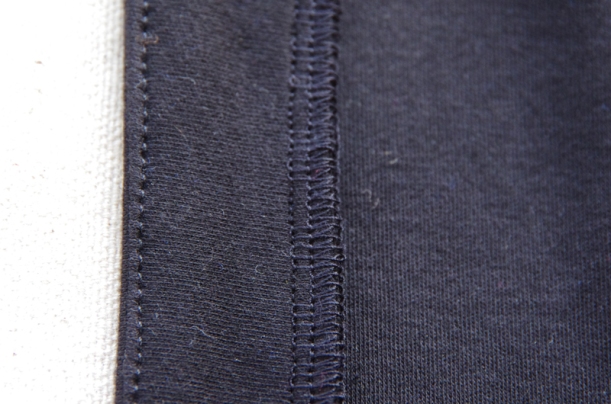
From the right side of the blouse, topstitch along the placket edge 1/8″ from the seam.
I like to topstitch with a slightly longer stitch than usual – I find it looks a bit more polished. Doesn’t that look nice?

Now, if you prefer, you are welcome to use Method 2 to sew your placket:
Sew the shoulder seams of the neckline placket and placket pieces as instructed in Method 1.

Press the seam allowances open and trim one set of seam allowances to 3/8″ if desired to reduce bulk.

Rather than sewing one placket to the blouse as we did in Method 1, we will assemble the two placket sets before attaching them to the blouse.

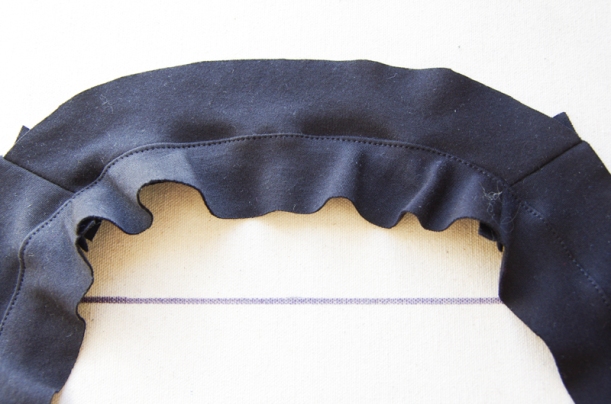
Place one placket on top of the other with right sides together. Pin the plackets together along the inner curve. Make sure the shoulder seams are aligned.

Start at center back and stitch along the inner curve using a 5/8″ seam allowance. Stitch from centre back towards the hem in both directions. Breaking the seam into two sections like this will help to prevent things from becoming misshapen. 5/8″ from the raw edge of the hem, turn a right angle and stitch across the width of the placket.

Here is how your placket will appear once you have stitched this seam:

At this point, you can understitch if you like to ensure that the placket will fold and press crisply.
To understitch, press the seam allowances towards the inner placket (this could be either of the plackets, you choose!) with your hands. Stitch through the inner placket and both seam allowances 1/8″ from the seam. You can see the understitching in the photo above.
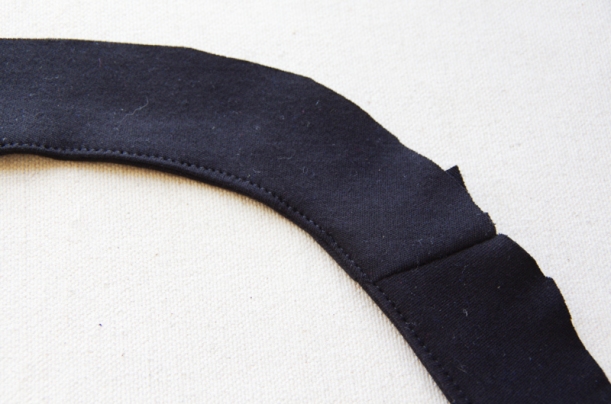
Press the placket so wrong sides are together and raw edges are aligned. Turn out the placket corner at the hem.

Now it is time to attach the placket to the blouse. Baste together the two raw placket edges if you like so they don’t shift around while you sew. Pin the placket to the blouse carefully so that right sides are facing (the placket with visible understitching is the wrong side).
The rest of the process process will differ slightly depending on the machines you are using.
If you have a serger:
Beginning at one hem, carefully start serging so that the placket and blouse hem are even. serge all the way around to the other hem. Make sure that the shoulder seams are aligned.
If you are using a straight and zig zag stitch:
Using a straight stitch, start at center back and stitch towards either hem. Finish the seam allowance using rayon seam tape or a zig zag stitch.
Finishing the placket

Press the finished seam allowance towards the blouse. Topstitch the seam allowance in place 1/8″ from the placket seam.
I hope your plackets turn out well! Take it slow and enjoy the process calmly :D.
Tomorrow we will sew our closures and I will show you my finished blouses! On Friday I would love to showcase some of the blouses you have sewn – please email photos to me at info@threadtheory.ca if you would like to be featured. Otherwise, blog and Instagram away and I will find your Camas projects on the web. Exciting!
