Jeans Sew-Along: Finishing Details
Today we will finish our jeans! These are the most satisfying steps of the whole sewing process: We will add the belt loops, add the optional tag and hem the legs.
Let's start with the belt loops.

With the wrong side facing you, finish the right side of the long belt loop strip using your choice of a serger or a zig zag stitch.

Fold the long raw edge towards the center of the belt loop and press.
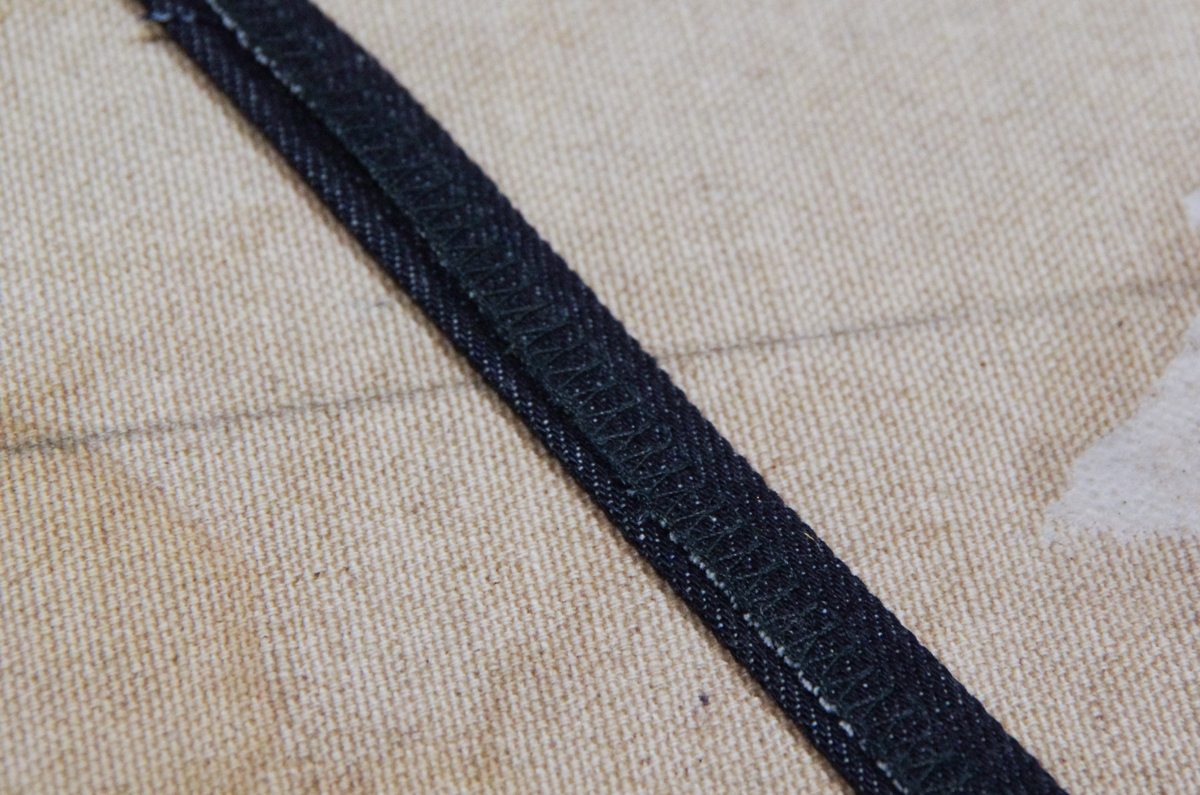
Fold the finished edge over the raw edge so that the belt loop is pressed in thirds.

From the right side of the belt loop, topstitch along either edge. Be sure to catch all three layers of fabric. I usually topstitch just a little less that 1/4" in from the folded edge (rather than edgestitching) to ensure I've caught the serged edge.
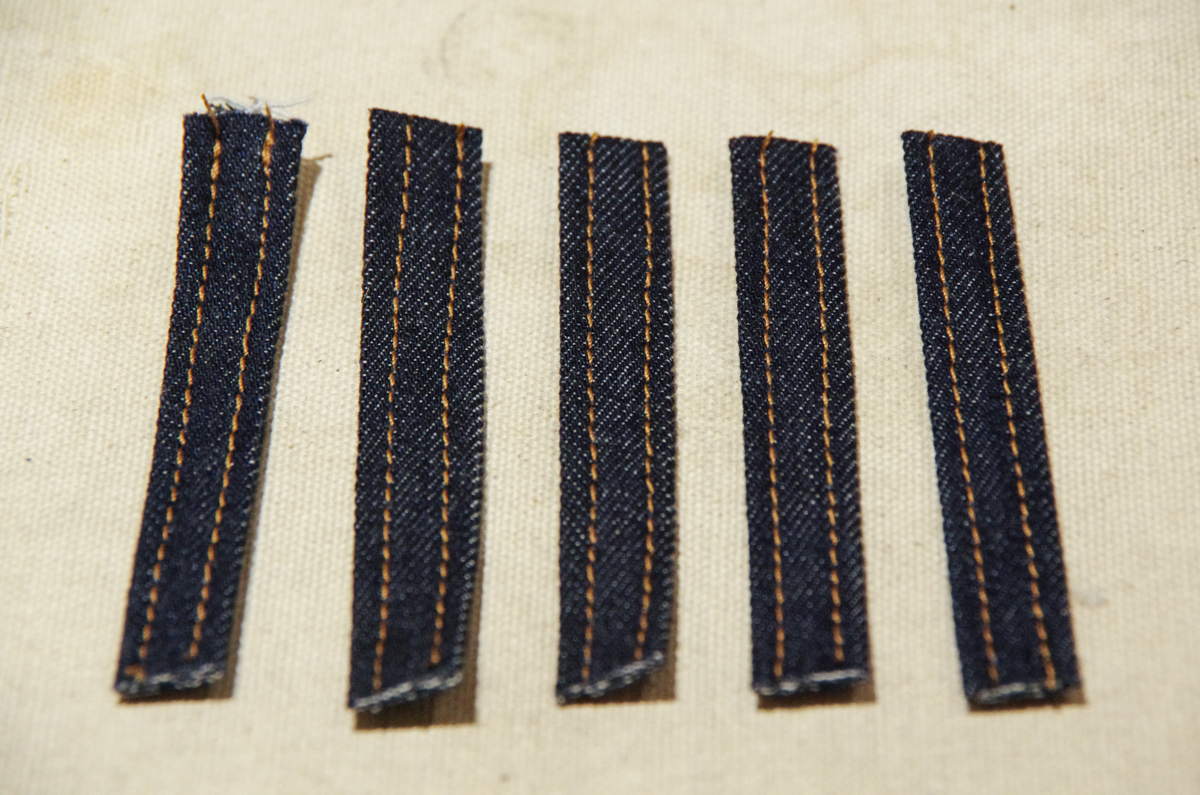
Cut the belt loop strip into five equal lengths.

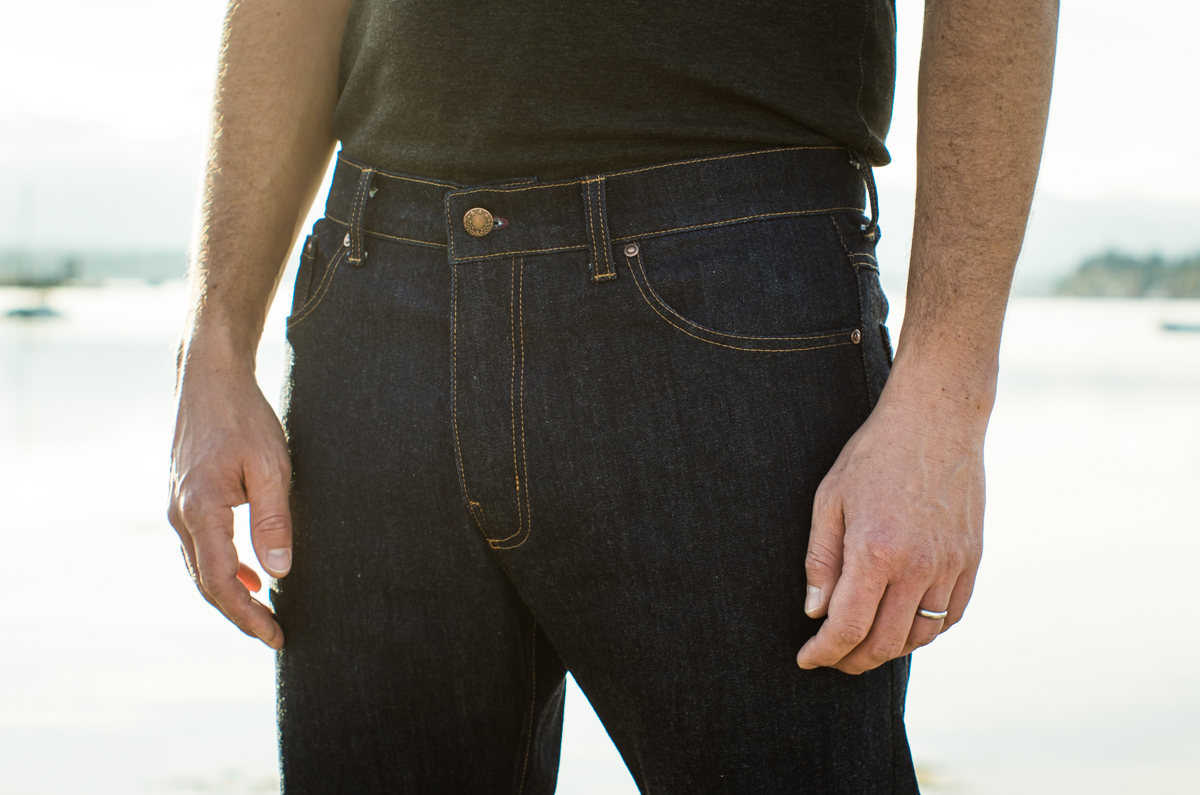
Place the belt loops as per the diagram in the instruction booklet. They should be extending above the waistband with right sides together. They are positioned as follows: 2 are on the front of the jeans about 1/2" from the front pockets (so there is enough room to add a rivet to the front pocket later), 1 is at center back, and 2 are about 1.5" back from the side seams.
Stitch the belt loops in place in line with the waistband topstitching.


Fold the belt loops down and curl under the raw end of the loop 1/2". Stitch across the bottom of the belt loop with topstitching thread. Stitch across the top of the belt loop with topstitching thread - line up this stitching with the waistband topstitching.

And now are belt loops are finished!

Before we hem the jeans, it's a good idea to try them on the recipient to check for the perfect length. Make sure they are wearing their favorite shoes. You can also compare the length to their favorite storebought jeans if you are trying to keep the jeans sewing project as a surprise gift! Make any small length adjustments as necessary by trimming a little off the hem or by sewing with a slightly smaller hem allowance.

Press the hem up - the Quadra jeans need to be pressed up 3/4" and the Fulford Jeans need to be pressed up 1/2".

Press up once more to enclose the raw edge (again 3/4" for the Quadra Jeans and 1/2" for the Fulford Jeans).

From the right side of the jeans, edgestitch around the hem. Give the hems a nice press to finish them off.
And now we can apply our rivets!

Add rivets to all of the front pockets - the two front pockets and the coin pocket. Use the manufacturer's directions. Here I am using the Prym rivets that we stock in the shop with the included tool. Since jean rivets are quite a ways from the fabric edge, I simply use a cutting board instead of folding over the other half of the rivet application tool. I still use the purple holder and the top half of the tool for the right side of the rivet as this helps me to hold it securely in place and prevents me from squishing the shaped metal.

Aren't you amazed how professional these little details have made your project look? If you really want to pull out all the stops, you can add one last detail to your jeans: a leather or Kraft-tex (washable paper) label to the back of the waistband.

Cut a label measuring 3" X 2 1.2" and position it about 3 1/2" to the right of the center back belt loop. Edgestitch around it using topstithcing thread.

I love the cheeky statement this blank label makes..."Look, I made this myself...there's no brand!"
We're now done our Quadra or Fulford Jeans! Way to go! You might like to give them a wash before they are worn to give them that soft, worn in look (new jeans can look a bit too pressed and stiff).
Congratulations on finishing such a big project! Thanks for sewing along with me.
