Fairfield Button-up Sew-Along: Day 8 - The Yoke
Today we are sewing the yoke on our Fairfield Shirts. I like to use a method that many sewists lovingly refer to as “the burrito method.” It results in a yoke seam and shoulder seams that have no exposed raw edges. Let’s jump right in:
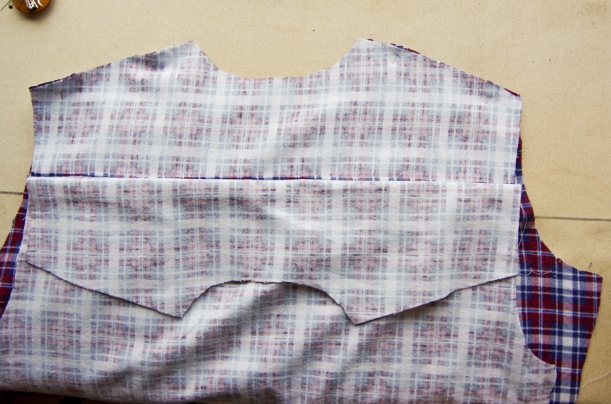
Begin by attaching your yoke pieces to the shirt back. Lay one yoke piece on your work surface right side up. Lay the shirt back on top of it with the wrong side up. Baste the two layers together if you like (not necessary but it’s helpful if you are trying to maintain a perfectly matched print). Lay the last yoke on top of this with the wrong side up. This last yoke will be your yoke facing. It is the visible yoke in the photo below:

Stitch all three layers together using a 3/8″ seam allowance.

Grade the seam allowances so that one is 1/8″, one is 1/4″ and one is 3/8″. This will help to reduce bulk.

Press both yokes upwards.

Edgesitch 1/8″ from the bottom of the yoke. If you would like, you can also topstitch along this seam 1/4″ from the bottom of the yoke.

Now it is time to sew the shoulder seams. To do this, let the yoke facing drop out of the way. You will only be working with two layers of fabric – the shirt front and the yoke.
Pin the yoke and front shoulder seams.
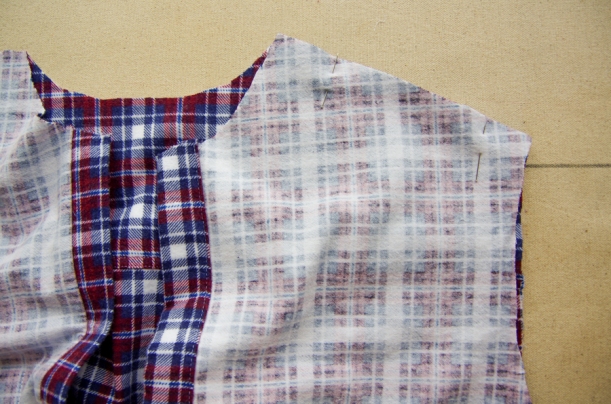
Stitch these seams using a 3/8″ seam allowance.

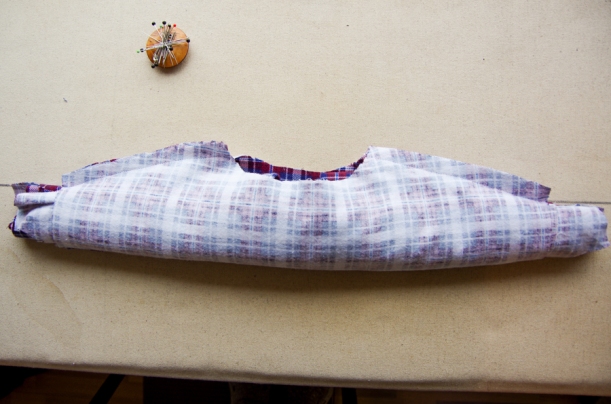
Now this is the point in to process when you will begin to understand why it is called the ‘burrito method’! We will now proceed to wrap up our shirt so it becomes the filling and the yokes become the tortilla. Let me explain:
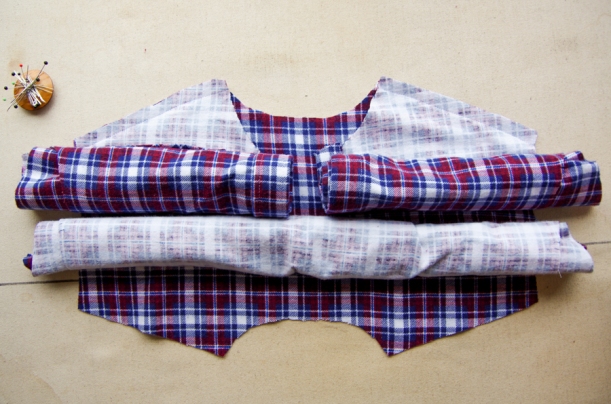
Lay the shirt back onto your work surface so that the right side is up (you will be looking at the wrong side of your shirt front). Make sure that the yoke facing is still drooping downwards.
Roll up the shirt back until you reach the yoke seam. Roll up the shirt fronts until you are close the to shoulder seams:
Rolling up the shirt back will have exposed the yoke facing. Fold it upwards and over your rolled shirt. With a little bit of tugging you will be able to join the yoke and yoke facing shoulder seams with right sides together (and no other shirt fabric in the way).
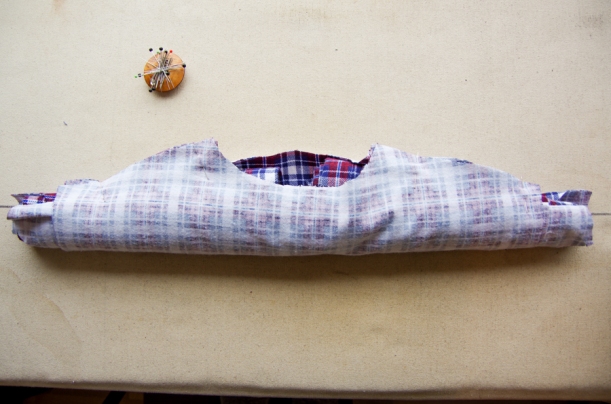
Pin the shoulder seams and stitch using a 3/8″ seam allowance. You will be stitching over top of your previous stitching line. You can grade these seam allowances to reduce bulk too.
To dismantle your burrito wrap, pull all of the rolled fabric through the neckline. You will be left with finished shoulder seams:
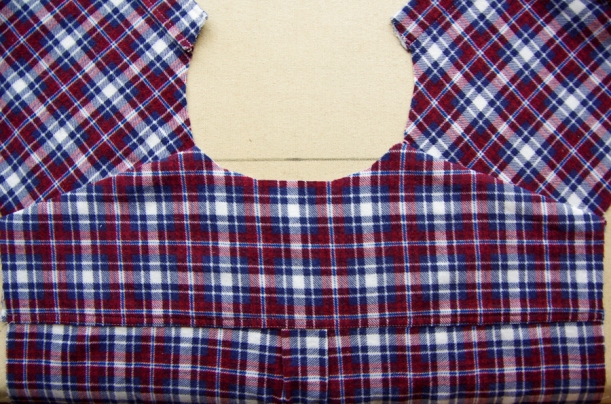
And a gorgeous interior featuring absolutely no visible seam allowances!

At this point you can edge stitch along the yoke shoulder seam if you would like – this is purely optional. I like to do this extra stitching if I have decided to top stitch and edge stitch the majority of the seams.
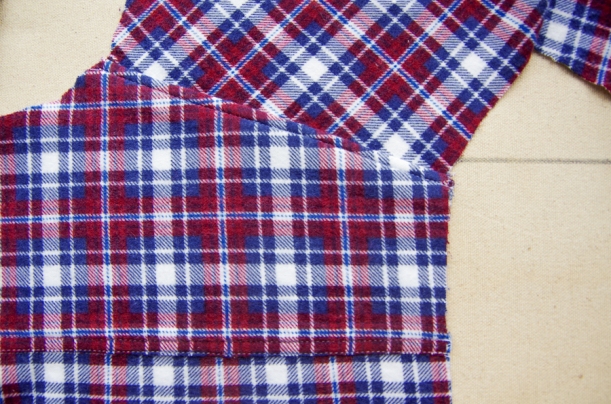
And now you’ve completed a proper shirt yoke!
For this tutorial I used the same photographs that I traced to create the illustrations for our instruction booklet. I thought it might be helpful to show you the photographed version of my instructions. If you are stuck on any steps and want a different perspective than the photographs and illustrations provide, there are tons of excellent resources available! Be sure to check these three out in particular:
Video Tutorial by The Sewing Arts Center (it’s very clear!)
Tutorial by Male Pattern Boldness (scroll down past the collar drafting part of the tutorial)
Tutorial by Grainline Studio for the Archer Shirt
I will be back on Wednesday to show you how to sew the sleeve plackets on to your Fairfield. See you then!