Comox Trunks Sew-Along: Day 4 - Cutting out your fabric and preparing your machine
It is officially Day 3 of the Comox Trunks sew-along and today we are finally going to start working with our fabric! Today we will be cutting out our fabric and preparing our sewing machines to work smoothly with thin knits. By now you should have gathered together your pre-washed knit fabric, corresponding thread, a length of medium weight pre-shrunk knitted elastic (elastics will normally specify on the roll/packaging whether they have been pre-shrunk or not...if they aren't it is advisable to wash them with your fabric as that's what you'll be doing when the trunks are finished, after all!). You should also have picked your size.
If you have not yet chosen your materials, have a look at the fabrics and elastics I suggest throughout this post.
Okay, let's begin! Lay out your pre-washed fabric by folding it in half and matching up the selvages. I like to pin the selvages together, especially with knits that are prone to curling, so as to ensure that all the pattern pieces will be properly lined up with the grain of the fabric. See how the knit likes to curl?
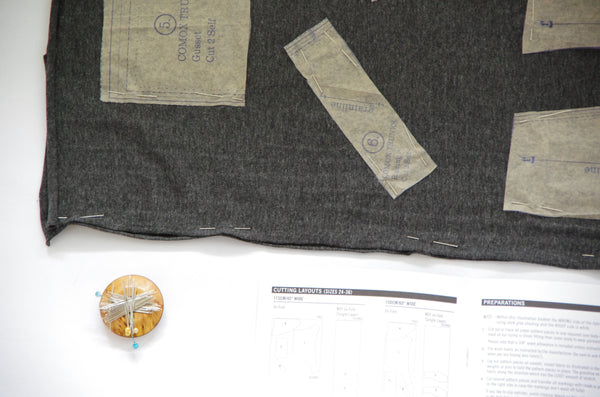
In the first edition of our printed instruction booklets, I have made fabric layouts that specify you should cut pattern piece 2 and 3 on a single layer of fabric. We've since revised these layouts so that this is no longer necessary - simply cut them on the folded fabric along with all the other pieces so as to create two 'mirrored' versions of each piece.
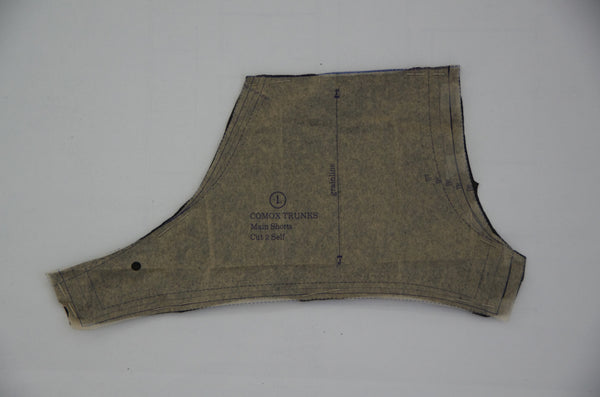
The only pattern piece that needs to be cut 'on the fold' is piece 4 which is the back of the trunks. Cutting this on the fold will result in a single fabric piece that is double the width of the paper pattern piece.
Also, if you are using a fabric with 4 way stretch which is a recommended fabric choice for these trunks (this means that the fabric stretches length-wise and width-wise), you don't necessarily need to cut piece 6 (the binding) on the bias. We placed the grainline in this manner so that you have the option to use contrast colours or prints for your binding regardless of if they are 4-way or-2 way stretch (or even a woven fabric if you are feeling adventurous!).
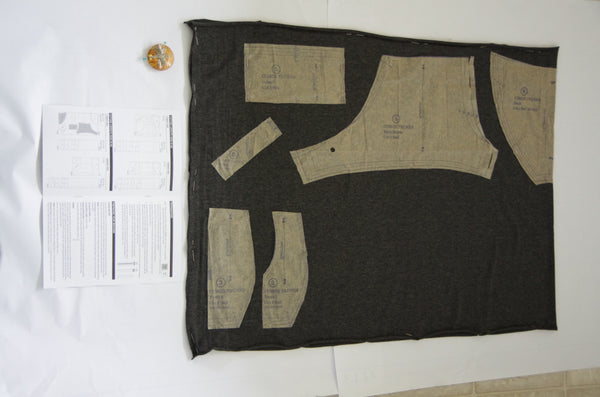
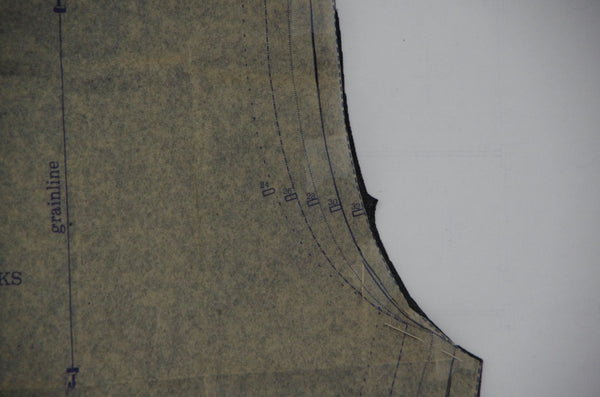
When cutting out your fabric, mark notches by clipping triangles outwards our using chalk or a pin. Avoid clipping into the seam allowance partly because it is quite small (only 3/8") but mostly because some knits have a tendency to run when nicked (even after you've sewn the seam).
Here's a close up of the little notch I made:
Now that all of our pieces are cut out, its time to set up the machine!
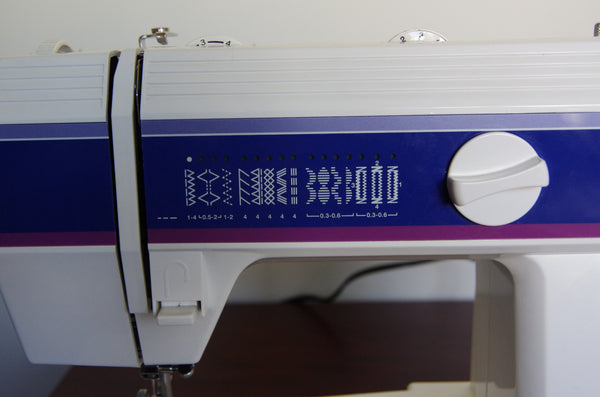
For this sew-along I am sewing one pair of trunks with my regular domestic machine:
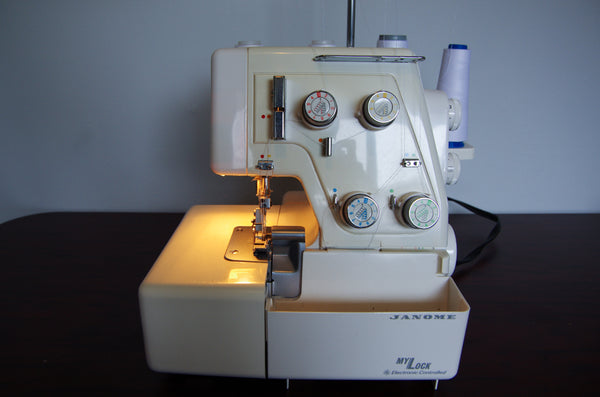
...And a second pair of trunks using my serger:
This way, you will be able to see how to construct your trunks with any available machine. It is well worth your while to play around with the settings on your machine with a scrap of your fabric until the machine works smoothly and your stitches are even. My little domestic doesn't have a huge amount of stitch options but I find the zig-zag stitch works well for the main seams with a narrow width. Also, it really helps to adjust the presser foot pressure so it is lighter than normal.
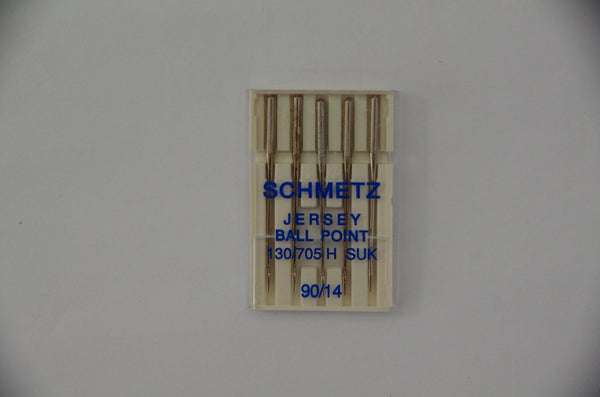
Also, I like to use a ball point or stretch needle when using knits. After all of our careful cutting of outward notches it would be a shame to cause a run in the fabric because the sharp needle has snapped some of the fibres!
This next picture is not very clear but hopefully you can see how I played around with adjusting the width of the zig-zag stitch. After creating a seam of varied zig-zag widths using two layers or knit I pulled open the layers to examine which width of zig-zag was the most invisible from the right side. If your stitch is too wide you will see threads and ripples on the right side of the garment - not good!

Here are the settings that I found worked best on the charcoal jersey for my machine (remember that the number scale and settings are different on every machine so don't be tempted to blindly use my numbers....test test test on your scraps!):
When I use the reinforced straight stitch for seams that need lots of strength (this works well on some knits but it is too rough on delicate knits and can cause holes because the needle punches the same area three times):

When I use the zig-zag stitch for major seams:


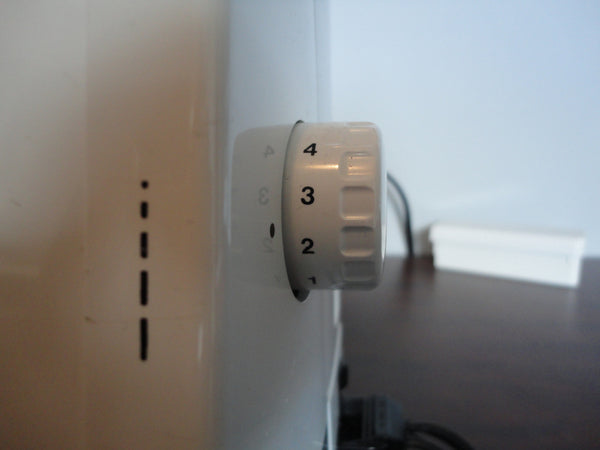
I didn't take photos of my serger's settings because it turned out that the stitches looked best on the Maple Leaf fabric that I used for my serged sample when I set the Differential Feed to "0". You might notice in the instruction booklet that I mention you should adjust the Differential Feed when sewing knits. I think this wasn't necessary for the Maple Leaf knit because it has very little stretch and acted more like a woven.
If you are confused about what I mean by Differential Feed, you need look no farther than this excellent blog explanation to have this dial de-mystified!
Are you raring to get sewing yet? We'll get started on Thursday by sewing the trunk front which is the most fiddly bit of this really fast project. Looking forward to it!