Comox Trunks Sew-Along: Day 5 - Sewing the trunks front
It’s time to get sewing! It’s nice to have our machines already set up after the last post so that we can get right into the fun part today!
Firstly, we have to prepare our two strips of binding. For my charcoal pair I went with self binding but for my Maple Leaf pair I used a contrast dark red – feel free to experiment with different combinations!
Start by folding each long edge into the middle and press:
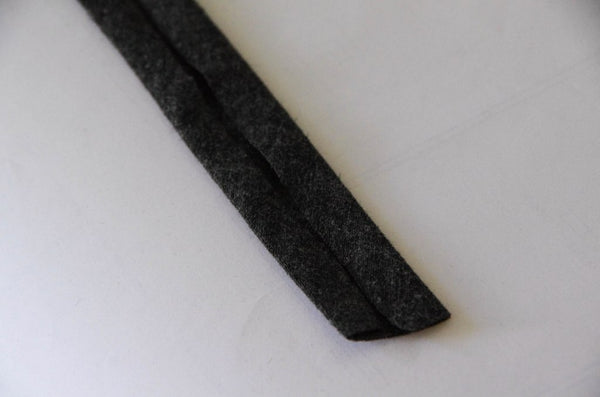
 Fold this segment almost in half. I like to make one “half” just a touch wider than the other so there is less chance of me missing the bottom layer of the binding sandwich in the next step (because that is SO frustrating…especially since knits are a bit tricky to un-pick).

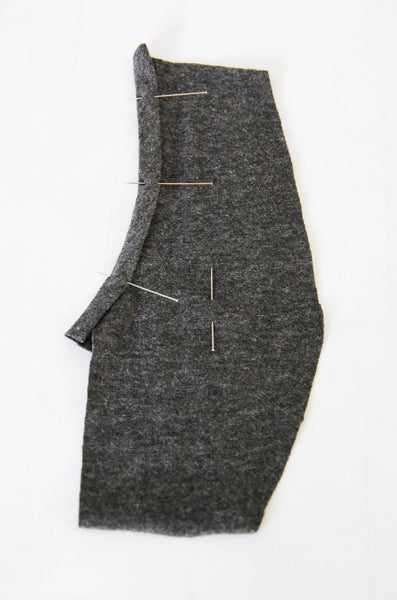
Once your binding is pressed, pin it to both Front 1 sections along the sharp curve. Keep the narrower side of the binding facing you so that when you sew along the edge of it, the wider binding will be underneath the fabric and will be caught easily. In the printed instruction booklet I state: “DO NOT treat the two Front pieces as mirrored pieces.” Since we revised the cutting layout, as mentioned in this post and in the errata section of our website, you will now be treating these as mirrored pieces. Sorry for the confusion! The PDF pattern has been revised so if you are using the PDF instruction booklet, align your Front Pieces as illustrated (mirrored).
Now it’s time to sew the binding to Front 1. Before I show how to do that, I have a handy little tip that has saved me much sewing strife. It is a good habit when sewing both knits or wovens to start a seam with your needle down in the fabric. I must have lost this good habit somewhere along the way (I remember being taught to do it!) and so was continuously frustrated when I began to sew knits because my machine seemed to “eat” the knit at the beginning of seams about 50% of the time! It would suck the thin knit down into the bobbin chamber and create a huge mess. This problem was eliminated when I put my needle in the full “down” position before I even get my foot near the peddle to start the seam. If this tip helps save at least one person the frustration I felt when beginning to sew knits I will be thrilled to hear it!

And here is our attached binding. I used a zig-zag stitch for this version but you could also use a straight stitch or reinforced straight stitch as the binding itself doesn’t need to stretch:

Here you can see a close up of the stitching:

The binding is a little longer than the curve (especially if it has stretched while you sewed it. Just trim off the little bits of excess:

Now it is time to attach Front 1 to Front 2. Align with right sides together and pin along the long curve. From this point onwards I will include photos of both the charcoal pair that I’ve sewn with a regular machine and the Maple Leaf pair that I sewed with a serger:


Note that I sewed the binding to the front of the serged pieces after I sewed Front 1 and Front 2 together – you can sew the binding on either before or after, whatever you prefer!
By the way, look at my Maple Leaf placement! I was chatting with Sophie from TwoRandomWords about how I had forgotten to worry about pattern placement when I cut this pair out and was sad that I wouldn’t end up with the Canadian version of the classic fig leaf across the trunk fronts…to my surprise, luck would have it that the leaf lined up almost perfectly!

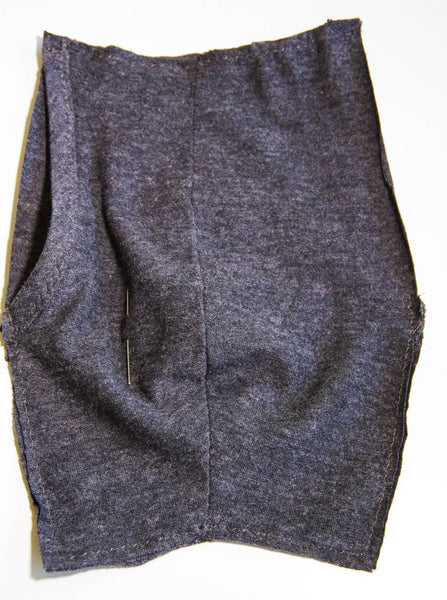
Now that the two layers of the front are assembled, we can sew them together to create the right exit fly. In the first version of the printed instructions the cutting layout would lead to front sections that are sewn with WRONG sides together (a nice way to eliminate a raw seam from the inside centre front of the trunks but this will lead to the wrong side of your fabric peeping out of the fly). Our revision instead instructs you to sew the two fronts with RIGHT side facing WRONG side. Here is how it will look:


When you go to baste these pieces together, remember to ensure that the bound edge is curved out of the way as much as possible – the hole needs to be open wide enough to allow for use ;).
I zig zagged within the seam allowance around the edges. You could also use a long straight basting stitch but then you’ll probably have to remove this stitching later on so that the seams can stretch without snapping threads:

I used a straight stitch for my serged version since it would be trimmed off by the serger later anyways:
