Fairfield Button-up Sew-Along: Day 13 - Hemming and Buttons
It’s the last day of our sew-along today! You're beautifully sewn shirt is just about ready to wear.
To finish our shirts, let’s begin with the hem – a quick and easy task! Press up the hem allowance 1/4″:

Press up the hem again 1/4″ to enclose the raw edge:
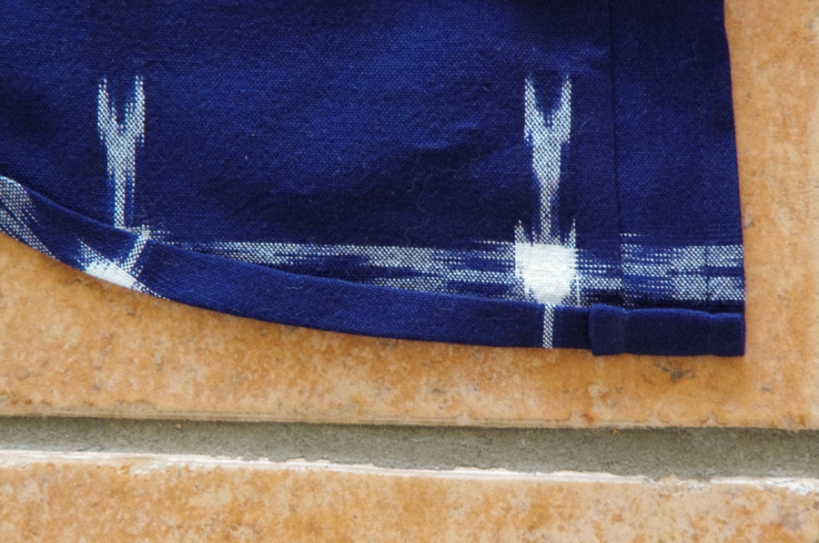
I like that the curved hemline at the hip doesn’t interfere with pressing the hem. It’s just the right amount of curve to provide shaping without bunching up at the peak.

Stitch along the entire hem.

And now, let’s move on to our buttons! While many people dread sewing buttonholes (I can’t say I look forward to them myself), there is no need to get too uptight – just use a few tools and tricks and you will be surprised how professional they look when you are done!

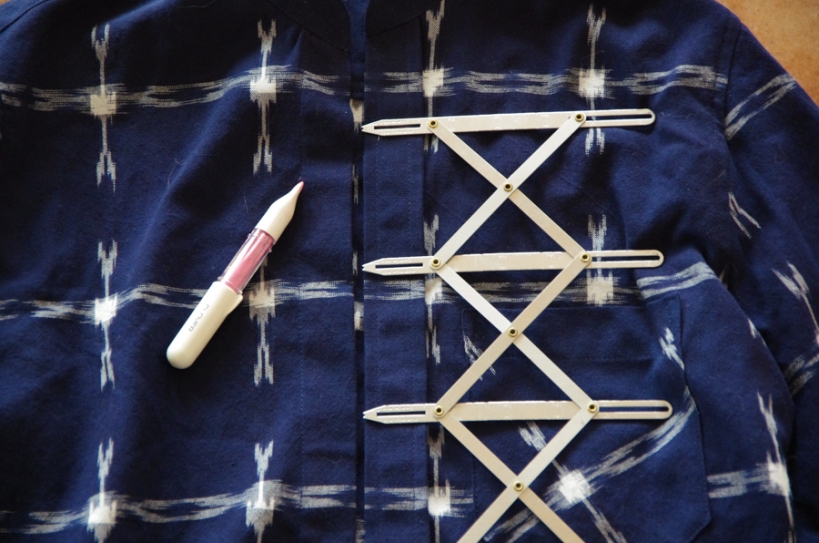
I like to use our expanding gauge to mark my buttonholes. I generally ignore buttonhole markings on the pattern pieces and instead place my primary buttonholes at important points before spacing the rest evenly between them. When sewing shirts for Matt I ensure that a button is placed at the widest point of his chest and also that the top button is placed nicely. He likes to leave the collar stand button undone (as most men do when they are not wearing a tie) so it is important that the top button is not set too low so as to expose a bunch of chest hair or something! If the person you are sewing for has a rounded belly, make sure to put a buttonhole at the area of greatest strain so that the shirt does not pull open.
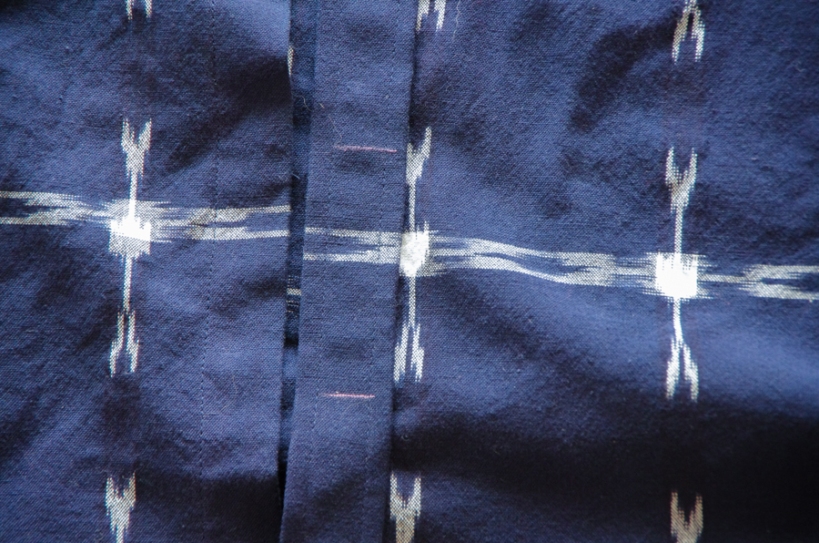
Even though the buttonholes are sewn vertically, I like to make a horizontal marking – this way I can use this marking as a placement for my presser foot and the top of the buttonhole. I then use my placket top stitching as a guide to keep the buttonhole exactly in the center of the placket. The top stitching is easier to see while sewing with a buttonhole attachment than a vertical chalk marking would be.
Make sure to make a practice buttonhole before you begin on your shirt! I tend to choose a buttonhole length that is slightly longer than my button. For instance, I am using 3/8″ wide buttons (from our shop) for this shirt so I sewed a 1/2″ buttonhole. This extra length allows the button to slip in and out easily.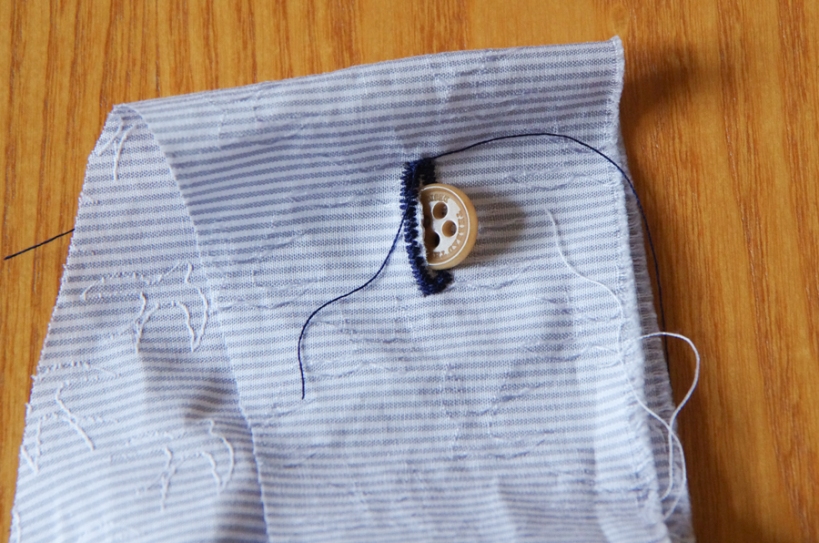
Apply your buttonholes to the collar stand, shirt front, and cuffs. If you like, sew the bottom button hole on your shirt front horizontally. You could even opt for a fun contrast thread for this bottom buttonhole. This flashy little detail is quite common on store bought shirts and is a great way to add a bit of creative flair to such a traditional garment.
I find the trickiest part of sewing buttonholes actually occurs after the sewing is finished! It is quite devastating to make a mistake when cutting open your buttonhole.
My favorite way to open buttonholes is with the extremely sharp chisel that we sell in our shop. I didn’t even need to use a hammer to cut these buttonholes – I just pressed down with the chisel and they sliced open in the most satisfying manner.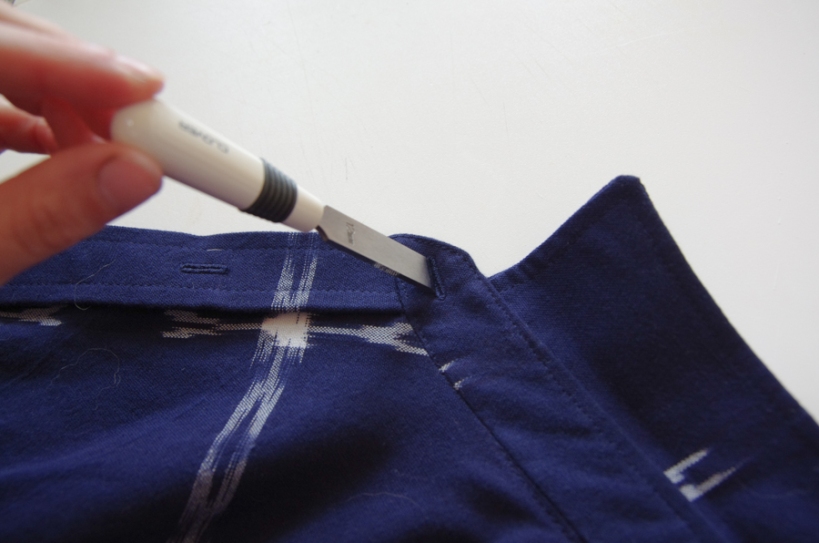
The chisel is 1/2″ wide so it was the perfect width for my buttonholes. The inside of the hole looks so tidy when it is cut this way!

Alternatively, you can use some sharp and precise scissors (such as the Merchant & Mills buttonhole scissors in our shop) or employ your seam ripper.
I highly recommend using a fresh and sharp seam ripper and a preventative pin at either end of the buttonhole to prevent cutting through your buttonhole and adding a gaping slice to your carefully sewn shirt! You can see how this preventive pinning technique works near the bottom of this tutorial by Made Everyday.

Lastly, it’s time to add our buttons! If you are matching stripes across the shirt, be very careful with your button placement. Position the button so that it will sit near the top of each buttonhole. If you simply place the button at the center of each buttonhole you will find that the buttons slip up to the top of the holes during wear and your stripes will look like they are not properly matched!
If your buttons tend to work loose or fall off over time (mine used to constantly!), you might like to check out the button sewing technique that I learned in design school. It was (almost) worth the cost of tuition to learn this technique alone!

And, that’s it!!! We are done!!! I hope you’ve enjoyed following along with this sew-along. I can’t wait to share some of your finished Fairfield Shirts next Friday. Be sure to share your makes by email (info@threadtheory.ca) or by using #fairfieldbuttonup
Even if you can’t photograph your shirt on a model (don’t ruin the Father’s Day surprise for your dad by asking him to model before Sunday!), you can photograph your shirt hanging from a clothes line or pleasingly folded up beside your sewing machine. Whatever sort of photo shoot you come up with will be perfect – it makes my day seeing your finished makes, your fabric choices and your design decisions.
Thanks for following along! Happy sewing!