Fairfield Button-up Sew-Along: Day 5 - Cut into your fabric
Today is a great day for those eager to sew – we are cutting into our actual fabric at last!

The first thing I suggest when cutting out a pattern is to wash and iron your fabric. It is tempting to skip the ironing step (especially if you’ve just pulled the fabric warm out of the dryer and it is fairly wrinkle free) but it really makes all the difference when carefully matching prints such as stripes and plaids. A wrinkled selvage can lead you astray when folding your fabric in half and may result in your pieces becoming off grain. Long story short, take that extra step and iron your fabric before cutting into it!
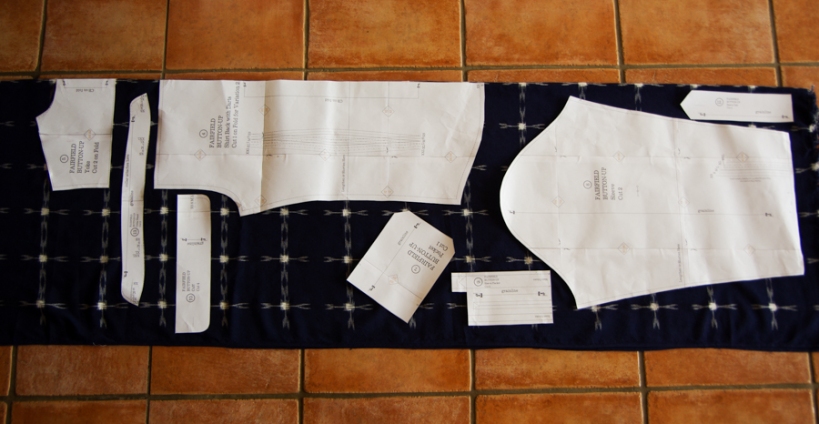
The cutting layouts included within the Fairfield instruction booklet are intended to be used with fabrics that feature either one solid color or a print that you decide not to match.
If you are working with a fabric like this, go ahead and follow along with our suggested cutting layouts!
You will notice that part of the shirt is cut on folded fabric and part is cut on a single layer of fabric. When working with a single layer of fabric you will need to work with the wrong side facing you (the right side is against the table or floor). Working with the fabric placed in this direction will result in a center front button placket that faces the correct direction for menswear! The Ikat I am using has no obvious right or wrong side:

Keep in mind that you will be sewing quite a few flat fell seams on this shirt – I recommend clipping notches outwards rather than snipping into the seam allowance because an intact seam allowance is needed to create a tidy flat fell seam. Some of the seam allowances are very narrow (1/4″) so it is also safest in these cases to clip outwards (even if they won’t be sewn into a flat fell seam).

If you are working with a printed fabric, lay out your pattern pieces to suit your print rather than to match our cutting layouts. Chances are you will need to deal with one of these three challenges: Matching, design placement, or a one way layout.
One Way Layout:
If your print has an obvious ‘up’ and ‘down’ you will need to place all of your pattern pieces facing in a single direction. Our cutting layouts do not need any adjustments to work for one way prints!
Many shirt patterns suggest that you cut your cuffs and collars with the long edge of each piece aligned to the grain/selvage. I placed the pattern pieces with the short edges aligned to the grain/selvage so that the flowers or birds (or whatever directional print you have) face the same direction as the sleeves. The only piece that is not placed in this manner is the under collar – it is so thin that you will likely not be able to see the direction of the print and it is also mostly hidden by the collar. If you prefer, though, you are welcome to rotate it on your fabric so it’s longest edge runs from selvage to selvage.

Design Placement:
Large scale prints with motifs that are several inches wide often need a bit of special treatment and extra fabric. If you are attempting to match the print (across center front, for example), keep in mind that the design repeats less often than a small scale print. According to my favorite sewing reference book, Reader’s Digest, Complete Guide to Sewing, a general rule of thumb to figure out how much extra fabric you will need is: “The length of one print repeat should be added for each yard of fabric called for.”

If you decide not to match the prints you can instead place your favorite elements of the print in highly visible areas. For example, you might like to place the most interesting or most complimentary colored motif across the chest of the shirt so that it highlights the face and is very visible. You might like to ensure that the left chest does not feature the same motif as the right chest as this can tend to look a bit strange.
Also keep in mind to avoid choosing the same motif to feature on the yoke as on the upper portion of the shirt back – this immediate repetition of the pattern always appears jarring.
When working with a large scale print I like to cut small design elements such as the sleeve placket and the collar out of the least busy areas of the fabric so that the print doesn’t overwhelm the design. In the photo below, the main column of the sleeve placket is positioned so it avoids the main elements of the ikat print:

My Nonnie did a great job of this here – she avoided any large black areas on her sleeve placket:

Matching:
Common choices for men’s shirts include vertical stripes, horizontal stripes or plaids. If you have chosen one of these you will need to do at least a small amount of pattern matching. In my opinion, there are three levels of pattern matching:

- You can take a very careful approach to matching that creates the illusion of a seamless garment by continuing the print across two or more pattern pieces. In the photo above you can see that I cut the yoke and shirt back to carefully make the distance between the dots continue evenly across the seam line.
- You can choose one element of the print to match and ignore the rest – This is what I normally do. It creates just enough harmony to make the shirt look thought out while preventing you from loosing your mind due to the frustration of cutting out and sewing perfectly matched printed pieces! I find, for example, that a plaid or other grid style print still looks nice if only the vertical pattern is matched, leaving the horizontal pattern to position itself more or less randomly (or vice versa). Of course, this is a matter of taste- you might not feel the same way about plaids and grid type prints.
- You can choose one main area of the garment (across the center front of the shirt) to match and ignore all other areas of the garment. As you can see in my quick plaid shirt below, the yoke, cuffs and sleeve placket are not matched but the center front is (or at least it did match until I placed the snaps in the wrong position lol).


Regardless of which ‘level’ of pattern matching you hope to achieve, here are some guidelines based on the style of print you are working with:
Stripes: Horizontal stripes usually require extra fabric while vertical stripes do not. This is only a loose guideline – if you are working with very wide vertical stripes, you may need to get more fabric than the pattern calls for because you will need to spread pattern pieces farther apart.
Plaids: Even plaids generally take less fabric to match than uneven plaids. When working with plaids you must pay attention to both lengthwise and crosswise matching.
Even plaid:

Uneven plaid:

Now let’s move on to the specifics of print placement.
The Procedure:
This is the order of events when you would like to create a perfectly pattern matched garment. I’ve adapted these from my Reader’s Digest, Complete Guide to Sewing.
Stop at step 1 for vertical stripes, at step 2 if you aren’t a perfectionist (that’s where I’m stopping today!), and at step 3 if you enjoy a good puzzle and want to put your pattern matching skills to the test!

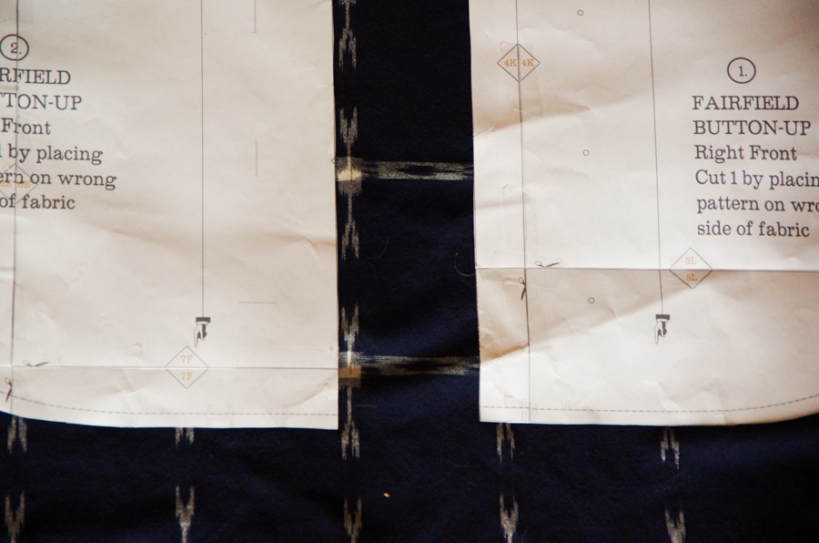
1. Centering: Decide which lengthwise stripe or bar of plaid will be at the center of the garment. For a men’s button up shirt, this is along the button hole and button placement markings. I find it looks nicest to choose one of the smaller bars of plaid when working with uneven plaids – it can look a bit strange to have the widest and brightest bar running down center front like a runway! For my Ikat shirt I have made sure that the button and buttonhole markings fall on the same double pointed prong radiating from the center circle. Note that I didn’t line up the center front with the prominent circles to avoid the runway look.
Place all pattern pieces so that the center front or center back is lined up with this specific stripe or bar. When cutting a piece on the fold (such as the back of the shirt, fold the fabric so that the centered stripe is folded exactly in half.

2. Place the dominant crosswise bars: This is only a concern when working with plaids or crosswise stripes. Usually the most dominant (brightest and widest) stripe is placed at an area that flatters the body. For example, if the wearer wanted to make his chest appear broader, you might like to place the dominant stripe across it. If he wanted to avoid accentuating a wide waist, you would want to avoid placing the dominant stripe at waist level.

Pick a notch or our “Lengthen and Shorten Here” lines as a point of reference to ensure that the dominant stripe is circling the body at the same level.

3. Crosswise matching: This type of matching allows you to continue a plaid or horizontal stripe across two curved pattern pieces at areas you prefer – for example, you might like the plaid to continue across the chest and into the sleeve as much as possible. This isn’t really necessary to do but it can look quite fancy if you achieve it! In order to do this, you need to work with the seam lines rather than the seam allowances. Draw these onto your pattern pieces. Then place the notches along the armhole and along the sleeve cap so that they sit on the same section of plaid. It won’t be possible to match the plaid all along the sleeve cap (near the shoulder seam for example) but it is generally most effective to match near the notches and ignore the rest of the seam.
If all of that has you a touch overwhelmed, approach your printed fabric in a different way – here is how I like to think about cutting it out if I don’t feel like messing around with much matching.
A couple tricks to reduce frustration (and as a bonus you might use less shirt fabric!): Men’s shirts present some great opportunities for playing with prints so that you don’t have to perfectly match them and so that you don’t have to waste so much fabric between each pattern piece (arguably the worst part of matching prints).

- Cut details on the bias – the pocket and sleeve placket can both be placed randomly on the fabric at a 45 degree angle so that you can utilize some fabric scraps rather than perfectly matching them to the chest and sleeve pieces.

- Add a center back seam to the yoke (don’t forget to add a seam allowance) – this way you can cut it on the bias to create a fancy chevron effect. You will only need to match the small vertical center back seam instead of needing to match the long horizontal seam between the yoke and the shirt back.
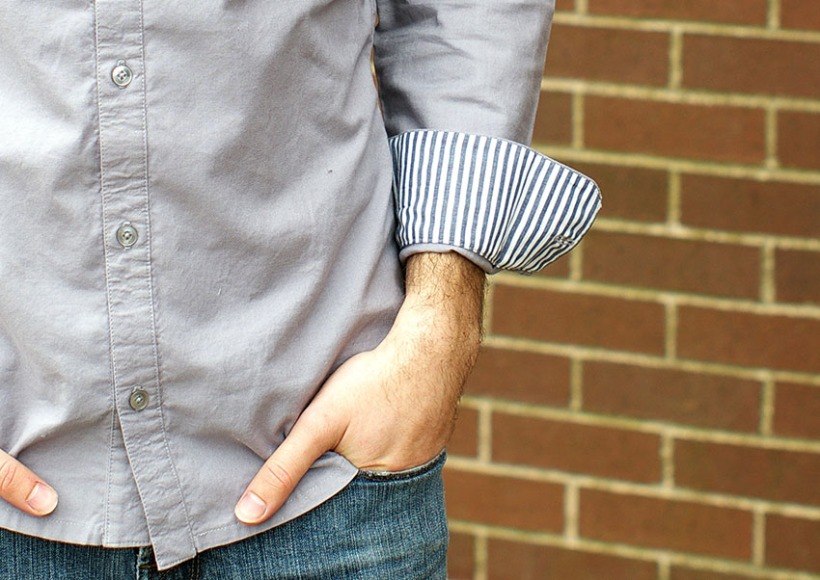
- Only cut one yoke and collar stand and two cuffs from your main fabric. Use a contrast fabric (possibly from your scrap bin) to cut the second yoke and collar stand as well as the remaining two cuffs. This way you will have more yardage for pattern matching the exterior of the shirt and you will have a contrast fabric on the interior of the shirt (which can give a shirt great hanger appeal!). Here is a very old shirt – my first button-up! – that I cut in this manner (but not because I was matching plaid obviously):
To wrap things up, here are a couple of my favorite resources for matching plaids and stripes:
- An in-depth Seamwork Magazine article on matching plaids and stripes
- A great series about plaid fabrics at Really Handmade. This post is about uneven plaids, the rest of the posts can be accessed through links at the bottom of the article.
- A nice overview about working with plaids with member projects as inspiration over on Craftsy.
- Tilly’s tips for sewing with stripes – this is a great post if you want to take a step back so that you aren’t so overwhelmed and just focus on the basics of pattern matching.
I’ll be back tomorrow with a post on applying interfacing and sewing the button placket!