Morden Work Pants Sew-along: Day 2 - How to Fit Your Morden Work Pants
The fit of the Morden Work Pants is very relaxed with a mid-rise. There are knee darts to help with mobility and comfort. We highly recommend making a muslin to test for fit and if you need to make any pattern adjustments.
Some very common adjustments that people need to make to pants patterns are:
- Adjusting inseam length
- A front rise or back rise adjustment may be needed if you have a longer or shorter torso, or more or less fullness in those areas than the pattern allows for.
- Taking in or letting out at the waistband
- Tapering or widening the leg opening
- Blending between sizes
In this post, I will walk you through how I made adjustments to my pattern to get the best fit.
To figure out what size to choose and what adjustments need to be made, you can compare your body measurements to our body measurement chart. If you are between sizes always size up and adjust the pattern down.
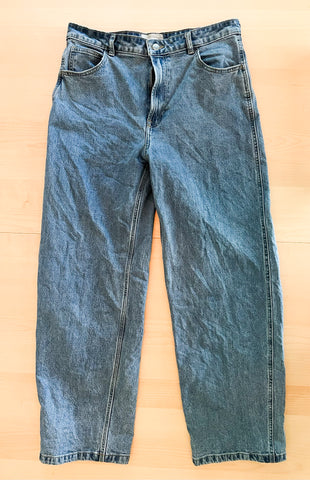
An easy way to get started is to measure a pair of pants that you already own that fit similarly to the intended fit of the Morden Work Pants. I have a pair of wide-leg jeans that I like the fit of, so I decided to use the measurements of these pants to compare to the garment measurement chart to find my size.
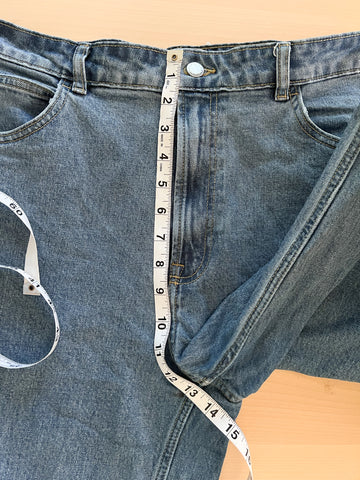
To get the most accurate measurements, it's best to measure the garment while it is lying flat on the floor or a table.
Use a measuring tape to measure your garment, not a straight ruler.
Take the waist, hip, front and back rise, inseam, and leg opening measurements. Write down your measurements and compare them to the garment measurement chart in the instruction booklet. If you are between sizes always size up and adjust the pattern down.
HOW TO MEASURE YOUR GARMENT
Waist: measure straight across the waistband. Double that length for the waist circumference measurement.

Hip: Measure straight across the hip line of the pants. The hip line is typically right above the pant legs. Double this length to find the hip circumference.

Inseam: Extend one pant leg and move the other aside so you can see the seat seam. Start with the edge of your tape measure centered at the seat seam allowance. Measure down the inseam seam allowances to the edge of the hem. Curve your tape measure to match the organic shape of the fabric.

Leg Opening: Measure straight across the leg opening. Double the length to get the leg opening circumference.

Front Rise: Position the front of the pants so you can see the entire length from the waistband to the seat seam intersection. Start with the edge of your tape measure at the top edge of the waistband. Measure to the seat seam intersection, curving the tape measure along the center front.
Back Rise: Position the back of the pants so you can see the entire length from the waistband to the seat seam intersection. Start with the edge of your tape measure at the top edge of the waistband. Measure to the seat seam intersection, curving the tape measure along the center back.

FIND YOUR SIZE
After comparing my garment measurements to the finished garment measurement chart, I determined that I will need to blend between sizes 8 and 10. I will also be making adjustments to the front rise, knee darts, and leg opening.

ADJUSTING THE PATTERN
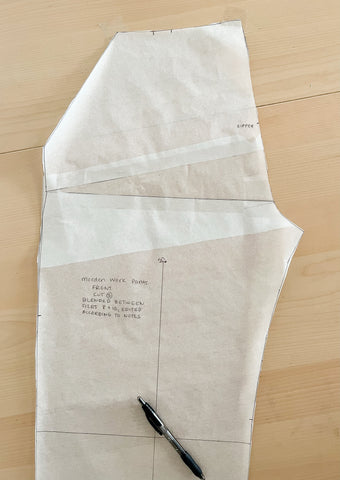
Here I will walk you through how I adjusted the Morden Pants pattern to match the fit of my jeans. Because I made a muslin sample, I only adjusted the front and back pieces first.
I traced off all pattern pieces for Variation 1. On the front, back, and back yoke I blended from the waist to the hip between sizes 8 and 10.
FRONT RISE: From comparing garment measurements, I only needed to adjust the length of the front rise. The back rise measurement of the pattern is close enough to my pants.
Since I only adjusted the front rise, I cut along the lengthen/shorten line from the center front - to but not through - the side seam creating a hinge in the paper.

I cut a piece of scrap paper and placed it underneath the front pattern piece. Next, I opened up the cut edges to create a wedge shape that opened 3" at the center front. Once everything was in place I taped the adjusted pattern piece to the scrap paper.

After making any pattern adjustments it is important to true the pattern. The first thing I did was blend between the center front edges to create a new center front. Next, I added a small amount of paper to the side seam to true the jagged line that was created by making the wedge shape.
INSEAM/KNEE DARTS: An important feature to note on the pattern is the front knee darts. The front knee darts need to be positioned where the knee of the wearer is, otherwise, the front leg will not fit correctly. This is why there are lengthen/shorten lines above and below the knee darts on the pattern. The position of the front knee darts may need to be higher or lower on the pattern.
When I measured along my inseam to where my knee is compared to the pattern I determined that I had to position the knee darts higher on the leg.
The inseam measurement of my jeans was close enough to the pattern measurement so I did not want to adjust the total inseam length.

First, I cut along the lengthen/shorten line above the knee darts.

To move the knee darts up, I overlapped the cut edges by 1 1/4" (3 cm).

To keep the inseam at 30 3/4" (78 cm) the pattern needed to be lengthened below the knee darts the same amount.
To do this, I cut along the lengthen/shorten line below the knee darts and separated the cut edges 1 1/4" (3 cm) placing a scrap piece of paper underneath. I taped the pattern to the paper and trued the inseam and side seam lines.

LEG OPENING: The leg opening of my jeans is slightly more tapered than the Morden Pants pattern. To get the fit that I wanted I took 3/4" (2 cm) off the leg opening from both the inseam and side seam. I then blended from the knee darts to the hem to create new inseam and side seam lines.

The same adjustment was made to the lower back pattern piece, blending from the top of the pattern to the hem. Since I was confident this was an adjustment I wanted to keep, I went ahead and repatterned the back hem reinforcement piece to match the new shape of the lower back.

FITTING THE MUSLIN
I basted up a sample in muslin fabric to test out my pattern adjustments.
The reason why we encourage sewing up a muslin, even after making flat pattern adjustments, is that you may find other adjustments need to be made - or you might not like the adjustments you did make - once the pattern is sewn up in fabric.
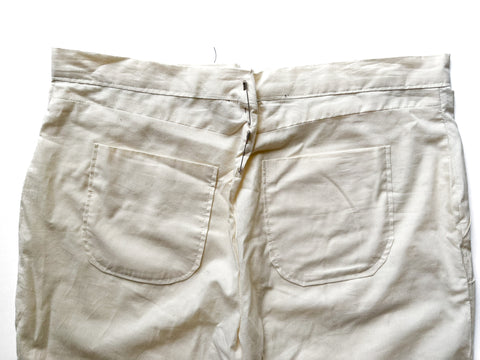
A very common adjustment made to pants patterns is adjusting the waistband. The Morden Work Pants have a straight waistband to allow for more comfort and mobility. Due to being a straight waistband, however, you may find there is a gap at the top of the waistband at the center back.
For my pants, the waistband had just a little too much of a center back gap so I decided to take that in.

After trying on the sample, I realized I should have done a straight size 10 instead of blending to an 8 at the waist. I plan on using my Morden Work Pants for gardening and yard work which will require a lot of ease of movement. The sample fit was just a little too tight around my upper hip area - which you can see from the horizontal drag lines of the fabric - making sitting and bending uncomfortable.

Now I will show you how I made the additional adjustments needed after testing out my sample and finishing the adjustments to other important pattern pieces!
WAISTBAND
From pinning my sample I determined the amount needed to take out from the top of the waistband.
First and most importantly, I traced a new waistband piece that was a size 10.
To take the amount off of the top of the waistband only, the pattern piece will now look like the picture below. Since the waistband piece is folded when finished, the center of the pattern piece is technically the "top" of the waistband. I took in the amount needed at the center of the pattern piece and then angled it out to the long edges of the pattern piece.

FLY FACING AND SHIELD
Because I added length to the front rise, I also need to lengthen the fly facing and fly shield pieces to match. Since both pieces are squared off at the top, I simply traced off new pieces that were 3" longer.

HIP/WAIST AREA
Since I determined I needed to use a straight size 10, I added scrap paper to the front and back pattern pieces at the side seam from the thigh area to the top of the piece. I then traced and blended out my pattern to match the size 10 side seam. Lastly, I traced off a size 10 back yoke pattern piece.