Woodley Tee Sew-A-Long Day 1
Day 1 of the Woodley Sew-a-long will feature assembling the body and finishing the shoulders. Before following along with these steps, please refer to Woodley Tee Sew-A-Long: Getting started to make sure you are all set up for sewing with knits!
Cut out the pattern pieces of the Woodley Tee in your fashion fabric.
Prepare and Attach Front Pocket:


Press in all the sides of the front pocket piece, along the marked seam allowances. Stitch down the top edge first, and leave the other edges pressed in place.

Pin the front pocket to the front body at the placement markings.


Edgestitch along the outer edges of the pocket, through all layers. For extra strength at the pocket openings, stitch a reinforcement triangle as shown above.
Assemble Colour-block Pieces:

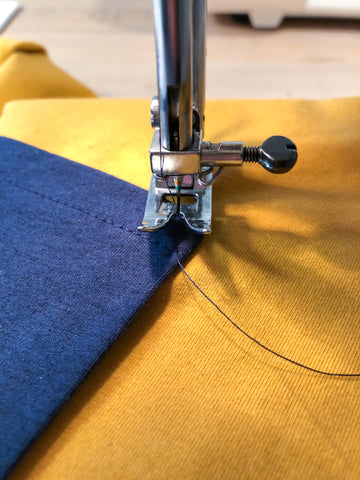
For the colour-block version, with right sides together pin the front top and front bottom pieces together. Stitch along the seam allowance using your preferred knit stitch.

Open the front pieces along the seam. Press the seam allowance up towards the front top.
Repeat these steps for the back top and back bottom pieces.
Sew Shoulders:

With right sides together, match the shoulders of the front and back. Stitch along the seam allowance using your preferred method of knit stitch. Press the seam allowance towards the back.
Assemble Neckband:

Fold the neckband in half, right sides together, matching the short edges. Stitch the short edges together so that the piece becomes a long loop. Press the seam allowance to one side.

Fold the neckband so that the long edges are matching, with WRONG sides together. OPTIONAL: At this point to keep the raw edges of the neckband from separating and shifting, stitch the edges together. If you do this, you can also finish the edge of the neck opening of the t-shirt so you don't have to worry about that edge in later steps.

Align the neckband to the neckline, matching the seam of the neckband to the center back notch of the back t-shirt. Stitch the neckband to the neckline using your preferred method of knit stitch.
Open up the t-shirt along the shoulder seams and neckline, with the wrong side facing up. Press the neckband seam allowances towards the t-shirt.
Make and Attach Shoulder Binding:
I will demonstrate two ways of finishing the shoulder binding. One way is to use twill tape and fusible web, the other is to create your own binding from self or contrast fabric.
Here is how to attach twill tape:

Cut a strip of 20mm wide twill tape about 36" (91.4 cm) long. Place the shoulder binding over the shoulder seams and around the back side only of the neckband seam allowance. You will have to fold and curve the twill tape slightly where the shoulder seam meets the neckband to cover around that intersection. Make sure the shoulder binding is completely covering the seam allowances. You can position the twill tape to be centered over the seams, or more towards the back.

Cut several strips of fusible webbing, about 2-3" in length. Position the fusible web along the shoulder and neckline SANDWICHED BETWEEN the shirt and twill tape. It would be extremely helpful to use the fusible web at the shoulder seam and neckband intersection. Using an iron, carefully fuse the twill tape to the shoulder and neckline, following the manufacturer's instructions, making sure the twill tape stays positioned over the seams.

Using a straight stitch stitch along the twill tape through all layers, connecting the twill tape to the shoulder and neckline seam allowances.

How to create your own shoulder binding:

Cut a strip of shoulder binding on grain from self or contrast fabric 1.25" (3.17 cm) wide and at least 36" (91.4 cm) in length. Fold the long edges of the binding to the wrong side, overlapping the edges, creating a trifold that is about 5/8" – 3/4" wide (1.6 cm – 1.9 cm wide). Press.

Place the shoulder binding over the shoulder seams and around the back side only of the neckband seam allowance. You will have to stretch and curve the shoulder binding slightly where the shoulder seam meets the neckband. Make sure the shoulder binding is completely covering the seam allowances. You can position the shoulder binding to be centered over the seams, or more towards the back. Pin.

Using a straight stitch, carefully edgestitch along both long folded edges of the shoulder binding, securing it to the shirt. Depending on how you positioned the shoulder binding, you may see some stitching along the back part of the neckband. Press.