Strathcona Henley Placket Tutorial
Are you a little bit nervous about sewing the Strathcona Henley placket? Don't worry! This is normal! This tutorial will show you how to approach the placket in a slow and careful manner that allows you to backtrack and re-do pieces as needed.
Since the fabric that I used for this Strathcona Henley is of medium weight, I decided to sew the Henley placket using a lighter scrap of contrast cotton knit that I had left over from a past project. I opted to sew the placket using the most fool-proof manner possible – hand sewing!
Even though I love sewing with knits (especially since I know that any knit garment will become a staple in my closet!), I am often filled with trepidation when a design requires me to sew something small or detailed with a knit, such as the Henley placket. In order to avoid the worry of nicking and unravelling my knit fabric while unpicking crooked topstitching, I simply hand stitch any small details and enjoy the relaxing few extra worry-free minutes that this takes!
To begin the placket, you will first need to prepare the fabric piece by ironing a selection of folds. These folds will provide you with a guide to apply the interfacing and will later help you fold your placket correctly when it has been attached to the Henley front. Here are a series of photos to walk you through these steps:
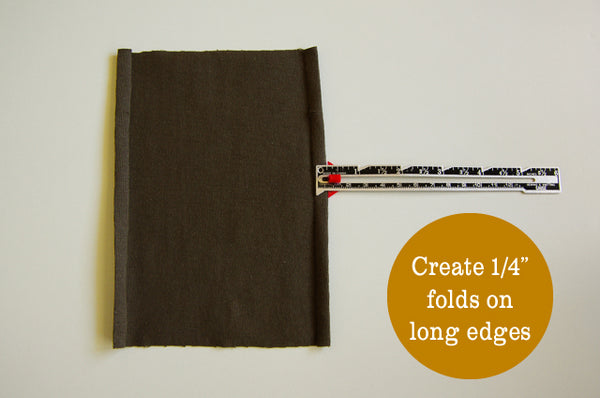

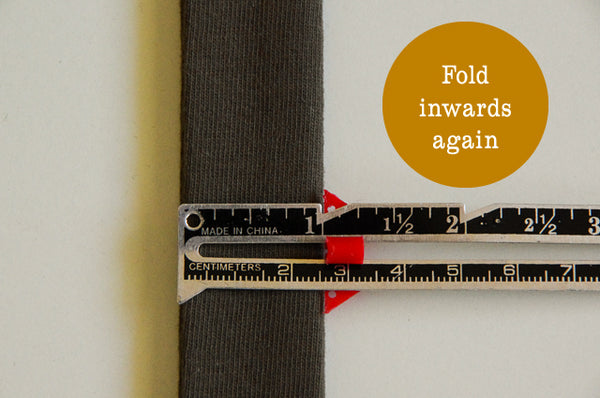
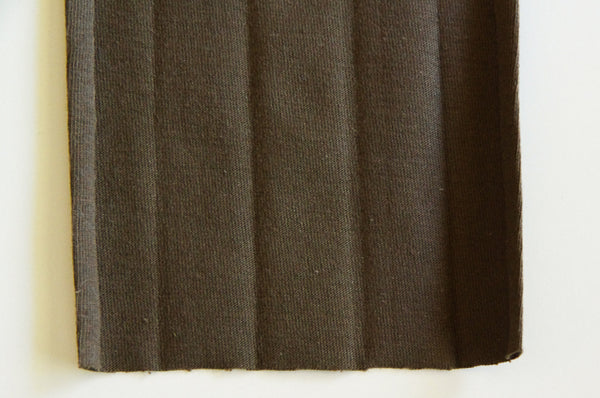
Now you can open up your folded fabric to see your ironed guidelines.
Using the ironed guidelines, apply 1” strips of interfacing to the areas either side of the center section. You may need to re-press your guidelines after applying your interfacing. Then, fold the entire placket in half and press just along the fold to create the center line that you see in the photo below. This center crease will act as a guide for you to cut along later.

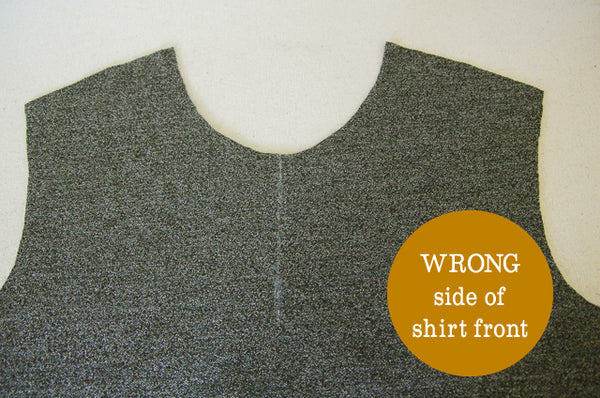
On your Henley front, you will have marked the “Placket Placement Line.” Make sure you are working on the WRONG side of your garment. This is very important, because if you attach your placket to the right side of the shirt front, your placket will end up backwards later on!
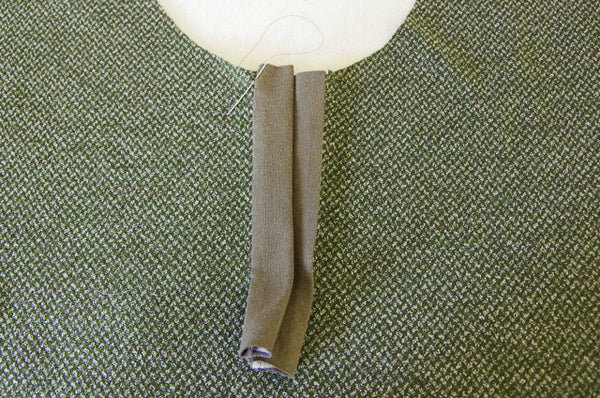
Pin the placket’s center crease to this marked line. Also, place a pin or mark with chalk the future bottom of the placket. The bottom is indicated by the notches on the left and right of the placket.
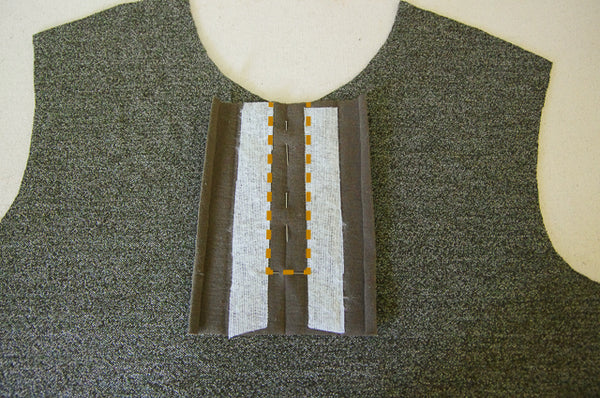
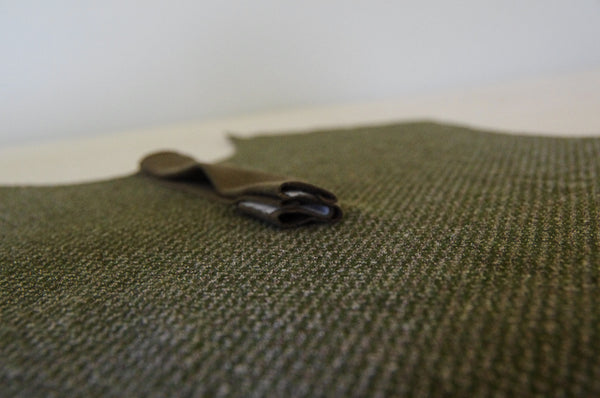
Now you can sew along the creased lines either side of the center and across the bottom to create a squared off “U” shape. Cut along the center line through both layers of fabric until approximately 1” from your bottom stitching. At this point, clip outwards to each corner as pictured below. Clip quite close to your stitching but be careful not to actually clip over it!
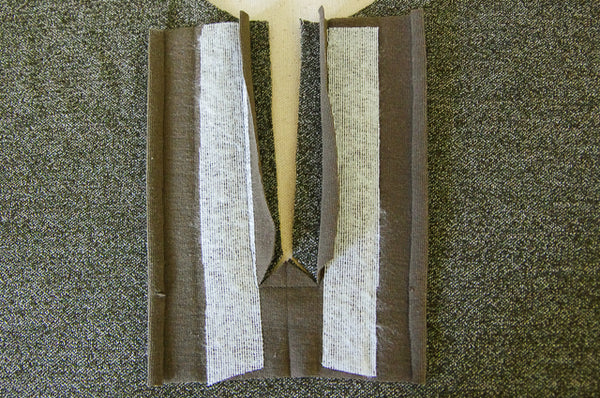
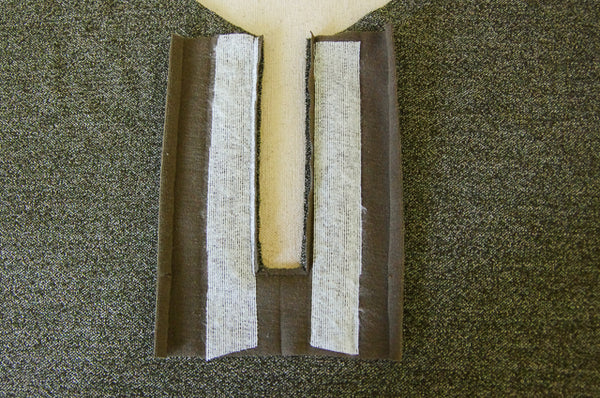
Now trim the fabric flaps to 1/8”-1/4” to reduce the bulk.
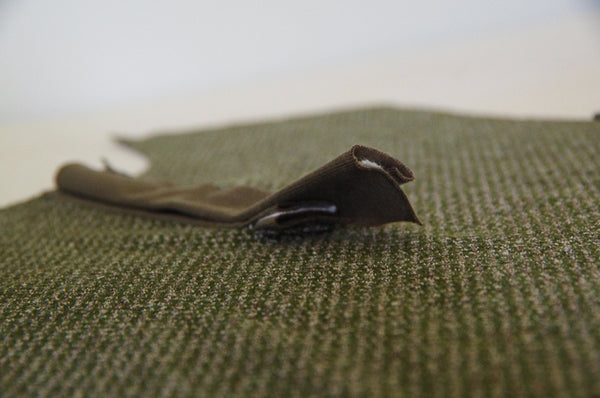
And you are ready to start folding and sewing! Push the entire placket through the opening you just created and flip the shirt around so you are now looking at the right side of the shirt. Fold along the creased fold lines so that each side of the placket is sandwiching the trimmed seam allowances. Pin the right front placket (if you were wearing the shirt) and sew it in place using tiny, invisible stitches from top until bottom (the bottom is where the notches and your stitching are, not the bottom of the placket fabric). Alternatively, you could topstitch 1/8” from the placket edge using your machine.
Before sewing the left placket, you will need to prepare the bottom of the fabric. Tidy up the loose fabric at the bottom so it becomes a series of 1” folds.
Trim all but the top two layers to within ½” from your bottom stitching. This will reduce the bulk at the bottom of your placket.
Fold the bottom fabric under squarely and pin in place. Now it is time to hand sew the left side of the placket!

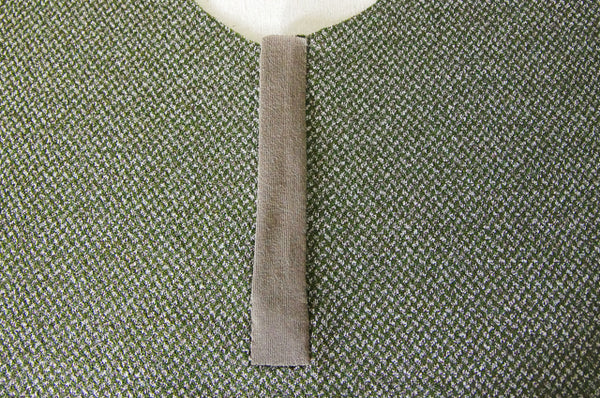
Continue sewing around the bottom of the placket until all edges are secure. Press your placket really thoroughly at this point to make sure that the shirt is sitting nicely without any pulling or puckers.
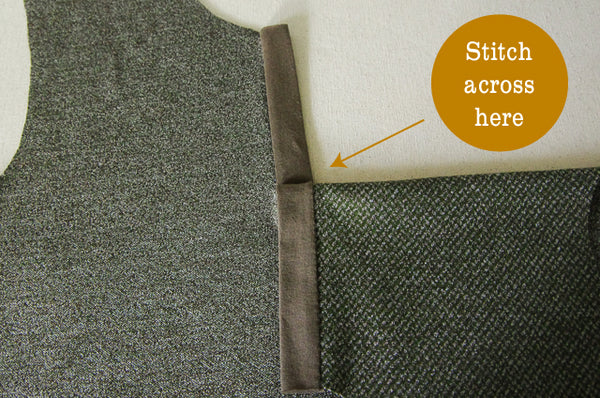
For this next step, you could skip all the hand stitching and move directly to finishing the bottom of your placket with topstitching, but you’ll probably notice there are still a lot of areas on the underside of the placket where fabric could shift around and get caught out of place when topstitching. It’s super quick and easy to just do a few hand stitches to ensure everything stays where it should. First, turn the garment over so you’re looking at the wrong side of the Henley front. Tuck the bottom of the placket into the ‘pocket’ made by your previous hand stitching.
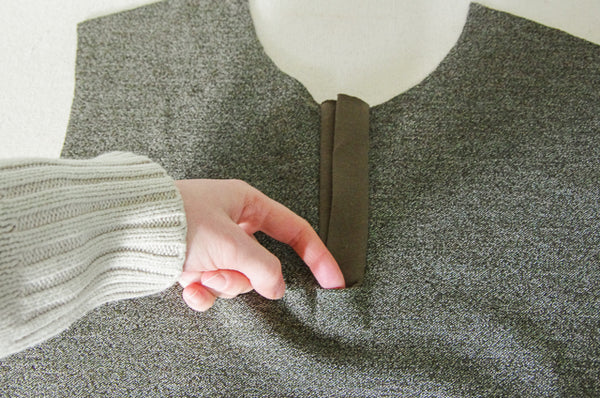
Stitch where you just tucked so that the fabric can’t sneak out again!

You can also open up the placket as pictured below and make a few stitches to join the left and right plackets pieces together across the bottom.
Now, the last step is some very visible topstitching which I invariably fail to make perfectly square! It is possible to stitch a perfect square and cross-lines if you are more precise with your machine stitching than I am, but if you are like me, just embrace the rustic manliness your slightly un-square topstitched square gives your Henley! Once snaps or buttons are applied and the rest of the garment is sewn, it will blend in nicely.

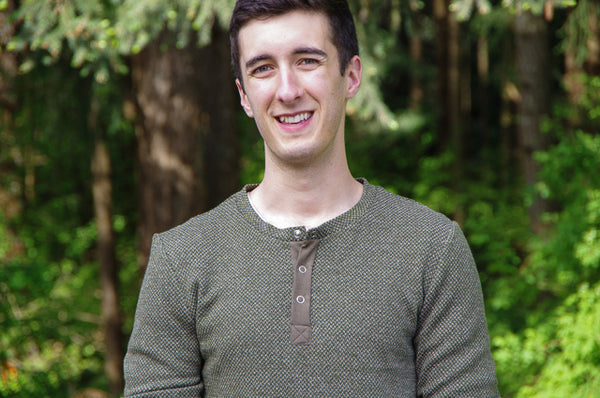
The rest of the Henley is a breeze after this and takes me about an hour to finish from this point! And voila, Matt has a new sweater to wear for spring hikes and around the campfire (because, in my opinion, these are the perfect sorts of situations to wear an earthy and rugged wool Henley)!
