Fairfield Sew-Along Button-up: Day 3 - Create a Custom Fit
Now, let’s talk about fitting!
Many months ago when I asked for your input while I was designing the Fairfield pattern, many of you gave me some insight into fitting issues you struggle with. The main ones that you mentioned were:
- A slim build (most patterns include too much fabric around the waist and in the sleeves for your figure)
- A long body (most shirts are too short to tuck in comfortably)
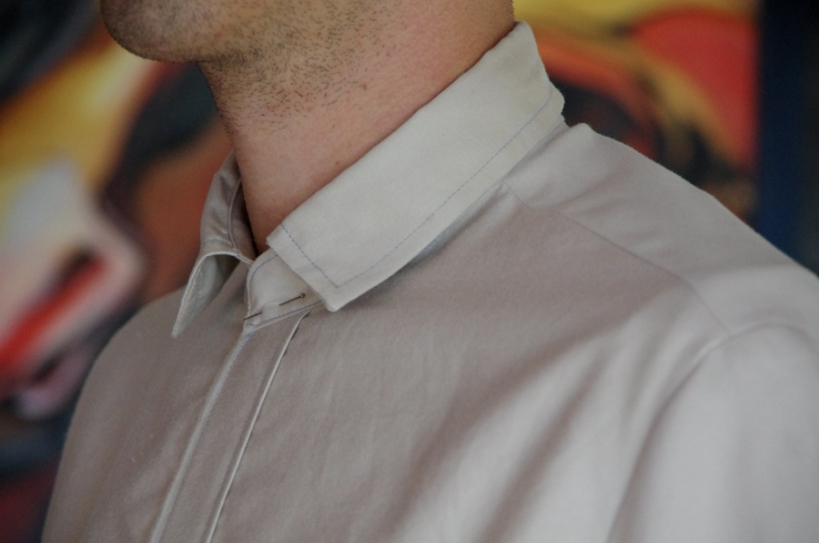
- An unusual neck size (thinner or thicker than most shirt patterns)
- A rounded belly
- Uncommon shoulder dimensions or shape (narrow, wide or rounded)
We will be addressing all of these today. If you have a particular fitting puzzle that I haven’t gone over in the post below, please comment and I will try to help you out!
Let’s get started:
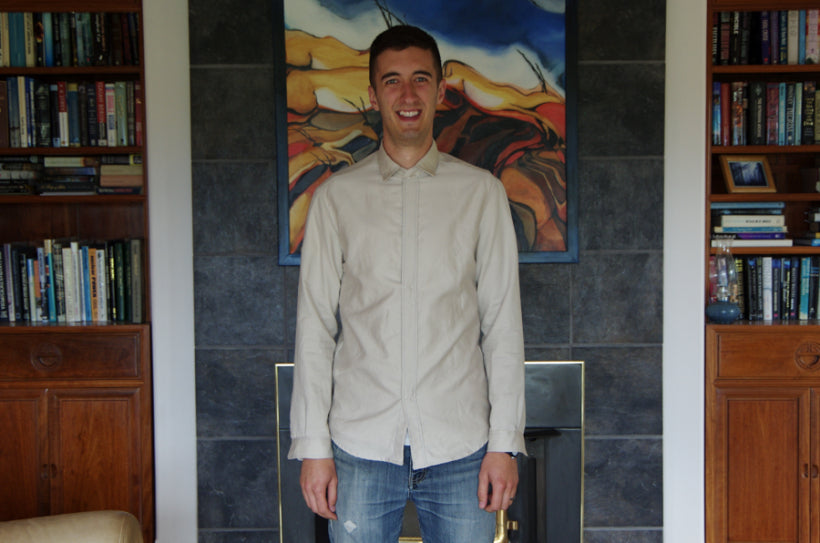
Put the mock up on your wearer. Pin the mock up closed at center front all the way up the the collar stand. Make sure the pins are pointed away from the wearer’s chin…ouch!
Stand back and carefully examine the wearer and mock-up while they stand in a relaxed but fairly upright posture.
Most fitting reference books suggest that you address fit issues in this order
- Length issues (from neck to hips and then sleeves)
- Width issues (from chest down to the hips) and lastly
- Specialized alterations (such as a rounded back or belly).
I have also been taught in various fitting classes to address fit issues from largest/most obvious to smallest (while very generally sticking to the top to bottom rule but bending it if necessary).
Both approaches have worked for me in the past. I find I change tactics depending on the garment type and the specific fit issues involved. For example, I will use the first approach if there are very few unusual fit issues involved. As another example, if a rounded back fit problem is quite severe, I will use the second approach because often adjusting for the rounded back will allow the strained fabric to relax and solve any length issues.
In an attempt to make this post very visual, I’ve pretended that Matt has a few of the following fit issues by pinning the shirt to make it smaller, larger, shorter or longer than it actually is. I hope these photos help!
First we will look at the fit issue as it appears on Matt. I like to ‘solve’ the fit issue on the muslin by cutting or pinning to visually get a grasp on how the change will look on the paper pattern. Then it is just a matter of making the same cuts and adjustments to the paper pattern pieces.
When I cut the mock up apart I like to use medical tape or masking tape to hold the various pieces together. This allows me to measure the open areas once I take the mock up off of Matt so that I can use these exact measurements when changing the paper pattern.
After each fitting explanation I’ve included resources. These resources are blog posts that focus on one fit issue exclusively. They go into greater detail then I have here since I am covering many fit issues at once. Aren’t we lucky to have the internet filled with such amazing, instantly accessible resources?!
Before working with your paper pattern, make sure to draw in all seam lines! Changes will be made from the seamline and not from the edge of the paper.
Length:
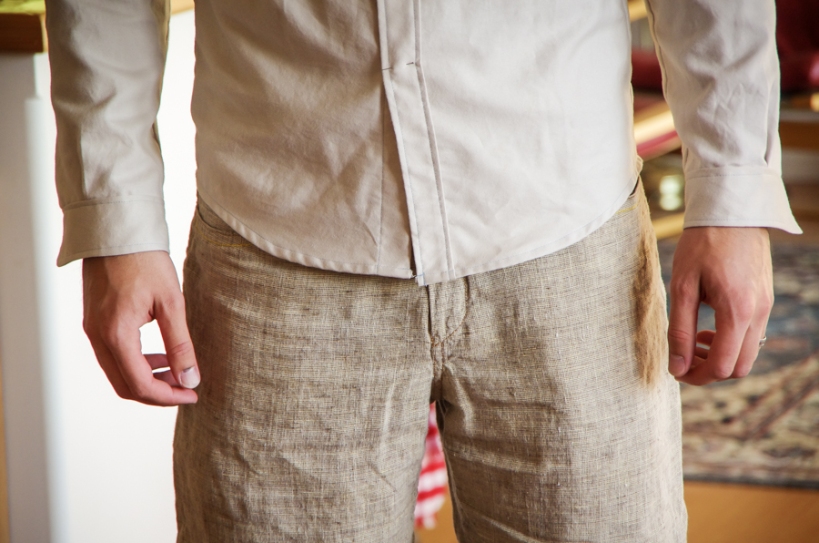
Torso

The hem should not become untucked when the arms are raised. The hem shouldn’t extend beyond the bottom of the pant fly.
Solution: Add or remove length to the shirt fronts, back and the placket interfacing. Cut along the “Lengthen or Shorten Here” lines. Overlap the pattern pieces to shorten and tape the pattern pieces to a new sheet of paper to lengthen.
Resources: Check out my tutorial on lengthening and shortening a pattern for all of the details!
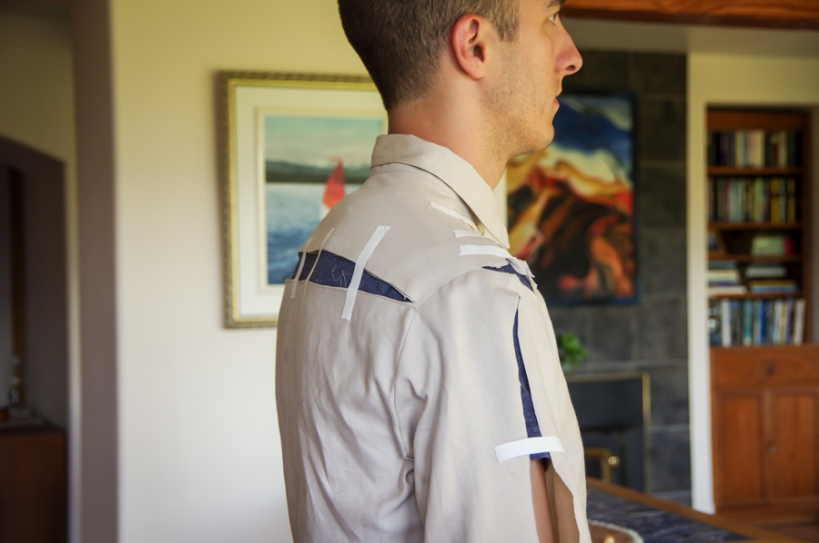
Shoulder
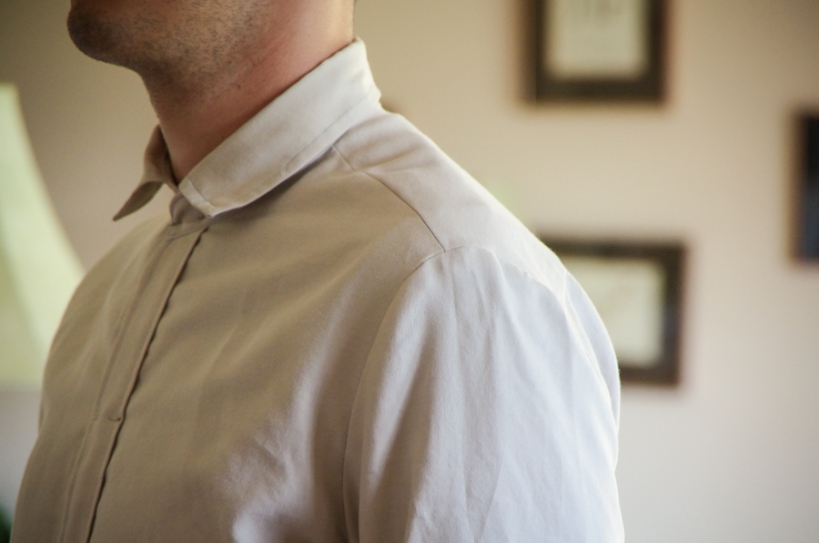
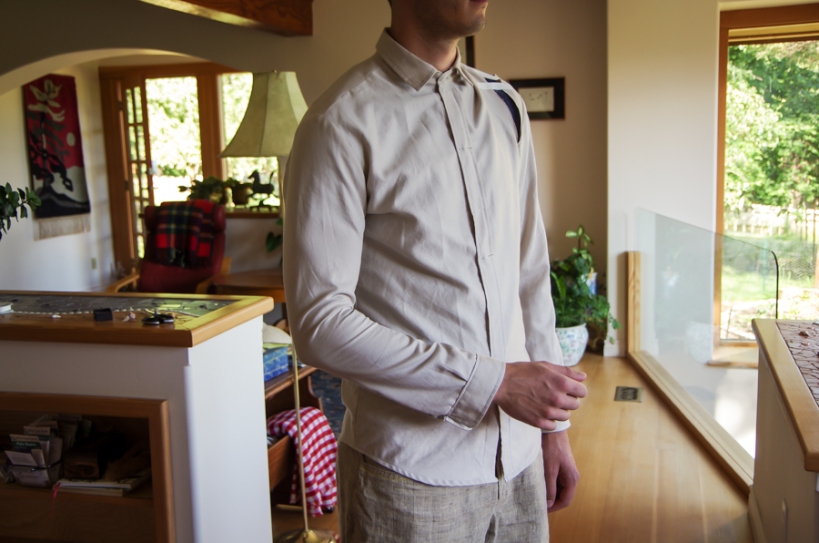
The shoulder seam should meet the armhole at the end of the shoulder bone (before the shoulder begins to curve towards the arm). It is too long if it extends onto the arm. It is too short if it causes the sleeve to pull and sits before the end of the shoulder bone. I’ve pinned the shoulder seam so that it appears too short for Matt in the photo below:
Solution: You will need to adjust the shirt front, yoke, and shirt back.
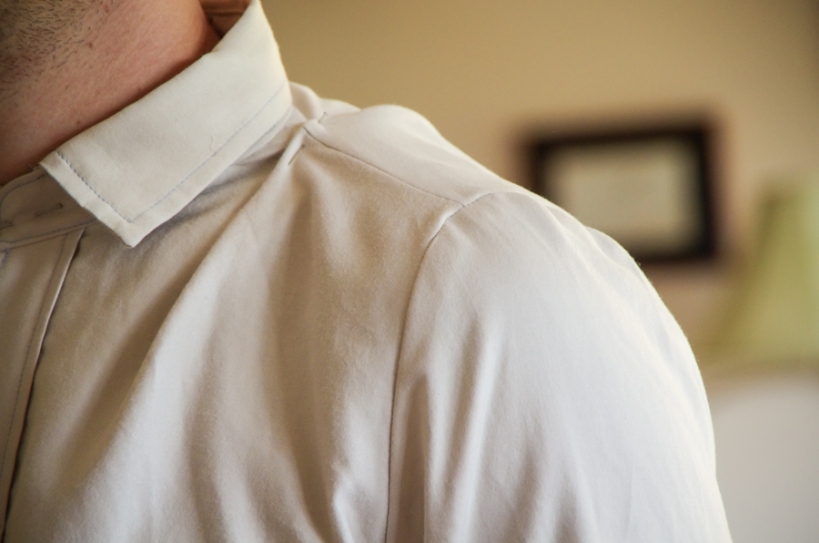
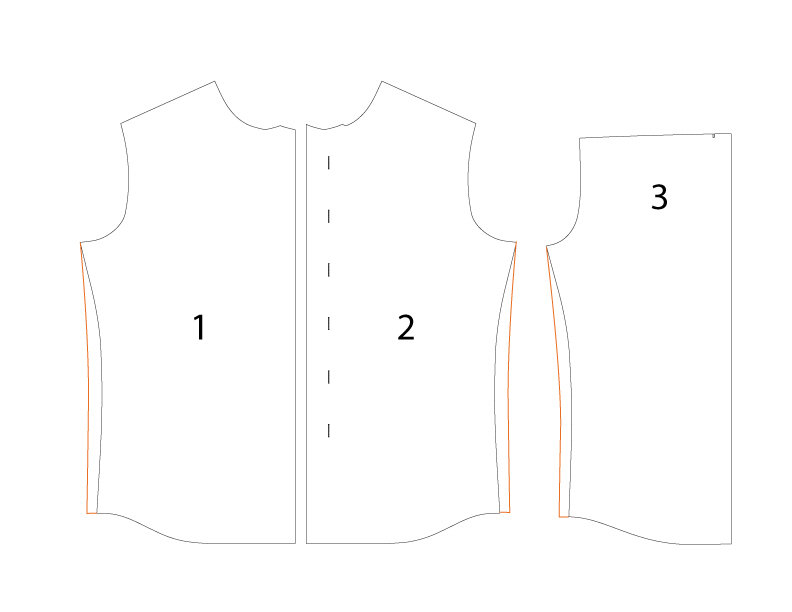
Adjust the Shirt Front: On the shirt front, cut into the pattern from the middle of the shoulder seam to the armhole seamline (3/8″ from the edge of the paper). Cut into your armhole seam allowance slightly and leave a “hinge” of paper between the two cuts.
Here is how it looks on the mock-up:

And here is how it looks on the pattern:

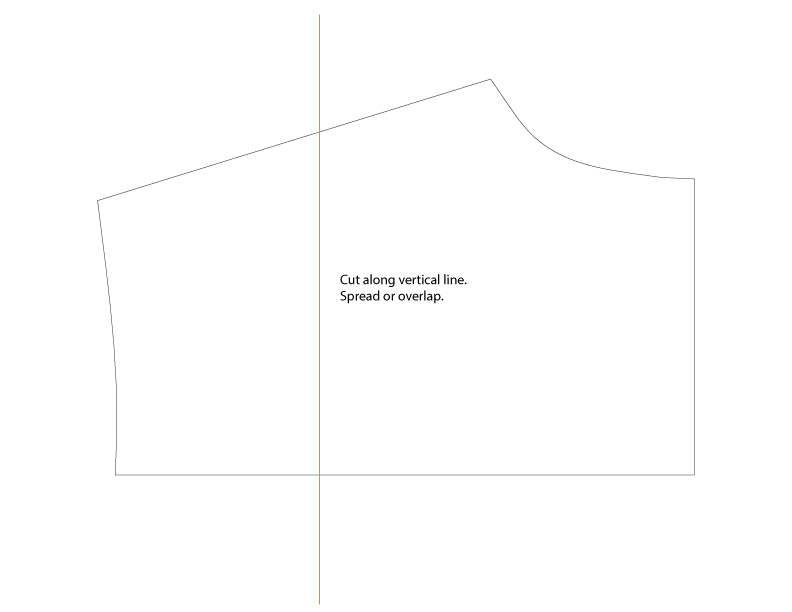
- To create a longer shoulder seam, spread the large cut open and allow the small seam allowance cut to overlap. Tape the pattern piece to a sheet of paper to fill in the empty wedge and trim.
- To create a shorter shoulder seam, overlap the large cut and allow the small seam allowance cut to spread open. Tape the overlapped cut closed, straighten out the shoulder seam by drawing a new line with a pencil and trimming along this line. Fill in the empty wedge in the armhole seam allowance by taping the pattern to a piece of paper and trimming.
Adjust the Yoke/Shirt Back: You have two choices here.
- Cut through the yoke pattern piece and spread it wider or overlap it (just like lengthening or shortening a pattern…but this time the cut is vertical rather than horizontal). This adjustment is easy but it means you will also need to add or remove width to the shirt back which will change how the shirt body fits. If you notice the muslin is too baggy or too tight, slashing along the entire shirt back will solve two fit problems at once.
- If you are happy with the fit of the shirt body and only want to adjust the shoulder length slash towards the armhole in the same manner as we did for the Shirt Front. Here is how this looks on the mock-up:
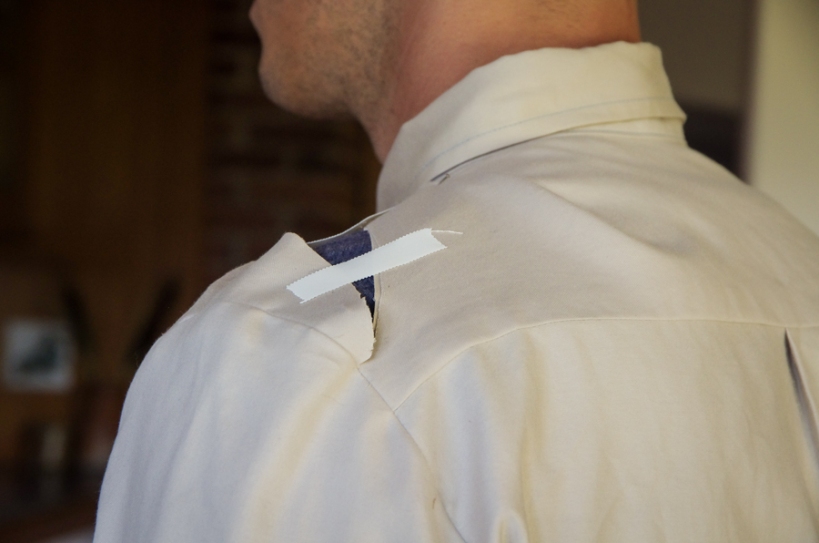
And here is how this looks on the pattern:

Resources:
Note that both these tutorials use a second cut and hinge to raise the shoulder seam upwards. This cut may seam a little fancy or confusing (which is why I don’t use it in the method above) but it will make it easier to draw a new shoulder seam because both halves of the cut shoulder seam will still match up fairly well.
Colette Patterns Albion Sew-Along: Adjusting shoulder length with a yoke
Curvy Sewing Collective: Narrow Shoulder Adjustment
Sleeve
The bottom of the cuff should sit where the palm meets the wrist (about 1″ below the protruding wrist bone). Keep in mind that adjusting the fit of the shoulder can change the sleeve length so it is a good idea to fix any shoulder fit problems before finalizing the sleeve length.
Solution: Add or remove length to the shirt sleeve. Cut along the “Lengthen or Shroten Here” line and adjust as mentioned for the torso.
Resources: Check out my tutorial on lengthening and shortening a pattern for all of the details!
Width:
Back and Chest
As I mention in the instruction booklet, choose your pattern size primarily based on the Chest circumference. If you try the mock-up on only to find there is not enough arm movement due to strain across the back or that the fabric is pulling across the chest, the simplest solution is to pick larger pattern size. You can then adjust the more detailed areas of the pattern (the neck size, the shoulder length, the hip width, the sleeve length) to suit the wearer.
Sleeve
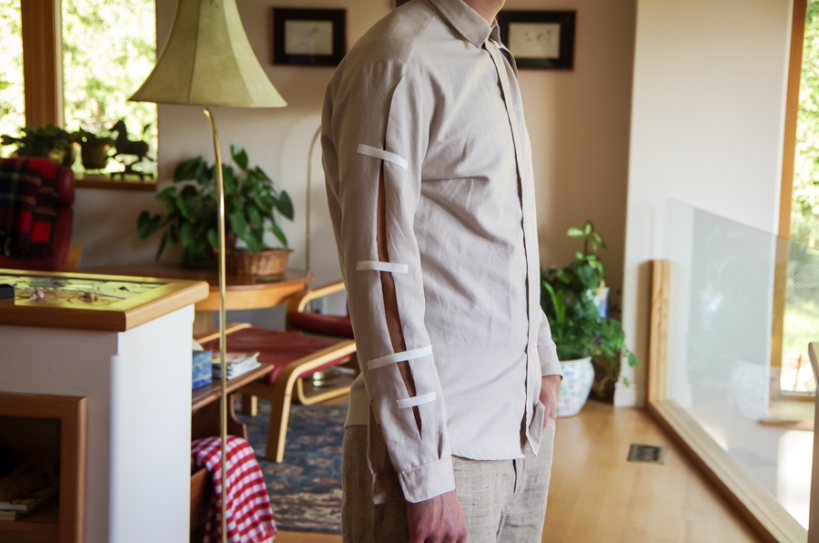
We have drafted the Fairfield Sleeve to be fairly slim. If you notice that the sleeve is too restricting when rolled up to the elbow, you might like to add width to the sleeve. In the photo below I’ve pinned the sleeve along the seam so that it is about 1.5″ narrower than the actual Fairfield sleeve to show you how a sleeve width fit issue would appear:
Solution: Add up to an inch of ease by cutting horizontally across your sleeve pattern at the underarm and cutting vertically the entire length of the sleeve. Leave a “hinge” at all four seam lines. Clip into your seam allowances to make it possible to spread the sleeve open. Spread the vertical cut line open the amount necessary to create some room in the sleeve. This will cause the horizontal cut line to overlap which will shorten the sleeve cap very slightly. Add the height back to the sleeve cap by drawing a slightly taller cap.
Here is how the vertical cut appears on the actual mock up:
And here are the cutting lines you would need to make on the pattern to add this extra width:

Resources:
I haven’t photographed/illustrated this adjustment thoroughly because the Curvy Sewing Collective has done a bang up job of doing so! Their tutorials are awesome![]()
Waist and Hips
The Fairfield waist curves inwards slightly to suit an ‘athletic’ or slim figure. I have pinned the mock-up at center back in the photo below so that the shirt appears tight at the hips for Matt – this way you can see what the mock-up would look like if you needed to add width:

If the wearer has a fuller figure you have three choices:
- Adjust the side seam shape so that it is straight or less curved. This small adjustment will give the wearer a little bit more room but won’t solve any serious fit problems.
- Grade up to the next size at the waist and hips. This is a great choice for figures who do not have a rounded stomach but who are stocky instead of lanky. Their mass is distributed fairly evenly around their torso.
- Use our “Larger Figures” pattern. It is tricky to adjust a pattern to suit men with larger figures because men tend to carry the extra weight distributed mostly towards centre front. This means it is necessary to angle the centre front in addition to adjusting the side seam shaping. A button up shirt includes lots of detail at centre front so we made this adjustment for you!
Resources:
Check out our tutorial on grading between sizes – it is very easy!
Now that we have some of the basics figured out, we will move on to special fit issues on Tuesday. These include, adjusting the neck size, adjusting for sloped or square shoulders, and adjusting for a rounded upper back.