Jeans Sew-Along: The Fly
As part of our Men's Jeans Sew-Along, today we will be tackling the zipper fly. During the last post we prepped our fly extension and inseam. Today we prep the zipper shield, attach the zipper, and perform all the necessary topstitching!

Grab your zipper shield piece. The above zipper shield is from the Quadra Jeans pattern. The Fulford Zipper shield looks a little bit different (narrower and less angled on the bottom) but you will still need to perform the same steps.
Fold the shield in half with right sides together.

Stitch along the bottom angled edge of the zipper shield using a 1/4" seam allowance. Trim if desired to reduce bulk and then flip your shield right side out and press.

Finish the long, straight edge of the shield with a serger or zig zag stitch.

Using the template provided on the pattern piece, mark the zipper tooth placement line and the zipper notch on the shield. The photo above (and the rest of the sew-along post) features the fly pieces from the Fulford Jeans so you can see the difference to the shape of the Quadra zipper shield.

Align the zipper on top of the shield with the teeth centered over the marked line. The left zipper tape will likely line up with the edge of the shield but the marked line is there to guide you in case your zipper tape is wider or narrower than the zipper tape I used!
The bottom of the zipper stop should line up with the zipper placement notch.

Stitch down the zipper along the left side using a zipper foot.

Place the zipper shield unit under the right front (the left side of the jeans when you are looking down at them on your work surface).
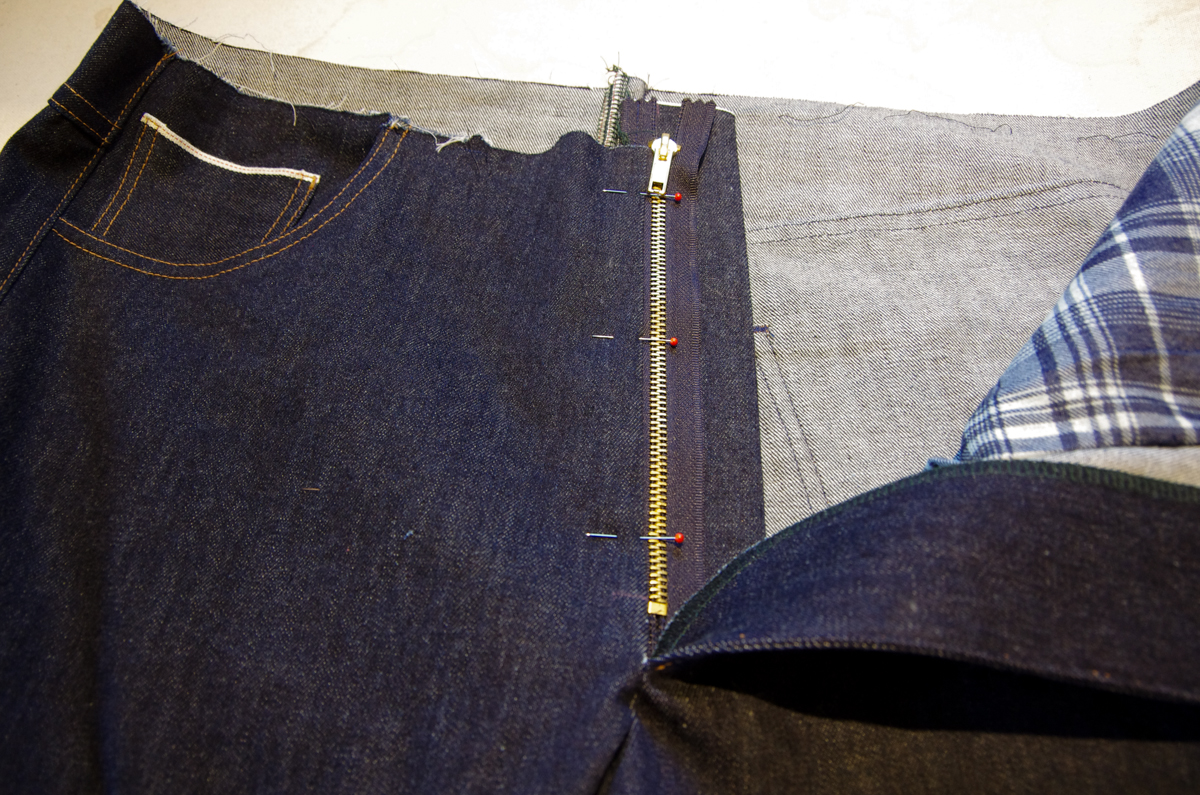
Make sure to line up the bottom of the zipper stop with the zipper placement mark on the right front. Pin the length of the zipper in place. Don't worry if the zipper shield and zipper extend over the top of the jeans! This is just because you are sewing a smaller size (and the shield fits all of our sizes). I will show you how to shorten these momentarily.

Edgestitch along the zipper using a zipper foot until the zipper placement notch.

If you need to shorten your zipper, you can do so now, as I've done on my Quadra sample below, or you can do so just before you add the waistband (as I did for my Fulford sample). I'd actually recommend shortening them as late in the sewing process as possible to avoid the risk of accidentally pulling the zipper to far closed and thus pulling the slider right off the zipper (ug!!). No matter when you shorten it, though, the process is the same:

Use narrow scissors or a knife to cut off the excess teeth and tape. I like to use my sturdy little Merchant & Mills wide bow scissors for this job. They are already handy since they are my thread clips and they cut between the teeth easily.

You can also remove teeth with pliers along the seamline where you will be attaching the waistband. Many sewists like to do this to ensure their stitching will not have to go over the metal teeth when they attach the waistband. I usually avoid this step by hand cranking my machine any time I am stitching near the zipper - this removes the risk of breaking a needle on the metal teeth because I can subtly shift them out of the way if I feel the slow hand-cranked movement of the needle come against a tooth.
Anyways, now we've talked about the ways to shorten the zipper and avoid broken needles, let's proceed with the fly!
With the right side of the jeans facing you, close up the fly as it will look when it is finished. Make sure that the left front completely covers the zipper (since there is a 1/4" overlap). Pin in place at the top of the fly through all layers.

See how the zipper is nicely hidden under the left front?

Flip the jeans inside out so you are looking at the wrong side of the fabric. Fold the jeans to the right so that you are looking at only the fly elements and the rest of the jeans are out of the way.

Lay the zipper flat so you are looking at the underside of it. The fly extension is beneath it and extends to the right. Adjust the extension until it is sitting straight beneath the zipper (using that pin we placed as a guide for where the extension should sit). Pin the zipper in place.

Stitch the zipper tape down to the fly extension (no other layers should be in the way).

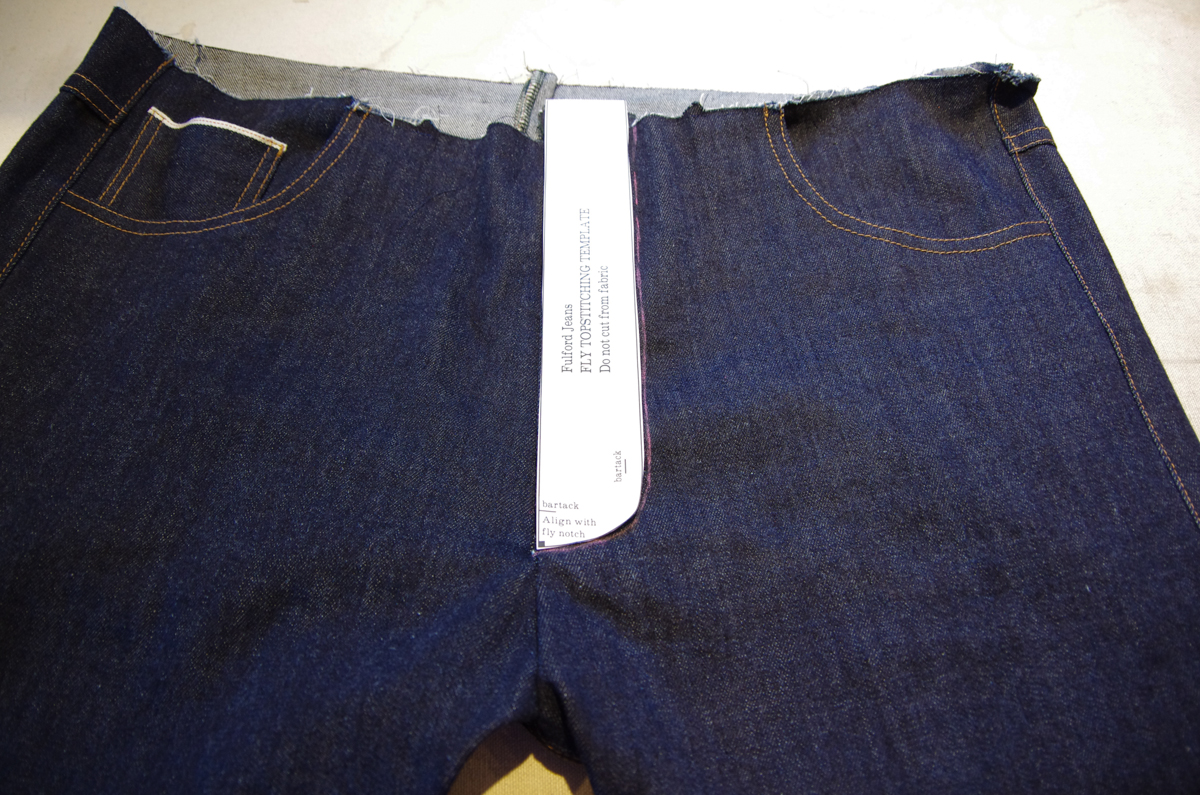
Now both sides of the zipper are secure, let's complete our fly topstitching! Flip the jeans right side out and place the fly topstitching guide on the left front. Line up the bottom of the guide with the fly notch. You'll notice that the bartack marking sits just below and just to the left of the zipper stop so you won't need to worry about stitching over metal teeth when you are making your bar tack.
Trace the topstitching guide with chalk. Also transfer the bartack markings.

See how there is an opening below the zipper stop? We will be closing this up by the time our topstitching is complete!

Before we topstitch, fold the zipper shield out of the way. A common mistake when stitching a fly is to accidentally stitch it closed by catching the zipper shield during the topstitching step!

Here is how the zipper shield looks when it is folded out of the way from the wrong side. You can see on the right hand side of the zipper that we will be catching the fly extension and the jeans front only when we topstitch.

Sew the first row of topstitching along the chalk marking.
Backstitch tidily or leave tails on your thread and pull the upper thread through to the wrong side of the jeans and knot the threads. This creates a cleaner look at this visible point but I still prefer to backstitch since I feel it produces a stronger result.

Complete a second row of topstitching 1/4" away from the first row - this second row is closer to center front and lines up with the vertical bartack marking.

With the zipper shield still out of the way, edgestitch along the entire seat seam on the left leg of the jeans (if you were wearing the jeans). This edgestitching should go through the left leg and both seam allowance layers.

Continue the stitching all the way up to the zipper placement notch (just below the zipper stop).


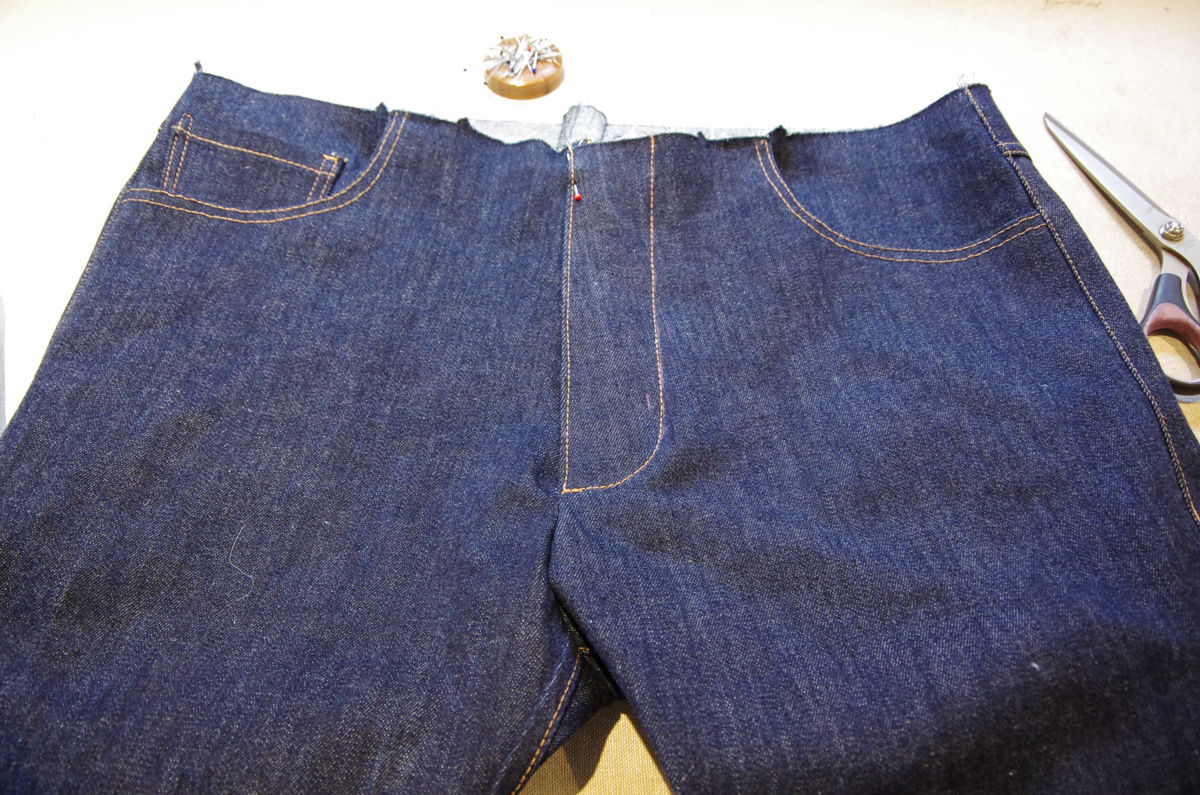
With this edgestitching complete, there is no longer a hole below the zipper stop.

Create a second row of topstitching 1/4" away from the first.

This second row of stitching also extends up to the zipper placement notch.

Finish off the fly by folding the zipper shield back into position.

Create bartacks by sewing a narrow zig zag stitch or by backstitching thoroughly at the two bartack markings. These bartacks go through all fly layers (including the zipper shield) so they keep the shield in position so that nothing can be caught in the zipper!

From the wrong side of the jeans, you can see where the bartacks catch the zipper shield. Please excuse my snarled topstitching thread - as I mentioned earlier in the sew-along, my machine doesn't really like backstitching while using topstitching thread!

And there we have it, a finished zipper fly! We are almost done our jeans! We will be sewing the waistband on in the next sew-along post.