Jeans Sew-Along: The Waistband (and how to adjust the waistband fit after the jeans are finished)
We're on the home stretch now! Today we will be sewing our waistband and attaching our jeans button.
Begin by ensuring that your waisband pieces are interfaced. Note that if you are working with a denim with quite a bit of stretch, you may want to consider using a knit interfacing so that the interfacing doesn't stabilise the waistband so much that it no longer comfortably stretches! I've used a woven interfacing here because I decided I didn't want my waistband to stretch (I only wanted the denim to stretch when extra room for movement is needed through the legs).

Place the right and left waistband with right sides together and pin along center back.
Stitch using a 5/8" seam allowance. If you found you needed to take in the waistband slightly when you fitted the jeans to the wearer, you can do so at this point. I took the waistband in a total of 1/2" (by stitching 1/4" in from the seamline) but I left the extra wide seam allowance untrimmed in case the wearer's weight fluctuates and he needs the waistband let out at a later point. We will go over how to do this at the end of this post!
Press the seam allowance open.
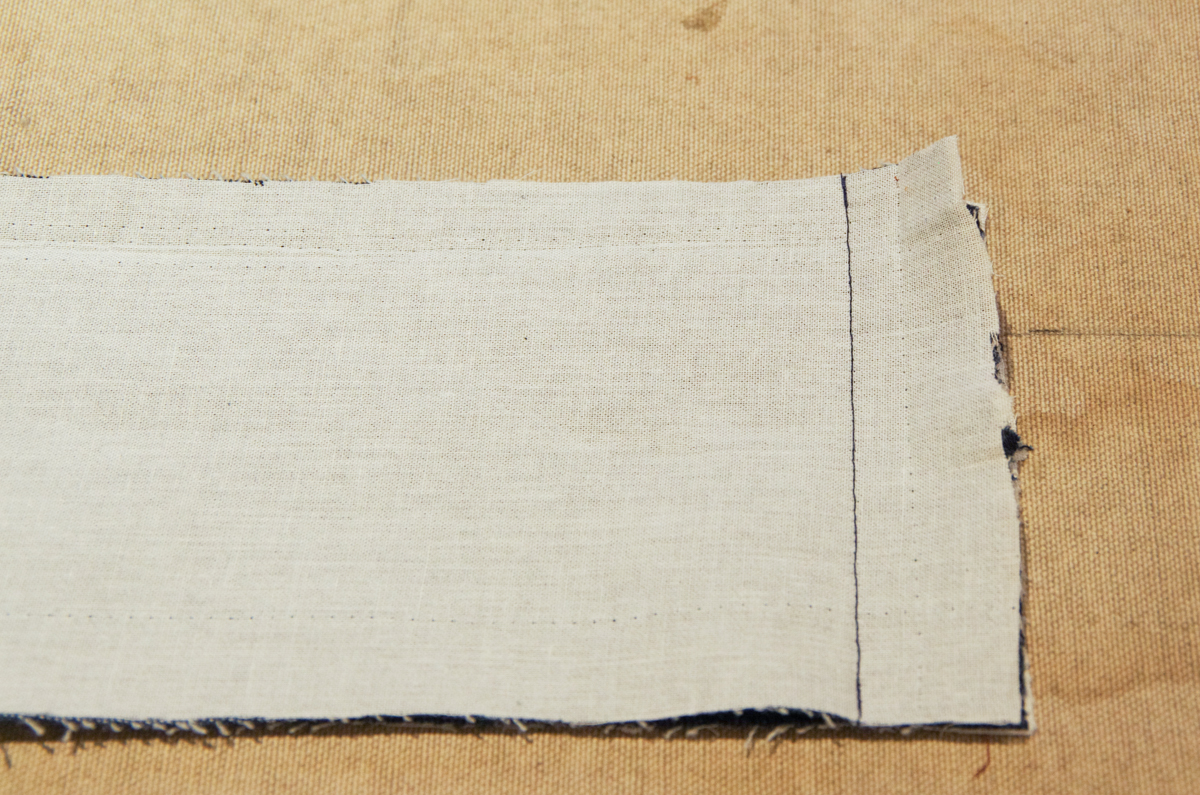
Press up the bottom of the waistband 5/8". Be sure to have your waistband laid out so that the left waistband is to the left, the right is to the right and the wrong side is facing you - this way you will be pressing up the correct edge of the waistband.

Pin the waistband to the jeans with right sides together. Match the center back seam, the side seams to the notches, and then allow the waistband to extend 5/8" beyond either side of the fly. Pin thoroughly. You will notice that the jeans and the waistband are slightly different lengths, we will be easing as we sew to provide a very nice fit (no gaping waistband).

Stitch using a 5/8" seam allowance.

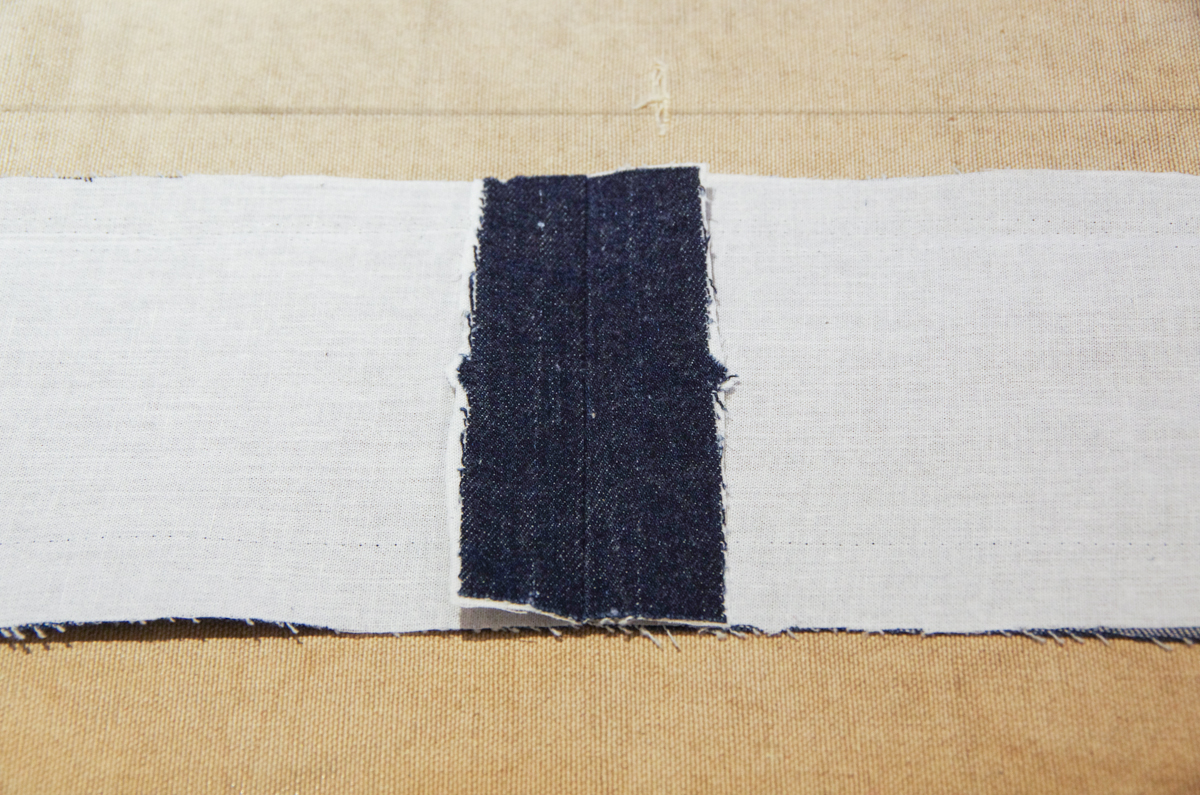
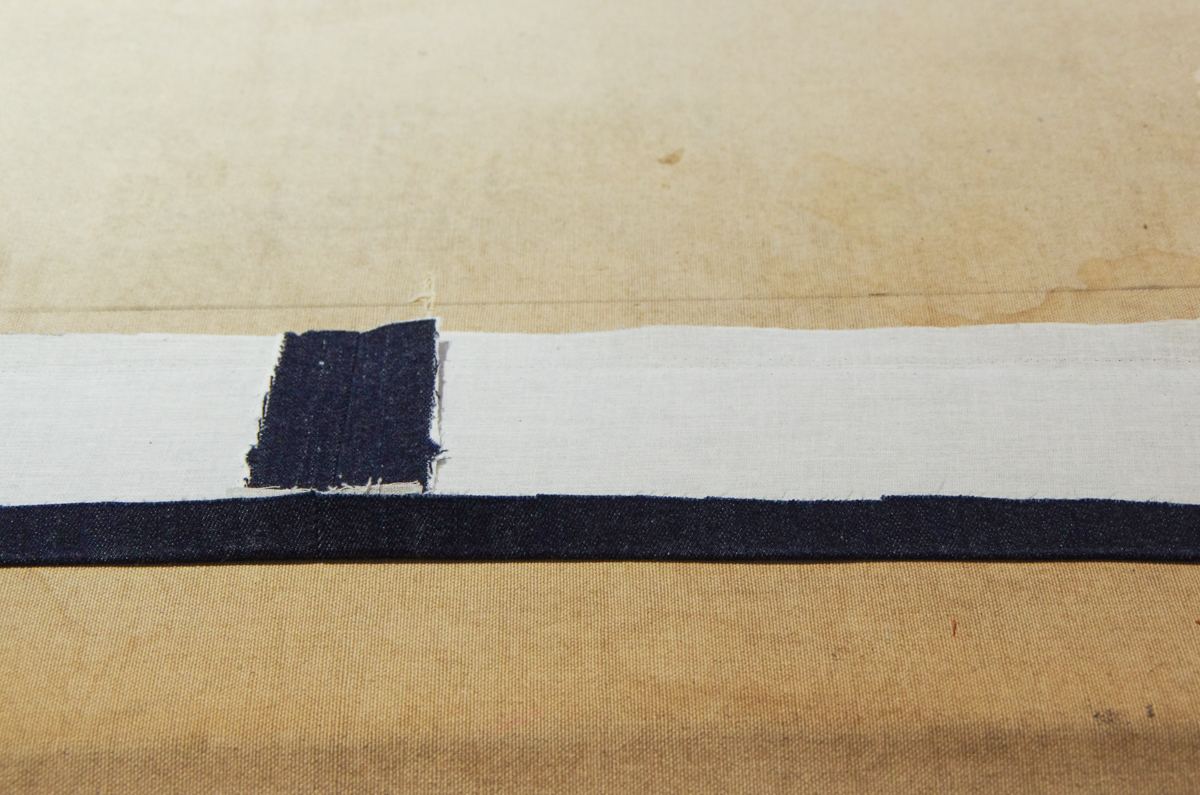
Grade the seam allowance. I like to trim the bulky jeans seam allowance narrower and leave the waistband seam allowance wide as this reduces the most bulk.
Press the seam allowances towards the waistband.

We will now be finishing the front edges of the waistband. Fold the waistband in half with right sides together. Make sure the seam allowances stay tucked up towards the waistband. Pin through all layers (both layers of the waistband and both seam allowances).

Create a vertical line of stitching along the edge of the waistband. Make sure it lines up as perfectly as possible with the edge of the fly.
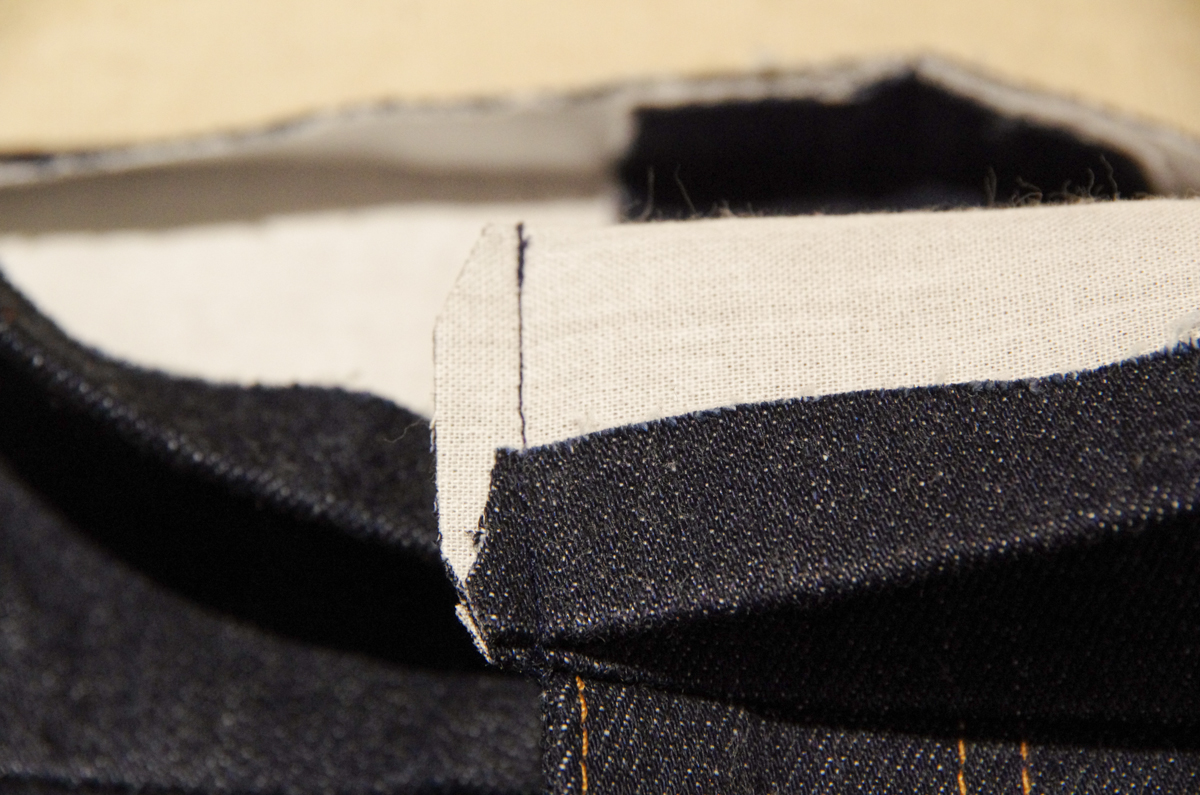
Trim the seam allowance thoroughly to remove as much bulk as possible. Notice how I've clipped in towards each corner and graded the seam allowance.
Repeat this process for the other end of the waistband.

Flip the waistband right side out and press in half thoroughly. We will now be stitching the waistband close. It really helps to take a few extra steps at this point to ensure your topstitching catches both layers of the waistband and hides the seam allowances entirely. I like to very thoroughly pin on the wrong side of the jeans and then baste the waistband in place, also from the wrong side of the jeans.

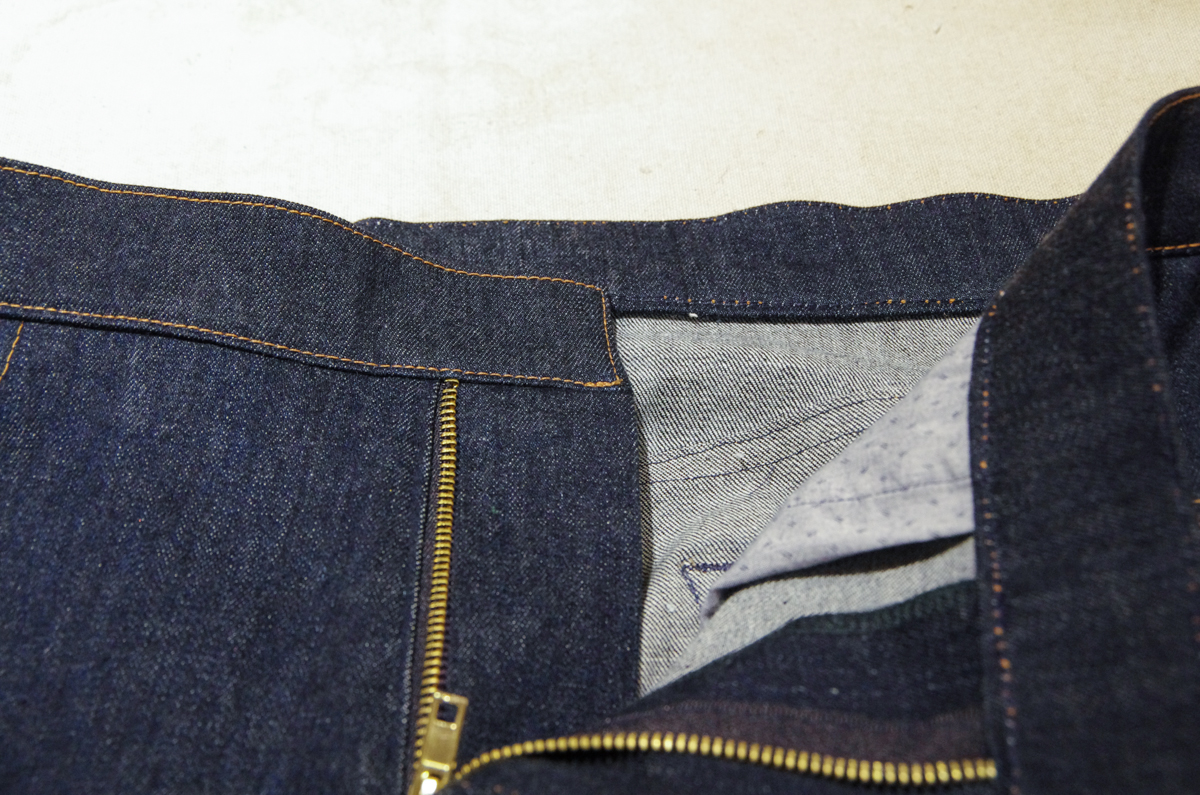
From the right side of the jeans, start the edgestitching on the right front (the fly underlap) so that backstitching is not visible when the button and fly are closed. Edgestitch around all edges of the waistband.

Doesn't that look lovely?

Here you can see the backstitch on the right front - nicely hidden from view when the jeans are worn:
With our waistband complete, we just need to add a buttonhole and button!

Mark your buttonhole with chalk. Remember to adjust the length of the buttonhole to suit your chosen button. Create a buttonhole that is big enough to make it easy to slip the metal shanked button through. You might like to test the size out on a scrap since I find metal shank buttons need more room than you would normally expect!
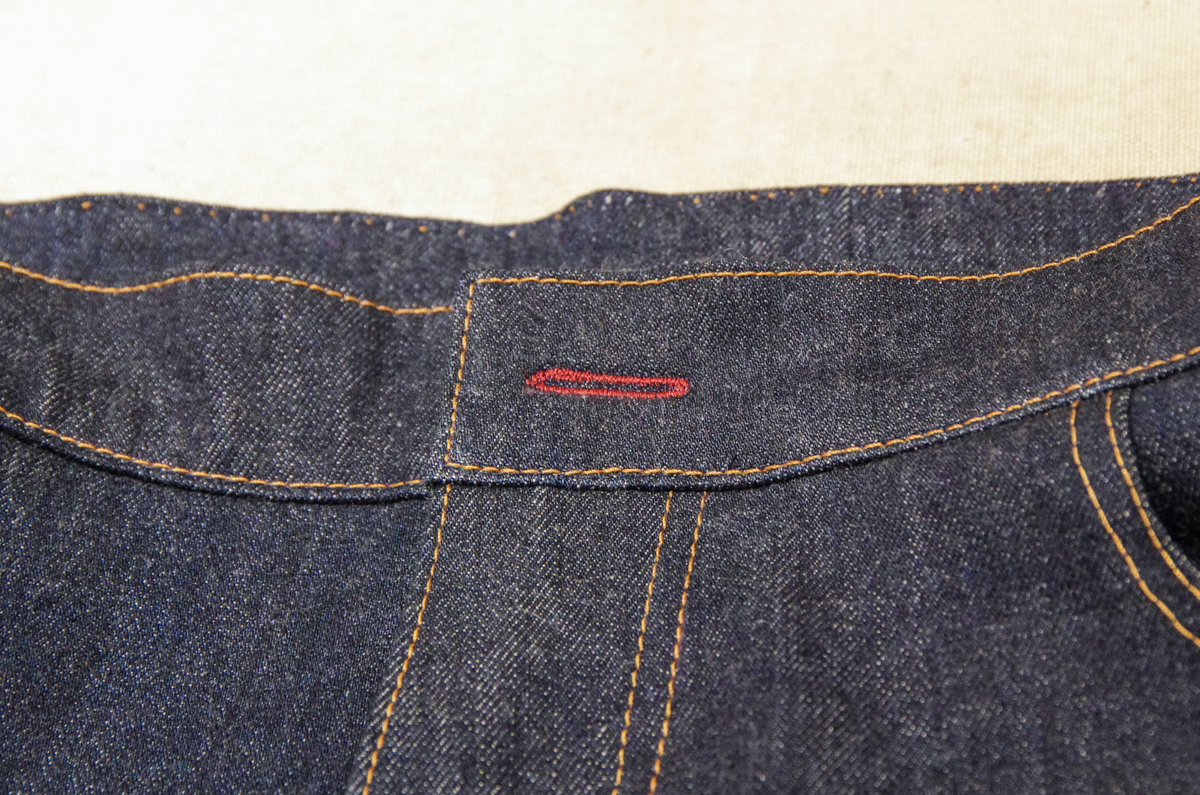
I like to stitch a contrast buttonhole as is often found on storebought jeans. Nice contrasting colors include red or brown but you could customize to match your pocket bag colors of your recipient's favourite color!

Open the buttonhole using a button hole chisel or a seam ripper. I love using the buttonhole chisel as I am far less likely to rip into the buttonhole stitches with it...I always manage to break a few of the zig zag stitches when I use a seam ripper!

Now it is time to apply the button. The button is placed directly above the zipper on the right hand side of the jeans. I'm using the pliers and Prym buttons that we stock in our shop. You can also use a hammer and a sturdy surface to apply jeans buttons (such as a cast iron fry pan, for instance). I find a sturdy surface is very important when I am not using some sort of application tool in order to ensure a strong application.

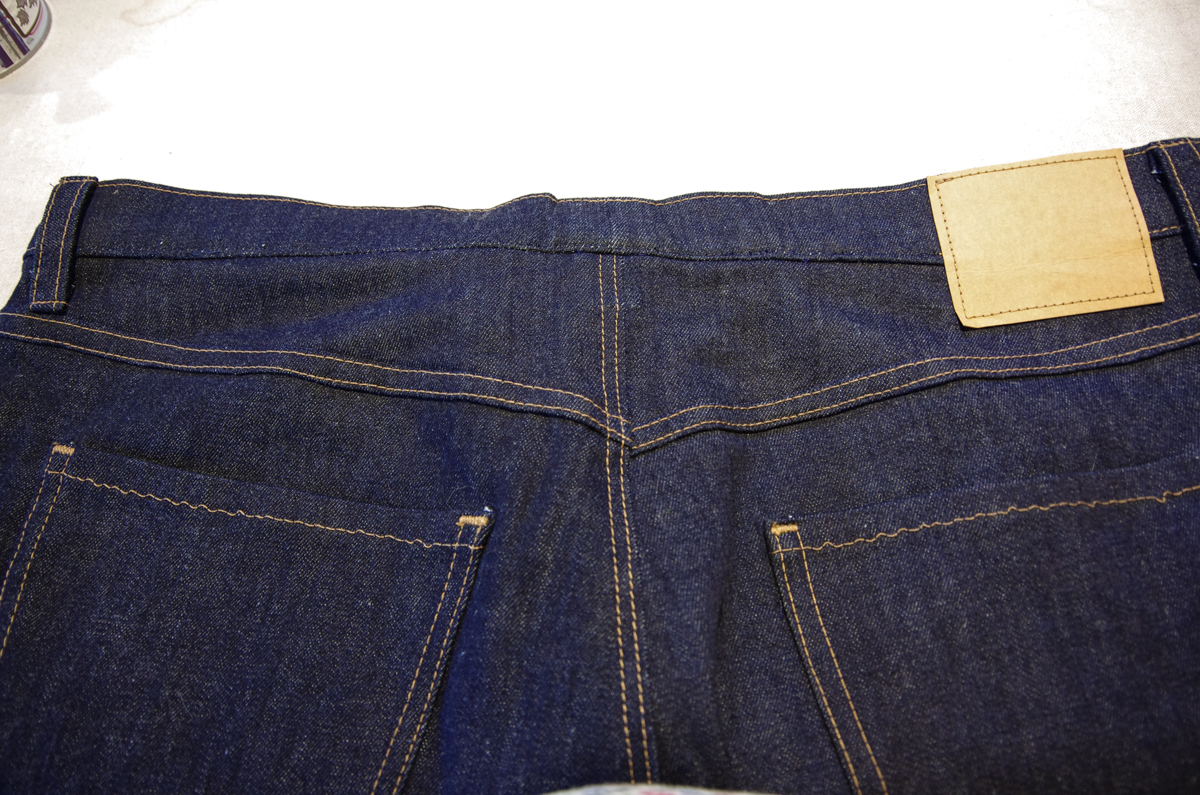
And there you have it, a finished waistband!
Now, before we finish up for today, I want to show you how useful the center back seam design can be for men with fluctuating waists. It is also helpful if you plan to sew these jeans as a surprise gift and are not able to fit as you go.
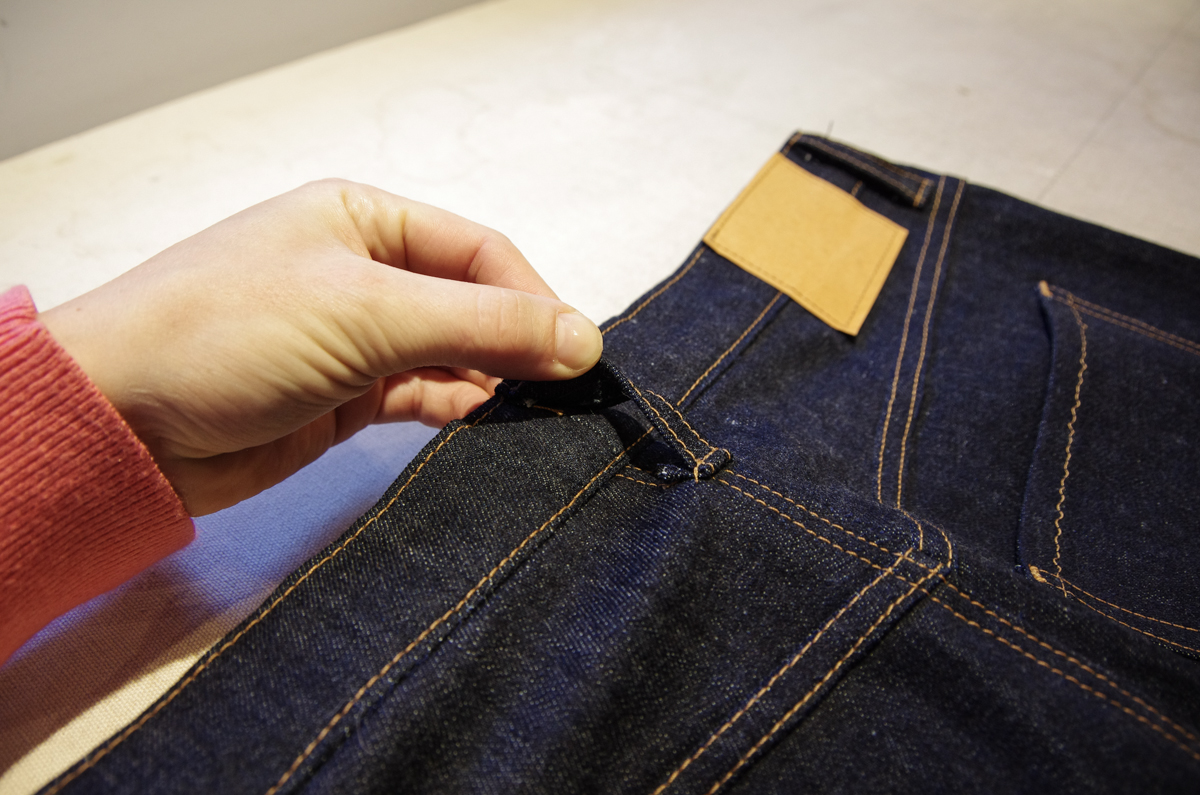
Normally, finished jeans are VERY unpleasant to alter because the entire waistband must be removed (including all that topstitching!) in order to bring the waistband in and you really can't let the waistband out since it is necessary to grade the seam allowances at the front edge of the waistband so thoroughly.

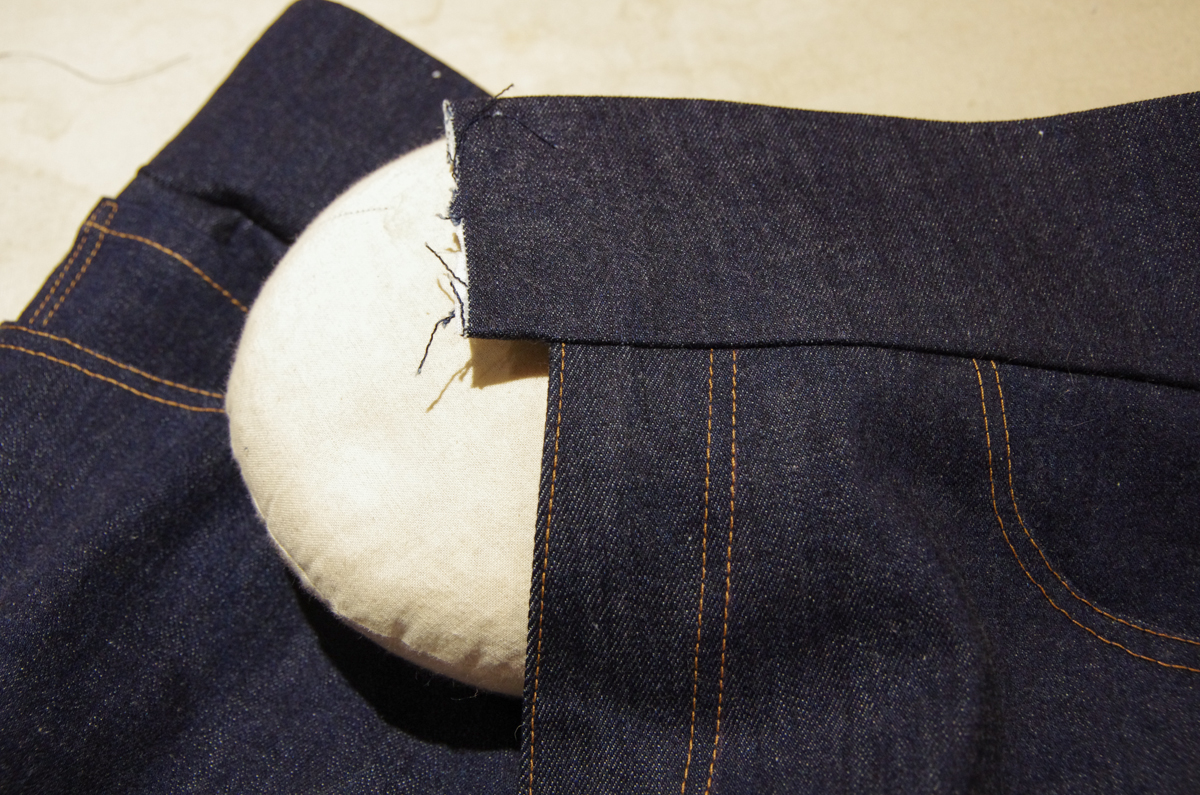
With a center back seam everything is simplified! We can bring the waistband in or let it out by removing the center back belt loop.
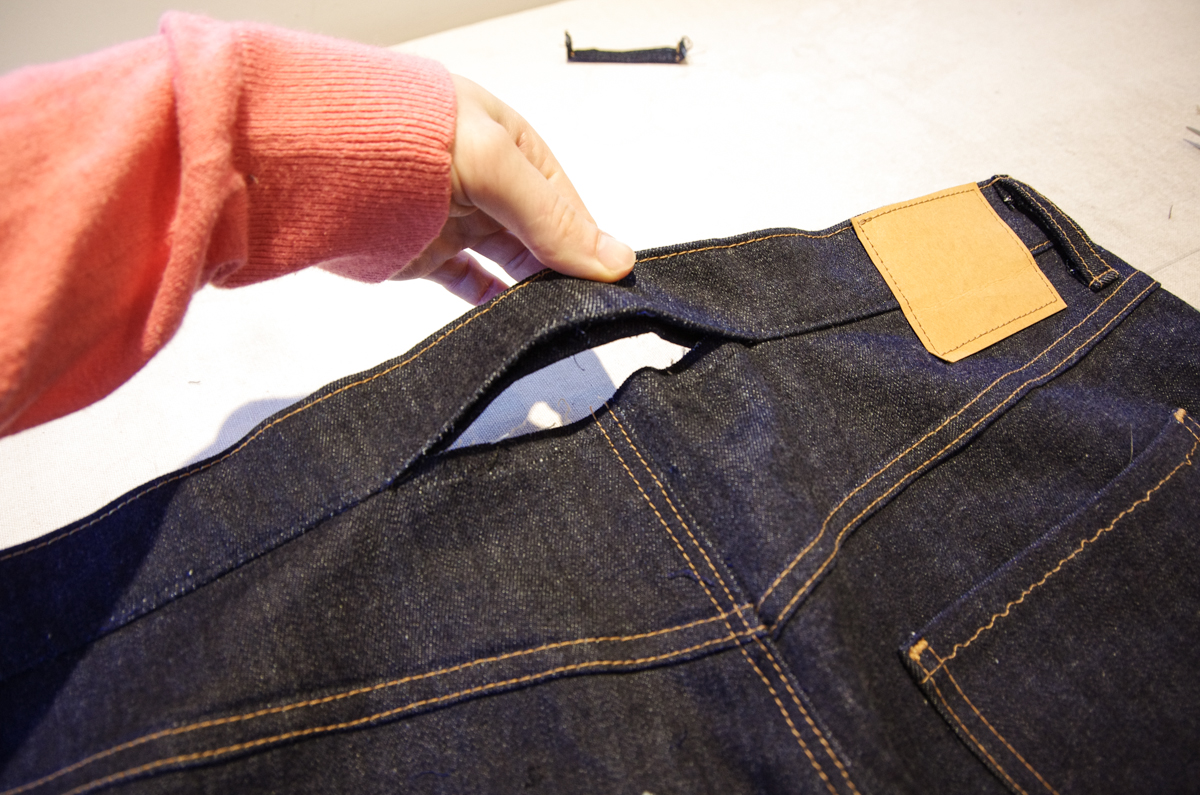
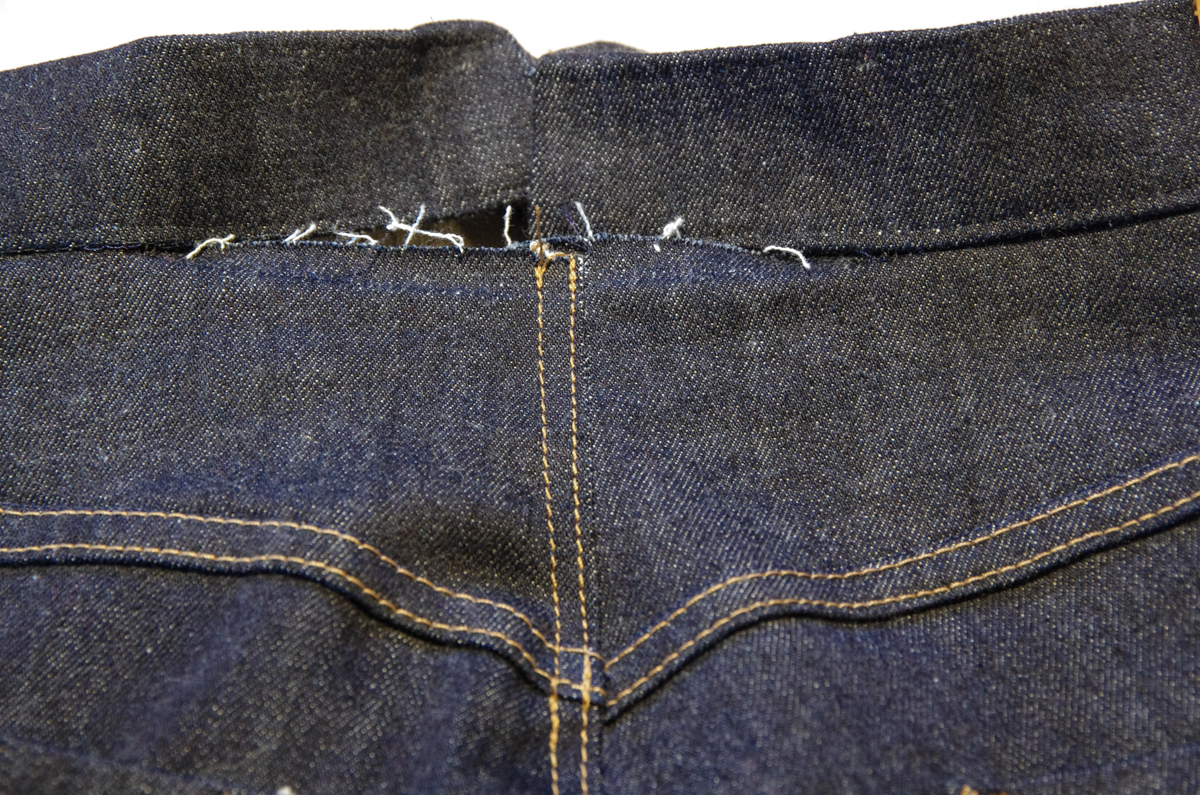
We then just need to remove some of the topstitching. Here I've chosen to remove the topstitching all the way until the side belt loop (left in the photo) and the tag (right in the photo) so that I can hide my backstitch when I re-topstitch under the belt loop and somewhat under the edge of the tag. Be sure to remove the topstitching from the top edge of the waistband at the same time. I didn't do that here but needed to do so when I opened up the centre back of the waistband in a couple of steps...so you may as well remove that stitching now too!
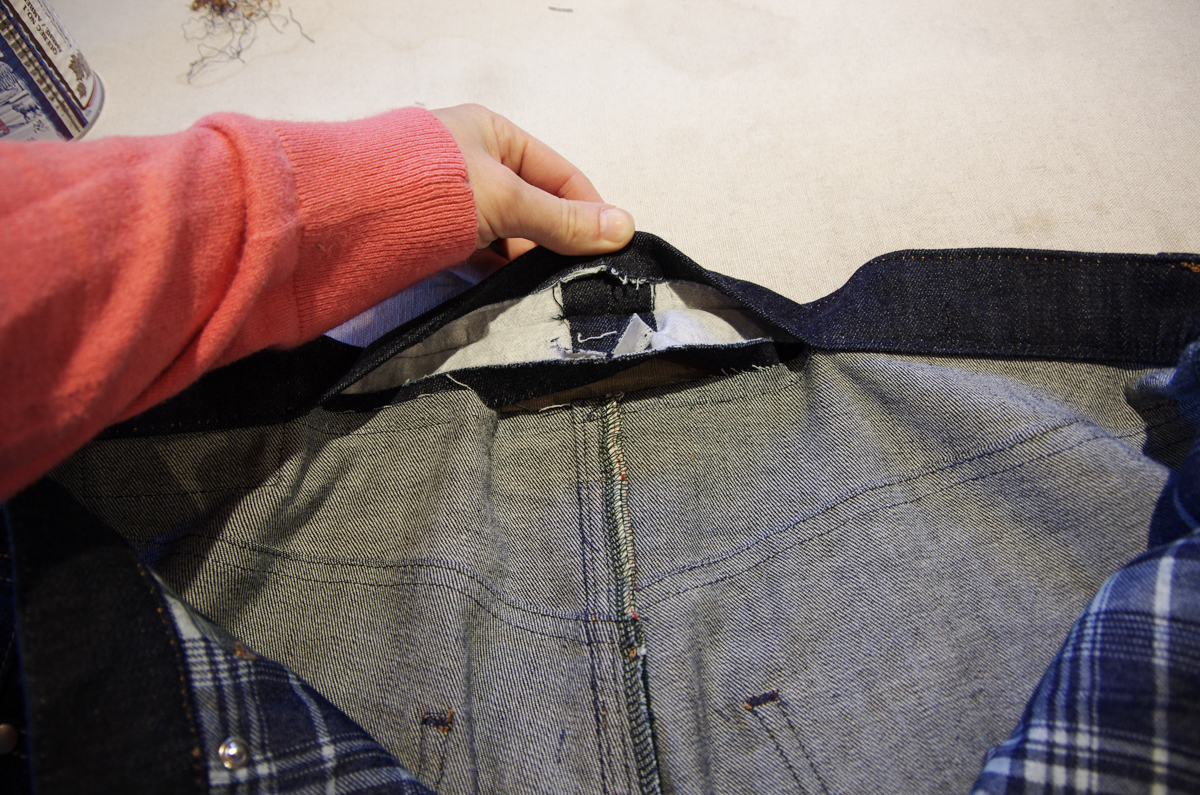
Open up the waistband and stitch rip the original seam. I am only bringing in this waistband 1" so I didn't need to rip very far.

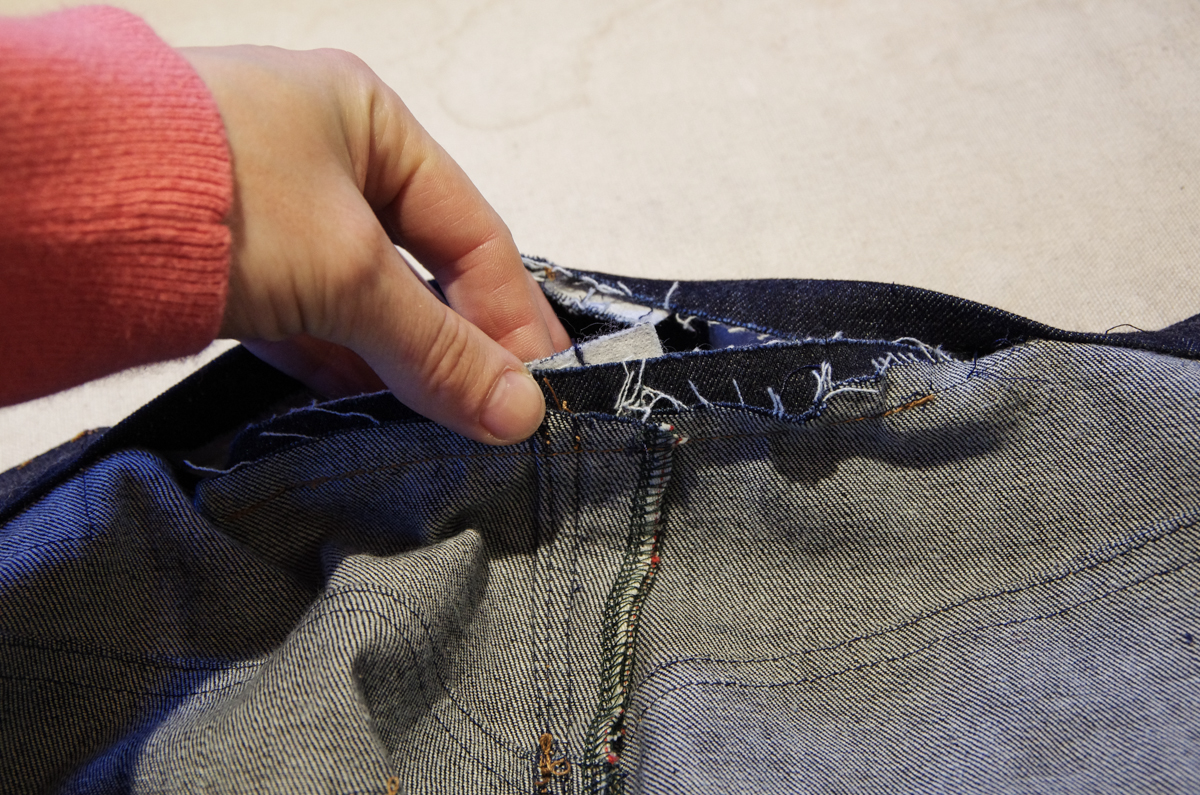
Now open up the center back waistband seam.

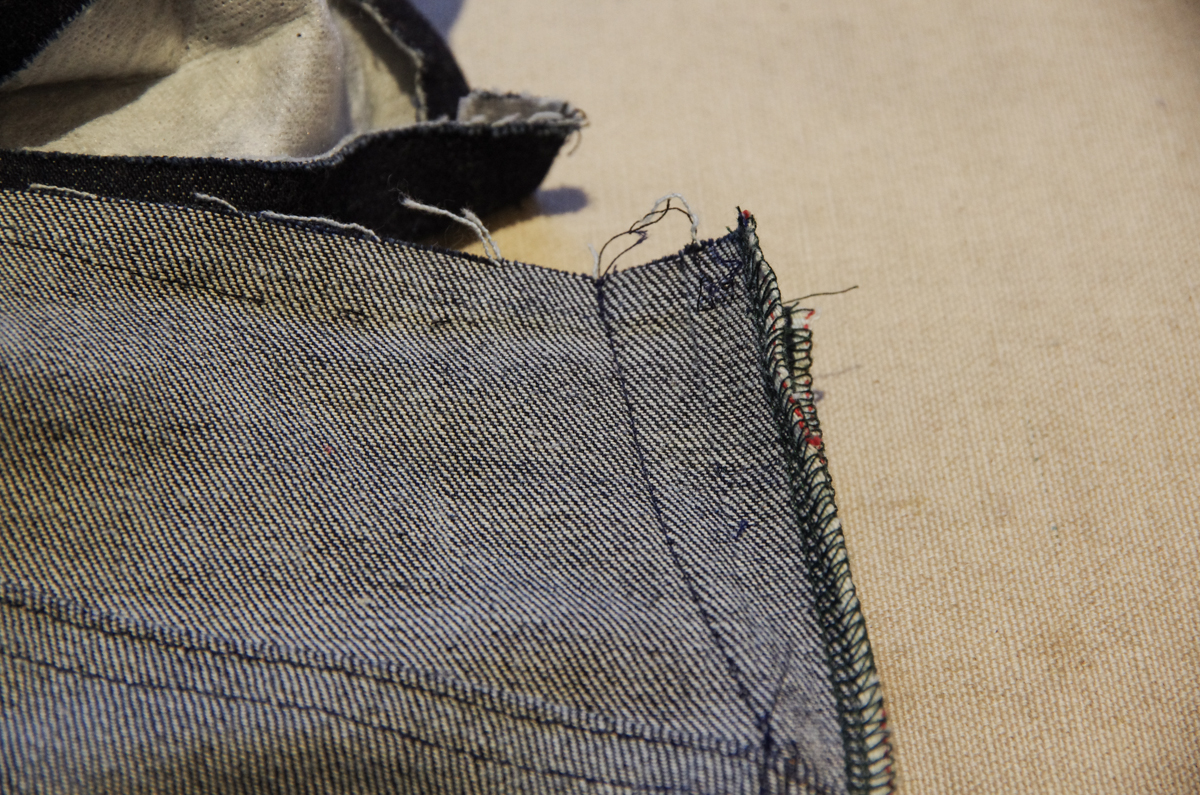
If you are adjusting only a small amount you may be able to ease the new waistband length back on to the jeans without changing the seat seam at all. If you are changing things a bit more, open up the seat seam...this adds a fair amount of work but isn't impossible! Stitch rip the topstitching either to the yoke seam or all the way to the inseam so that you can hide your new backstitching down there. I chose to just rip to the yoke seam but in retrospect, I think this was too short of a distance to taper the seam (as I was removing 1" which is 1/2" from each leg) and this resulted in too steep of an angle when I stitched the seam up again. I would recommend doing the small bit of extra work to stitch rip all the way to the inseam so you can create a smooth curve when you take in or let out the seam...it will save you the work of having to re-do your adjustment when you see the seat seam no longer sits well against the wearer's body!

Stitch rip the seam as far as necessary in order to smoothly taper the new seam when you take in or let out the jeans.
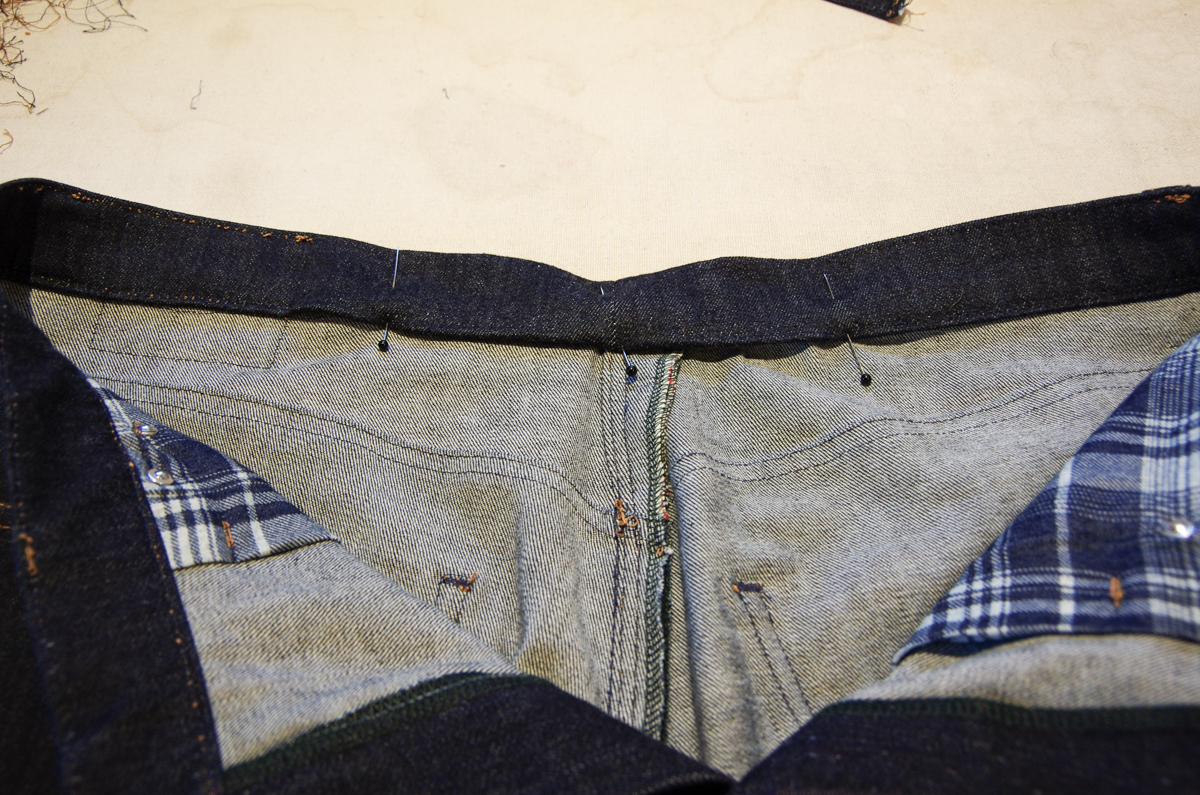
Ok, now we are ready to reassemble! Stitch the seat seam starting with 5/8" at the point you chose (here I am stitching from the yoke seam, but again, see how sharply I had to taper? It would have been better if I created a smooth curve by tapering all the way to the inseam). Taper to the necessary amount by the time you reach the waistband. If you are letting the jeans out to make more room, taper to a smaller seam allowance. If you are taking them in, like me, taper to a larger seam allowance.
Re-do your edgestitching and topstitching along the seat seam.

Stitch the center back of the waistband. Be sure to take it in or out the necessary amount. Check that it will nicely match the jeans when you go to stitch the waistband back on.

Press the center back seam open.
Reattach the waistband to the jeans and press the seam allowance towards the waistband.
Fold the waistband over and press to enclose all raw edges. Baste it in place.

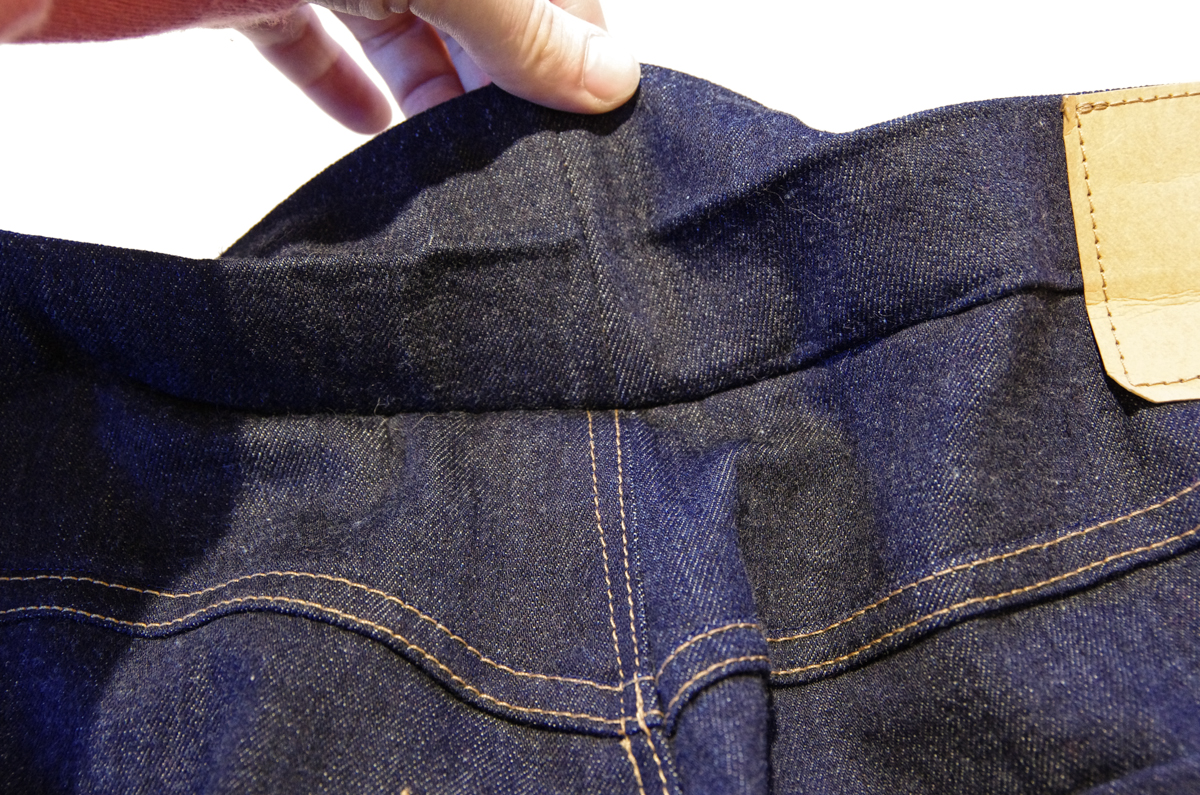
Re-topstitch from belt loop to belt loop.

And lastly, reapply your belt loop.
And now your jeans should fit perfectly, even if the wearer's waist has fluctuated an inch or so since you originally sewed the jeans!