Jeans Sew-Along: Choose a size and test for fit
Today is the second day of our jeans project - we've selected materials, pre-washed our fabric and now we are ready to choose a size and get fitting!
Both the Quadra Jeans and Fulford Jeans instruction booklets include a handy page detailing how to choose your size. Let's walk through this visually. First, have a look at the page below (or, for a higher resolution and larger text, look in your instruction booklet) and then we will look at photos of Matt measuring himself.

You will notice that we need five main measurements. There are other measurements included in the garment measurement chart but these five are the ones that most significantly effect the fit of the jeans. Begin by measuring the man's waist circumference:

Make sure the waistband is at his narrowest point, or if, like many men, his narrowest point is no longer at his waist, circle the tape measure at approximately naval level. When you purchase jeans in the store they will be listed using this waist measurement size. As we will soon discover, a size 30 jean does not mean that the jean waistband actually has a circumference of 30"! I'll show you why in a moment.
Record the waist measurement in the chart within your instruction booklet. Now lets move on to measuring the hips:

Circle the tape measure around the widest point of the hips and seat. This location can vary for men depending on the shape of their hips and bottom. Again, make sure the tape measure is horizontal. Record this measurement in your instruction booklet as well.
Now that we've collected both body measurements, let's analyse which pattern size the man might match. We will then proceed to collecting garment measurements to firm up our decision.
Matt's measurements are:
Waist: 30"
Hips: 38"
I plan to sew him the Quadra Jeans and so below you will find the Quadra Jeans measurement charts:

The size 30 body measurement chart lists a hip measurement of 37" so Matt is a fairly close match to the size 30 but I might consider grading between sizes depending on how the garment measurements match the size 30 as well.
Let's move on to garment measurements so we can make our decision...these measurements are based on the actual finished jeans and not on the body that fits into them. To measure the inseam, you need to measure from the crotch seam all the way down to the hem with all wrinkles removed from the jeans:

It is more accurate to do this when the jeans are off of the man and laid flat on the floor but it is important to see the jeans on the man too. This is because, regardless of the man's preferred fit of jeans, the fit on their body can differ greatly from man to man: Some men let their jeans sit low on their hips and others pull them up high. Some men like a hem to touch the ground and others like their jeans quite a bit shorter. Does the man wear his jeans so there is a lot of empty room between the jean crotch and his body (wearing ease)? The tape measure should not push up into the crotch when measuring but instead simply measure to the end of the seam. Record this measurement.
Matt's inseam measured about 30" so he may need a tiny bit of length taken off the Quadra size 30 (which have an inseam of 30 3/4"). Since it is only small difference and since the jeans he was wearing are very slim fitting and short legged, I think I would cut out the Quadras as they are and adjust the hem when I baste the pieces together (instead of shortening at the lengthen/shorten line). If the difference were greater (3-5" or so), taking some length off from the line we provide on the pattern would allow you to preserve the shape of legs (important for the tapered Quadras, not as important for the straight Fulfords!). We have a tutorial on how to lengthen or shorten a pattern piece on our website.
Now we will measure the rise of the jeans to determine where the waistband will sit on the man's body. For this garment measurement, you will need to measure the garment on the man. It helps if the man is wearing jeans/pants with a rise that he really likes when you take this measurement so you can compare his ideal fit to the fit of our pattern.

Have a look at the Rise measurement given under the size that most closely matches the man's waist and hips. Measure from the crotch of the jeans (again, where the jeans naturally sit away from the body), up to that number (which is the bottom of the jeans waistband). The jeans Matt wore had a rise of 8 1/2". This is a very close match for the size 30 Quadra Jeans which feature a rise of 8 3/8". This is encouraging news that indicates Matt will probably like the fit of the Quadras! Place a pin or chalk mark or tie a string around the man at the height of the Fulford or Quadra rise to allow you to take the last measurement - the Garment Waistband.

Circle the tape measure around the man exactly where you placed your Rise marking. The tape measure should only be wrapped as snug as the man likes his waistband to fit. If he likes a loose waistband that he cinches in with a belt, you might need to wrap it a bit looser than you usually do. If he prefers to wear jeans without a belt, you might need to wrap the tape more snug to ensure the jeans will stay up unassisted.
Matt's Garment Waistband measurement is 34 1/2" which is a close match to the size 30 Quadra Jeans (which have a garment waistband of 34 1/4"). Now you can see why the finished jeans will not have anywhere near a 30" waist! They will be 4 1/4" larger than that!
Now it's time to pick your size! Keep in mind the following:
- It is more important to match the garment Waistband measurement to our size chart than it is to match the body Waist measurement...the jeans will not be worn at the body's natural waistline so it doesn't matter very much if that measurement is larger or smaller than the size chart due to a belly or an exceptionally tapered waist.
- Choose a size that most closely matches the man's hips and the garment waistband. Know that you may need to adjust the length of the jeans if the inseam measurement does not match your chosen size.
- If the man's Garment Waistband measures between two sizes, you will likely have a better fit if you size down. You will still have plenty of room within the 5/8" seam allowances to let out the waistband slightly if he needs a little more room.
Now that you've selected the closest size, you have three choices to test and adjust the fit as detailed below. Alternatively, you can just sew them up and hope for the best...but I highly recommend taking the time to do one of these options since all of that topstitching makes it difficult to adjust the fit of the hips, legs and seat seam once the jeans are finished. The waist can easily be taken in or let out though due to our two piece waistband (more on that later!).
Here are three fitting options:
- Adjust the paper pattern: Make adjustments to the paper pattern before cutting into fabric to suit the man's inseam length and leg width preferences. This is a good option if tiny changes are necessary but I would not recommend performing too many changes before actually trying something on the man! Perhaps just grade between sizes at the hips or add/remove a bit of length.
- Mock up with different fabric: Cut out the pattern as is using a cheap mock up fabric (any stiff medium weight woven will do!). You can then baste together the pieces quickly and try them on the man so that you can adjust the shape of the lengths, length of the legs, and shape of the seat seam while the mock up is on his body. Transfer the changes to the pattern pieces and then cut into your real fabric. This is a good option if the man's measurements fall across several sizes on our measurement chart and lots of changes will likely need to be made. This allows you to accurately see the fit on the man without any risk of ruining your fabric.
- Baste together the denim: Choose the size that is the most likely match and cut out the jeans in your actual fashion fabric. Baste together the pieces to try on the man. The pattern includes 5/8" seam allowances so it allows you quite a bit of room to play with the shape of the seat seam, the curve of the hips, and the width of the legs. This is a good option if only one measurement differs from our size chart - perhaps the man's hips are quite a bit narrower than our proportions so you will need to take in the jeans along the side seams.
I usually choose option three when sewing our jeans patterns. The last time I did this I snapped a few photos so you could see that I baste together at a later point in the sewing process than you might expect!
You can baste all the pieces together before you begin to sew (as I suggest in the instruction booklet), or, if you feel you will likely only need to tweak the fit in the hips a little and test to see if the waistband feels good on the wearer, you could do what I've done here.
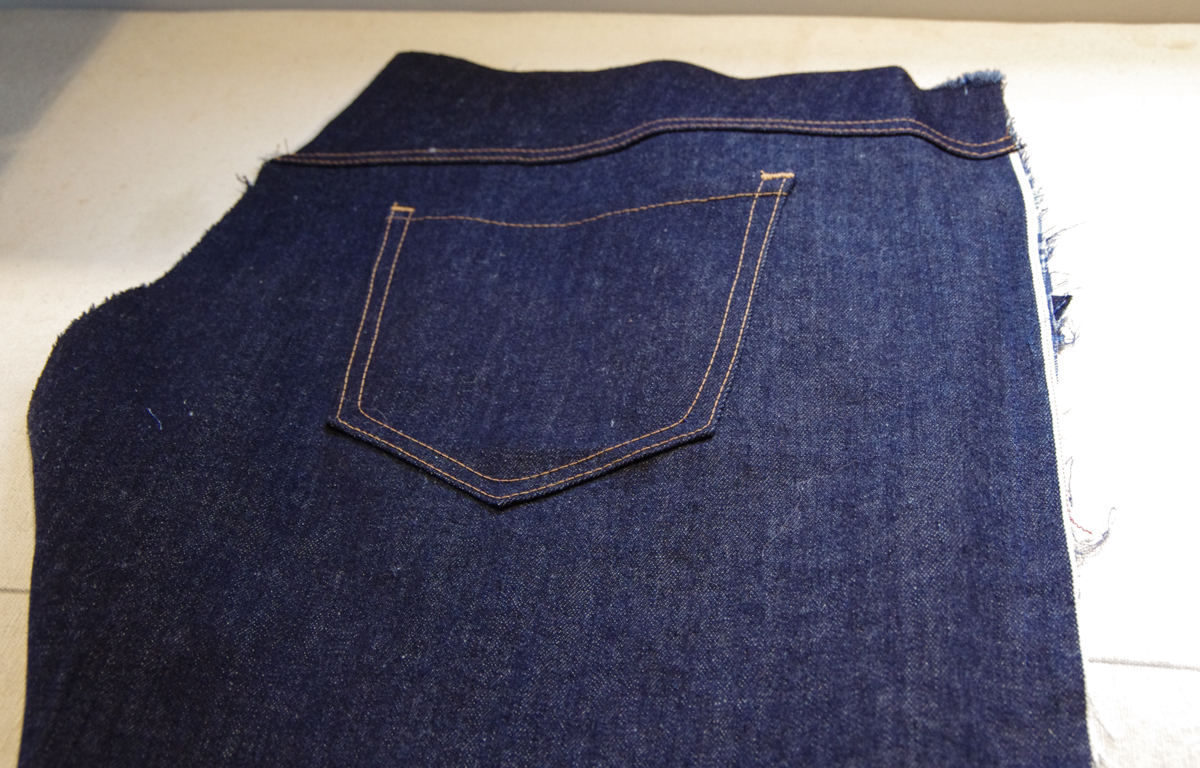
I sew all the jeans details (back pockets, front pockets, yoke), sew the inseams and then stop. I then proceed with the next stage of the sewing process (side seams) with a long basting stitch and the fabric with wrong sides together:
I baste the seat seam as well (I did it right sides together in the photo below but I'd actually recommend wrong sides together so that the seam allowances are easier to see and manipulate when the garment is tried on):

The fly is left open and unfinished. To ensure the waistband can be sewn on accurately I press under the seam allowances. The right side, when the pants are worn, has a 1/2" seam allowance and the left side, when the pants are worn has a 5/8" seam allowance. In the photo below, the allowance on the left will be folded under 1/2" and the allowance on the right will be folded under 5/8".

Lastly, I temporarily attach the waistband. I carefully mark the buttonhole and button and then simply stitch together along the center back seam and then apply it to the jeans. The button marking lines up with the folded edge of the fly and the buttonhole should be set 1/2" in from the folded edge of the fly.

Try the jeans on the wearer and pin or clip them closed so that the button and buttonhole marking overlap. This will give you an accurate feel for how the finished waistband will fit despite having no fly extension, zipper shield or button to do up! Pinch and pin any areas that need taking in or letting out...be careful to avoid over-fitting as the man still needs ease to sit and bend his legs!
If you have questions about fitting your jeans, please email me at info@threadtheory.ca or comment. You can also join our Facebook community where many engaged menswear sewists are quick to offer advice the moment you post!
See you in a couple of days for our next sew-along post! We will setting up our machines and sewing the patch pockets.
Download the Quadra Jeans or Fulford Jeans to join us in this sew-along.