Tailored Peacoat Series: #6
![]()
Today is the last big sewing day for the Tailored Peacoat Series since tomorrow's post will involve just finishing touches. Get ready to insert your sleeves using a different method than our usual one (no gathering with this one!).
Sewing the Sleeves
I sewed the front seam of the sleeves, then used a strip of bias silk organza as a hem reinforcement, since I don’t have wigan (you can buy this bias cut sewn in interfacing here).
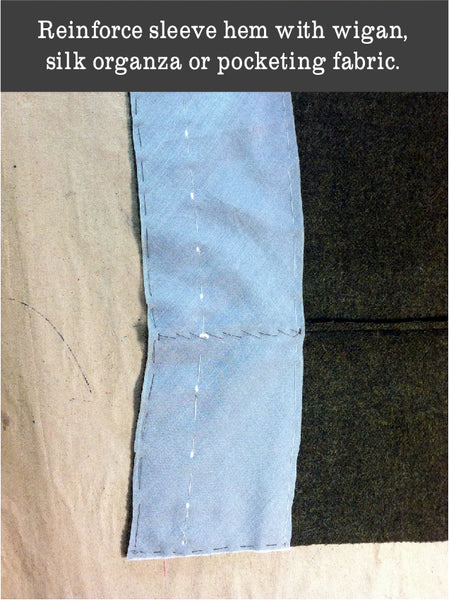
Pocketing might have been a better choice. The sleeve linings were cut with an extra 1 inch of seam allowance at the top of the sleeve (Dana added this extra seam allowance, this is not included as part of the Goldstream Peacoat pattern).
After the sleeves were hemmed and linings assembled, I sewed the seam allowances of the sleeve and lining together for a few inches at the elbow. This keeps the linings from twisting inside the sleeve.
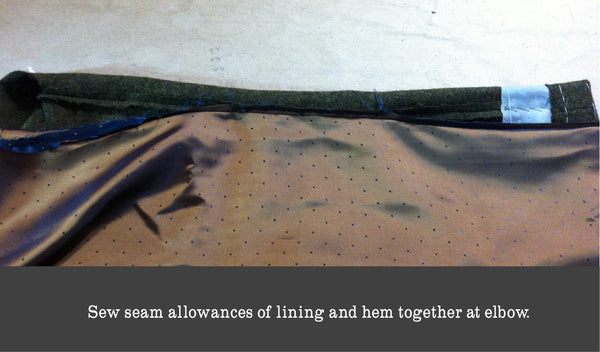
Sew the lining at the hem with an ease pleat, and baste the sleeve and lining together about 3 inches below the top of the sleeve.
Setting in the Sleeves
I was taught to set coat sleeves using a different method than the gather-the-cap method almost every book, pattern, blog, etc, uses. In fact, when I have to gather the sleeve cap (I’m looking at you, 1840’s men’s coats), I usually want to scream/cry/throw things. If that method works for you, great, but I've always had trouble with it.
The sleeves have ¼" seam allowance (The Goldstream Peacoat pattern uses 5/8" seam allowances but Dana has adjusted her pattern to include 1/4"). Mark ¼" seam allowance on the armscye of the coat, either with tailor tacks when you cut the coat, or thread trace it now. Pin the sleeve into the armscye, matching the notches.
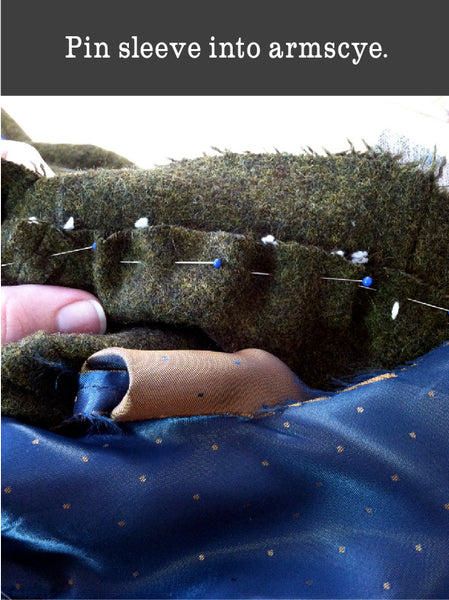
The pins don’t have to be close together, just enough so you can tell how the sleeve is hanging. Don’t worry about extra ease in the sleeve right now. Once the sleeve is pinned, check to see how the sleeve is hanging. The sleeve ease is really well distributed in this pattern, so it should sit well, but feel free to move it around if you aren’t happy. Next, baste the sleeves with matching thread, since this can stay in the finished coat. Use a fairly small running stitch.
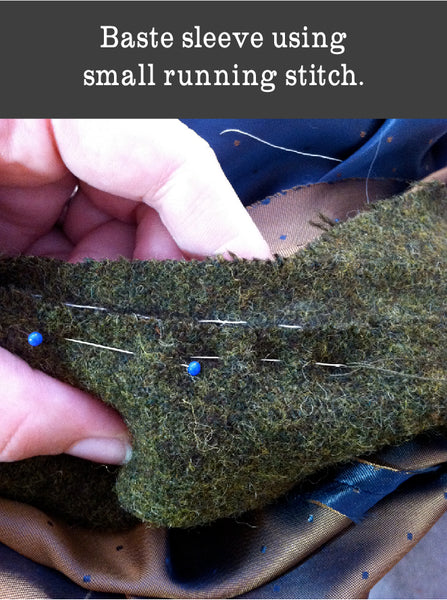
This is where you want to ease any wrinkles into the armscye; happily, most wool likes to ease, and using a small seam allowance makes it easier to control the fabric. Check the hang of the sleeve again, and make sure there aren’t any big wrinkles or other unhappiness. If you’re having problems, you can try pressing the seam, just don’t go more than an inch into the sleeve. Hand sewing the sleeve into the armscye instead of machining it also gives you greater control.
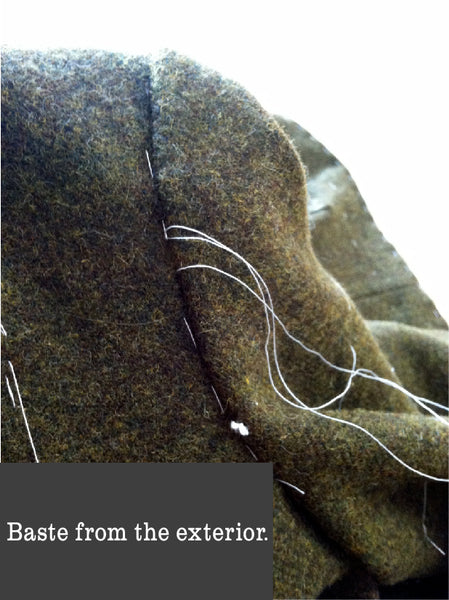
Once the sleeves are sewn, baste around the armscye from the exterior of the coat, as close to the sleeve seam as possible and going through as many layers of canvas, shoulder pad, and lining as you can.
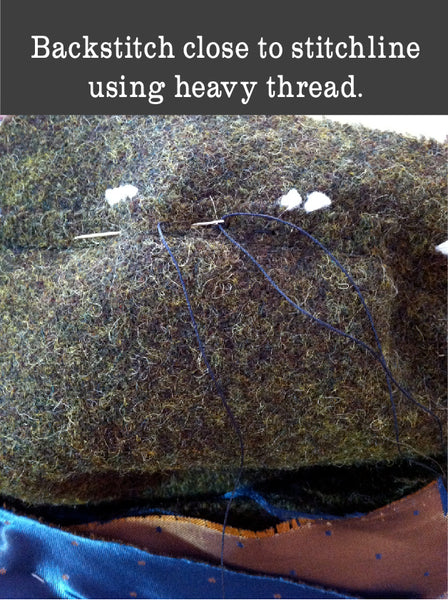
You want to push all the seam allowances of the coat and sleeves towards the sleeves, and to hold all the layers in place. Since there is extra ease in the lining, there might be a few folds when you baste the layers together, just make sure the lining isn’t pulling anywhere. From the inside with the sleeve facing you, backstitch through all the layers close to the stitch line using heavy thread.
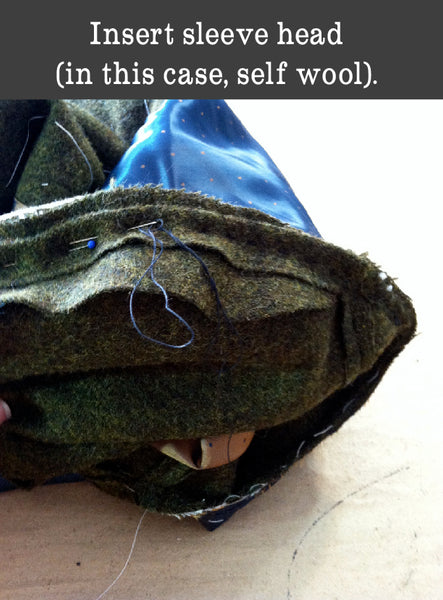
I was able to go through the shoulder pad and catch the lining on the other side, but if your shoulder pads are thick you might have to do a second line of backstitching from the lining side, catching the shoulder pad to the lining. Trim away the extra wool, canvas, lining, and shoulder pad; I usually leave only ¼ inch under the arm and taper to ½ inch at the top and sides of the armscye. Sew a sleeve head in the armscye, starting at the front notch or sleeve seam and going around the top of the sleeve to the back sleeve seam. Sleeve heads fill out the ease at the top of the sleeve and give a smooth look to the shoulder. You can buy them or make your own; I used a bias strip of wool 2 inches wide, folded over about ½ inch and pressed.
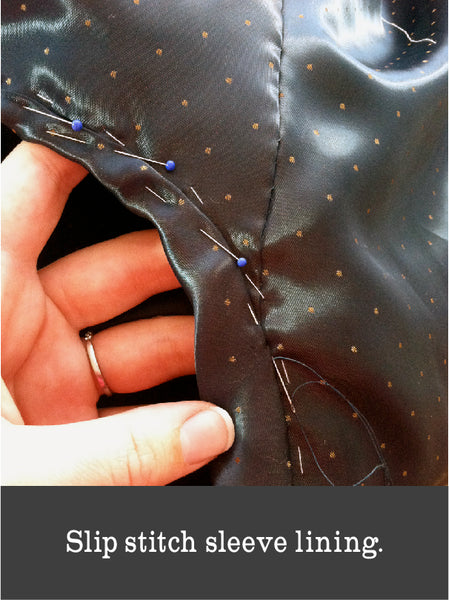
Fold the sleeve lining over ¼" and slip stitch in place, matching seams with the sleeve and just covering the backstitching. Its perfectly acceptable to have small gathers in the lining around the top of the sleeve. Lining rarely eases as nicely as wool.