Belvedere Waistcoat Sew-Along: Day 10 - Assembling the Back
Today we all but finish our waistcoats! By the end of this post the back and back lining will be completely attached to the waistcoat fronts so that buttonholes and buttons will be the only remaining step.
Prepare your waistcoat fronts by basting the open shoulder and side seams closed. This way the layers won’t shift around when you attach the back.
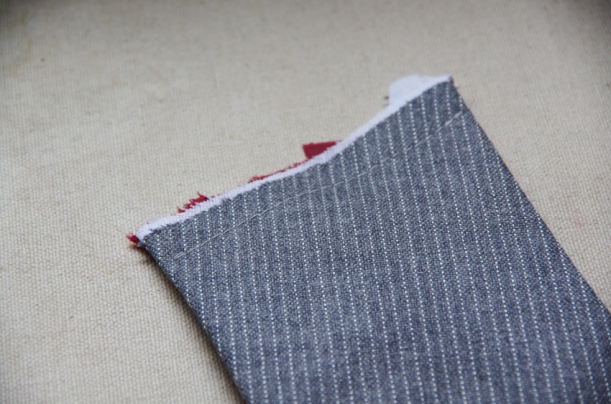
If you have drafted a partial shawl collar as I did in an earlier sew-along post, you will need to fold it over and stitch it in place before attaching your waistcoat back.
My fabric choice is unusually thick, so your collar will look much smoother and more flat when you fold it over. Do not press the folded roll line (it looks best when it is softly folded), just pin and then stitch the collar in place along the shoulder seam.

I handstitched the collar to the waistcoat front to keep it secure during my next sewing steps…I plan to take out this stitching once the waistcoat is finished, I just did this to reduce the bulk of the collar and maintain the shape of the collar even when the waistcoat is crumpled up and being pulled through the hem hole later (you’ll see what I mean in a bit!).
Also, I didn’t mention this during the post where we drafted the collar or where we understitched along the waistcoat front: You might like to stop your understitching just below your last button and leave the neckline without understitching. When you fold over the collar the facing becomes the visible part of the collar so your understitching is front and centre! The understitching also prevents the seam from being pressed slightly to the underside of the collar (in fact, it encourages the seam to roll towards the facing which makes it more visible. If I were to sew another vest with this style of collar I would make sure to stop my understitching before the top button. As it is, this chunky wool waistcoat will have other visible topstitching (on the tabs and at the armholes) so hopefully the understitching doesn’t look too out of place. I’m sorry if you now have to pick out some unwanted understitching, I should have thought to mention this sooner!
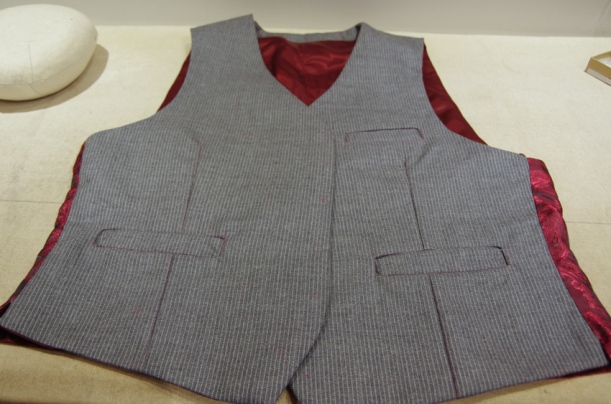
Ok, with the collar ready to go, let’s move on to another feature I’ve added to the waistcoat I am sewing for myself – the tabs found in our free add-on pattern pieces. Scroll down until you see the pinstriped waistcoat if you have not chosen to add these tabs.
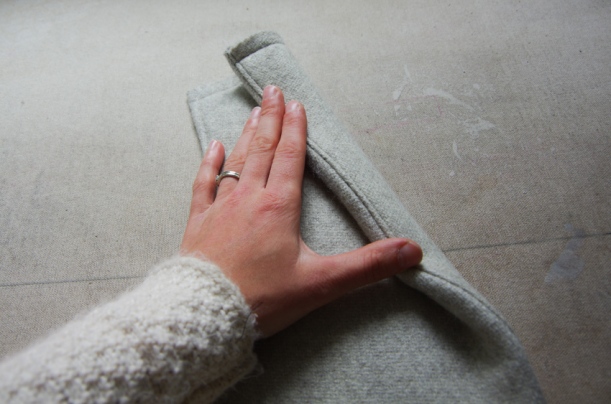
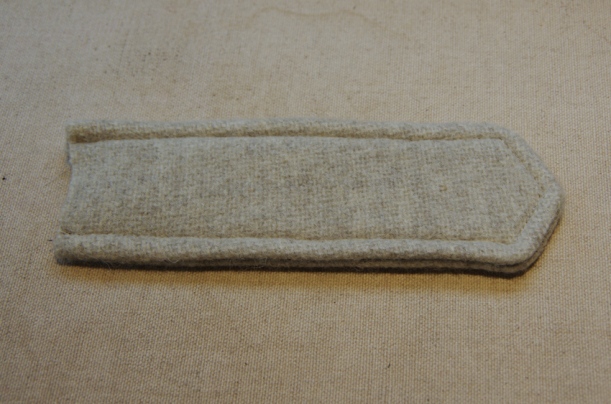
Place each pair of tabs with right sides together and stitch around the long and pointed edges.

Trim the seam allowances and corners thoroughly.

Flip the tabs right side out.

Press them thoroughly and topstitch around the perimeter (I used 1/4″ topstitching but it is up to you what you use!). You could skip topstitching for a clean finish if you preferred.
Place the tabs on the waistcoat back at the narrowest point of the waist.

Baste them in place within the seam allowance.

Now you are ready to proceed with adding the waistcoat back to the fronts as per the instruction booklet!

Lay the waistcoat back (not the back lining) on your work surface right side up. Lay the fronts on top of the back so that right sides are together. Pin along the shoulder and side seams.

Baste along the shoulder and side seams using a scant 5/8″ seam allowance. Now is a perfect time to try the waistcoat on the wearer to check for fit! If you notice gaping along the back armhole you can experiment by taking in the shoulder or side seam. If you notice more or less room is needed at the waist (with the fronts pinned closed) you can take in our let out the side seam.

With any small fit adjustments done, it is now time to add on the back lining! Place the waistcoat back on to your work surface so the wrong side of your fronts are visible. Lay the back lining on top so that the wrong side is facing up. Pin along the shoulder seams, the neckline and the side seams.

Stitch the shoulder, neckline and side seams by following your basting stitches. To stitch the shoulders and neckline, begin by stitching one shoulder seam towards the neckline. Stop when you feel the neckline edge of your waistcoat front. Pivot your needle and stitch around the back neckline. Pivot once again when you feel the second waistcoat front edge and then finish by stitching along the second shoulder seam.

The only remaining openings are now the armholes and the hem. Pin the back and lining armhole seams together. You will need to shift the waistcoat fronts out of the way and stretch out the larger back armholes.

Stitch the armholes from shoulder seam to side seam.

The armholes feature a strong curve so it is necessary to clip these seam allowances carefully. You should also clip the neckline seam allowances to help this curve sit nicely when the waistcoat is flipped right side out.

Now the only step remaining is to stitch the hem. We will be leaving a gap between one of the darts and the centre back seam so that the waistcoat can be flipped right side out. Stitch from one side seam to the dart and backstitch. Stitch from the other side seam to the centre back and backstitch. If you are working with unusually thick fabrics you may need to leave a larger opening than this.
Trim the hem seam allowances and corners. Now fish the entire waistcoat through that hole and press the side seams, neckline, shoulder seams, armholes and hem thoroughly!

Close up the hem by hand. And while you do so, you may find that your carefully pressed waistcoat has become a cat bed (it seems as though she can sense when I’m going to be standing still and hand stitching for a while).
Now, we’re ready to add the buttonholes to the waistcoat front, the corresponding buttons and perhaps a label to the neckline!