Belvedere Waistcoat Sew-Along: Day 9 - Finishing the Front
Today we will be attaching the lining and facing to the Belvedere Waistcoat fronts. If you are sewing Variation 1, the first step is to create the side seam vents. These vents can actually be added to either variation if you would like a little bit more room for movement. The vent expands to create a larger circumference around the stomach while you sit, bend or simply have a full belly after a large meal!

Begin by cutting a small rectangle of fusible interfacing measuring approximately 2″ X 3″. Apply this to the wrong side of the lining at the bottom of each side seam. This will help add rigidity to the lining fabric so that the vent appears crisp and flat when finished.

Pin the waistcoat front to the lining with right sides together.

Beginning at the side seam notch, stitch across the 5/8″ seam allowance. When you get to the seamline, place your needle down in to the fabric and pivot around it. Stitch an angled line towards the hem notch.

Trim along your stitching so seam allowances are 1/4″ or less to reduce bulk. Clip up to your stitching at the corner.
Regardless of whether you are sewing Variation 1 or 2, it is now time to sew the hem, front and neckline seams. If you have added the vent, begin stitching at the hem notch. If you have not added the vent, begin stitching at the side seam. Stitch along the hem, pivot at the angled point and then stitch up the front until you reach the shoulder.
To prevent the lining and facing from rolling to the right side when your waistcoat is worn, understitch as far as possible along the hem and front.

To understitch, work from the right side of the garment and stitch the facing and lining to the seam allowance. Your stitching should be 1/8″ from your original seam.

It won’t be possible to understitch around the angled point at the hem. Simply stitch as far as possible and backstitch. Then you can continue a new line of understitching along the hem.

Trim one seam allowance shorter than the other and thoroughly clip in to the seam allowance along curves. Also clip across corners to reduce bulk.

Next we will close up the armhole. With raw edges of the fabric even and right sides together, pin the front and lining together along the curve of the armhole. Match the dart. Depending on the fabrics that you are using, you may notice that the lining has stretched out or that your wool front has shrunk during the sewing process. Not to worry! Lay out the lining so that it flat and equal in size (or slightly smaller) than the waistcoat front. Trim off the 1/8″ or so excess along the curve of the armhole. This will help to prevent the lining from peeking out on the right side of the waistcoat at the armhole.

Stitch the armhole curve using a 5/8″ seam allowance.

It is necessary to thoroughly trim the seam allowances and clip in to the curves since the armhole curve is so exaggerated. These clips will allow the fabric to sit smoothly when the garment is flipped right side out.

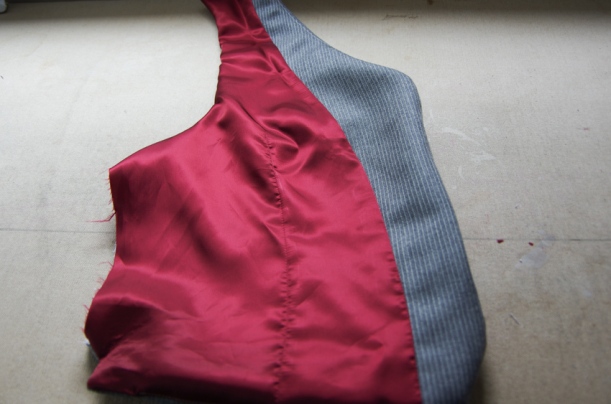
And now it is time! Let’s flip the waist coat front right side out!

Do this by reaching in to the open side seam.

Now give the front a very thorough press.

Are you proud of how beautiful your finished front looks? I hope so!

Tomorrow we will add on the back and our waistcoats will be VERY close to finished!
