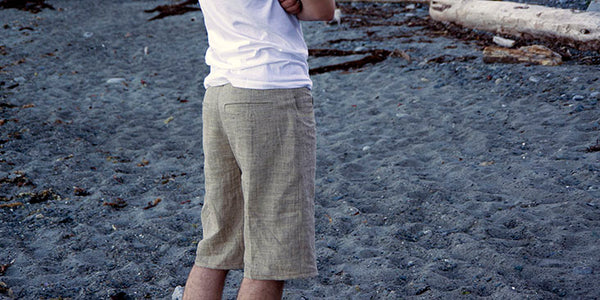
Welt Pocket Tutorial

This tutorial will show you how to make elegant pockets that you can add to trousers, jackets, vests or wherever else you can imagine this style of pocket. While this type of pocket is often referred to as a welt pocket in the sewing community and in sewing literature, it is actually traditionally called a 'jetted' pocket. A true welt is formed on top of the garment and topstitched in place. I like this jetted style better because it results in a clean finish with no visible topstitching. Even though it is truly a jetted pocket I will continue to refer to it as a welt pocket since that is what it is most often called these days and I want to make sure that you can find this tutorial when Google searching 'Welt Pockets'! :P
Welt pockets often have the bad reputation as being scary and difficult to sew. While it might take a little while to make perfectly square corners and until the origami folds become second nature, they really aren't that difficult...it is just a matter of doing the right step at the right time. And here are all the right steps laid out in photos for you!

For these shorts I used the Jutland Pants pattern which includes all necessary pieces. In case you are working with a pants pattern that doesn't include welt pocket pattern pieces, here are some guidelines to make your own.
For each pocket:
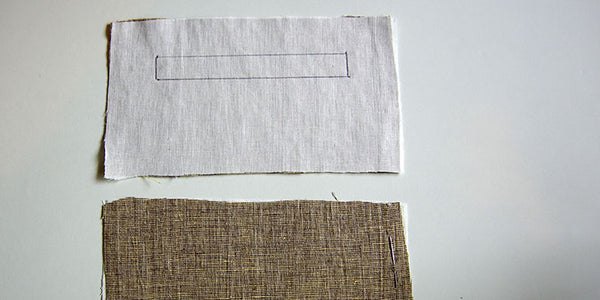
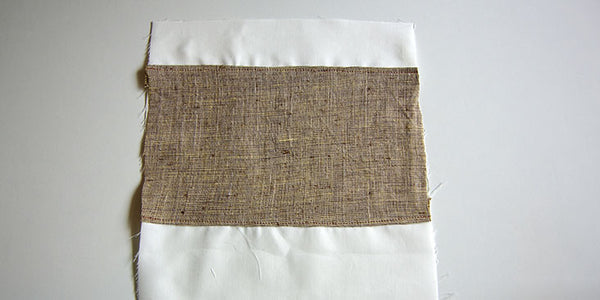
- Welt rectangle - one interfaced rectangle that is about four times the height of your welt and a couple inches wider.
- Shallow pocket lining - one shallow pocket piece (either shaped like mine is or just a shallow rectangle that is the same width as the welt rectangle) made out of thin cotton or some other pocketing material.
- Deep pocket lining - one long pocket piece that is shaped to match the width and bottom of your shallow pocket piece and is tall enough to extend past the top of the pants (mine was 12" tall)
- Pocket facing - a rectangle approximately the size of your welt piece that will be top-stitched to the deep pocket lining to act as a backdrop for the welt pocket (so that you don't see the pocketing fabric behind the open welt).
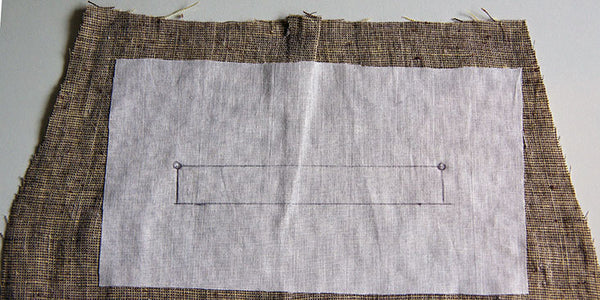
- Interfacing - A square of interfacing that is larger than your welt rectangle piece to apply to the trousers.
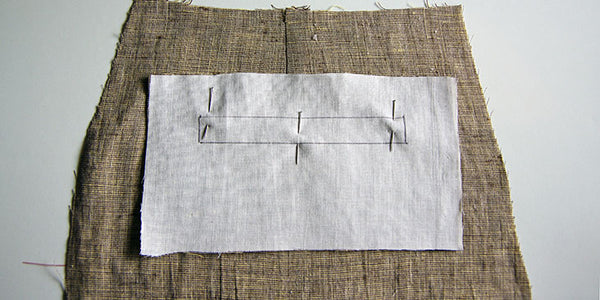
Okay, now that we have all of our pieces cut out and interfacing applied, we can begin to assemble the pockets! On the top third of the wrong side of the welt rectangle, mark the finished width and height of your welt (you can choose this based on your preference or use my measurements which were 5/8" tall X 5 1/2" wide). If you are sewing the Jutland Pants, you can use the welt template that we've provided.
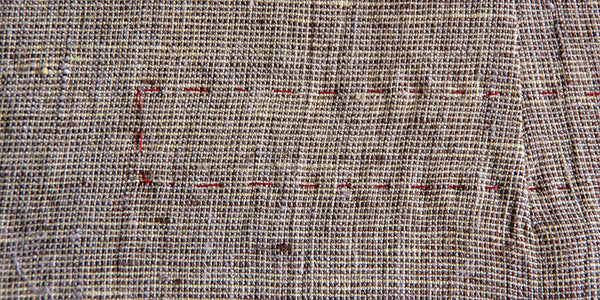
Draw markings on your interfaced trouser pieces as well - make sure you mark both the right and wrong side of your pants. If you are sewing the Jutland Pants, use the provided marks to choose your welt placement. You can use chalk or you can use thread basting to create your markings.
Here is my basting stitch:
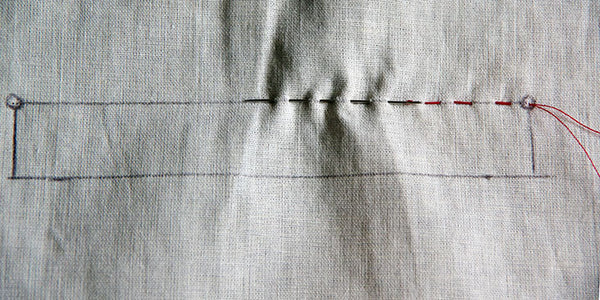
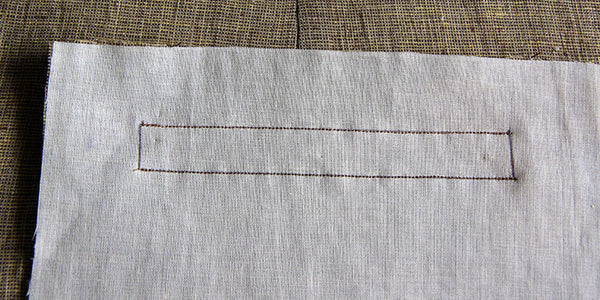
And the view from the right side (make sure to stitch thoroughly at the corners so that they are very accurate):
Line up your trousers with your welt piece, right sides together. Your markings will come in handy here to make sure everything is lined up precisely.
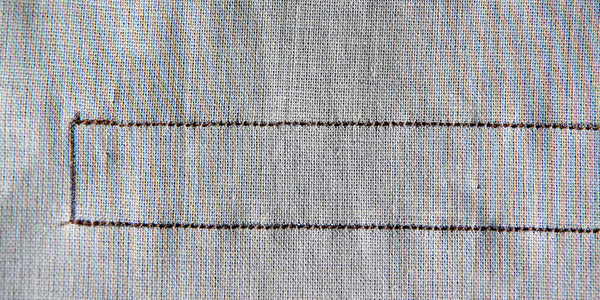
Using a very short stitch length for added strength and precision, stitch along the long edges of the welt rectangle. Stop and back stitch precisely at each corner.
Here is a close up to show you how carefully you should stitch over the marked lines:
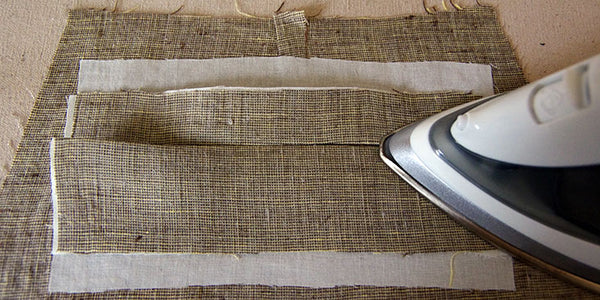
Now press the loose sections of the welt to help things fold crisply later on. Here I am pressing the top of the welt:
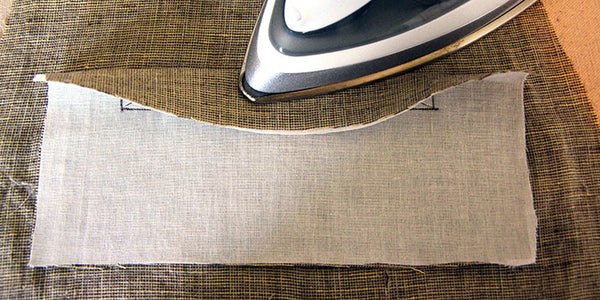
And pressing the bottom of the welt:
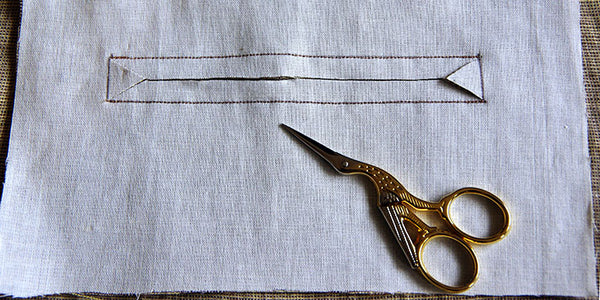
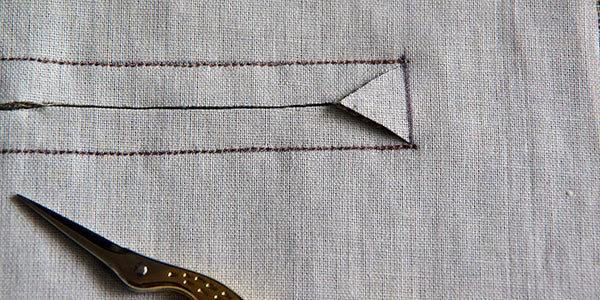
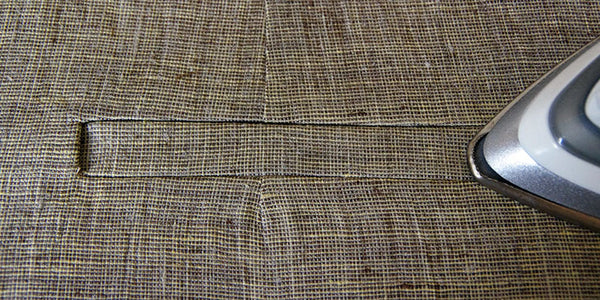
Using sharp little scissors, cut along the center of the welt and stop 1/2" from either end. Cut on a diagonal towards each corner, clipping as close to the stitching as you dare! The closer you get, the crisper your welt corners will appear later on...but be warned - if you snip beyond your stitching your welt will have little holes in each corner!
Turn the welt to the wrong side of the garment so that you are left with a rectangular window on the right side:
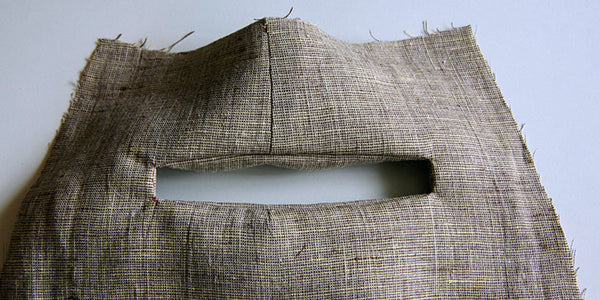
And the loose fabric on the wrong side:
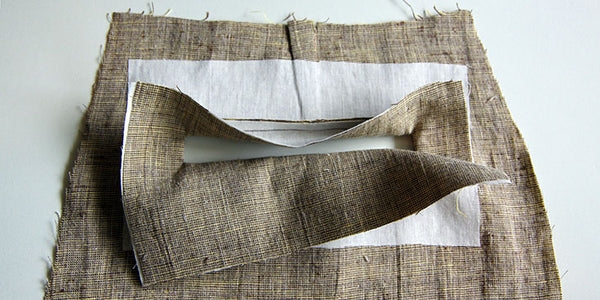
Now is a great time to remove all the basting thread!
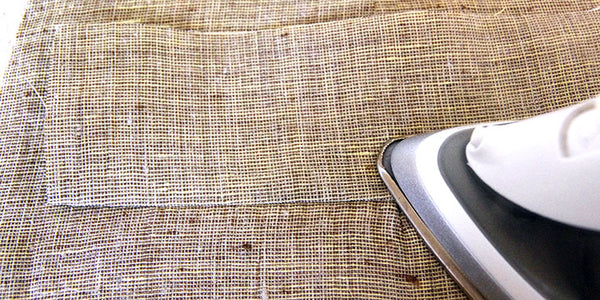
To reduce bulk later, flip up the bottom of the welt and press the seam allowances that are hidden underneath open.
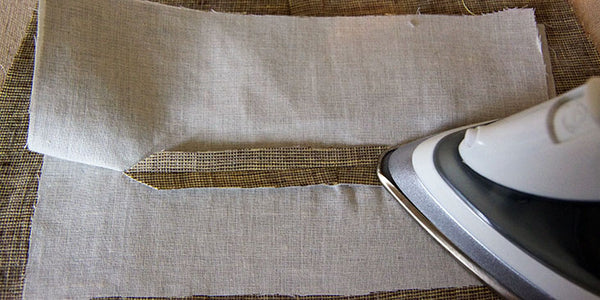
And now press the sides and the top of the welt crisply flat (isn't linen lovely to press?). If you'd like, you can press the seam slightly towards the wrong side of the garment so that it isn't visible from the right side.

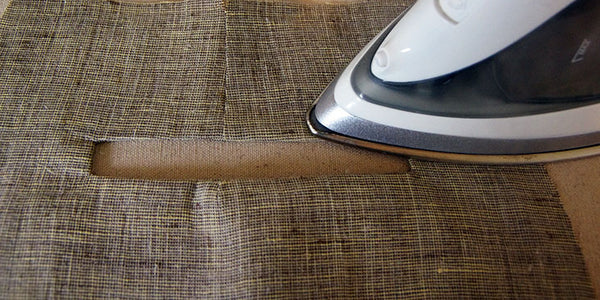
Turn the garment on the right side to press all four corners carefully - you can pinch and pull them a little to make them look perfectly right angled.
From the wrong side of the garment, create an accordion fold with the welt rectangle so that the folded edge meets the top of the welt window. Press the folded edge crisply.
From the right side of the garment, your welt will look almost finished!
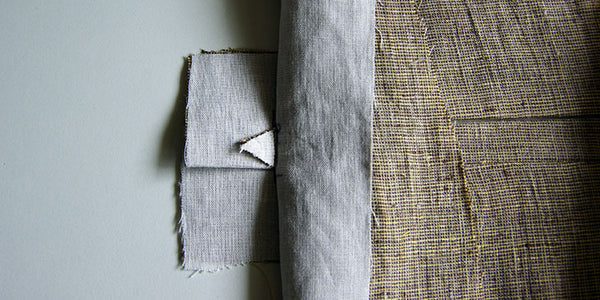
To keep the welt in place, uncover the sides of the welt by folding over the trousers. You will see a little triangle of fabric and your accordion fold. Stitch as close to the base of the triangle as possible through all layers except the trousers themselves.
Your welt is finished! Now it's time to add the pocket bag so that it doesn't open up to display underwear (unless you've made yourself some perfect Comox Trunks that you really want to show off :P).
To add the pocket bag, first place the shallow pocket lining with right side down on top of the welt. Line up the top pocket edge with the bottom of the welt. Stitch using a 5/8" seam allowance.
Finish with a serger or a zig zag stitch:
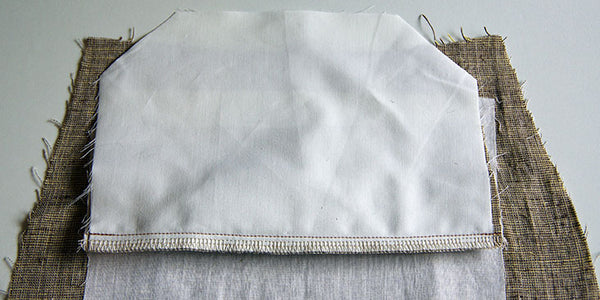
Press pocket lining downwards:
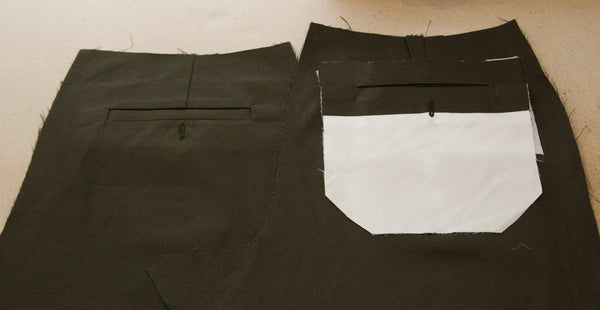
At this point you can add a button hole to your welt pockets if you desire. I made a separate pair of pants to demonstrate how to do this:
At this point in the welt pocket sewing process, stitch a vertical buttonhole below the welt through the main pants and the single layer of the pocket lining. I stitched mine over the bottom of the Jutland Pants dart.
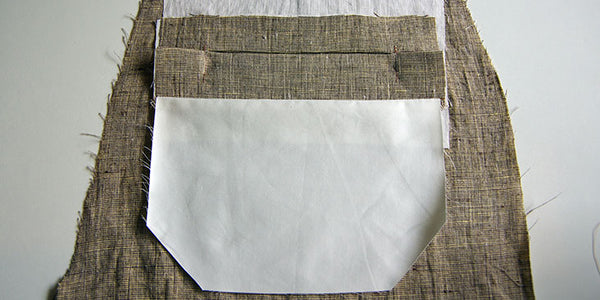
To prepare the deep pocket lining, first press under the long edges of the pocket facing 5/8":

Top stitch the pocket facing to the deep pocket lining. You will want to place this facing so that it lies directly over the welt pocket when the bottom of the deep pocket lining is lined up with the bottom of the shallow pocket lining.
Line the pocket pieces up with right sides together and pin in place through all layers of the welt folds (but not through the trousers themselves).
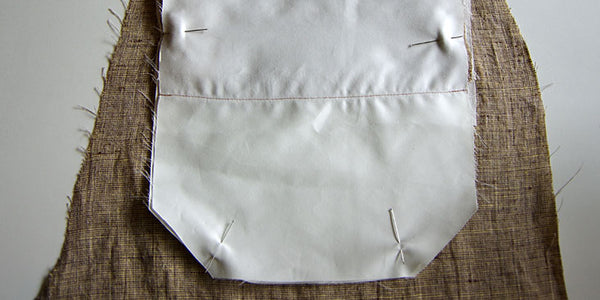
Stitch around all pocket edges using a 5/8" seam allowance. You won't need to stitch up to the top of the deep pocket lining because no other layers extend this high.
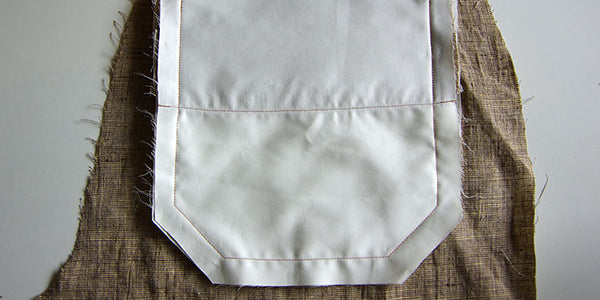
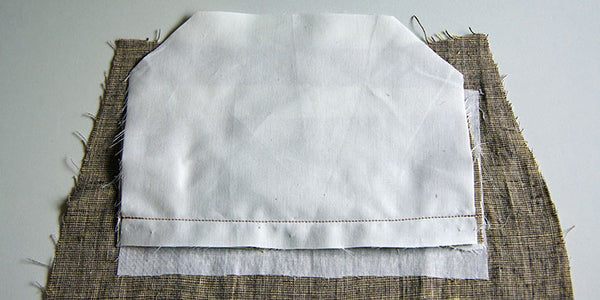
This is how your pocket will look at this point:
Finish the edges of the pocket with a serger or a zig zag stitch.
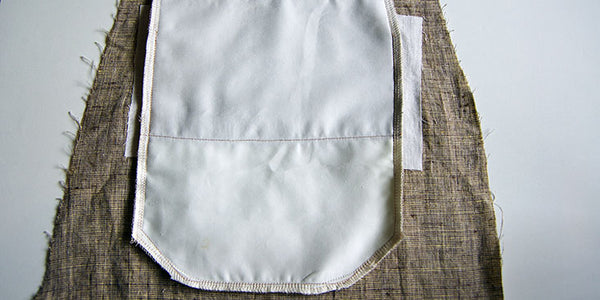
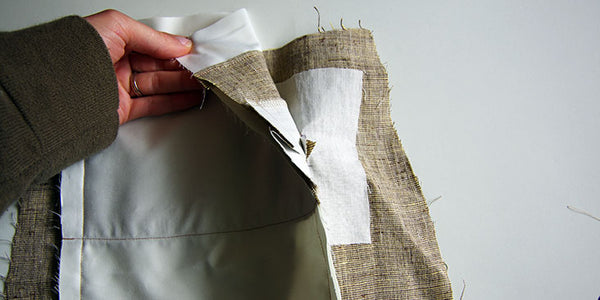
To prevent your welts from sagging in the middle, fold down the top of the trousers to expose the little seam allowance between the trousers and the pocket pieces. Stitch through the seam allowance and all the pocket layers.

If you are adding buttons and button holes to your pants, this is the point that you can sew on your button! Open up the pocket and position the button directly under the button hole.

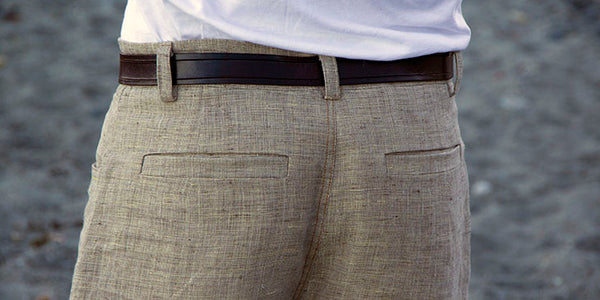
And that's it! A finished welt pocket! With a button:

Or without a button:
Now you can add them to just about everything!