

Eager to learn more?
Sift through our pattern hacks, sewing technique tutorals and guest blog posts by selecting from the filter below-left.
Tutorials
Sew a Silk Tie

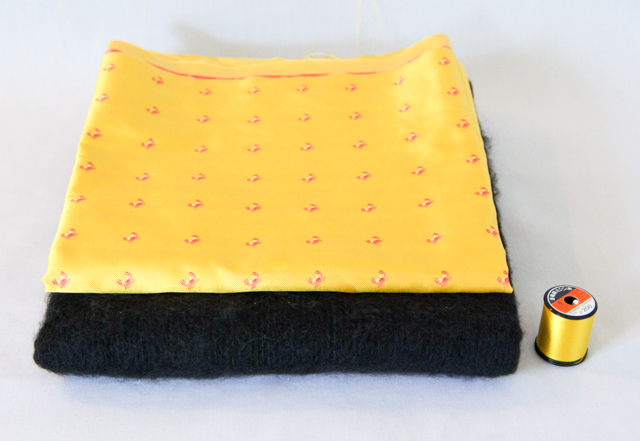
Would you like to try your hand at tie-making this Father’s Day? It isn’t difficult to make your Dad a tie since the internet abounds with beautiful tutorials and even free patterns for all skill levels! Since a quick search for “tie tutorials” can lead to fairly overwhelming results, I decided to compile the fruits of my research into one handy blog post and a tutorial that brings together all of my favorite elements from the instructions already available on the web! Britex has a wealth of tie making supplies that can be very difficult to find elsewhere. For my tie I used this sunshine yellow Italian silk faille featuring nothing less than hot pink embroidered crabs! Since ties are cut on the bias, this silk was ideal for my purposes – the crabs run 45 degrees to the selvage! The silk is from Britex Fabrics and is currently sold out – there are all sorts of other gorgeous silks in their online shop though!

I consulted Matt (the prospective wearer) on the direction of the crabs – he elected to point them downwards so they wouldn’t be aggressively pinching at his neck.
While you will find my tutorial below, first (or afterwards) you might like to read all of the tutorials and other resources that I found so that you can truly immerse yourself in the world of tie-making. Here are all ofthe links sorted into the various categories that I researched:
The Anatomy of a Tie:
- Necktie Anatomy: The Classic Necktie Deconstructed as found on The Gentlemanual
- The Necktie Series as found on Put This On
Tutorials geared towards the average home sewer:
- Father’s Day Tie (pattern and tutorial) as found on The Purl Bee
- Men’s Style: How to Sew a Classic Necktie in 10 Easy Steps! as found on Craftsy
- Free Men’s Necktie Pattern and Tutorial as found on SweetShopSewing
Tutorials geared towards the advanced home sewer/menswear enthusiast:
- Tie Construction as found on Shirts And Ties
- How to Make a Silk Tie (article about tie maker Jon Henley) as found on The Guardian
- How we make our custom made/bespoke ties as found on Sam Hober
Videos on Tie-making:
- How to make a hand-crafted tie with Robert Surratt
- Tie-making, Behind the Scenes: How a Tie is Made By Hand
Particular Tie-Making Techniques:
- How to Hand-Sew: The Slip Stitch as found on Craftsy
- How to Make a Men’s Tie…Properly (best article on forming the tip of the tie) as found on Twenty-first Century Lady
Pattern Options:
- Wide: Men’s Necktie by SweetShopSewing
- Medium: Osman Tie by BurdaStyle
- Narrow: Father’s Day Tie by The Purl Bee
- Super Narrow: Skinny Tie by SeeKateSew
Now that we’re prepped, let’s move on to my tutorial! For this project you will need:
- 1 yard silk of medium weight. This may seem like a lot of fabric but remember that your tie must be cut on the bias! You may be able to squeeze a tie out of less if you are careful.
- 1 yard interlining (described below). This will also be cut on the bias.
Most ties are created with a sewn in (rather than fusible) interlining comprised of wool or a wool/nylon blend. This interlining gives the tie body (a good tie shouldn’t be flat, it should be lightly pressed so it maintains a three dimensional quality) and also a bit of rigidity. It is important to match the interlining with the fabric otherwise you run the risk of making your tie too stiff and negating the point of cutting your tie on the bias! You want your tie to look fluid and smooth…achieving this is probably the trickiest aspect of tie-making.
Since this silk faille was quite stiff I decided to use a loose wool interlining. In retrospect, I wish I had chosen an option with a touch more rigidity such as this classic wool interlining. Aside from the lack of rigidity, the color black was not the best pairing with the yellow silk – it shows through ever so slightly on the finished tie. All the same, the amount of body this wool gives the tie is ideal and I am happy that the tie ended up fluid enough to allow it to hang nicely (though I worry it might become misshapen over time).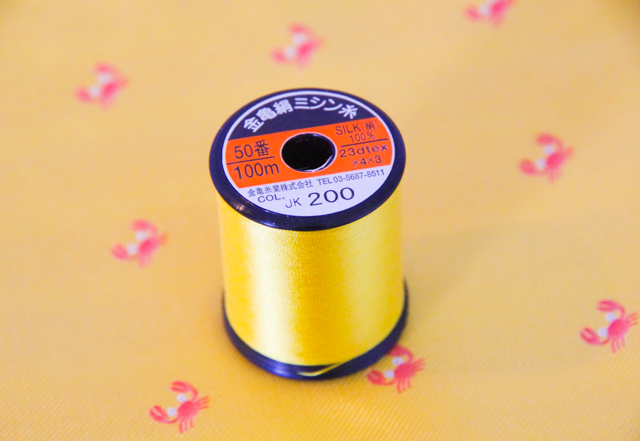
Since there is quite a bit of hand sewing involved in tie-making, it’s a good idea to use fine silk thread to avoid knots.
Once you’ve gathered your materials, establish the exact bias on both your silk and interlining. Some tie patterns represent the entire tie so they must be cut on one layer of fabric while other tie patterns require that you cut them out on the fold (making it easy to fold your fabric on a 45 degree angle).
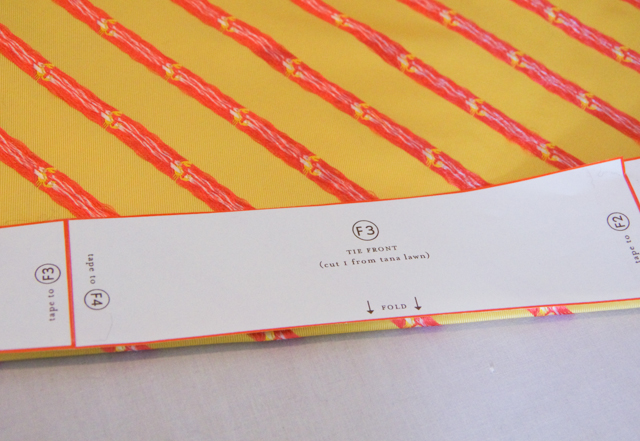
A tie shell is comprised of three main pieces (pictured below from left to right): The blade (the wide front), the neck (the middle), and the tail (the narrower back). The interlining is usually cut from one piece but I joined two pieces of fabric for mine by abutting the seams and zig-zagging them together so as to avoid adding extra bulk. On the right hand side of the photo below you can see my two “tipping” pieces – the tie I have made is “self-tipped” rather than “decorative-tipped” because I used the same silk rather than a contrast material as the lining. I also added a garment tag and a little strip of fabric to create a keeper loop. A man can choose to feed his tie tail through it if he desires (though some fashion blogs say this is not currently fashionable…who knew?!).
I chose to start making my tie by sewing the tips. Some people like to join the three main tie segments together before embarking on the tip but I wanted to avoid handling the tie as a long strip too much since the weight of the tips could cause the bias cut fabric to stretch out of shape. Here is an example (of a store bought tie) so you can see what we are aiming for when sewing a tie tip:
It is not easy to achieve something this precise (as you will soon see!). While all the sewing involved in tie-making is basic, the precision and skill employed is key to a high-end tie. I think I have a long ways to go before I could consider calling my version a ‘luxury’ tie!
If your tie pattern came with two pattern pieces for the tips, they will likely be the same size as the blade and tail tips. Trim them down 1/4″ on all four sides (not along the top).

Starting at the top edge, sew the tie and tie tip together with right sides together and a 1/4″ seam allowance (you can see my stitching on the right hand side of the photo below). Stop sewing 1/4″ from the end of the tie tip.
Here is a detailed photo showing you where to stop sewing:
Pull the tie tip over to the other side of the tie so raw edges meet and sew the other side of the tie tip in the same manner. You should sew up to but not over the previous stitching to form a precise point. Be careful to push the excess tie blade fabric out of the way (it will form a bubble). Here is a close up of the tie tip with the bubbled tie blade below:
And here is a photo of the bubble from the wrong side of the tie blade: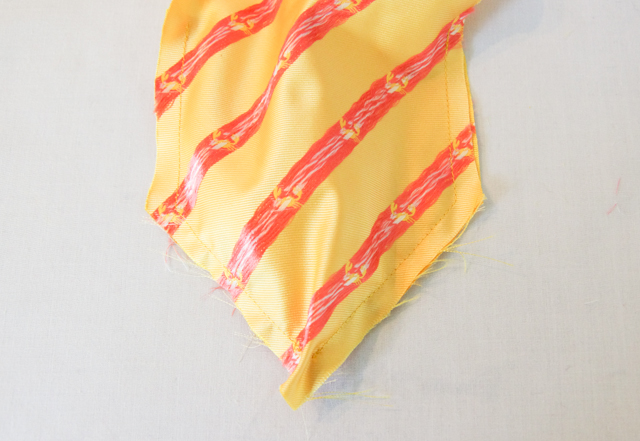
And a close up of this bubble:
Finish the tie point by folding the blade in half and stitching across the point from the center of the blade to the raw edge. This stitching will be perpendicular to your stitched point and within the seam allowance it should not cross your previous stitching.
When you turn the tip right side out, try pinching the point seam allowance to stop it from crunching up and becoming misshapen as you fold. The goal is to have your point seam allowance fold neatly within the tie. I wouldn’t advise trimming the point when you are working with silks since the danger of fraying drastically is very great!
My point did not turn out perfectly but stitch ripping was only an option once due to the amount of fraying I was experiencing! The point is not 100% angular but it is certainly passable from the distance most will be viewing it. From the underside you can see why it did not end up appearing precise:
Practice will hopefully make perfect!
Now it is time to sew the three tie segments together. Carefully press open the seam allowances (don’t push the iron along the fabric as this will cause your bias cut fabric to stretch out of shape, instead, just lift the iron up and move it to the next position).
Now that the points are assembled and the tie segments are joined, it is time to insert the interlining and prepare to hand stitch the final seam!
Turn under the seam allowances 1/4″ along the entire length of the tie (again, make sure to press instead of iron!).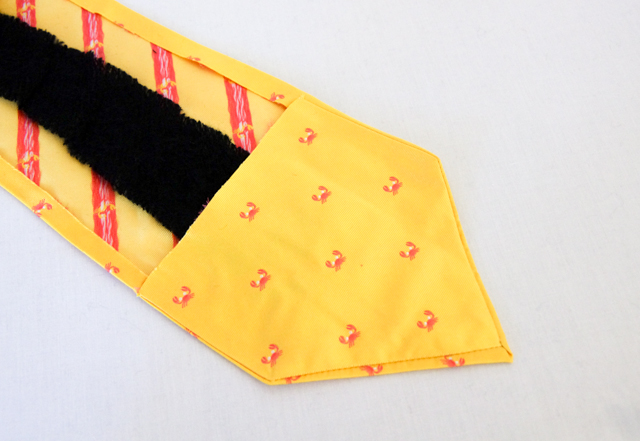
Press the tie edges inwards to meet in the middle. As you can see in the store-bought tie below, sometimes this seam can be slightly overlapped – depending on how you like to slip stitch, you can either abut the seam or overlap! You can also see how the keeper loop is inserted into this seam prior to stitching it down. We will do this now:
Create your keeper loop using a scrap of the silk. Ideally you would create a tube and turn it right side out. You could also avoid the frustration by simply creating binding and top stitching the open edge closed (keep in mind this makes the keeper loop a little stiff).
Stitch the loop to the seam allowance on the tie blade:
You can see the positioning of the keeper loop below:
Pin the entire seam together and prepare your thread for hand stitching! It is a good idea to run your thread through beeswax because you will likely be working with a very long piece of thread if you are trying to stitch the entire seam in one go. While it is possible to stitch the seam using several shorter lengths of thread, this is not ideal due to the nature of the slip stitch you are about to sew. Adding too many anchored points will cause the thread to restrict the natural fluidity of the tie (you will see what I mean in a moment!).
Begin stitching by anchoring the thread at one end of the tie:
Create a large and loose slip stitch all the way along the seam (I allowed the thread to travel up the silk 1/2″ between each stitch). See the list of tutorials above to learn how to slip stitch. Be very careful when stitching to avoid stitching into the front of the tie!
To end your stitching you will be creating another anchor/tack – but this time, the first loop of the anchor will not be pulled tight. Leave a loop of thread (as pictured below but about half the size) that you can tuck into the tie. This loop will allow your slip stitch to adjust in tension as the tie is worn and rolled over time – it will seem strange to leave your hand stitching so loose and seemingly fragile, but it is very necessary when trying to achieve a fluid tie.
Now it is just the finishing touches left! Press the keeper loop flat and tack each side to the back of the tie.
Bring your thread and needle down through the inside of the tie to stitch on the garment tag. Make tiny stitches along either short edge of the tag.
Your tie is complete! Give it a final gentle press and examine your work: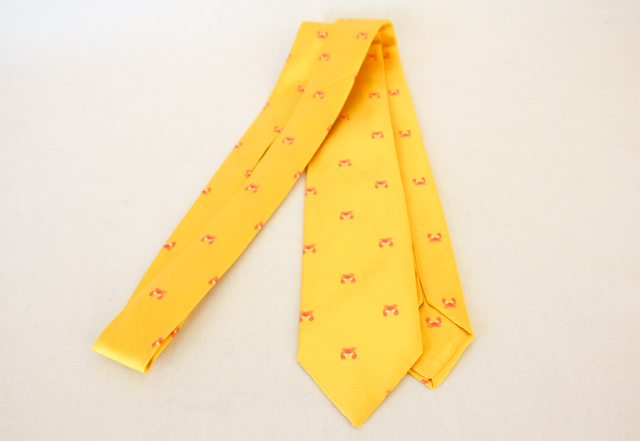

Before giving it to the wearer, fold the tie in half and roll it gently – this will allow the bias cut fabric to settle smoothly so that it is not stretched in any off-kilter sort of way. Your loose stitching and anchored loop of thread will have a chance to work while you do this!
I hope this tutorial saves you a lot of time researching before you embark on tie-making! Have you tried making a tie in the past? What resource or tutorial did you find most helpful? Did I miss any key resources during my research?