Tailored Peacoat Series: #2
![]()
Today, the second day of our Tailored Peacoat Series, Dana is walking us through a couple minor changes to the front patch pockets. She will also be discussing the use of hair canvas to interface the coat front. Okay, lets get right into it:
The Front Patch Pockets
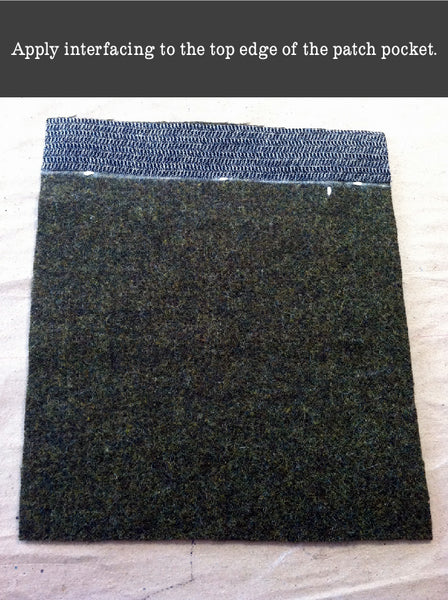
The only change I made to the pockets was to fuse a piece of interfacing to the top of the pocket (the part that will be folded over to the back). It will keep the pocket from stretching (this is a great tip, especially if the wearer likes to shove their hands into their pockets quite often). I used weft interfacing.
I basted around the edge of the pocket, making sure the lining rolled to the inside. I also did this for the pocket flap.

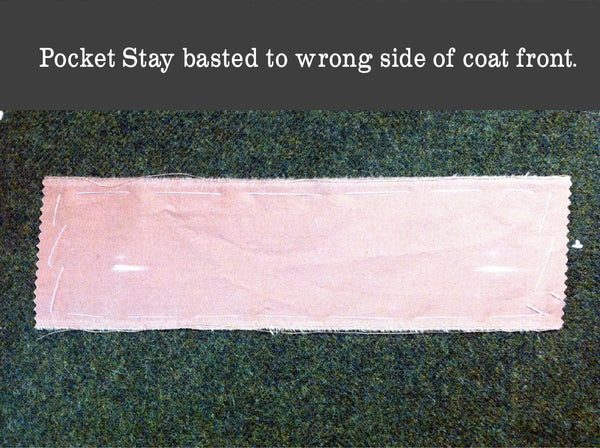
Using the placement markings for the top of the pocket as a guide, I basted a piece of pocketing (I used washed quilting cotton, but there are pocketing fabrics and Silesia out there) on the wrong side to act as a stay for the pocket (Definition: A stay is a piece of material applied to the wrong side of the self fabric to provide extra strength and resilience. An example that is commonly visible in ready to wear clothing is a button sewn to the inside of a garment at the same time as the exterior button is sewn. When used, the button will be pulling on the inside button rather than stretching out and damaging the self fabric). The stay fabric should be about 2” wider than the finished pocket and 3” tall. Position it so it will be behind the flap but still low enough to catch the top of the pocket.
I basted the pocket in place before slip stitching the edge down, then top-stitching. Yes, I do LOTS of basting.
Applying Canvas/Interfacing
In a hand tailored coat, the interfacing is attached to the coat front, not the facing. I used hair canvas for interfacing. You can buy premade coat fronts, or make your own. If you buy one, I’d recommend getting a few sizes bigger than the coat you’re making, so you know it will be big enough. (You can find this one in the Goldstream Tailoring Supplies Kit or you can buy them individually at B. Black and Sons.)
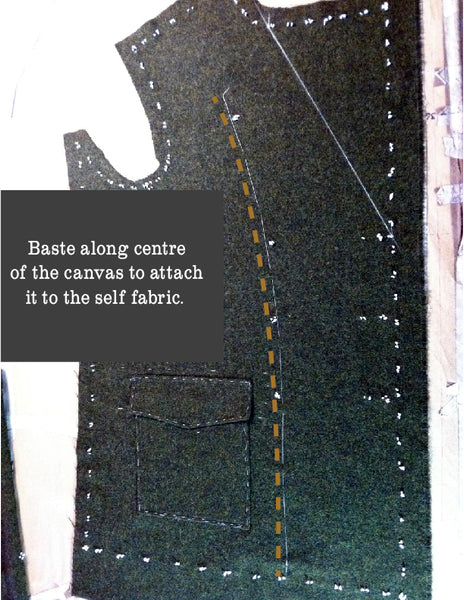
Lay the coat front on top of the canvas, and baste in the center of the canvas, making sure you leave space at the top for the shoulder pads, and don’t extend beyond the hem line.
Baste along the front edge, about an inch from the roll line and across the bottom, and at the far edge of the canvas and about 2” away from the armscye so you have room to set the sleeves.
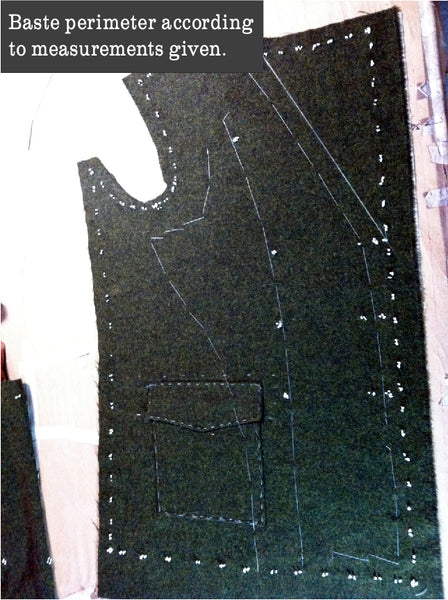
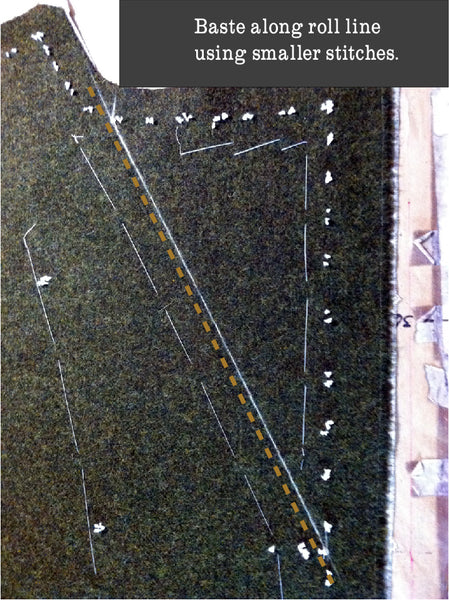
Next, baste the roll line, taking smaller stitches so its easier to see the line from the back of the coat, and baste the lapel. If the canvas extends beyond the fabric in any places, trim it so they’re even.
To pad stitch or not to pad stitch; that is the question (Gertie has written a tutorial on pad stitching as part of her Lady Grey Sew-Along). On a suit coat, you would pad stitch the lapel, shaping the wool and canvas so the lapel rolls and sits nicely on the finished suit. Overcoats, however, are often designed with the lapels to be worn open or closed, and if both sides of the lapel will be visible, you don’t want the stitches from pad stitching to be seen. If you know the lapels will always be worn open and want to pad stitch the lapels, go for it.
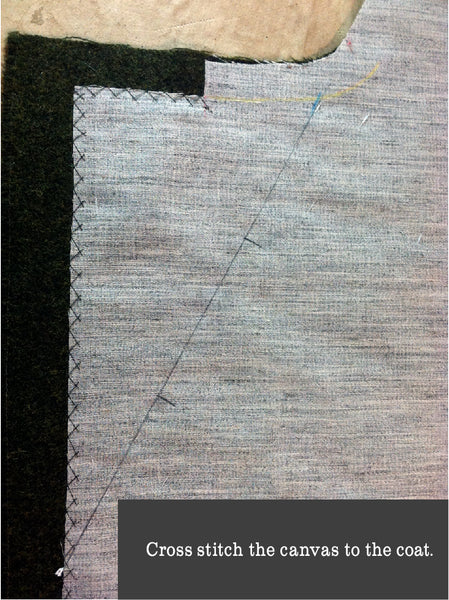
Trim the canvas even with the edge of the front and hem (here’s where knowing exactly where the edge is comes in handy), stopping at the notch for the collar. Cross stitch (also called catch stitch) the canvas to the coat.
Why didn't I tape the front edge? Taping the front edge keeps it from stretching, important if you have any curved edges, and makes a nice crisp edge. However, coupled with heavy fabric, it creates extra bulk, and the top-stitching will reinforce the front edge.
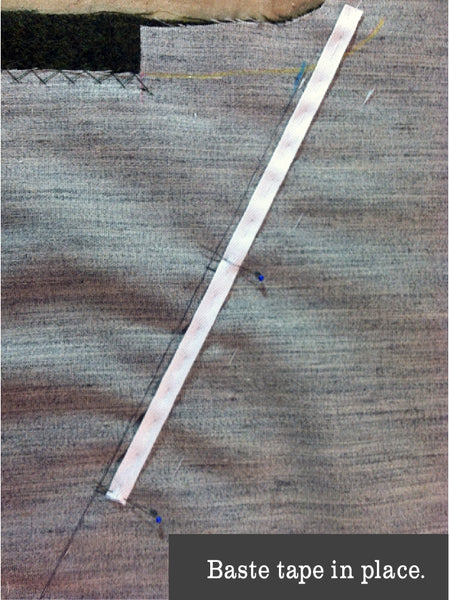
In the last picture, you can see that I divided the roll line into thirds in preparation for taping the roll line. I used 3/8” cotton twill tape. Please use cotton tape, not that poly stuff sold in packages. It doesn't respond well to a hot iron and lots of steam. Pin the end of the tape 1/3 of the way from the front edge, mark the 2/3 spot, then pull the tape 1/4" to 3/8” past the mark, then lay the tape flat along the rest of the roll line. There should be some rippling in the coat.
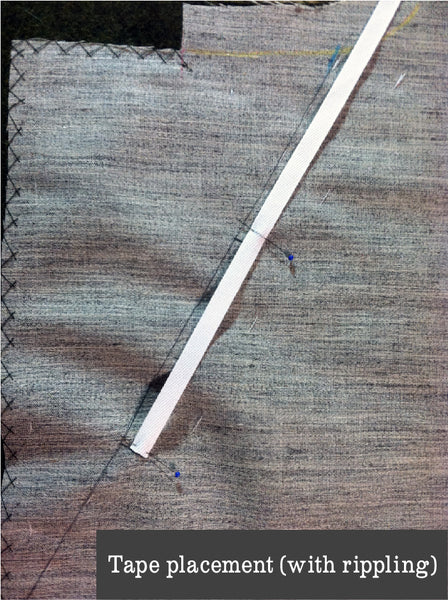
Baste the tape down, easing in the excess.
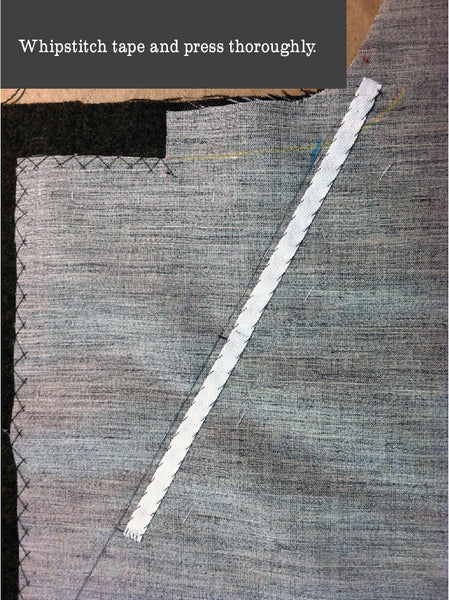
Whip stitch the tape down, catching only the canvas, then press the crap out of it (Nicely said Dana :P). The ease will press out, and the tape will keep the roll line snug against the wearer.
And that's it for today's lesson! Tomorrow we will move on to sewing the facing and the lining. I meant to remind everyone last post, but forgot so will remind you here instead: We have an Encyclopedia Peacoatica that was compiled by us from your wonderful contributions a couple months ago. It's a great place to go to find links to resources when planning to start your Goldstream Peacoat!