

Sew-along with us!
Perhaps you'd like some company while you sew? We've sewn up each of our patterns and photographed each step along the way. Find the pattern you're after in the filter drop down below left.


Sew-Alongs
Strathcona Tee Sew-Along: How to Sew a Men's T-shirt

Here we are, ready to sew a knit t-shirt! This post will go step by step through each moment of sewing a men's knit t-shirt using a basic sewing machine with a zig zag stitch.
Are you ready to sew? It won't take long!
Preparations
- Keep in mind that the Strathcona Henley has 5/8" seam allowances on all seams. Some t-shirt patterns may have smaller seam allowances than this - make sure to check your pattern!
- Insert a ballpoint needle into your machine and test your stitch style (check out this post if you are wondering how to choose a stitch style)
- Reduce the pressure on your presser foot if your sewing machine provides this option - if you are unsure whether it does, make sure to take the time to check your manual. Reducing the pressure will make handling your knit fabric much easier since it will not become stretched out as you sew.
- Whenever you start sewing a seam, start with the needle in the "down position" so that it is lowered into the fabric. This will reduce the risk of the first needle motion punching the fabric into the needle plate of the sewing machine.
Sew the Shoulders
If your knit is quite stretchy, you might like to stabilize the shoulders so that they don't get saggy over time. Stabilizing the shoulders will result in a smart looking fitted t-shirt - this may or may not be your style - you choose!

If you decide to stabilize, you can use rayon seam binding (as seen above), clear swimsuit elastic, a thin woven fabric strip, or even the selvedge of your knit fabric (you will notice that the selvedge isn't as stretchy as the rest of your fabric). The goal here is to choose something that doesn't stretch much and isn't very bulky.

Place the t-shirt front and back with right sides together. Place the stabilizer along the wrong side of the back of the t-shirt. You will notice that the back shoulder is wider than the front shoulder - it is drafted this way to accommodate for men's muscular and rounded shoulders! Stretch the shirt front to match the shirt back at the shoulder seam as you sew.

If you are using a very a stabilizer that does not allow any stretch at all, you might as well use a straight stitch for this seam. The shoulder seams do not need to stretch and they are quite visible so a tidy straight stitch can produce an attractive seam. If you choose to use an elastic or knit selvedge as a stabilizer you will still want to use a stretch stitch since all of your materials contain stretch!

Press the seam allowances towards the back to cover your stabilizer (it is also possible to press your seam allowances open if you would like to reduce bulk).

If you would like, you can finish your seam allowances using another row of zig zag stitching. This will stop any potential fraying (which may or may not occur depending on the style of knit you choose).

Trim the 5/8" seam allowance to reduce bulk.

Sew the Neckline
Now that the shoulder seams are sewn, you will have a neck hole that is ready to finish with binding!

With right sides together, join the narrow edges of the neckline binding. Sew this using a straight stitch (this short seam doesn't need to stretch either).

Trim the seam allowance and press the seam allowances open.

Finish preparing the binding by folding it in half lengthwise so that the raw edges meet. Press along the folded edge.

This is what your finished neck binding will look like:

Arrange the t-shirt body with right sides facing you. Place the binding circle on top of t-shirt, alight all of the raw edges. I like to match the binding seam to one of the shoulder seams but you could also align this seam with center back if you prefer.

If you are using the Strathcona Henley pattern, ignore all the notches on the neckline binding (they are intended for the Henley variation of the pattern). Pin the binding to the neckline so that it is stretched evenly around the neckline - it might take some fiddling to get this evenly stretched. I tend to use 8 pins spaced evenly.
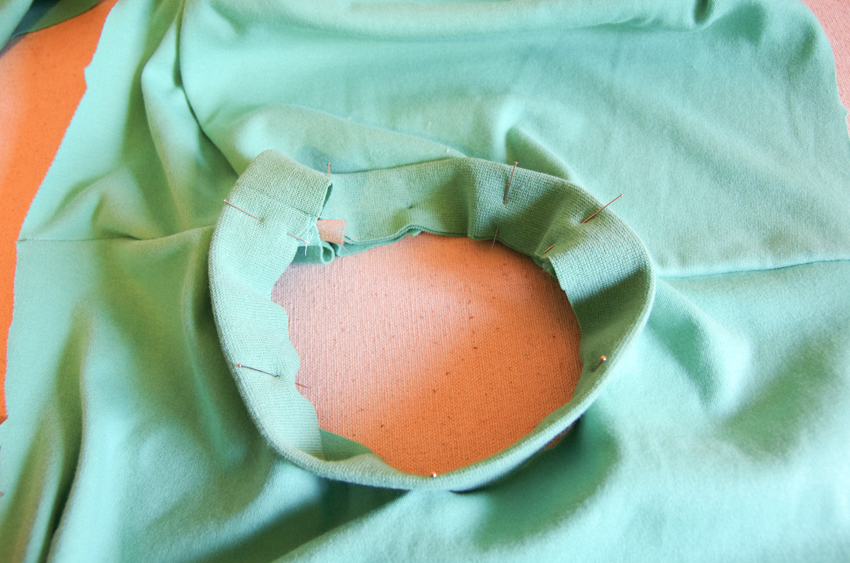
Stitch the binding to the neckline using a zig zag (or other stretch stitch). I used to place the t-shirt with the binding facing up on the sewing machine but recently switched my technique. I now place the t-shirt facing up and stretch the t-shirt with my fingers as I sew. Try out both ways and see what works best for you! I find that my new method reduces the risk of creating little tucks in the t-shirt neckline (they are super annoying to stitch rip!!!).
Press the finished neckline.

If you would like, you can finish the neckline by adding a line of stitching around the shirt 1/8" from the neckline seam to lock the seam allowance in place. I used a zig zag stitch here but you can up your game for really professional results by using a twin needle (or you can skip this step altogether if your fabric presses well and you don't think your seam allowance will tend to flip upwards - I often avoid stitching when I am sewing with crisp and thin cotton jerseys but find it is necessary when sewing with thicker cotton interlocks).

Trim the neckline seam allowance:

I like to trim from the shirt side so I don't risk snipping into the shirt!

Sew the Sleeves
Place the t-shirt and sleeve with right sides together.

Line up the shoulder seam with the middle sleeve notch:

Place a pin where each notch meets.

The double notches indicate the back of the garment.

Sew the sleeve seam using a zig zag stitch (or other stretch stitch). You will need to adjust often (with the needle down so that the fabric doesn't slip out of the way) to avoid creating any tucks and wrinkles.

Finish the sleeve seam allowance with a second row of zig zag stitching and trim.
Press the sleeve seam. In the Strathcona instruction booklet I recommend to press the seam allowance towards the sleeves - this is the classic direction to place sleeve seams (as seen on tailored garments). Lately I have been finding that pressing the sleeve seam allowances towards the garment and away from the sleeve produces a smoother seam more reminiscient of store bought t-shirts. Try both ways to see which way fits best on the recipient's shoulders! Press the sleeve seam on a tailor's ham or on the narrow curve of the end of an ironing board so as to keep the rounded shape of the seam.

Sew the Side Seams

Pin the sleeve and side seams - make sure that the underarm seam meets. Stitch using a zig zag stitch or other stretch stitch.

Finish the seam allowance with another row of zig zag stitching and trim the seam allowance.

Press the seam allowances towards the back - your shirt is almost finished!

Sew the Hems
You can finish the hem as you normally would - by pressing the raw edge up and then pressing upwards again - but you might find that this creates too much bulk for your knit t-shirt to sit nice and casually (it could look fairly stiff with a thick hem). Alternatively, you could finish the edge by pressing up once at the hem notch:

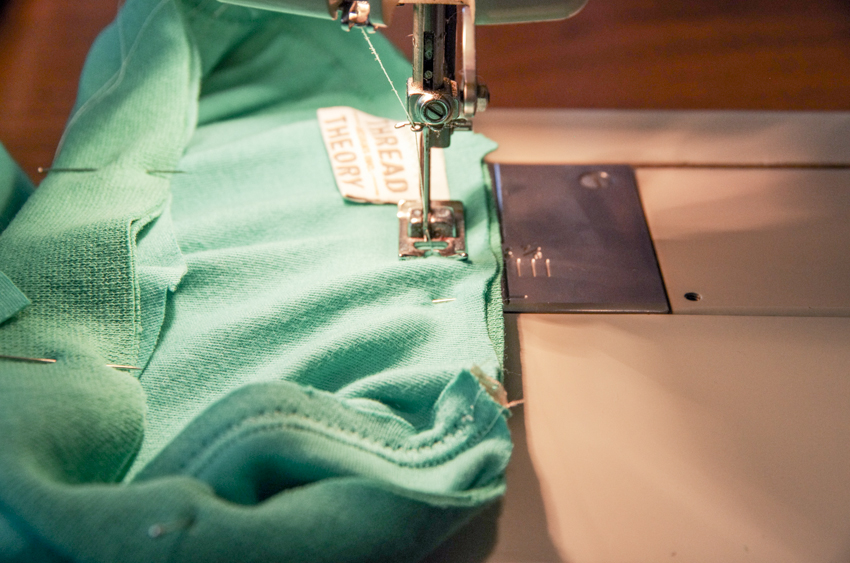
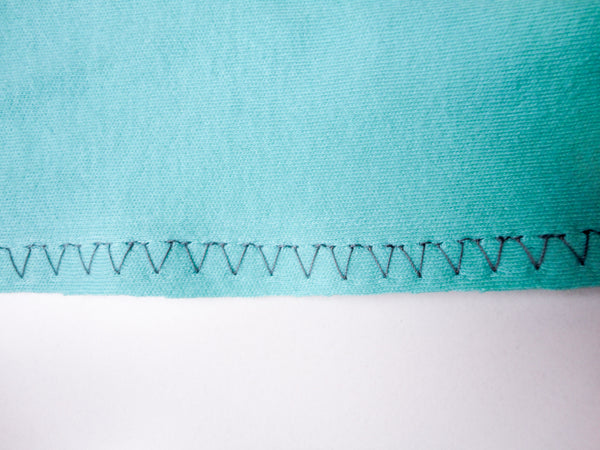
Once pressed and pinned in place, stitch the single layer hem in place using a twin needle, or, as photographed, with a simple zig zag stitch. Try your very best to keep the knit relaxed - refrain from stretching in any way!

Repeat this hemming step for the sleeve hems.

And that's all there is to it! A nice basic, classically shaped crew-neck menswear t-shirt is ready to wear!
I hope your t-shirt has turned out well! I will be sharing a blog post on Friday featuring Matt in his finished t-shirts - he's thrilled to have fresh basics added to his closet!
If you would like to share your Strathcona T-shirts (or any other t-shirts that you sewed while following this sew-along) please use #strathtee so we can see the results!
Strathcona Tee Sew-Along: How to Sew with Knits
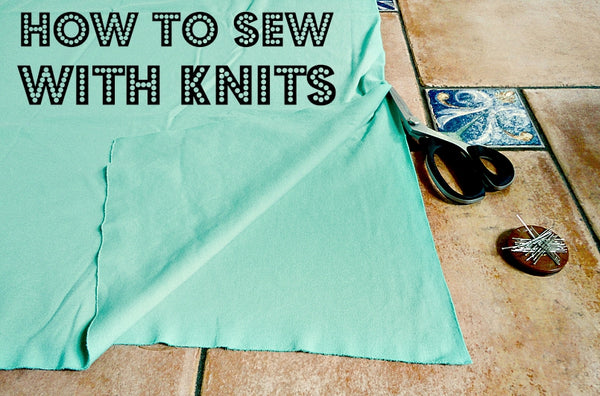
Welcome to Sewing with Knits 101! I've written a Question and Answer post featuring the main questions that weighed heavy on my mind when I first began to sew with knits. Judging by the emails we get about sewing with knits, these questions are also worrisome to many of you! I hope this post will answer them so that you feel confident to get sewing:
Will my machine sew knits?
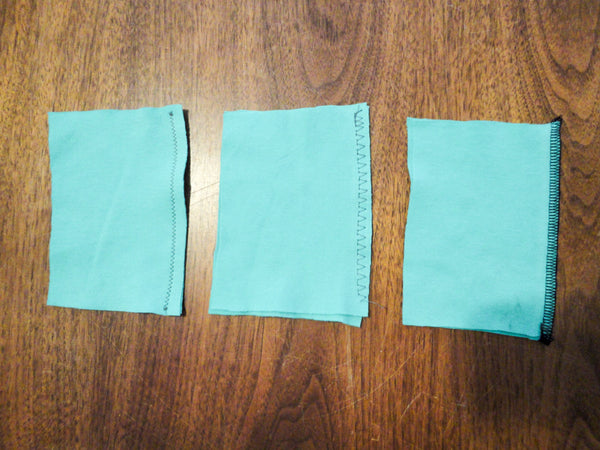
- Three machines, three stitch types: A basic machine with a zig zag stitch, a fancier machine with a "stretch stitch" and a four thread serger.

If you have a basic sewing machine featuring several stitch styles:
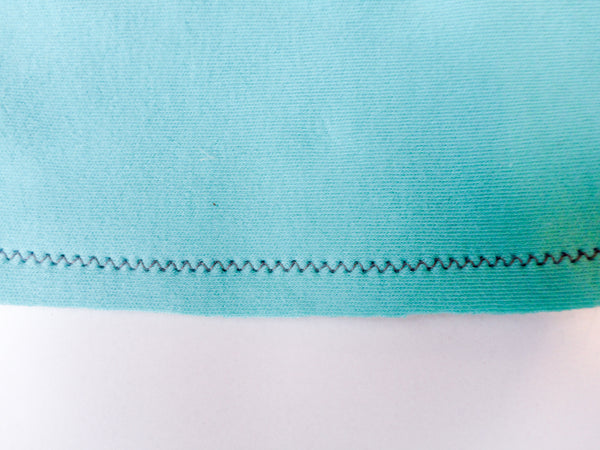
A small zig zag stitch sewn with a regular ol' domestic machine.
Yes! Your machine probably includes a stretch stitch style and will most certainly include a zig-zag stitch. Your goal when choosing a stitch is to find something that will allow the stitches to stretch so that they don't snap when the fabric is stretched (i.e. when the t-shirt is being pulled on over the wearer's head). Test all of the stretch stitch styles to see which one you prefer. I have had sewing machines in the past whose stretch stitch did not allow the fabric to stretch enough for my liking and I found the zig zag stitch was the best choice. The sewing machine I have now has a killer stretch stitch that I almost prefer to my serger because it works like a charm no matter what fabric I am sewing! Once you've found a stitch that stretches to your liking, sew a practice seam and spread it open - do you see thread ladders, bubbles or a tidy seam? If you are using a zig zag stitch the best way to produce a tidy, straight seam is to use a narrow stitch width.
-
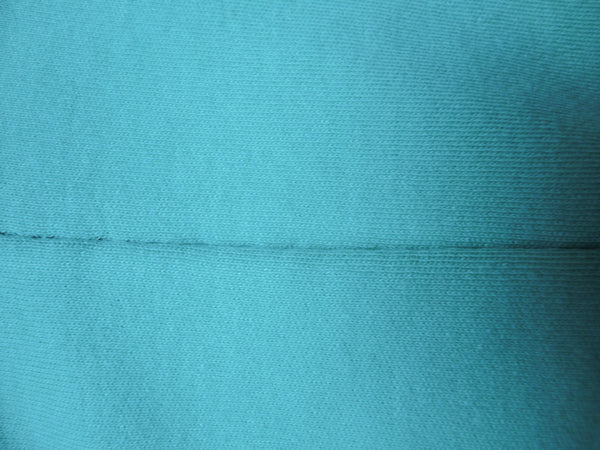
A fairly nice seam with a few small thread ladders visible (these would be less visible if I used a teal colored thread!).

If you have a fancy sewing machine with many stitch styles:
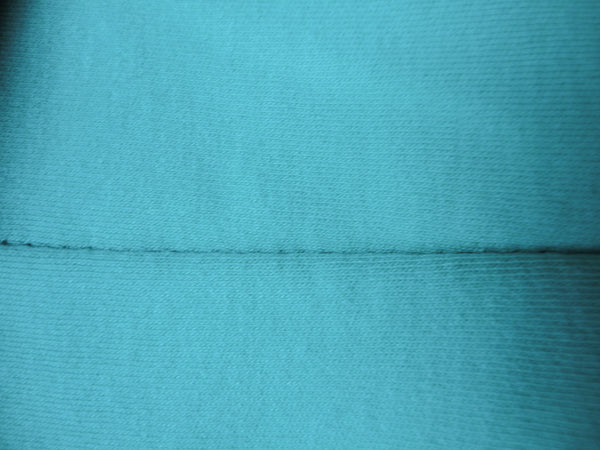
A neat "stretch stitch" option on my fancy old metal Kenmore. There are all sorts of stretch stitch styles so yours might not look exactly like this.
Yes! You are spoiled for choices :). Try out all of your stitch styles to see which one performs best with the fabric you are working with. Thicker knits might sew up nicely with a fancy stitch style that includes many needle holes but you will probably want to avoid this stitch style if you are working with thin and stretchy jerseys. The more the needle punches through the fabric, the more it weakens the fabric - not something you want when your fabric is quite delicate to start with! Of course, you can combat this by using a ball point needle - these round tip needles push past the fabric fibers rather than piercing and breaking them. There is a good chance that your fancy sewing machine came with a walking foot. Now is the time to pull it out! This foot will help to ease the top layer of knit fabric through at the same pace that the feed dogs are pushing the bottom layer through. You will be able to stitch even the most slippery and ungainly knits without distorted seams and rippling hems!
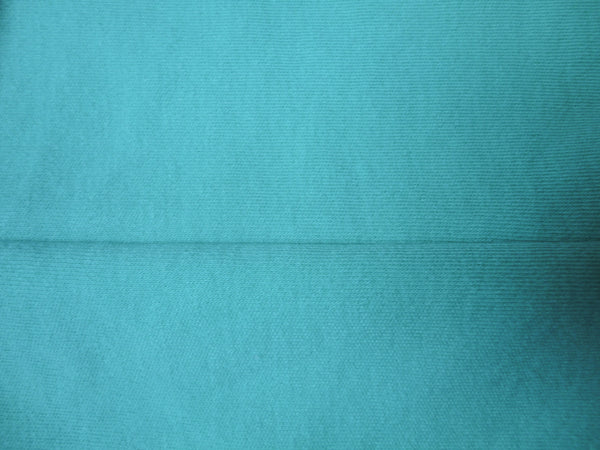
Less visible thread ladders on this seam! I might want to decrease the stitch length though so the gaps appear smaller.
If you have an older sewing machine or industrial sewing machine with only a straight stitch:
While most people would probably say no, I say yes! Just because you only have a straight stitch at your disposal doesn't mean you should avoid knits altogether. The garments you sew with a straight stitch will be more prone to developing holes in the seams if a stitch snaps but you have a sewing machine right there ready to run over any seams again if need be! Besides, if you are gentle when putting on the t-shirt, you can likely avoid breaking any threads. Increase your straight stitch length slightly to allow for a bit more stretch. To finish your seams you could sew another row of straight stitching or choose a knit fabric that isn't prone to unraveling (a jersey for instance) and skip seam finishing altogether!
If you have a serger:
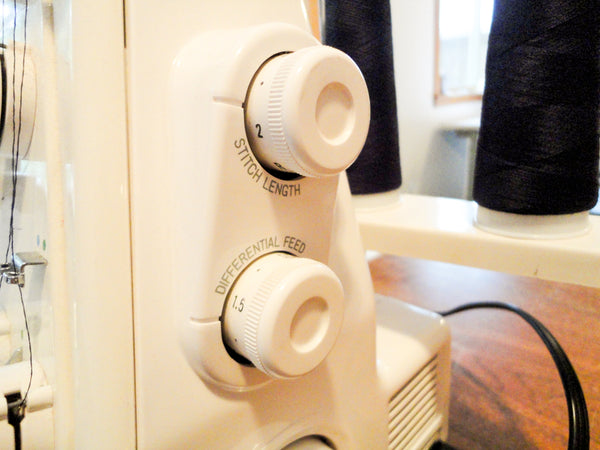
Of course! Sergers are designed to work with knits. Depending on your machine, you can set your threads up to stitch the seam and simultaneously finish the seam allowances or you might stitch the seam using a zig zag stitch and then finish the seam allowance with the serger. One thing to watch out for when serging knits is for stretching or puckering of the entire seam. Below you can see a stretched seam on the left, a puckered seam on the right and a nice straight seam in the middle. To avoid puckering or stretching, play with your differential feed knob and a few fabric scraps each time you start working with a new knit fabric.

The serged seam - my favorite of all the seams!
My knit fabric won't cooperate while I cut out my pattern - do you have any tricks?
Trick #1: Cut on the floor
You won't have to worry about your knit slipping off the table as you cut if you spread your fabric out on the (clean) floor. If you have a large table that allows you to cut with your entire fabric spread out flat, this will work even better!
Trick #2: Cut out a single layer of fabric
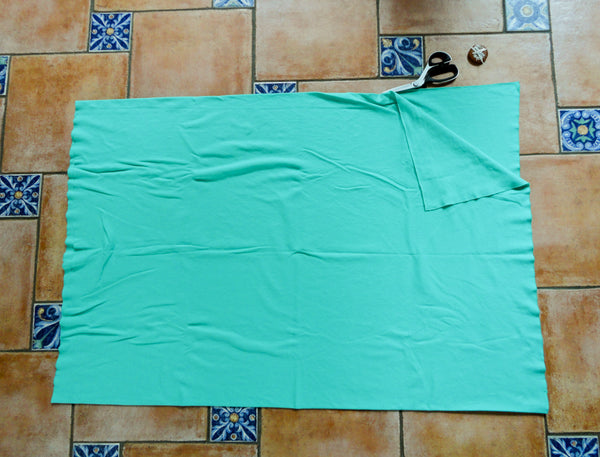
If your knit fabric was knitted in the round (as is commonly the case), you will need to cut the tube along the grainline so that you can spread out your fabric as one layer.
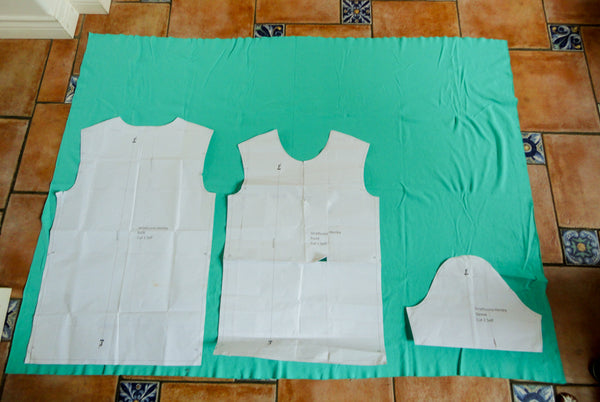
While most sewing patterns ask you to cut out your pattern pieces with your fabric folded in half (with the selvedges together) it is more accurate to cut out knit garments using a single layer of fabric. Working with a single layer will allow you to ensure the knit is completely flat (without folds and ripples) and isn't stretched/distorted in any way. If you have a pattern piece that is supposed to be cut "On the Fold", trace the other half of the pattern piece so that you have paper pattern pieces representing the entire front and back of the garment and do not need cut along the folded fabric edge.
Remember, if you need two of one pattern piece it will need to be mirrored! For example, if you are cutting out sleeves, cut out the first sleeve with the pattern piece right side up on the fabric. Cut out the second sleeve with the pattern piece right side down on the fabric. This will result in two mirrored sleeves (a right and a left sleeve).
Don't forget to cut mirrored pattern pieces!!!
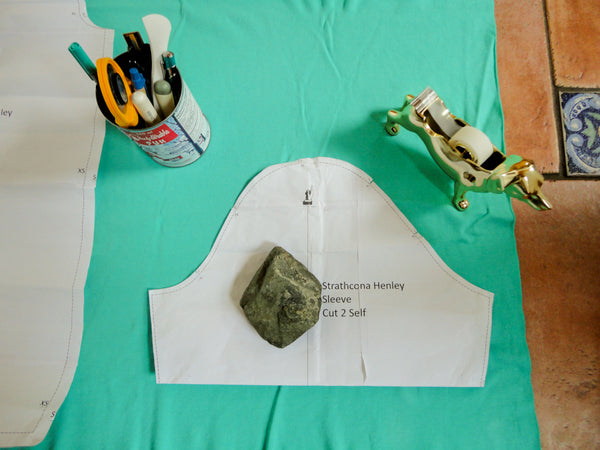
Trick #3: Use weights
Place heavy items (rocks, soup cans, pattern weights) on your pattern piece and on the fabric around the pattern piece. Weighing everything down will help to combat the shifting of your scissors so that the fabric stays in one place and un-stretched as your scissors move along the edge of the pattern piece.
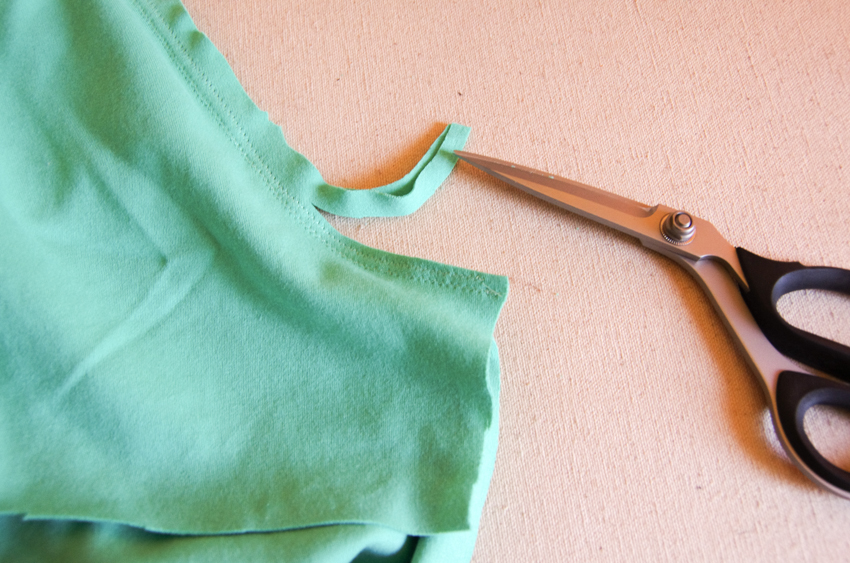
Trick #4: Use a rotary blade or slide your scissors
It is important to cut extra carefully when working with knits because the scissor's movement can easily pull the knit fabric out of place resulting in jagged edges or misshapen pieces. A rotary cutter eliminates any issues caused by scissor blade movement. If you are using scissors to cut, slide the bottom blade of your scissors along the floor or cutting surface and move the top blade up and down. This can be tricky to get the hang of but it will result in much more accurate cutting!
I want my t-shirt to be the best that it possibly can be! Do you have any tips for cutting out the pattern pieces?
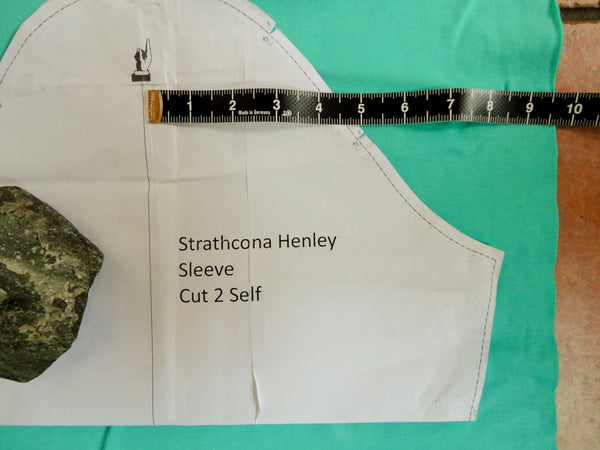
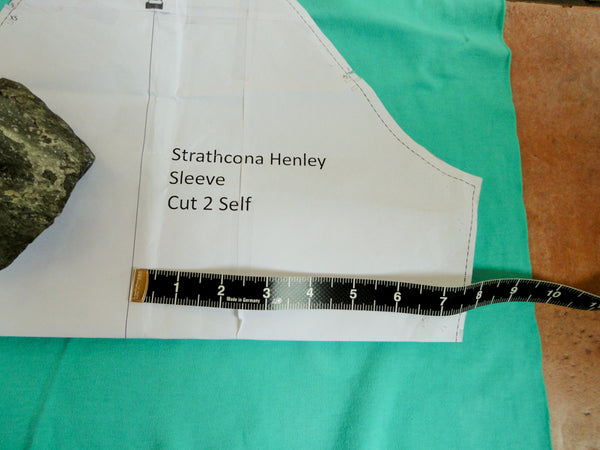
Tip #1: Keep the direction of greatest stretch in mind when placing pattern pieces
Double check (or triple check!) that you are laying out your pattern pieces so that the direction of greatest stretch runs around the body (rather than up and down the body). If you cut your pattern pieces so that the stretchiest direction of the fabric is vertical along the body your knit garment will stretch and sag out of shape. When cutting out the neck band for a t-shirt, you have a couple of options for placing your pattern piece on the fabric. If your knit fabric is especially stable and you are worried that your neck band won't be stretchy enough, place your neck band fabric on the bias (at a 45 degree angle to the grainline). If your knit fabric is sufficiently stretchy, place your neck band so that the longest edge is aligned with the direction of greatest stretch (and the narrow edge is aligned with the grainline). This will allow the neck band to stretch around the neck to help to retain the shirt's shape.
Even though your pattern piece might indicate cutting the binding on the bias, use your judgement based on what type of fabric you have chosen. This neck binding is being cut out with a stretch ribbing so there is plenty of stretch available when I place the long edge of the binding in line with the direction of greatest stretch. If you were using a very stable knit, you might consider cutting the piece on the bias to create more stretch!
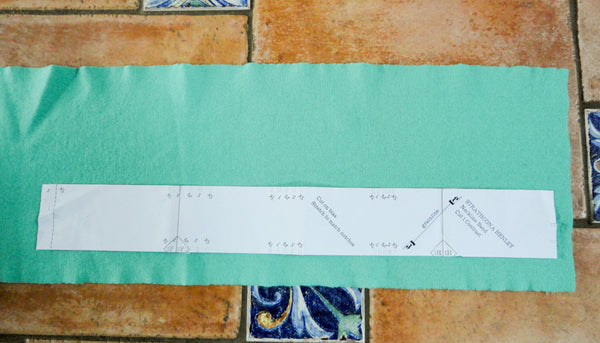
Tip #2: Ensure your pattern pieces are completely on grain
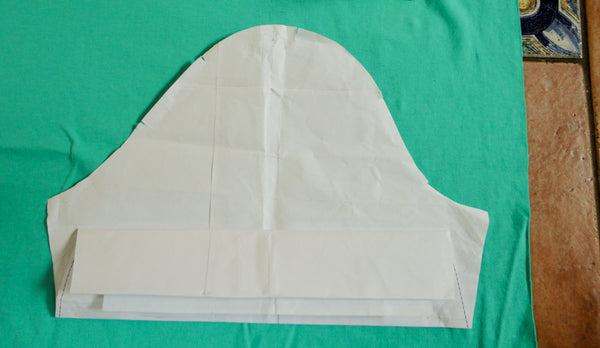
Cheap store bought t-shirts often have a very obvious problem - they twist around the body as you wear them so that the side seams are angling towards the front and back. This twisting problem occurs because the grainline is not running vertically down the shirt front and back, instead, it is on an angle. When the manufacturers cut out the fabric they stacked many, many layers of knit and then sawed through them to cut out the pattern pieces. Either the blade of the saw was not sharp enough or the layers of fabric were too thick for the saw to handle, as a result some of the fabric layers (likely the loose ones on the top and bottom of the stack) shifted as the saw cut resulting in twisted, off grain pieces. Don't replicate this common problem while sewing your custom t-shirt! Place your paper pattern piece on the fabric and measure from either tip of the grainline to the fabric selvedge to make sure that the grainline is aligned to the selvedge evenly (pictured below).
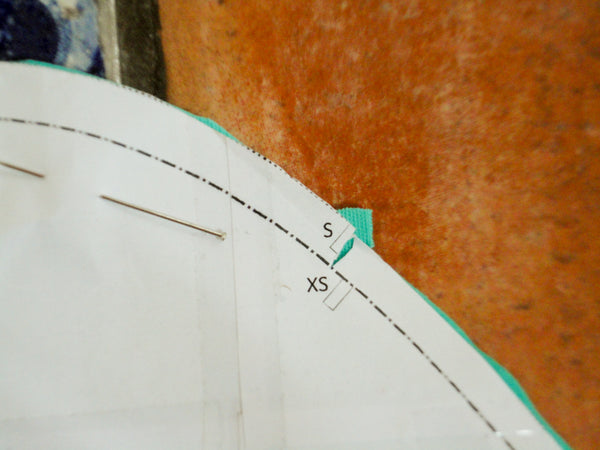
Tip #3: Cut notches outwards
Knits can be prone to 'runs' just as you might see on a knit stocking. Cutting notches inwards as you might normally do when cutting out a pattern weakens the seam allowances of the garment. As you wear and wash the t-shirt you might be horrified to notice that your t-shirt is unraveling at the seams where you cut your notch! Instead of cutting notches inwards, cut little triangles of fabric outwards. If you prefer not to perform this fiddly cutting technique, you could just mark your notches with chalk or a pencil - easy peasy!
Best wishes while you cut out your Strath Tee! If you take the time now to ensure your machine is operating at full capacity and that your fabric is accurately cut out, the actual sewing of the t-shirt will be a total breeze. Use the #StrathTee to show us the fabric you've chosen and to give us a look at your seam sample progress!
Strathcona Tee Sew-Along: How to Choose Men's T-shirt Fabric

Choosing the perfect fabric is the most difficult aspect of sewing a men's t-shirt! This guide will help to demystify menswear appropriate knits so that you can start the sewing confident that you will end up with a classic and flattering T-shirt.
What makes a t-shirt knit masculine?
To many people, the answer to the above question would be easy - they would say that the knit must be 100% cotton and of medium weight. As you may have already discovered, it can be very difficult to find such a fabric at your local fabric store! I am here to argue that you can make a very manly t-shirt with all manner of knits. Let me prove this to you by showing you some big brand store-bought examples ranging from basic cotton interlock to blended fabrics completely void of cotton!

- 100% Combed Cotton Interlock T-Shirt from Nordstrom - this is a classic choice of fabric that will create a great 'basic tee'.

- 100% Washed/Broken-In Cotton Jersey T-Shirt from J. Crew - this is a very modern and comfortable choice of fabric that will result in a very casual, drapey t-shirt.

- 99% Cotton, 1% Polyester Jersey T-Shirt from H&M - polyester blends are very commonly found in graphic tees or event tees. A blended fabric can include a far higher percentage of poly than this example but it is important to keep in mind that this will result in a 'sportier' shirt, sweat wicking shirt best suited for the gym. A small polyester content will often result in a t-shirt that doesn't wrinkle when it comes out of the dryer or out of the dresser drawer!

- 95% Cotton, 5% Spandex (i.e. Elastane) Jersey T-Shirt from H&M - a fabric with spandex content is best suited for tight fitting shirts that feature areas of negative ease (notice how the shoulders, chest and sleeves in the above example are skin tight). Spandex content will often result in a heavier and more drapey fabric so it will cling to the body in an unflattering way if it is used with a loose fitting t-shirt design.

- 85% Viscose (i.e. Rayon), 15% Wool Jersey T-Shirt from H&M - this example illustrates how fun it can be to experiment with fiber content when sewing t-shirts! If you are into hiking and camping you might be interested to make a t-shirt 'base layer' out of Merino wool. It isn't difficult to find Merino wool yardage and the resulting t-shirt will cost FAR less than fancy base layer garments from outdoor stores!

- 100% Slub Cotton Jersey T-shirt from J.Crew - It can be fund to experiment with textures when choosing t-shirt knits. A slubbed knit can look very rugged and masculine. I find that if a fabric is slubbed and heathered and fairly light weight, it will result in a t-shirt that looks attractively reminiscent of a cowboy's undershirt ;).

- 85% Cotton, 15% Linen Jersey T-Shirt from H&M - this is another great example of a creative blend of fibres. You can also look for Cotton/Rayon knits (quite drapey) and Cotton/Bamboo knits (very soft and smooth) when choosing menswear t-shirt fabrics!
As you can see, most of these shirts feature medium weight fabrics with little drape and minimal stretch. It is interesting to note that the only shirt containing spandex content features a much tighter fit than the other shirts. Since spandex content is becoming an increasingly common element in knit fabrics, it is good to know that a masculine t-shirt can still be produced with the spandex-laden fabrics found all throughout fabric stores.
Aside from fabric content, it is important to note the style of knit. An interlock knit is stiffer and has less drape than a jersey knit. I find that if I am in doubt about the suitability of a fabric for menswear (especially if I am choosing a printed fabric), I will err on the side of caution by using an interlock rather than a jersey.
Check your closet!
So now that we've determined that there is a surprisingly large range of acceptable fabric types, we must narrow things down by keeping the prospective wearer's preferences in mind! The easiest way to do this is to open up the recipient's closet and look at the t-shirts that are already there. Are they mostly of medium weight? What do the fabric content labels say? Do many feature unusual textures and graphics? Are there a broad selection of styles or does the person favor one type of fit?
Here are Matt's favorite t-shirts as an example along with why they are his favorite:

He has had this free event t-shirt for MANY years and it is only just now beginning to show wear. He loves that the hems do not fold up and wrinkle as many of his t-shirts with less polyester content tend to do. The weight is quite heavy compared to some of his more 'fashionable' t-shirts but the polyester adds a bit of fluidity to the fabric so it doesn't look too crisp and so that it forms to his body just enough to be flattering.

He wears these v-neck H&M t-shirts often because he likes the fit of the sleeves and the v-neck (and the selection of bright colors). He wishes that the fabric were slightly heavier because they tend to show a bit of nipple!

While he wears these Armani t-shirts often, their tendency to wrinkle bothers Matt. The sleeves are always folding up and the narrow neck binding makes them look a bit misshapen. These shirts were designed as undershirts rather than t-shirts and the fabric is even more light weight than the H&M t-shirts due to this. Matt requires all of his clothes to be suitable for mulitple purposes so a thin t-shirt meant ONLY for use under button-ups does not suit his wardrobe.

This is Matt's favorite Strath Tee! It is made using a Girl Charlee knit that is no longer available. I think it may be a blended cotton/poly knit. It doesn't contain very much stretch and it is of light to medium weight (a touch heavier than the H&M tees). Matt gets compliments on the print CONSTANTLY and he feels really confident in this shirt. I shortened the sleeve length considerably to be the most flattering length for Matt (I will talk about this more in the next sew-along post!). I think that the print suits the crew neck style and might be a touch more wild than Matt prefers if it were on a v-neck shirt.
How thick? How stretchy?
I like to err on the side of thick and not very stretchy but picking fabrics with different properties (thick and quite stretchy, thin and not very stretchy) is still a possibility as we saw in the ready to wear shirts above! Here are the fabrics that I picked for the Strath Tee sew-along. They include:
A 100% Cotton Interlock of medium weight with matching 1X1 ribbing...

A 100% Cotton Interlock of medium weight without ribbing...

A 100% Cotton Jersey of light weight (note that there is no spandex content so this fabric does not contain too much drape)...

A cotton/bamboo blend jersey of light to medium weight (sorry, I don't know the percentages!)...

You can sort of see their relative thicknesses here (the teal and white knits are the same fabric in different colours so I only photographed the white interlock):

And here are their stretch capabilities:

I have stretched each fabric as far as it will stretch without becoming misshapen. None of them are able to stretch very far but I was surprised that the cotton/bamboo jersey stretched farther than the interlock! The cotton jersey stretched least of all and bounced back to its original shape the slowest of the three fabrics.
Do I need ribbing?
As you may be able to tell in the photos of store bought t-shirts at the top of this post, most modern t-shirts do not feature heavy ribbing at the neck band. 1X1 ribbing is the most common choice for modern t-shirt neck bands. 2X1 ribbing used to be a fairly common choice for men's t-shirts in the past (these "Ringer Tees" would often feature ribbing at the sleeve hem as well) but this is no longer the case. In fact, I have recently been noticing store bought men's t-shirts with self neck binding rather than ribbing!

- The Ringer Tee: A light weight jersey t-shirt featuring heavy ribbed bands (from American Apparel).
The advantage of using ribbing to bind a t-shirt neckline is that your neckline will not be prone to stretching out. Ribbed knits spring back into their original shape very quickly. If you can't find matching or contrast ribbing, test your fabric's shape retention abilities by stretching it considerably and then releasing it. Does it revert to it's original shape or does it look a bit saggy and stretched out? If your fabric contains a small percentage of spandex, you will easily be able to skip purchasing ribbing because the spandex performs the same job as the rib knit. If you are using a 100% Cotton knit that is quite crisp, you may find it keeps it's shape tolerably well. If you are using a blended jersey with considerable drape, you will likely find that the fabric is prone to dragging and drooping once it is stretched - you can combat this by cutting your neck band shorter or by finding a ribbing fabric for your neck band.
Can I use prints?
When deciding on a fabric choice, you might be tempted to use crazy prints. While many menswear enthusiasts will urge you away from all-over prints...I say go for it! Here are my reasons why:
- It is next to impossible to find a border style print that you can position just over the chest of the shirt to simulate the appearance of your average graphic tee - believe me, I've tried! If you don't feel like getting crafty with fabric paint, spray paint or screen printing, an all over print might be your only choice.
- It is fun to push boundaries while sewing! A t-shirt doesn't take much fabric or time to create so this is the perfect canvas for edgy print choices. If the recipient is overwhelmed by the print, the t-shirt can easily be made into a tunic dress or a women's t-shirt instead (speaking from experience here :P).
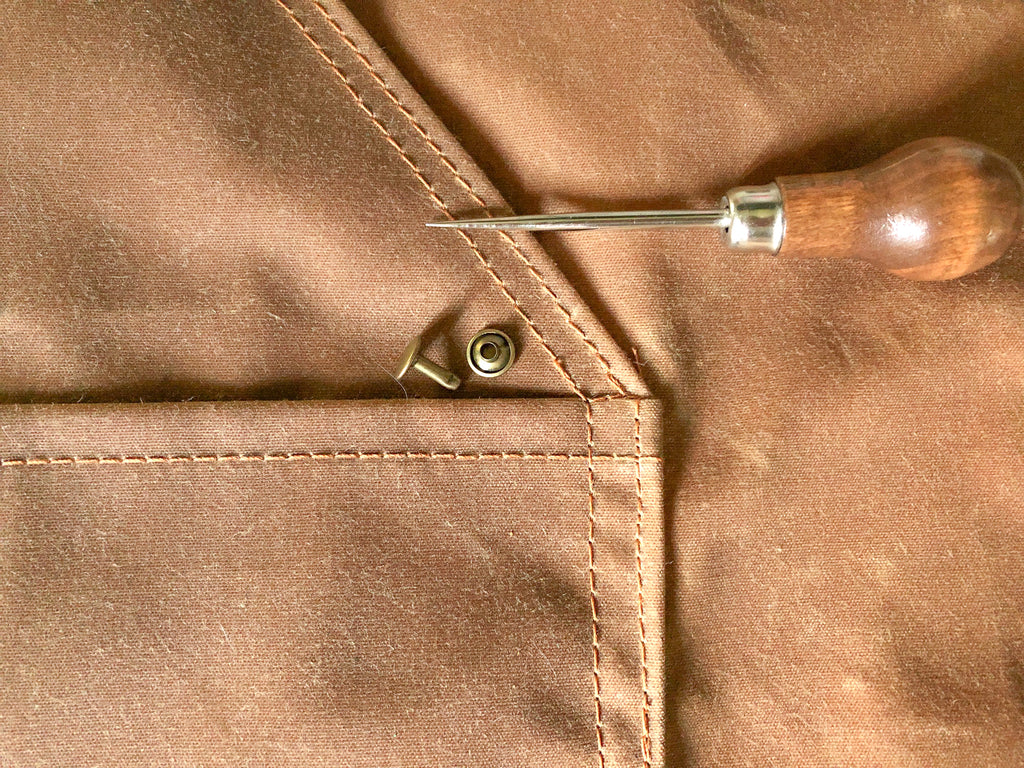
- All over prints are becoming increasingly common in menswear. Here is my favorite example from Canadian company Frank & Oak. I like the idea of adding a solid pocket to the t-shirt to break up the print:

Where to shop:
Since fabric stores are most often geared towards women's fashion, children's garments or quilting, it can be a little bit disheartening to sift through the knit section. I often find myself grumpily pushing aside licensed cartoon French Terry, silky rayon knits, and endless bolts of pastel knits until I am left with only three or four suitable bolts of interlock or jersey to choose from! Luckily, men's t-shirts can be easily personalized using contrast stitching, contrast neck binding or even a contrast pocket if you are faced with a limited selection of colors or prints at your local fabric store.
If you are very limited at your local fabric shop and would like to find better quality or selection online, here is my tried and true list of online knit fabric shops! Each of these shops is a favorite of mine for a unique reason:
Organic Cotton Plus
The quality and selection of the organic knits in this shop are excellent. You can sort the fabrics so that you are only looking at Interlocks or Jerseys and you can even sort so that you are choosing fabrics made within the US! The solid colors available are generally quite earthy and manly but there is also a growing selection of intriguing geometric prints.
Simplifi Fabric
If you are in Canada, you might feel extra limited in regards to knit choices due to the current exchange rates - ordering internationally just doesn't make sense right now! Fortunately, there is no need to look outside of Canada because Simplifi (based in Ontario) carries eco-friendly textiles of high quality. Their knits section is quite large but you will have to sift through a large amount of prints designed for children's garments (which are SUPER cute!). If you sort by fibre, you will find that they have a great base of solid knits including a comprehensive selection of bamboo knits - my favorite!
Girl Charlee
If you are looking for a huge selection of fun all-over prints, this is the place to look! You might want to order swatches since Girl Charlee carries such a huge range of knit styles - it can be difficult to tell how drapey, stretchy, heavy, or good quality they are based on the descriptions alone. Matt finds some of the Jersey Blend fabrics are just as comfortable and light weight and easy to wash (no wrinkles) as his favorite H&M t-shirts.
Gorgeous Fabrics
This is an excellent shop to peruse if you are hoping to create a high end t-shirt in an unusual material. There are some beautiful heathered jerseys and even some merino wool knits. Some of the knits are labelled "Tee-shirt weight" which is useful for our purposes! By the way - knits are 20% off right now! And there are some REALLY beautiful Italian sweater knits in stock; I am super tempted to make another Newcastle Cardigan!
Spoonflower
Aside from being able to design your own printed fabric at Spoonflower, you can also peruse the huge library of other people's designs. Spoonflower can print on an Organic Cotton Interlock knit which would likely be very suitable for a t-shirt and also on a jersey. I haven't ordered the swatch pack myself so don't rely on my suggestions about which fabric type to print on! It is probably best to order a sample pack for yourself :).
I hope you are able to find the perfect knits for your sew-along Strath Tee! Make sure to use #strathtee when sharing your t-shirt progress.
Strathcona Tee Sew-Along: Schedule

While we have quite a few sew-alongs and tutorials on our website, there are a few big gaping holes which really need to be filled! One such hole is a sew-along for the t-shirt version of our Strathcona Henley and T-shirt pattern. Currently, the only tutorial on our site specifically suited to the Strath is my tutorial on sewing the Henley button placket - extremely useful if you plan on sewing the Henley variation but not so helpful if you are sewing the T-shirt!
In preparation for the sew-along, the Strathcona T-shirt and Henley pattern is currently 25% off! The tissue pattern is currently only $15.00 while the PDF pattern is only $8.25. The sale will run until the sew along is over on September 23rd.
Here are the aspects I will cover in this sew along - you will notice it will only take three blog posts to complete (it really is that simple to sew a t-shirt):
Blog Post #1 on Sept 16th
Blog Post #2 on September 18th
Blog Post #3 on September 21st
I hope you will sew along with me! Please don't feel rushed to find fabric in time - you are welcome to start sewing whenever you are ready. Any comments and questions added to these sew along posts will be answered by me indefinitely! Please use #strathtee to share your sewing process and finished tees!