

Sew-along with us!
Perhaps you'd like some company while you sew? We've sewn up each of our patterns and photographed each step along the way. Find the pattern you're after in the filter drop down below left.
Sew-Alongs
Goldstream Sew-along: Styling and Care

Matt wore his brand new Peacoat out on our very rainy Sunday walk so I could snap a few photos.

The conditions weren’t ideal for photography but Matt reported being dry and cosy once he popped his collar!

Matt tended to wear his last Goldstream over a button-up shirt and jeans for a fairly casual look in which the coat functioned as daily wear.

Now that we live in a more rural area though, he says this new coat will be his ‘city coat’ so I imagine it will get worn to dinners out, weddings, on holidays and the like. As such, I hope it will last a couple of decades at least!

To encourage the coat to wear well I have a few plans to care for it:
- It will be hung on a shaped wooden hanger so that it remains crease free and the shoulder pads keep their shape.
- We will be careful to keep the coat hung in a closet with lots of ventilation and space. It won’t be kept in the same closet as our rain jackets and grubby flannel work jackets as this could result in the wool taking on a damp, dirty smell in time.
- I’ll tuck a block of aromatic cedar in one patch pocket to keep moths at bay.
- Matt will spot clean by blotting with a damp cloth when necessary. I’ll also have him brush the coat with a suede garment brush to remove surface dirt and dog hair.
- I will fix any tears in the lining before they get out of hand (speaking of which, I really need to repair the lining of one of my own blazers!).

Hopefully, by writing these care requirements down (and by having Matt look them over), we will commit to caring for this coat as well as we possibly can! After all, the materials are all high end and it was a labor of love. There is no sense in the jacket becoming worn before it’s time.

Perhaps our baby will grow up to wear it one day!
Goldstream Sew-Along: Finishing Details
Today's the day! We have a little topstitching to do, we'll add our buttonholes and we will sew on our buttons. And then, of course, give our coat a very thorough final press before presenting it to it's lucky recipient.
Begin by performing the last bit of topstitching - the most visible topstitching on the entire coat. Stitch precisely 3/8" from the edge of the coat beginning at the hem, up the front to the lapel, around the collar and back down to the hem.

I like to curve the stitching where the lapel meets the collar for an attractive shape. If you keep your stitching straight, it creates quite a narrow angle when you pivot onto the collar, I think the curve looks more natural.
Now it's time to add our buttonholes. Make sure your button and hole placement markings are still 100% accurate (hold the tissue pattern up to your coat front to confirm and also just look to make sure the buttonholes are level with the buttons). Notice that there are three buttons and buttonholes on each coat front (some traditional Peacoats have six holes on one coat front and six buttons on the other but ours are sewn three a side so that the coat can be worn open and still look symettrical and attractive).

Mark the entire length of the buttonhole with chalk so you can trace the chalk line with your buttonhole stitch to ensure that your stitching stays horizontal. Stitch the buttonholes.

I’ve only added the three to close the coat front but you can also add one to the lapel as marked to hold it buttoned open or, as I’ve seen some sewists do, position the button on the opposite side of the coat front so you can close the lapel when wearing the coat in stormy weather.

Sew on the buttons to match the buttonholes. You might like to refer to my tutorial on sewing buttonholes to ensure that your buttons stay firmly sewn on!

If you have sewn the hood, you will also need to sew on the corresponding buttons to the neckline. If you've sewn the epaulets and sleeve tabs, you will of course need to add the buttons for these!
I like to do my most thorough pressing at this point since the coat has been manipulated quite a bit while all the handsewing was performed. Now's our chance to make sure it looks crisp and fresh for years to come!
On Monday I will be posting photos of Matt wearing his new Peacoat and we will discuss how best to care for a wool coat so that it will last decades.
Congratulations on finishing your masterpiece coat project!
Goldstream Sew-Along: Attach the Lining to the Coat
We've completed our coat exterior, our collar and our lining...now we just need to join all three pieces together!
The method I've used for the Goldstream Peacoat involves some handsewing along the hem of the coat and the hem of the sleeves. I've chosen this method since it is the simplest to wrap your brain around (bagging a lining can be pretty confusing for a first time outerwear sewist) and is a traditional way of inserting a coat lining. If you want to use an alternative method for attaching your lining to your coat, please go ahead! Options could include bagging it (no hand sitching involved! Sew as per this excellent tutorial) or hemming the lining seperately so that it hangs loose in the garment.
Ok, let's get started:

Place the coat exterior and collar together so that the right side of the coat is facing the undercollar.

Line up the notches and pin and baste in place.

Place the coat/collar combo and lining/facing combo with right sides together. Keep the sleeves tucked into the center of the 'sandwich' out of the way of the coat edges. Pin the two layers together so all notches and seams match.

I like to begin my stitching at the center back neckline and work my way to the hem. I then stop stitching and start again at the center back neckline working my way to the other side of the hem. Don't forget to sew one or two stitches at a 45 degree angle at the lapel corners so that it is possible to turn them to create a crisp point.

Grade the seam allowances and clip across the corners.

Flip the coat right side out...isn't this part exciting?! Take your time thoroughly pressing everything. Pressing is incredibly important at this step (and every step) to ensure a professional looking garment.
We are now ready to do some handstitching - we'll tackle the smaller portion of handstitching first by stitching the sleeve hems.

Turn the coat sleeve hem up at the hem notch and press.

Catchstitch the hem in place - don't worry about making tidy small stitches for this step. The main goal here is to keep the wool hem allowance adhered to the outer sleeve so that the folded edge of the hem stays crisp after years of wear.

Turn under the sleeve lining 5/8" and press. Place the lining over the turned up sleeve hem - it will overlap the raw wool edge 5/8". Pin it in place and then take your time slipstitching it. The sleeve could be considered finished at this point. If you would like to match the rest of the topstitching on the coat, you could topstitch 3/8" from the completed hem on both sleeves. I've decided to leave off this topstitching for Matt's version since his will be quite a formal coat.
Okay, we've had a chance to practice our handstitching, let's move on to the hem now and really apply our handstitching patience and skills!

Begin the hem by first stitching the coat and facing together: Position the facing and coat front with right sides together (so you are once again turning this part of the coat inside out, there is no need to turn it inside out completely). You will notice that the facing is angled while the hem is not. Place the raw edges together despite this difference. Machine stitch along the hem at the level of the hem notch which you will find on the coat front and lining pattern pieces.

Trim away the excess fabric and clip the corner thoroughly.

Turn the facing right side out and press. This is where the angled facing comes in to play. Instead of pressing along the seam line, allow the coat front to fall as it wants to so that the hem is a right angle. This will cause the seam line to angle up. Later, when we stitch the lining the fact that the facing is angled will minimize the exposed raw facing edge found on many tailored coats. I wish I had explained this more thoroughly in the instruction booklet as it is quite a nifty bit of simple pattern drafting!

Complete the coat exterior by folding the hem up at the notch (level with the completed facing hem) and press. Keep the hem folded precisely by basting 1/8" from the folded hem...this way you don't need to worry about it shifting as you hand sew.
Catch stitch the hem allowance in place just as we did around the sleeves.

The final step to complete the lining is, of course, to hem the lining material itself. Turn the lining under 5/8" and press. Just as we did on the sleeves, allow the lining to overlap the coat hem 5/8" and pin the lining thoroughly in place. This will be somewhat awkward where the lining joins the facing - tuck the lining corner between the lining and wool layers to find the point where you should start stitching.

Handstitch along the entire bottom of the lining. Once finished, you will notice that the lining seems too long - it wants to form a tuck.

This intentional tuck will allow the outer peacoat fabric to fall smoothly without ever puckering or bubbling at the hem due to the strain of the lining.

Wow! We really are almost done now! On Friday we will add our buttons and buttonholes.
Goldstream Peacoat Sew-Along: Sew the Coat Exterior
Today we sew our coat exterior. By the end of the day you will have a shell to try on! Let's get started:

Bring out your two back pieces and place them with right sides together. Sew the center back seam and press open (don't forget to use a pressing cloth to protect the loft of your wool!).

Now it is time to sew the shoulder and side-back seams. Line up the fronts and backs and pin at these seams. Sew and then press the seams open.

Before we set our coat body aside for a little bit, let's staystitch any areas that may be prone to stretching and becoming misshapen, do this along the neckline, armholes and hem.
Ok, it's time to assemble your sleeves! If you are sewing variation two with no sleeve tabs, simply place the upper and under sleeve with right sides together just as we did with the lining pieces. Stitch along the seams and press the seams open.

If you are adding the sleeve tabs, make sure to do this before stitching the sleeve seams! Sandwich the sleeve tab between the upper and lower sleeves so that it sits between the notches. If your tabs have a wrong side (perhaps the button hole is less tidy on one side), position this against the upper sleeve.

Sew the sleeve seam and then trim the tab allowance to 1/4" to reduce bulk. Press the seams open.

Finish sewing the sleeve by adding two rows of gathering stitches along the top of the sleeve head (just as we did for the lining pieces). Gather the wool ever so slightly.

If you are adding epaulets to your Goldstream, it's now time to baste them on to the shoulders (centered over the shoulder seam, pointed towards the neckline) so that they will be sandwiched between the sleeve and body of the coat.
Ready to add the sleeves to the coat? You might be surprised that working with wool is quite a bit more forgiving than easing the sleeves on the lining!
Place the sleeve and body with right sides together so that the top sleeve notch lines up with the shoulder seam, the other single sleeve notch lines up with single notch on the coat front, the upper double notch with the side seam, and lastly, the lower double notch with the double notch on the coat front. Pin thoroughly and adjust the gathering stitches.

Sew around the sleeve (remember to baste first if you'd like to make it easier to pick out any unintentional gathers). It helps to ease the sleeve (as I mentioned before) if you place the sleeve against the feed dogs of your sewing machine.

Grade the seam as necessary to reduce bulk (best not to grade this area very thoroughly as we want to keep it very strong. The sleeve seams are a point of wear!). Press the seam allowances towards the sleeve.

Let's add a little more structure to our coat now by handsewing some shoulder pads in place. I always recommend trying on the coat to determine shoulder pad placement. If your coat recipient is anti-shoulder pad, gently try to push them towards wearing some by having them try to Goldstream on at this point and slipping some pads in so they can see the effect in the mirror. A tailored coat like this one really needs the structure of a shoulder pad to hang nicely on the body...even if the pad used isn't very thick.

The straight edge of the shoulder pad can extend beyond the sleeve seam allowance slightly to add structure to the seam. Secure the shoulder pads with a few hand stitches to the shoulder seam allowance.
How does your coat look? Everything fitting nicely? If you want to make any last minute fit adjustments, now is most certainly the time - you can take in the center back seam or adjust the length of the sleeves slightly. Just remember to make similar adjustments to the completed lining (which will probably involve a little bit of stitch ripping at the side back seams if you need to take the waist in at all.
On Wednesday we attach our collars and lining to the coat. We've almost finished our masterpiece!
Goldstream Sew-Along: Facing and Lining
Today's a big day! We will be sewing the entire facing and lining for the Goldstream Peacoat. I positioned this process ahead of sewing the outer jacket so that we have the opportunity to practice on more affordable fabric before sewing similar steps with our wool.
Lining

If you chose to add darts to your coat front, add darts to the lining fronts in the very same manner. Press the darts towards the side seam. If your lining material is bulky you can instead press them towards center front so that they are pointed the opposite direction of your outer darts.
The back of the lining features a pleat to prevent any strain across the shoulders (a common spot for jacket linings to rip is where the sleeve joins the back due to strain across the back from full arm movement...a pleat helps to reduce this strain).

Form the pleat by bringing the two notches to meet. There are notches at the neckline and hem. Press the pleats slightly and pin them in place before basting them closed.
The details on the front and back lining pieces are finished so now we can attach them at the shoulder and side seams! Note that I refer to the 'side' seams as 'side-back' seams in the instruction booklet because the Peacoat front actually wraps around the side of the body and the seam where front and back attach is set towards the back on an angle.

Place the front and backs with right sides together. Pin and stitch along each seam and then press the seam open.
Facings

We can now prepare our facings to add to the Peacoat lining. This is where things get fun! I like to get fancy with my facings by adding a label on a decorative backing to the curved back neck facing. This gives the finished Peacoat huge hanger appeal! You can use a contrast scrap of fabric from your stash, a patch of leather or use a square of your lining fabric to create a backing for your garment tag.

If you don't have a garment tag, the contrast square looks beautiful on its own! For a hang loop you could make a narrow tube of wool or lining fabric, use a metal chain or some ribbon or other trim from your stash. Of course, a true tailored coat should be hung on a shaped hanger when stored but it is handy to have a loop to use when taking off the coat at dinner parties and the like.

Place the prepared back neck facing and front facings with right sides together and sew across the shoulder seam. Press the seams open.
Assembling Lining and Facings
Okay, let's add all our lining and facing pieces together! Before we proceed I want to share an idea with you to further customize your Goldstream. At this point you could add piping or bias binding made from your lining as a decorative feature along this seam. I will be adding bias binding (which I made using this tutorial) and you can see the look created with storebought piping in the photo below.

To prepare my binding I've pressed it in half with right sides together.

The binding measures 1 3/4" wide so that when I fold it in half it is 7/8". This way, when I sandwich it between my lining and facing pieces and then stitch using a 5/8" seam allowance, 1/4" of folded fabric is left peeking out.

If you are adding a trim like those mentioned above, you could baste it to your facings right now so that you don't have to worry about it shifting during the next step.
Place the facing and lining with right sides together. Take your time as you pin and align the shoulder seams and the center of the back neck facing with the center for the back lining.

Stitch the layers together - instead of beginning at the lining hem, begin at the notch near the hem. The facing will extend 5/8" beyond the notch.
Clip and grade the seam allowances as necessary depending on the bulk of your lining material and then press the seam allowances towards the lining.

Take a moment to stand back and admire how polished your Peacoat interior looks already!

Now is a good time to staystitch along the neckline, around the armholes and along the hem to prevent them from stretching out as we continue along with the construction process.
Okay, now we continue on with our long chunk of sewing by tackling the interior patch pocket and the lining sleeves!
Interior Patch Pocket

Bring out your interior patch pocket and interior pocket lining pieces. Place them right sides together with the tops aligned. Stitch across but leave a 2” opening to flip it right side out later. Press the seam allowance towards the lining.

Now we must pull down the smaller lining to match the pocket bottom. This forms a facing just as it did for the pockets we sewed for the exterior of the coat. Press at the notched fold line. Stitch around the pocket and then trim the seam allowances and clip the corners to reduce bulk.

It’s time to flip the pocket right side out through the hole! Press it thoroughly and hand sew the hole closed. Now it’s just a matter of applying it to the coat interior!

The pocket will go on the wearer’s left which is the right side of the finished facing/lining combo when it is laid on your work surface right side up. Align the pocket with the placement markings.

Stitch the pocket to the lining in the same manner that you applied the exterior pockets (topstitched and edgestitched or topstitched and handsewn).
Lining Sleeves
Now we need to dig out our upper and under sleeve lining pieces.

Place them right sides together and pin and stitch both long seams. Press the allowances open.

The sleeve must be eased into the armhole. To prepare for this, it helps to sew long basting stitches along the steepest part of the curve. Two rows will create even gathers. Pull these slightly.
I find it easiest to add the sleeve to the lining by placing the sleeve inside the lining with right sides together. There are quite a few notches to line up to make sure we don’t sew our sleeves in crooked. It’s nice to have these as a guide because the side-back seam is a bit unusual!
The top notch on the upper sleeve lines up with the shoulder seam. The other notch on the upper sleeve lines up with the notch on the coat front. The under sleeve have double notches: The top one lines up with the side-back seam, the lower one lines up with the corresponding double notch on the coat front.

Place the sleeve on the bed of your sewing machine and sew while looking at the coat body. This allows your feed dogs to help with easing. I like to do one loop around with a basting stitch, check for any pinched fathers, and then trace my basting stitches with a regular length stitch.

Trim the seam allowances to 1/4” and then press towards the sleeve.

Phew! That was a lot! We gave another fairly big day on Monday because we will be repeating many of these steps while we sew the coat exterior. Practice makes perfect!
Goldstream Sew-Along: Collar and Hood
If you are only adding the collar to your Goldstream Peacoat and will not be sewing the hood, today is a very quick stint of sewing and gives you a chance to rest or catch up! If you are adding the hood, things will be a little more involved.
Collar

Let's begin with the collar. Gather your Upper Collar and Under Collar pieces. Make sure they are clearly marked so that you don't forget which is the upper and which is the under! I like to mark the under collar with chalk or a pin. Both pieces should already be interfaced. Staystitch along the bottom curved edge from notch to notch. This stitching prevents the wool from stretching out while you are working with these pieces so that the finished collar will fit perfectly onto the neckline later.

Place the two collar pieces with right sides together and stitch along the sides and top of the collar using a 5/8" seam allowance. Remember to sew one or two stitches at a 45 degree angle at each point to make sure your corners will look crisp when the collar is turned right side out.

At this point I like to understitch as far as I can along the top of the collar. I open up the collar the best that I can and stitch the undercollar to the seam allowance. This just makes it easier to ensure the seam rolls towards the undercollar when you are pressing and topstitching later.

Grade the seam allowances and clip the corners thoroughly.

Turn the collar right side out and press. You might need to clip into the seam allowance further at each notch so that the raw edges sit flat. You can baste along the bottom of the collar at this point if you would like to keep the two raw edges together.
Hood
On to the hood! Gather your hood and hood lining pieces. The hood features a dart for shaping so let's sew that first. Pinch the dart with right sides together and stitch from the hood edge to the point.

As we did with the front darts (if you chose to sew those), do not backstitch at the dart tip. Instead, avoid puckers by leaving loose strings and then knotting them by hand. Press the dart towards the straight front of the hood. If your lining material is bulky (if it is quilted, for instance), you could press the lining dart the opposite direction to reduce bulk when you sew the hood and lining together.

Place the hood pieces with right sides together and sew along the big curve to complete the shape of the hood. Since this curve is quite exaggerated, it will not press smoothly unless we clip into the seam allowances. Make little notch shapes with your scissors to allow room for the seam allowances to bunch together when the hood is flipped right side out. Press the entire seam open - it helps to use a tailor's ham here to retain the curved shape of the hood but you can also just use the edge of your ironing board and iron small sections of the seam at a time.

Now we'll do the same steps to create our hood lining. Leave a 4" gap though so that the hood can be turned right side out later.

To attach the lining to the hood, place them with right sides together. You'll notice the lining is smaller than the hood because the hood will have a self facing. Make the hood front edges match and ignore the bottom of the hood for now. Stitch around the hood front. Grade the seam allowance to reduce bulk (if your lining is bulky, if it isn't, grading at this step isn't essential). Press the seam allowances towards the lining.

Now we can manipulate the fabric to create our self facing. Match the hood and lining darts. You will notice that, in doing so, the hood wants to fold at the notched fold line. Pin along the bottom and stitch, starting the stitching at the notched fold so that the wool facing becomes part of the inside of the hood.

Our hood is almost finished! Flip it right side out through the hole and press along the hood edge so that the facing is formed. Topstitch around the entire hood (edge and bottom) 3/8" from the edge of the fabric.
Take a moment to handsew the hole in the lining closed or remember to do this later when we perform the rest of our finishing handstitches.

Last up, we can add the buttonholes! This can be done now or saved for when we add the buttonholes to the front of our coat. The holes should be 1/8" wider than your chosen button.
That's it for today! Next post will be a fairly large one as we will make the entire coat lining in one go. Are you ready?
Goldstream Sew-Along: Sew the details
Prep work is finished and it's time to get sewing!

When I wrote the Goldstream instruction booklet I intentionally placed all of the garment details such as the darts, epaulets, sleeve tabs and pockets at the beginning of the construction process. My reason for this was two-fold:
First: They are quite simple things to sew that will give you confidence before moving on to the more complicated aspects of coat making.
Second: Once you have finished sewing these many little pieces your stack of remaining fabric pieces will suddenly seem so much smaller and more approachable!
Darts
So, let's begin with the front darts. You can include these or leave these off no matter the variation you have chosen. Pin the dart so right sides are together along the marked lines. Pin and then stitch from the hem to the dart point.

Instead of backstitching at the dart point, simply stop your stitching and hand tie a knot with the loose threads to reduce puckering. This is not especially important with a bulky wool but if you happen to be using a finer wool (closer to suiting weight) it is a nice touch. Press the dart towards the side seam.

When pressing wool, you will want to use a pressing cloth so as not to flatten the loft of the wool visibly. You might also want to use a tailor's clapper...not everyone has one of these (I don't!) but it is quite easy to substitute a piece of scrap wood or perhaps even a rolling pin in a pinch! Essentially, you want to be able to apply even pressure shortly after giving the area a burst of steam from the iron to encourage the thick fabric to press crisply.

If your wool is very thick and bulky and you notice the transition from three layers of wool at the dart to one layer of wool above the dart point is visible from the right side as a ridge, consider using the method I cover in the Belvedere Waistcoat Sew-Along to trim the dart tip (scroll down to the section on tailoring the waistcoat front to see the method).
Epaulets and Sleeve Tabs
If you have chosen to add the optional epaulets (which are on the shoulders) or sleeve tabs to your coat, assemble each set with right sides together. Stitch around them using the included 5/8" seam allowance.

Grade the seam allowance very small (no more than 1/4") and trim each corner so that it is possible to turn the tabs right side out crisply. When grading a seam allowance, trim one allowance slightly longer than the other so that the two allowances create a smooth slope instead of a ridge. This will reduce bulk and make it easier to topstitch in the next step.
Press the tabs flat and then topstitch 3/8" from the finished edges.

Apply buttonholes to each epaulet and tab to suit the buttons that you chose (make the hole 1/8" wider than the button). You could also wait to add buttonholes until the Peacoat is complete and you have the buttonhole attachment out to add the front buttons...but at that point the epaulets and tabs will be attached to the garment so there will be a lot more material to wrangle.
Adding the buttonholes now will help to reduce the nerves you might feel when stitching them onto the front of your masterpiece later! You'll have had practice!
Patch Pockets
We'll set our epaulets and sleeve tabs aside now and move on to the patch pockets. Gather the two pockets, two pocket linings. Place the pocket and a matching lining together with right sides up and top aligned. You'll notice the lining seems too short - this is because the wool pocket will be folded over during construction to create a built in facing to prevent the lining from peeking out the top of pocket.

Stitch across the top of the pocket part way, backtack and leave a 2" gap before stitching the rest of the way. This will allow the pocket to be turned right side out later.

Pull the lining down to meet the bottom of the wool pocket - this will cause the pocket top to become the notched fold line. Press along the fold line and then stitch around the pocket sides and bottom using a 5/8" seam allowance. At each corner, perform one to two stitches at a 45 degree angle. When you flip the pocket right side out the corners will look more crisp than if you had just pivoted at the corner.

Grade the seam allowances and ciip the corners as we did for the epaulets and sleeve tabs. Flip the pocket right side out and press thoroughly.

We can now add our pockets to the Peacoat front - exciting! If you sewed the front darts, you will only need to refer to the outside pocket placement markings (shown above) as the inner markings are now positioned too narrow for the pocket. They can still be helpful to keep your pocket level though.
If you have not sewn the darts, simply place the pocket atop the pocket markings and pin.
You now have a choice as to how you would like to stitch on your pockets. You can opt for two rows of stitching (topstitching 3/8" from the edge and edgestitching 1/8" from the edge) or you can sew only the topstitching and then invisibly handstitch the edge of the pocket to the coat front to ensure the lining does not peep out. This choice depends on your patience levels and your style preference. Two rows of machine stitching makes the pocket more noticeable on the final garment. One row of topstitching paired with handstitching results in a look that will match the single row of topstitching on the rest of the garment.

I've chosen to do one row and handstitch here!
Pocket Flaps

The last details we will be sewing today are the optional pocket flaps. Gather the two flap pieces and flap lining pieces. Place a flap and matching lining with right sides together. Make sure that you have marked which edge is towards center front as the flaps are not quite symmetrical. They are designed to slightly angle towards the side seam for a jaunty appearance.

Sew around the flap using a 5/8" seam allowance leaving the top edge free. Grade the seam allowances and trim the corners thoroughly and then turn the flaps right side out and press. If you like, you could baste across the top of the flaps at this point to keep the two layers together.

Place the flaps pointed up (with the lining visible) on your coat front with the raw edge positioned 1/2" up from the top of the pocket. Stitch across the flap using a 5/8" seam allowance.

Now we must trim the seam allowance to 1/4" so that it is completely enclosed in the next step.

Fold the pocket flap down and press. Stitch 3/8" down from the top of the pocket flap to enclose the raw edge and to keep the flap smoothly pointed downwards.
Well, there we go, our little details have all been sewn and the pile of pieces yet to approach has rapidly decreased! Next post we will be working on the collar and optional hood. See you then!
Goldstream Sew-along: Preparations
Today we cut into our fabric! But, before we go nuts with the scissors, we need to take some precautions:

First, read through the entire instruction booklet. While I don't state this step explicitly within the instructions, this is an important thing to do before you embark on the Peacoat. If you give the instructions a thorough read you will give your brain time to mull the project over and you will prevent mistakes that might have been made due to assumptions.
Next, prepare your paper pattern pieces. If you are working with the tissue pattern you have the option of cutting out the tissue pieces directly as I have done here or tracing them out so you can reuse the pattern in multiple sizes.

If you are working with the PDF pattern you could get it printed on Roll Feed or A0 paper using an online pattern printing service or at your local print shop. Alternatively, you could print the pattern at home (which is what I do). This is a large pattern with many pieces so if you are less than accurate with your taping or dislike the PDF pattern assembly process I highly recommend getting the pattern printed at the print shop! If you want to print at home, follow along with my tutorial. I happen to love the piecing and taping process, it is somewhat meditative for me.

Pre-treat your fabric as you plan to treat your finished jacket. Since most Goldstream Peacoats will be handwashed, drycleaned or spot cleaned only, you should not wash your wool (it will felt!). This blog post details all the ways you could pretreat your wool depending on the type you have chosen. I usually iron my wool with maximum steam.
Your fabric is ready and your pattern is ready - way to go!
Fold your fabric in half with right sides together. Place you pattern pieces on the fabric as illustrated in the cutting layouts. If you have one of our printed patterns, you will notice that the cutting layouts do not allow for prints and napped fabric. These cutting layouts are the most efficient use of the fabric as pattern pieces are puzzled together closely but some are upside down. If you are working with a boiled wool or some other wool that does not have an obvious 'up' or 'down', use these layouts!


If you are working with a print or napped fabric, our revised cutting layouts and fabric requirements allow for this and are included in the PDF pattern. Of course, if you are trying to pattern match, you will still need to purchase extra fabric and adjust the layouts as the scale of every plaid or pattern is different! Find the original cutting layouts above and the revised layouts below.


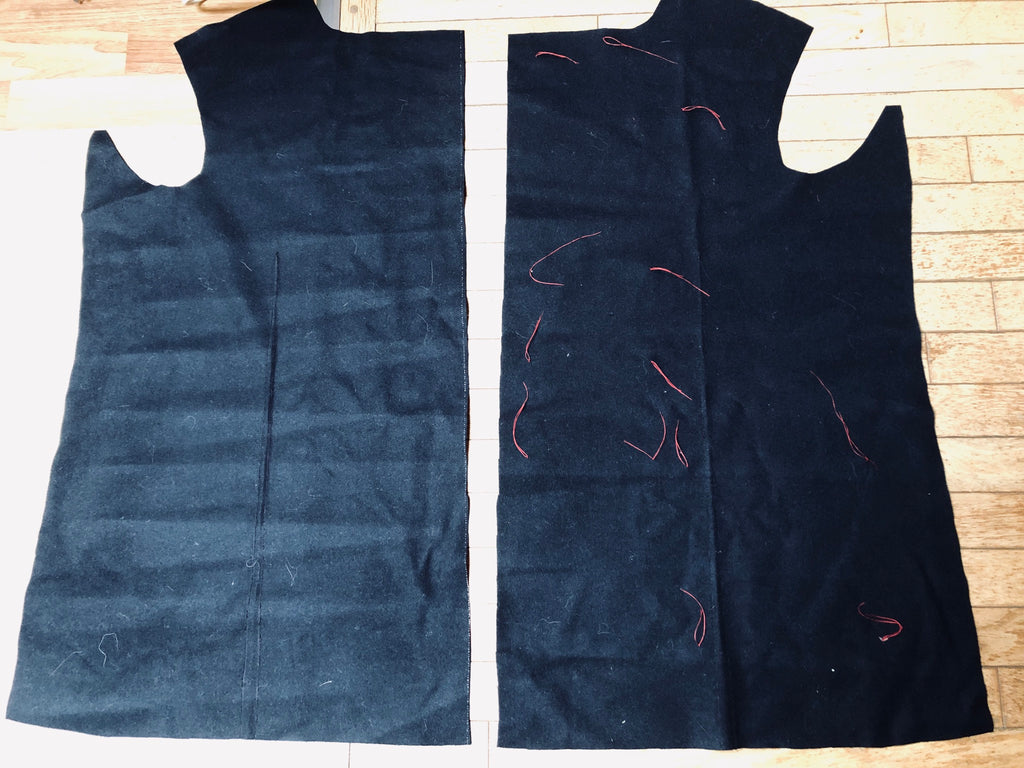
Once your pattern pieces are cut out, keep the paper pattern pinned to the fabric until you decide on how you will mark all of the details. When working with wool, you could use chalk or traditional tailor's tacks. I explain how to create tailor's tacks in the instruction booklet - here are photos to further illustrate the process.

Create a loose loop of thread through the paper pattern and both fabric pieces.

Carefully pull the pieces apart far enough that you can cut through the threads.

You will be left with a tuft of loose threads on both fabric pieces to precisely mark the pattern details. This is a very quick and accurate way of marking two pieces at once but be careful you don’t accidentally rub the threads off while sewing!
Many of you may be tackling the Goldstream Peacoat in short stints of sewing over a long period of time. You are likely folding up your pieces and stashing them away in a bag between each sewing session. Since your fabric will be handled frequently, I would recommend tailor's tacks or chalk for the markings that will be used early on in the sewing process (the darts, sleeve tab, epaulets and hood for instance) but if you use tailor's tacks or chalk for the pocket and button placement markings, the 1-2" strands of thread may work their way free when the fabric is folded and stored away. Since the button placement, in particular, is so important, you could stitch a full loop of thread and then knot it on the right side of the coat front. This will need to be done to each coat front individually so it is a little more time consuming than tailor’s tacks. The knots are worth it though as there is no chance of the marking being lost or rubbed away and you can simply snip the threads off when you go to apply the buttons.
Now that we've marked all relevant construction details on our fabric pieces, it is time to apply interfacing. Fuse or stitch your interfacing within the seam allowances. Add padstitching on large sewn-in interfacing pieces to further bind the wool to the stabilizer.

Padstitches are simply very long hand sewn basting stitches that do not go all the way through the outer wool so they are not visible on the right side of the garment. They might sound intimidating or tedious but in reality, a basic few stitches like you see above take only a few minutes and really help to adhere the sewn-in interfacing to the wool. Of course, proper tailor's padstitching is far more laborious and serves to help shape the wool to the finished shape of the garment (we will be relying on pressing with an iron and the garment seam lines instead).

Have a look at how few stitches were needed to secure the horsehair canvas to the Peacoat front that my mom sewed. She zigzag machine stitched within the seam allowance and then did very few handstitches. This bit of stitching has kept the canvas secure for years of wear now and my Dad’s Peacoat looks much smoother across the chest than Matt’s worn old one (to be fair, the wool my Mom bought was higher quality than the wool I used for our original sample so that makes a difference too).
Ok, all our fabric pieces are prepared, we will get right to sewing in the next sew-along post!
Goldstream Sew-Along: Fit and Style
Did you come across any exciting fabrics and notions during your hunt for Peacoat materials? Today we are continuing our prep work by determining the fit and style that you would like to acheive.

Variations
The Goldstream Peacoat comes with two variations - Variation one includes long darts at the front, classic details such as epaulets and sleeve tabs and flaps over the patch pockets. Variation two is a more relaxed fit with no front darts. It features a removable hood and simple square patch pockets (no flaps). All of these style elements can easily be mixed and matched on the base garment. For instance, someone might want a very classic navy Peacoat with epaulets but would love the option to wear a hood occasionaly and prefer to leave off the sleeve tabs since they find them cumbersome. Another person might like the casual look of variation two but prefer the slimmer silhoutte created with the front darts. Customize to your heart's content!

Both variations include a two piece sleeve, a shaped center back seam, a narrow double breast (only one row of buttons is functional so that the Peacoat can be worn open and still look symettrical and attractive). Both variations are fully lined and have an inner patch pocket.
I designed the Goldstream Peacoat with a new coat sewist in mind. I wanted it to be a simple sew (as far as outerwear goes) and easy to fit. The center back seam allows you to take in or let out the back to perform small fit adjustments across the shoulder and waist. The darts can easily be sewn wider or narrower to take in or let out the coat at the waist and hips.
Mock Up

Image credit: This very practical and thorough mock-up was made by SewAndrew using upholstery fabric - a great heavy material choice! He sewed the collar and added the facing. This is a good idea if you want to see how the finished collar looks (perhaps if you are toying with the idea of making the collar smaller) but it isn't necessary to determine fit. Be sure to look at his thorough blog post featuring all the fit and style considerations that he made.
I highly recommend sewing a very simple mock-up before you cut into your wool fabric as you probably plan to invest a considerable amount of money in the best quality wool your budget can afford...not to mention the time you will be investing in this project! An evening spent mocking up the pattern prior to the real deal is well worth your time.
To mock up a wool coat, it is most accurate to choose a material that has the some of the same properties as your finished coat. You can use a sturdy muslin fabric but I would not recommend a lighter muslin or my usual mock-up fabric of choice - thrift store bed sheets. If you are going the thrift store route, I would instead look for an old blanket (wool or otherwise).
First, choose your size and grade between sizes if need be. Here are tutorials that will help you out if you are unfamilar with measuring a man or grading between sizes.
Cut out the Peacoat Front, Back, and one or both sleeves (it is nice to fit with both sleeves but if you are short of fabric, it is possible to fit with one). It is not necessary to cut out the lining or facings or any of the design details such as sleeve tabs or the hood.
Fitting
When you sew the pieces together you can leave one dart unsewn so you can see the difference the dart makes in the fit and choose which effect you like best. Put the mock-up on the wearer and pay attention to any folds and drag lines in the fabric. Take your time pinching different seams and thoroughly pinning them or open up any seams to give more room where needed. In the photos below, Matt is wearing our original size small sample which fits him very well except for the arm length. We’ve pulled the fabric taught or loose to demonstrate fit issues for the purpose of the sew along.
Common problem areas to watch for include:
Across the shoulders: Have the wearer put their arms out in front of them and ask if they feel constrained (this is where it is useful to have two sleeves).

If they feel constrained the fabric will look too taught across the shoulder blades (even if it doesn’t but the wearer says the coat feels right, now is the time to add some room at the center back seam to suit the wearer’s preference).

Open up the center back seam across the shoulder blades to give more room. Or, if the mock-up buckles across the back and looks too roomy, take in the center back seam.

Taper your adjustment so that there are no changes made to the neckline or it will change the way the collar fits on the neck.
The small of the back: If the fabric is pooling at the small of the back, the coat is likely too tight across the hips so the fabric is not able to fall smoothly down the back.

Let out the center back seam and the angled side seams to give more room around the hips. You can also exaggerate the curve of the center back seam by bringing in this seam at the small of the back to create a very fitted appearance (this is a style choice). Avoid the temptation to overfit - remember that a warm wool coat is usually worn over bulky winter clothes. Have the wearer try on the mock up with a sweater underneath.
Sleeve and hem length: It is very easy to create the perfect length of sleeve. Matt clearly needs some length added to his sleeve!

Our Garment measurement chart includes the sleeve underarm length - this is not measured on a sleeve seam since it is a two piece sleeve. Measure from the wearer's underarm, over their ever so slightly bent elbow to the base of their thumb. If this measurement matches our garment chart, you are good to go! If it doesn't, use the provided lines and our Lengthen or Shorten tutorial to create the perfect sleeve and lining length. As for the coat hem, you might want to lengthen or shorten the hem to fit a particularly tall or short person, or, you might want to adjust the length to suit a style that you are after. You can lengthen the Goldstream to duster length if you so desire! You could shorten it to jacket length for a very jaunty look. Right now the finished coat is designed to fall to mid hip. Keep in mind that you may need to add a center back vent to allow the legs a full range of movement if you lengthen the coat a lot.
To see an inspiring lengthened version, head here. To see an amazing shortened version, head here.

If you need help fitting your Goldstream, please email me (Morgan...pictured above in a very old photo from the early days of Thread Theory!) at info@threadtheory.ca and include pictures of your mock up on the wearer. A straight on back view and straight on front view are most useful to me. I would love to help you out!
The next sew-along post is an exciting one - we are going to cut out and mark our fabric!
Goldstream Sew-Along: Gather Materials

I’m so glad you’re joining me for the Goldstream Peacoat Sew-along! Tackling a big project like a wool coat is so much more approachable if the steps are broken down and we just think about one aspect of construction at a time.
As you can see from the schedule in my last post, it will still be a number of days before we actually start sewing. The prep work is just as important as the actual sewing when it comes to sewing a professional looking Peacoat!
Today let’s talk about assembling our supplies so that you have time to make your decisions and gather materials before construction begins.

First up, your material:

Most people choose a medium body pure wool for their Goldstream Peacoats (have a look at many beautiful wool versions by searching #goldstreampeacoat on Instagram or simply entering ‘Goldstream Peacoat’ in your search engine). I prefer a very dense wool for this project because it creates the most crisp looking coat. Looser wools will tend to drape more against the body to result in a casual looking coat...which could be a great look for Variation 2 as this style with a hood is meant to be casual!
Other materials will also work well though! Look for any ‘coating’ material with enough body to create a crisp collar but avoid anything that is too thick to sew multiple layers with your sewing machine. When we attach the facing to the neckline we will be sewing through four layers of wool plus the interfacing used on the collar. Perhaps test out your prospective material by buying a small piece of yardage or asking for a swatch and then running multiple layers through your machine.
Next, the lining:

Image Credit: A cozily lined Goldstream Peacoat sewn and blogged at Cecile Bricole.
When lining your Goldstream, there are a couple of things to consider:
- How does the weight of your chosen material interact with the weight of your chosen lining? If you are sewing with a heavier wool, choose a more substantial lining so that the final effect does not seem flimsy and cheap when contrasted to the outer shell of the coat. If you are sewing with a light weight wool, avoid choosing a heavy quilted lining that might weigh the outer shell down and cause it to sag over time.
- What purpose will your Goldstream serve? Will it be a winter coat designed to keep the wearer very warm on a daily basis? Choose a quilted or flannel-backed lining. Or will it be a special coat that is worn for semi-formal occasions? Choose a beautiful bemberg lining or perhaps something with a bit of flair (pinstripes, paisley, a twill weave, etc.)

Now let’s pick our interfacing! You will want to use a pretty substantial interfacing for this project - far heavier than would normally be chosen for the average shirt or dress sewing project. Horsehair interfacing is ideal as it has the perfect amount of structure and body to pair with wool but, failing that, look for a medium to heavy weight woven interfacing - it could be fusible or sewn-in. I usually prefer sewn-in interfacing when working with wool because fusibles don’t tend to fuse very thoroughly.

When sewn as instructed, the Goldstream features a fairly minimal amount of added structure. The collar and facings are interfaced but the coat front is left unsupported. This keeps the project simple and approachable for those new to sewing a coat. It is very easy to add more structure to your Goldstream if you desire! Purchase sewn in interfacing or horse hair canvas and cut out two coat fronts. You can cut the entire coat front or you can cut a shape as illustrated in the diagram above so as not to add bulk to the dart. You will need double the stated interfacing if you plan to cut two coat fronts.

When my mom sewed a Goldstream for my dad, she experimented (for the very first time!) with hair canvas by following the directions in my handy Reader’s Digest sewing book (I share some of the relevant pages in our Belvedere Waistcoat sew-along). Structure is added to the key areas on the lapel and chest only so it is not necessary to buy very much hair canvas for this method. You can read about her sewing experience here.
Whatever level of interfacing you choose (your coat will still look wonderful if minimally interfaced as instructed!), apply the interfacing by fusing as instructed, or baste it to the coat within the seam allowances. Add even more structure by hand stitching across the entire surface so the interfacing stays adhered to the wool (this is called ‘pad-stitching’ and you can find more details on how to do this in our Tailored Peacoat Series).
![]()
In addition to interfacing, shoulder pads help to add structure to the Goldstream Peacoat. If possible, avoid those bulky wedge shaped shoulder pads that are often found hanging on the wall in the notions section of big box fabric stores as they add quite a severe shape (unless, of course, this amount of shaping is what you are after!). A more subtle, modern shoulder pad is suitable for the Goldstream.

Tailored coats usually include shoulder pads made from layers of fleece, hair canvas, and batting. You could make your own, find a pair from an online tailoring shop (scroll down to link to the shops I recommend), or scavenge a pair from one of the numerous tailored menswear garments in your local thrift store!

Lastly, it’s time to choose our buttons! I love a classic black peacoat with discrete black fouled anchor buttons. The fouled anchor design references the garment’s military provenance but being black instead of a shiny brass, the finished coat is a more versatile piece.

If you want to create a true classic though, brass fouled anchor buttons are the way to go! If you are created a more casual duffle-style coat, a leather or wood button would be lovely. I’ve always been a fan of braided leather buttons.

Select seven 1” buttons in your main style. Find four ½” buttons to coordinate (in the case of Variation 1 where they will be featured on the epaulets and sleeve tabs) or blend in with the wool (in the case of Variation 2 where they will be more or less invisibly adhering the removable hood to the neckline).
Resources
Here is a list of some excellent North American resources for wool, lining, stabilizer and buttons:
Wool:
Stylemaker Fabrics: (US) A wide variety of wool blends in lovely colors (and there are even a few nice plaids and prints!)
Sultan’s Fine Fabrics: (Canada) High quality 100% wools which, at the time of publication, are new in the shop and deeply discounted!
Mood Fabrics: (US) An enormous selection all conveniently organized in one ‘coating’ section.
Lining:
Mood Fabrics: (US) They have a nice selection of rayon twill linings including some heavier weight ones which would be ideal for the Goldstream.
Club Tissus: (Canada) Their Kasha lining has a satin right side and flannel wrong side to create a warm coat that still looks dressy.
Stabilizer:
Black & Sons: (US) Excellent selection of tailoring supplies with both fusible and sewn-in coat weight interfacings. Also, they carry double breasted coat fronts that can be pad-stitched onto the Goldstream front and trimmed to fit the specific style of the pattern if needed.
Shoulder Pads:
Black & Sons: (US) If you are purchasing your stabilizer from this online shop, you might as well purchase some shoulder pads too!
Make your own: Here’s a tutorial from Closet Case Patterns!
Find some at your local thrift store (any wool blazer or coat will have some that you can use!
Buttons:
Thread Theory: (Canada) I love our sustainably produced tagua nut fouled anchor buttons! They were designed for the Goldstream Peacoat and are the perfect size and lustre.
Black & Sons: (US) A wide variety of metal anchor button designs.
Lots of Buttons (US) A great place to go if you are searching for something specific as their selection is huge and their site features many ways to search.
Before you run off in search of fabric, keep in mind that I will be posting about styling and fitting in two days! During that post I will share RTW inspiration, past customer projects and we’ll also talk about how to make a muslin (and what type of material you should use for it). Some of these discussions might affect your final fabric choice!
Goldstream Peacoat Sew-Along: Schedule

If you're nervous about sewing the Goldstream Peacoat (perhaps this is your first coat project?), then this is the sew-along for you!
I will be walking you through each step within the instruction booklet by giving you lots of process photos and detailed advice. Care to join me?
September 30th: Assemble your supplies
Oct 2nd: Choose a size, fit and style considerations
October 4th: Preparations (cut and mark fabric)
October 7th: Sew the details (darts, epaulets, pockets)
October 9th: Sew the collar and hood
October 11th: Sew the facing and lining
October 14th: Sew the Peacoat body and sleeves
October 16th: Attach the lining to the coat
October 18th: Topstitching and buttons
October 19th: Styling and care
All posts will be shared here and newsletter recipients will receive a Friday round-up of the week's sewing progress in their inbox.
If you are looking for a more advanced coat-making project, head over to our Tailored Peacoat Series.
