

Sew-along with us!
Perhaps you'd like some company while you sew? We've sewn up each of our patterns and photographed each step along the way. Find the pattern you're after in the filter drop down below left.


Sew-Alongs

Finlayson Sweater Sew-Along: Day 1 - Choosing your fabric and supplies

Let's go fabric shopping!
Welcome to the Finlayson Sweater Sew-Along! Today we will be discussing fabric and notion choices. The Finlayson Sweater is a very flexible pattern - it will sew up nicely in just about any knit! It looks great as a light summer sweater in knits with hardly any body (for example, a cotton rib knit) and it looks entirely different but just as awesome in a thick and cozy sweatshirt fleece.
To choose your fabric, you will only need to keep a few simple guidelines in mind:
Warmth: The Finlayson looks equally nice in a classic sweatshirt fleece (with a smooth right side and fuzzy wrong side) or in a thin waffle or ribbed knit. A thicker, warmer Finlayson is perfect to wear over a t-shirt with jeans while a thin Finlayson would be really stylish worn under a blazer with slim-fit Jedediah pants!
Drape: Very drapey knits look lovely with the Finlayson but keep in mind that most men are not used to wearing drapey fabrics and that slinky knits tend to look a little feminine...so choose how drapey your fabric will be based on who you are sewing your Finlayson for!
Thickness (for your sewing machine): The Finlayson cannot be made with heavy-weight knits because the overlapped collar creates quite a few layers to sew through at center front. Domestic machines can easily handle these layers when sewing through a light or medium weight knit but might struggle with a super thick fleece!
Stretch: The Finlayson body is quite loose and boxy and the neckline is wide enough to fit over the head even if the fabric you choose has very little stretch. The only areas of the Finlayson Sweater that require a bit of extra stretch are the cuffs and the hem band. This is because they are drafted considerably smaller than the body of the garment to create a tighter fit in these areas. If your fabric doesn't have much stretch it can be a little more difficult to ease in the excess fabric when sewing the bands to the garment. Not to worry though! We've included a second longer cuff piece that will be easier to sew in more stable knits! Or...you could choose a contrast stretchy rib knit for the cuff and hem bands as is often seen on store bought hoodies (good luck finding a matching color though!).
If you can't find any suitable fabric at your local fabric shop, there are plenty of options online!
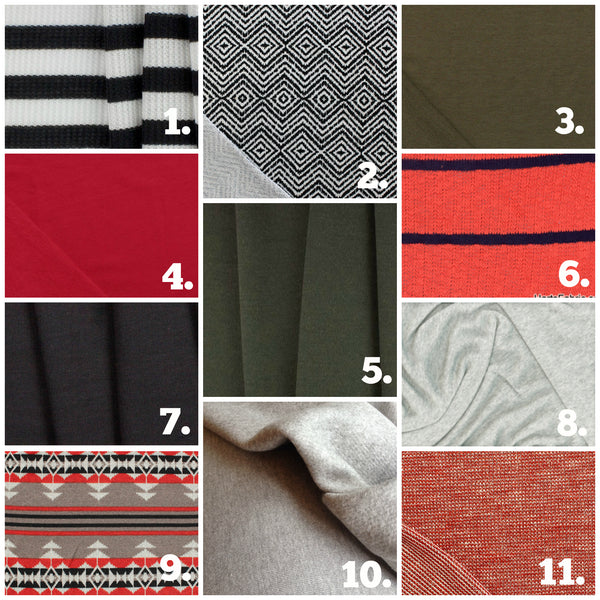
- Striped Black & White Cotton Blend Waffle Knit - Britex Fabrics
- Black Ethnic Diamond Baby French Terry Knit Fabric - Girl Charlee
- Sandalwood Cotton Modal Lycra French Terry Knit Fabric - Girl Charlee
- Rose Red Cotton Jersey Sweatshirt Fleece Knit Fabric - Girl Charlee
- Mid-weight Drapey Loden Green Wool Knit - Britex Fabrics
- Summer Sweater Knit Red - Harts Fabric
- Midweight Black Cotton Fleece Knit - Britex Fabrics
- Terry Backed Sweatshirt Grey - Harts Fabric
- Navajo Indian Blanket Red Mushroom Hacci Sweater Knit Fabric - Girl Charlee
- Organic Bamboo Charcoal Fleece - Simplifi Fabric
- Red Heather Sparkle Hacci Sweater Knit Fabric - Girl Charlee

And now let's talk notions
Since there are no tricky closures on the Finlayson, there aren't many necessary notions. All the same, I've got a few ideas and tricks up my sleeve to create a really professional and high-end hoodie or sweater, so if you prefer to take the extra sewing time, you can jazz up your hoodie with trims and stabilizers to your heart's content!
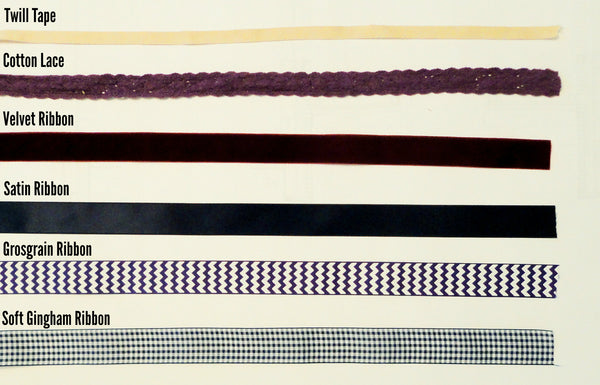
Within the instruction booklet I've included options for finishing the neckline and the kangaroo pocket openings with twill tape. Aside from twill tape, you can use all sorts of decorative trims to finish these areas. For the neckline it is best to use something with considerable flexibility because the trim has to fit to the slight curve of the neckline. Consider twill tape as recommended, cotton lace (soft and supple), or, hem tape or bias binding. For the kangaroo pocket you can use just about anything because the curve of the pocket opening is so very slight. Try any sort of ribbon or trim you would like! Here are the ones I've collected for my sweaters (I went a little over-board choosing these...I obviously won't be able to use them all :P).
To stabilize the shoulder seams (always a good idea when sewing knit garments so they don't stretch out and sag after a day of wear), you can use any of the following options:
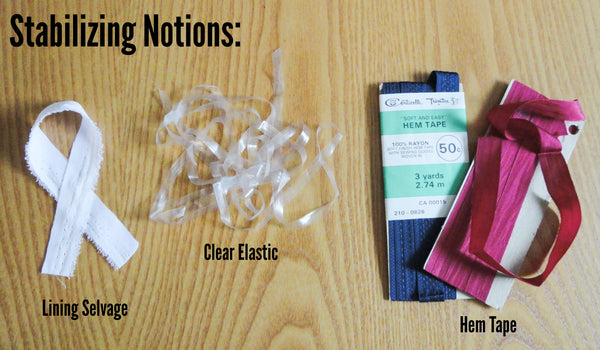
I like using strips of lining or selvages because I always have them on hand and they're free! Make sure to choose a thin fabric so you don't add too much bulk to your shoulder seams.
My second favorite choice is clear swimwear elastic. It is a little slipper to handle when sewing but it is very strong and resilient. I also like to add this elastic to all the horizontal seams - such as the cuffs and hem band. That way these seams won't stretch out when the sweater is being put on and taken off!
A pretty option for stabilizing the shoulders is to use rayon hem tape. I find vintage packages of these at almost every thrift store I go to and they are so cheap! These tapes are very stable and very thin and you can find them in almost any color you need.
Have fun choosing your fabric and notions! Please ask away if you are unsure of what to choose. I'll leave you now with my favorite fabric shopping tip: When in doubt about what type of fabric to choose, simply open up your closet or head to a thrift store/clothing store and examine garments that are similar to the pattern you are working with. If you like how cozy your Lululemon hoodie is, for example, have a look at the care tag and jot down the fiber content. Make a note of the fabric's thickness and texture. Or simply bring the garment to the fabric store and compare the fabric's stretch and drape with your potential choices right on the bolt!

Finlayson Sweater Sew-Along: Day 2 - Preparing your Pattern and Fabric
This afternoon will be assembling our PDF pattern and cutting out our fabric.
Preparing Your PDF Pattern
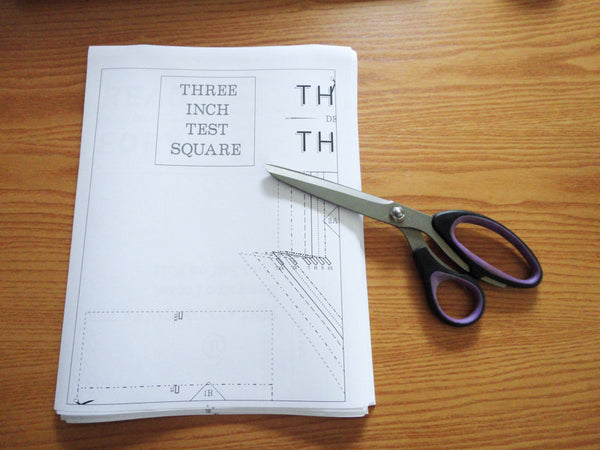
If you haven't already, print out your PDF pattern following the directions in the "Read Me First" file...did you read it first? I hope so! The file includes a chart, so that, if you accidentally drop all your printed pages and they scatter all over the floor (yes...I've done that before) you can still figure out which page goes where. The pages are numbered at the bottom outside the pattern margin, so that is a useful safety measure as well!
The Read Me First file also tells you to ensure that your pages will not be re-sized to fit the page. Printing the pattern at full size (so that the test square measures 3") will result in an accurately sized sweater. Our PDF files have big enough margins that they print correctly on Letter or A4 paper. Also, the margins allow a little leeway if your printer twists paper or grabs it at an uneven pace as ours tends to do. You can see in the photo above the my bottom margin has become very small due to our faulty printer! All the same, as long as everything inside the rectangular border is there, you are ready to start taping!

I have created a 'How to Assemble PDF Patterns' tutorial in the past and you are welcome to refer to this to assemble your Finlayson Sweater if you have never assembled a PDF pattern before. For those that are familiar with PDFs, I thought I would discuss a few of the most important tips during this sew-along just to refresh you!
First, when taping my pages, I find it quickest to cut all relevant edges (the bottom edge and the right edge which include scissor symbols) at one time. Secondly, I tape all the rows together so that I end up with a stack of rows as pictured above. Once that is done, I tape the columns together and I am left with a complete pattern!
Sometimes, if I don't have much floor space to work on or don't feel like crawling about the floor, I roughly cut out the pattern pieces before I assemble the columns. That way, I can just tape together the individual pattern pieces rather than attempting to line up two whole rows worth of pieces 100% accurately. This method takes up so little space that I have been known to assemble PDFs while sitting in bed with only a hardcover book to use as a 'table'!
Choosing Your Size
There are likely very few fit adjustments you will need to make for the Finlayson Sweater since the body of the sweater is boxy enough that it will fit most body shapes.
The key areas to achieve a good fit are: The shoulders, the chest and the sleeve length.
Here is how you measure each area:
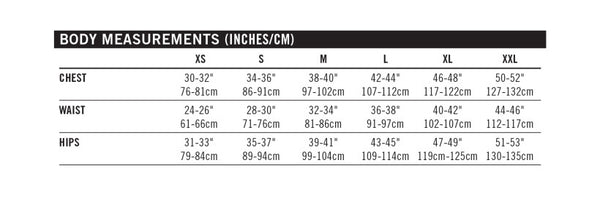
The Shoulders: Measure from shoulder to shoulder, starting and ending where a sleeve seam would sit. Keep the measuring tape fairly close to the base of the neck. On certain body types (hunched shoulders) this might mean the measuring tape is slightly curved. Once you record your shoulder measurement, compare it to the Shoulder Width measurement included in the Garment Measurements chart.
The Chest: Measure the entire circumference of the chest by circling the measuring tape around the widest part of the chest and shoulder blades (make sure you include the shoulder blades - it is easy to let the tape slip below them by accident). Make sure the tape is level and positioned just below the armpits. Once this measurement is recorded, you can compare it with the Chest measurement provided in the Body Measurements chart.
The Sleeve Length: Arm length can differ greatly from person to person, even if the rest of the body measurements are similar. Thus, it's a really good idea to check the sleeve length corresponds with the person's arm length every time you are about to sew a top. To find out how much you need to shorten or lengthen the sleeves when sewing our patterns, you will need to measure your underarm length. This isn't a standard measurement used by most pattern companies, but it is my favorite way to measure arm length because it so directly corresponds to the sleeve seam length which is easy to measure. To measure the underarm length, measure from the arm pit, along a slightly bent elbow, to the base of the thumb. This is your underarm length and can be compared to the Sleeve (Seam) measurement included in the Garment Measurements chart.
Since I am making my Finlaysons for myself, I cut a size XS with which my body measurements were very similar aside from the arms. I had to shorten the sleeves considerably to match my stubby arms :P.
It is important to note that the Sleeve (Seam) measurement is the final length of the sleeve, measured along the seam (and including the cuff). If you like your sleeves to sit lower than the base of the thumb, you may need to lengthen the sleeve and if you like your sleeves to sit closer to the wrist you will likely need to shorten it. My underarm length measured 18 3/8" and the Sleeve (Seam) for size XS measures 20 3/8". So: 20 3/8" - 18 3/8" = 2". This is the amount of length I needed to take off of the Sleeve pattern piece.
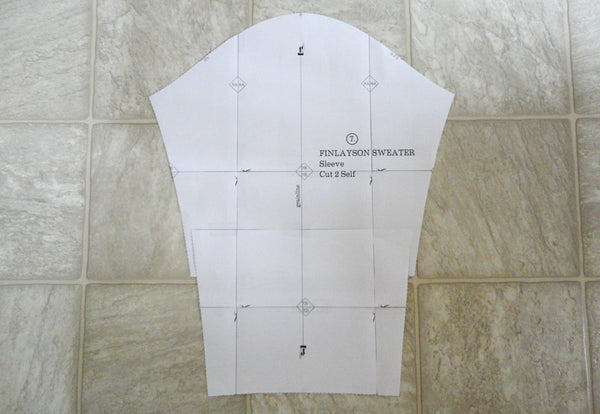
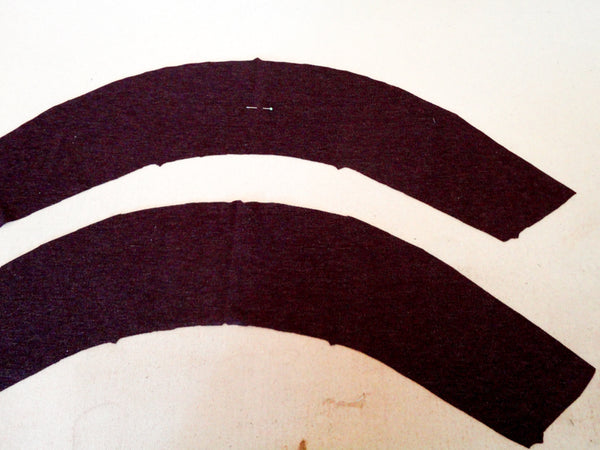
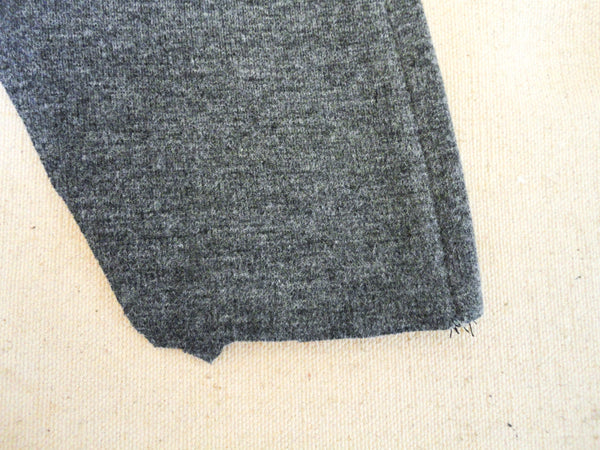
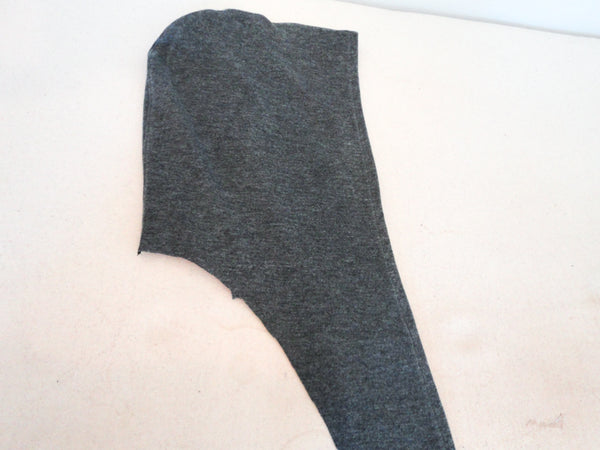
To shorten the sleeve, cut along the "Lengthen or Shorten Here" line on the Sleeve pattern piece. Overlap the two pieces as pictured above and tape them together.
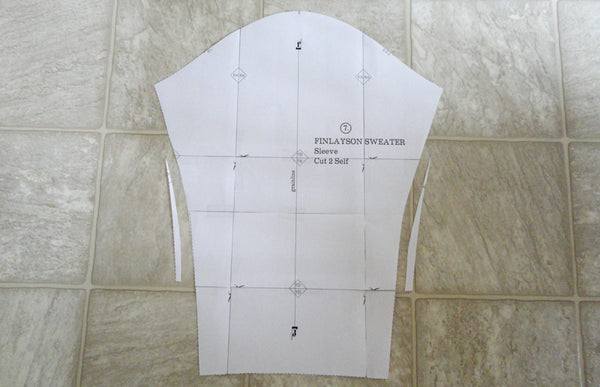
Now trim off the jagged edges so the sleeve seams are once again gently curved and smooth. If you were to add length to your sleeve, you would cut along the same line and add extra paper to fill the gap. I covered lengthening and shortening pattern pieces in detail for our Jedediah Shorts Sew-Along, so you can check that out if you would like more photos and explanation!
Now we're ready to cut out our fabric! The layouts we provided in the instruction booklet are quite conservative about how much fabric you will need - especially if you are cutting out an XS or S sweater! We don't like to estimate too low because I think it is ALWAYS better to end up with too much fabric than not enough! To illustrate how much fabric you can save if you are creative with your pattern piece layout, are not using a fabric with a nap or directional print, and are cutting out one of the smaller sizes, I managed to cut out my Finlayson Variation 1 from my double knit using only 1.2 m of 150cm/60" wide fabric! It was an adventure, that's for sure...
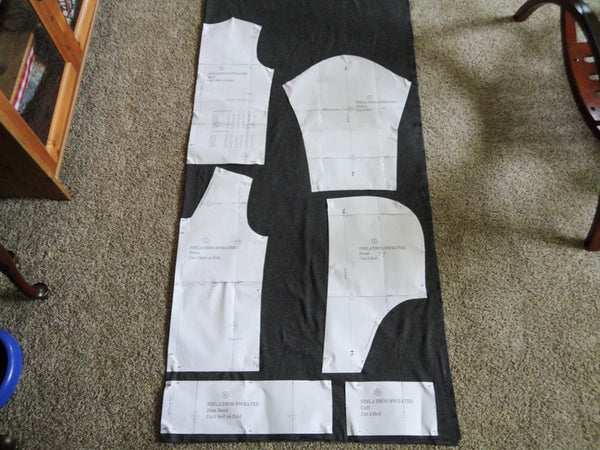
First, I laid out the fabric with the selvages folded towards the center to create two 'Folds'. With the fabric laid out in this manner, I fit the pattern pieces on like this:
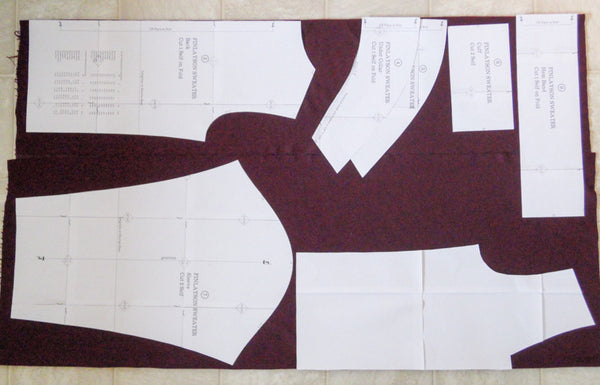
As you can see (in my unclear photo...sorry!), the pieces in the top right corner extend beyond the salvage. I cut all pieces that fit first and then adjusted the fabric like so:
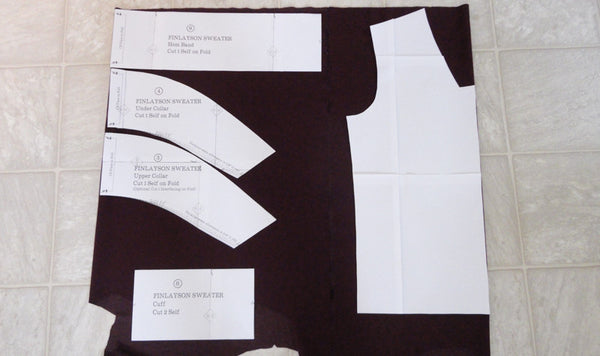
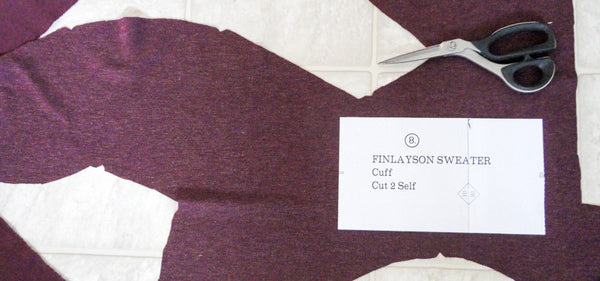
Still, the Cuff piece did not fit on the folded fabric so I cut the remaining pieces and then unfolded the fabric. I cut the two cuffs on a single layer:
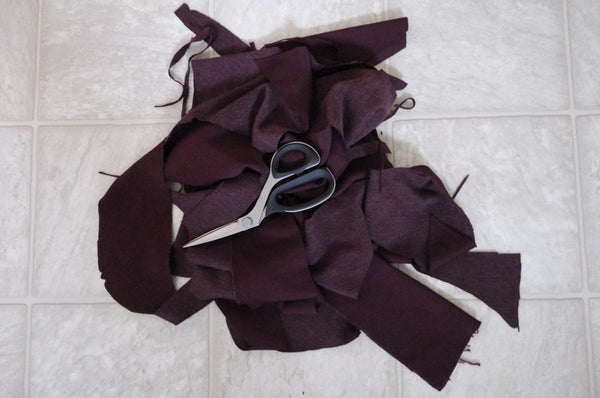
It was tricky and a bit of an adrenaline rush as I began to worry I didn't have enough fabric but...in the end it saved me 1.2m of fabric! WOOT! Look at how small my scrap pile was:

When I cut out knit fabrics I always cut my notches outwards to form little triangles rather than notching inwards. This will prevent 'runs' occurring in the fabric.
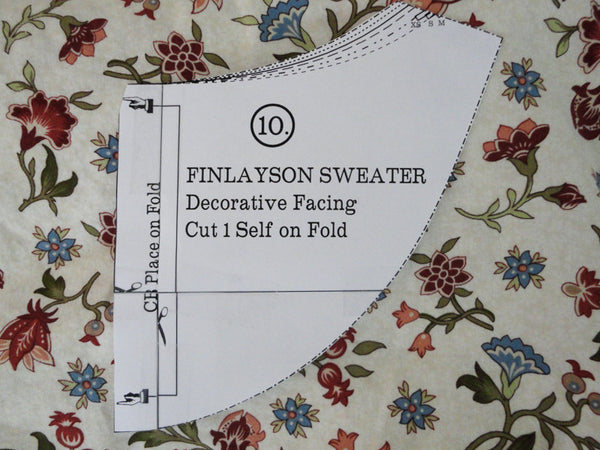
The last pattern piece I cut out was the Decorative Facing. I chose a pretty cotton for this as it doesn't really need to stretch!
And now on to Variation 2! I laid this one out without being so stingy with my ponte knit fabric.
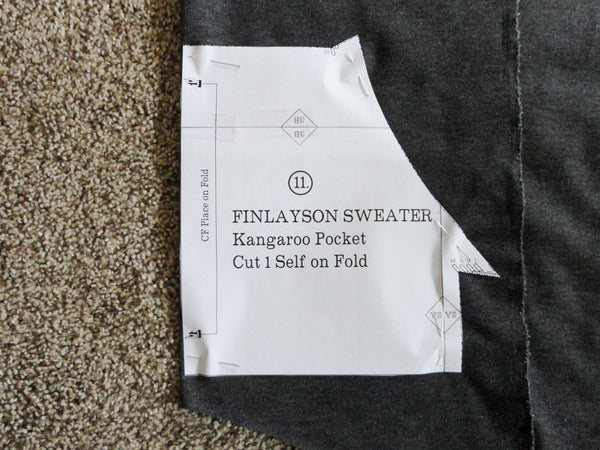
I saved a little bit of fabric (enough to make a knit mini skirt perhaps? Or a super cozy colour-blocked Scout tee!) by cutting out all pieces except the Kangaroo Pocket first and then refolding the remaining fabric narrowly (rather than in half) to cut out the pocket on the fold.
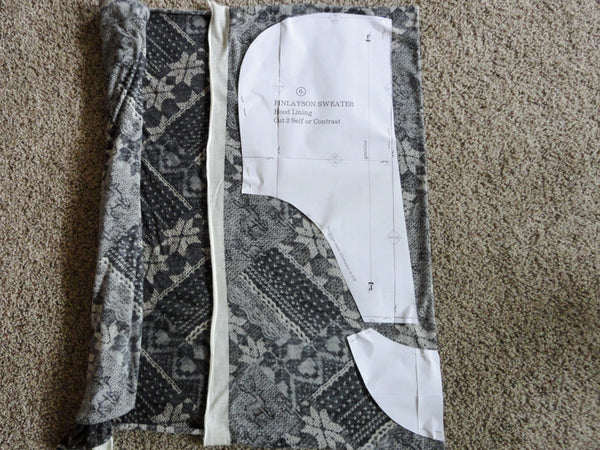
I cut out the Hood Lining and the Decorative Facing out of a light contrast knit.
And now our Finlaysons are all cut out and we are ready to get sewing!

Finlayson Sweater Sew-Along: Day 3 - Sewing the neckline facing and shoulder seams
Welcome back to the Finlayson Sew-Along! We get to start sewing today! I will be adding the optional Decorative Facing to both sweater Variations and then we will sew the shoulder seams.
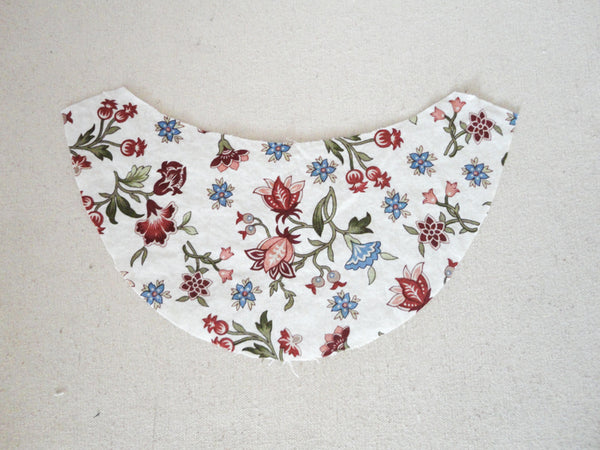
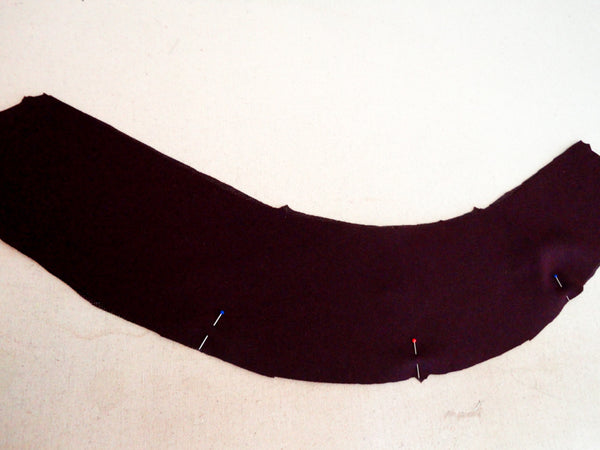
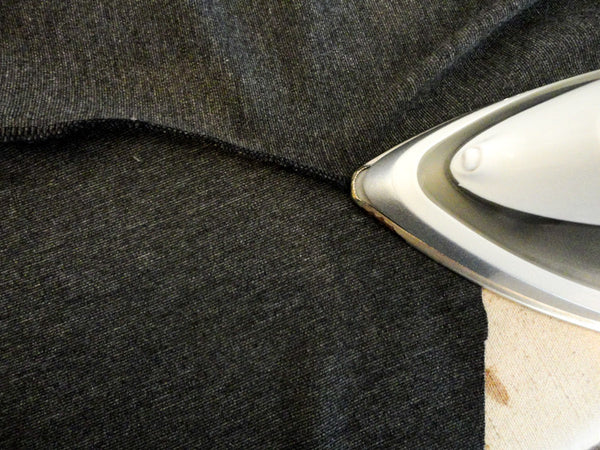
Begin by stay stitching along the lower facing edge using a 5/8" seam allowance and a regular length straight stitch. This stitching will help you create a smooth curve and even seam allowance when you iron under the seam allowance.

Next, clip up to the stitching line at regular intervals along the sharpest area of the curve. I find using sharp embroidery scissors to be the most accurate way of clipping up to the stitches like this - it is easy to clip into the stitching by accident, so be careful with each snip!
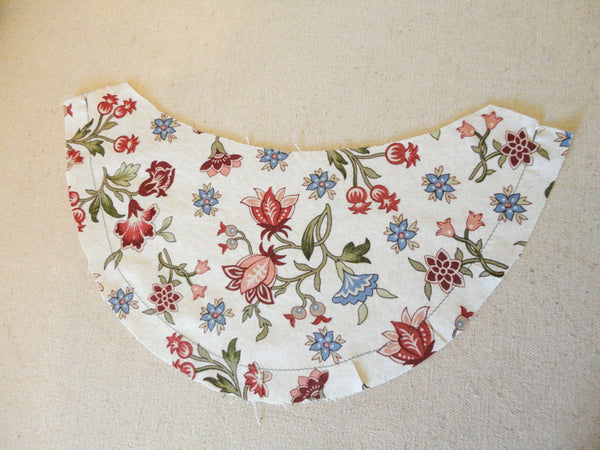
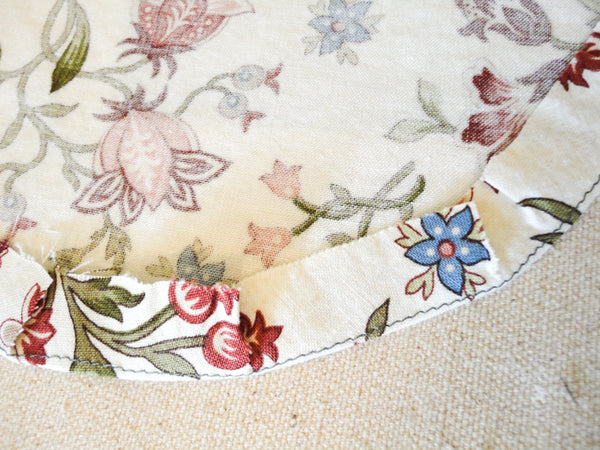
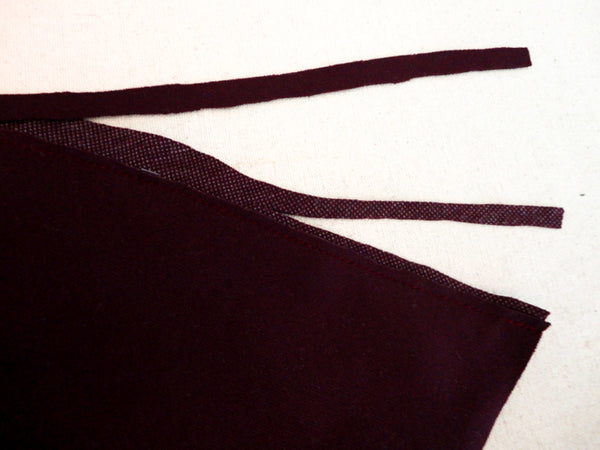
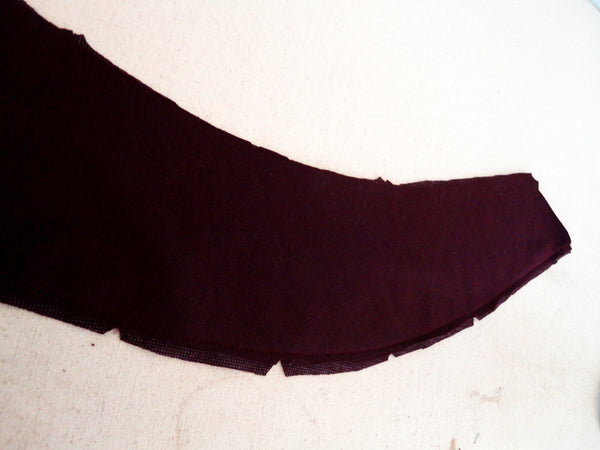
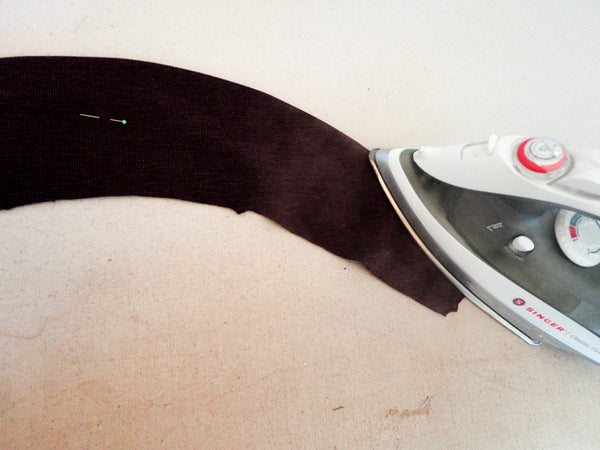
Press the entire curve under as evenly as possible so that the stitching is hidden on the wrong side of the Decorative Facing.

You can see that the clips you made in to the stitching allow the seam allowance to overlap slightly so that the outer edge of the curve can be manipulated into this smaller area.
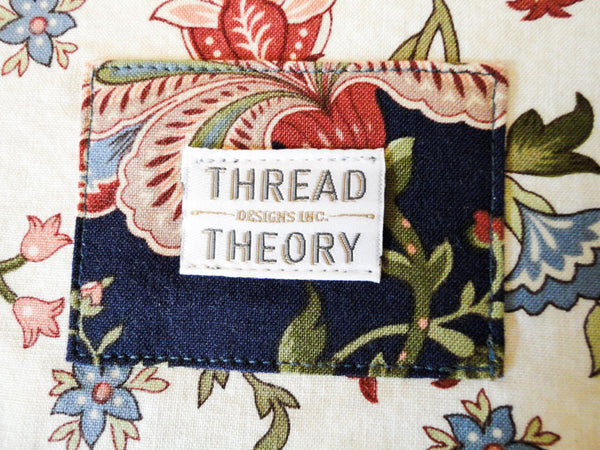
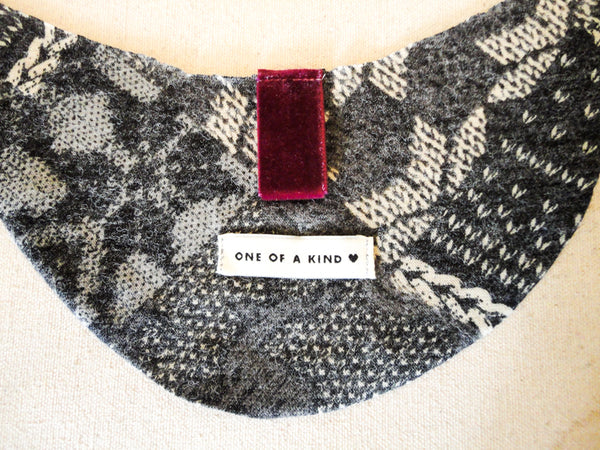
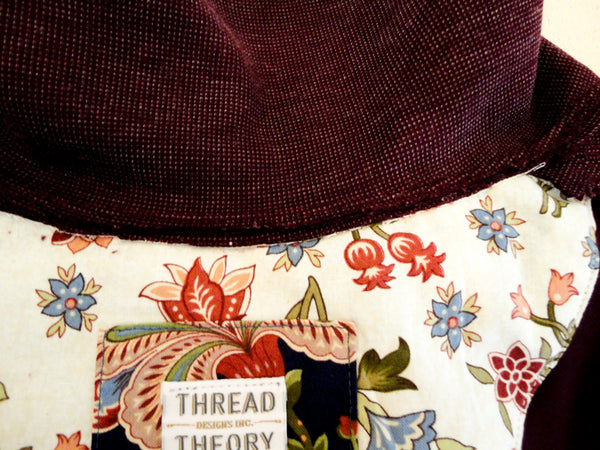
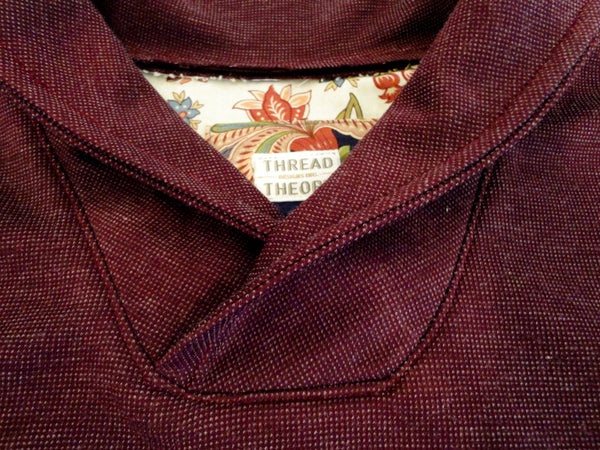
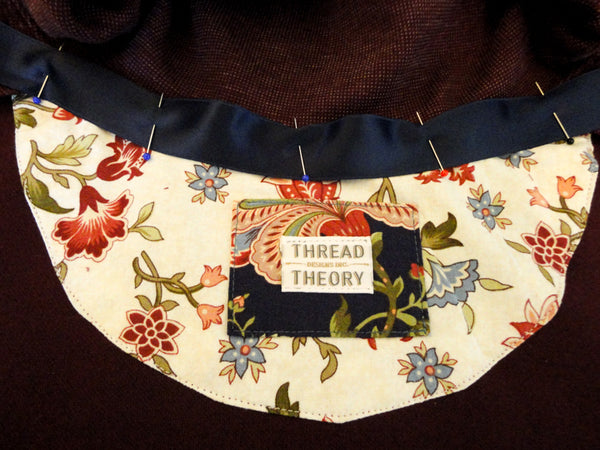
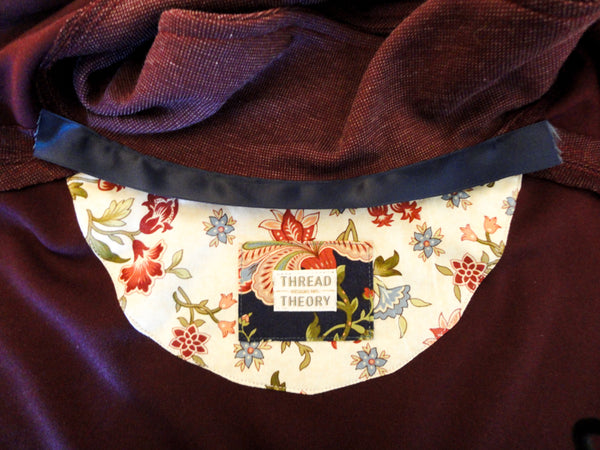
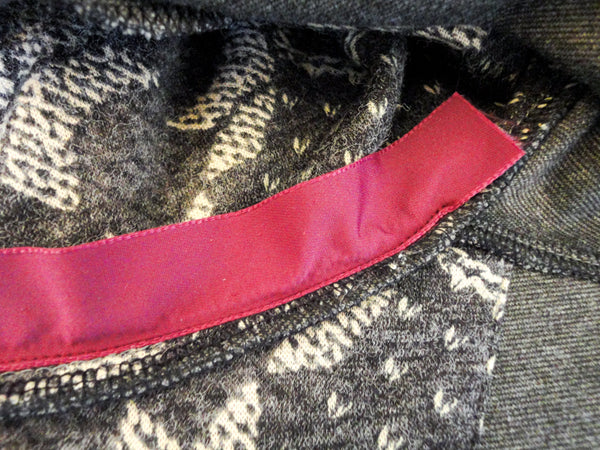
If you would like to apply a garment tag or other sort of decoration, now is the time! I top stitched a Thread Theory tag and a square of contrast fabric to my Facing for Variation 1:
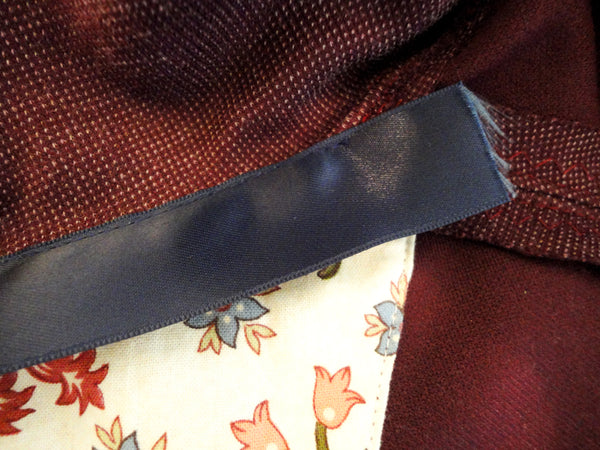
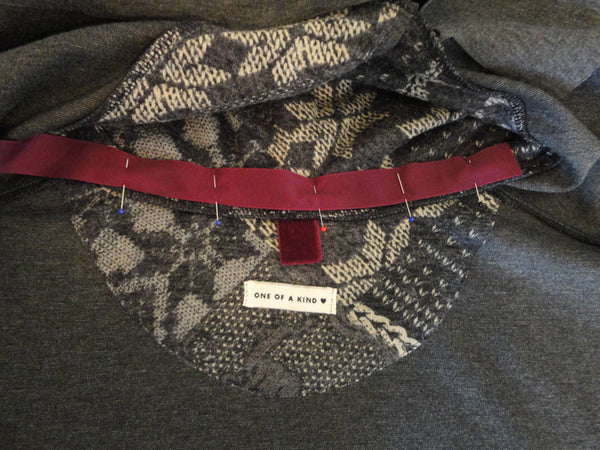
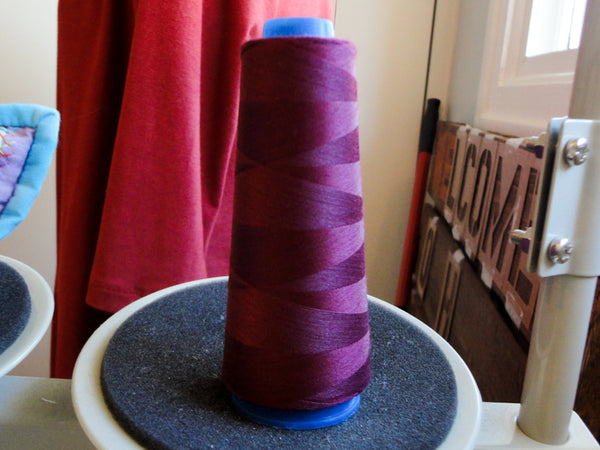
...and one of the lovely Sewaholic garment tags along with a 3" piece of velvet ribbon (as a hanger) to my Facing for Variation 2:
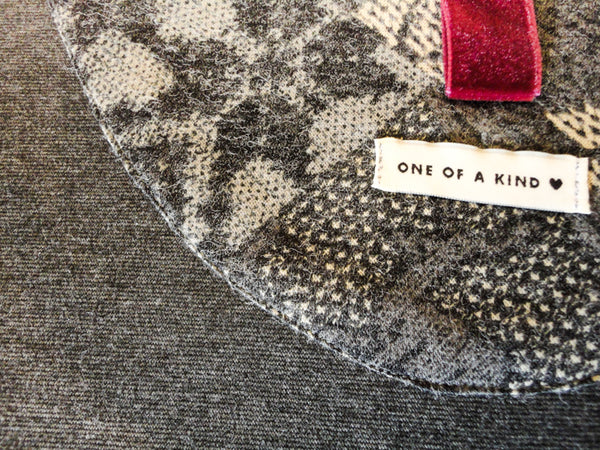
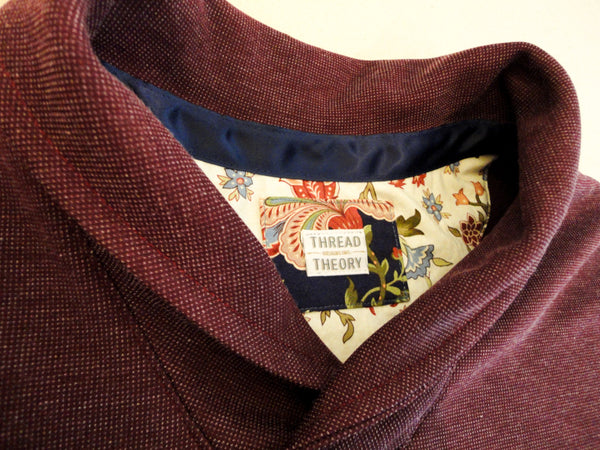
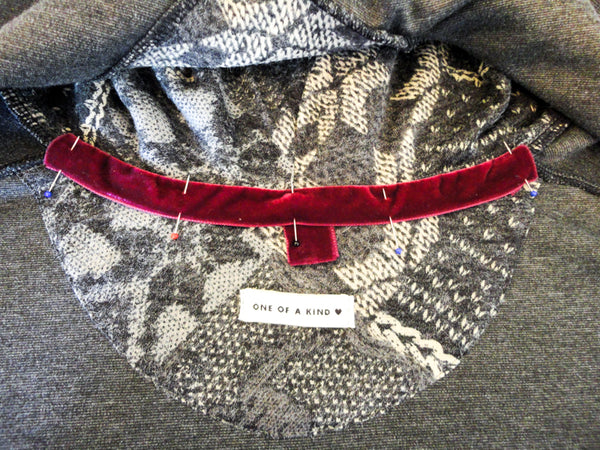
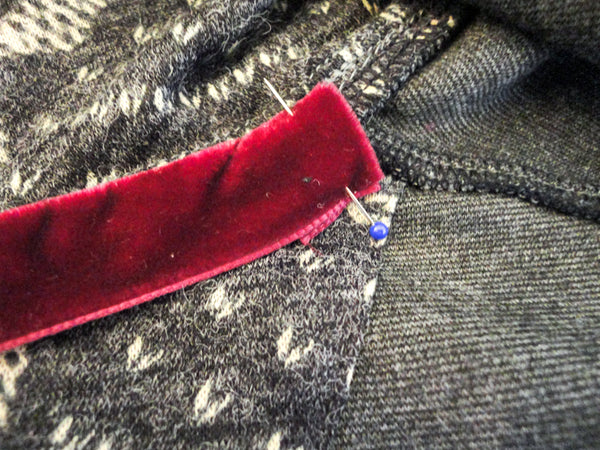
To attach the Decorative Facing to the sweater Back, pin the facing so that it is even with the neckline's raw edge so that the wrong sides are together (so that the facing will be on the inside of the sweater).
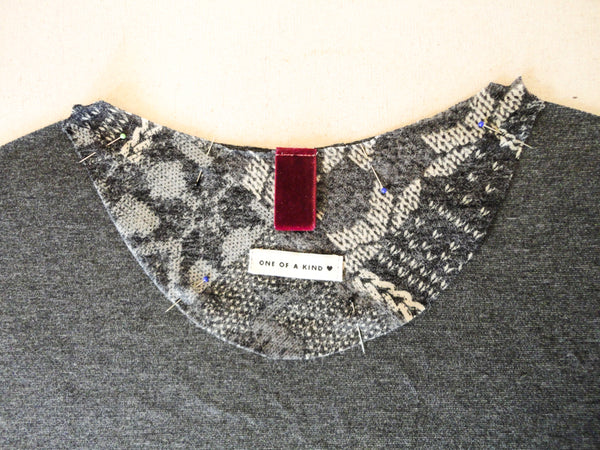
Top stitch around the entire facing - make sure not stretch one fabric layer more than the other!
With the Decorative Facing applied, we're now ready to sew the shoulder seams.
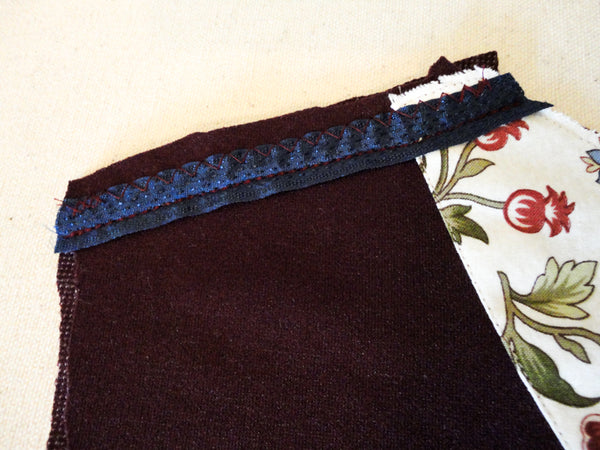
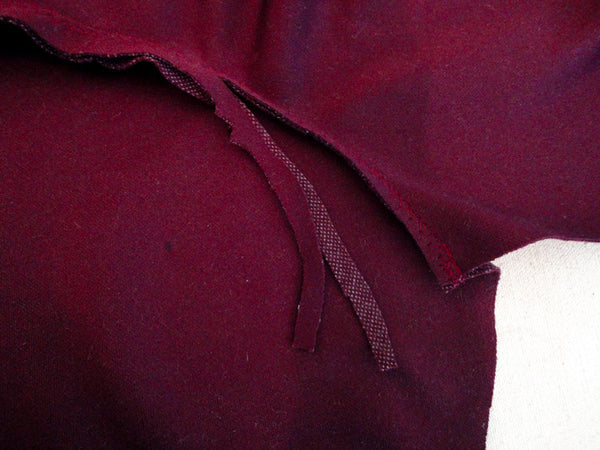
First, let's begin by deciding which method of stabilization to use! Have a look at the post on materials if you haven't already. There are some close up pictures of the materials for you to examine. For Variation 1 I will use Option 1 (from the instruction booklet) and apply rayon hem tape (you could use the ribbon, twill tape, clear elastic, or stay tape with the same results).
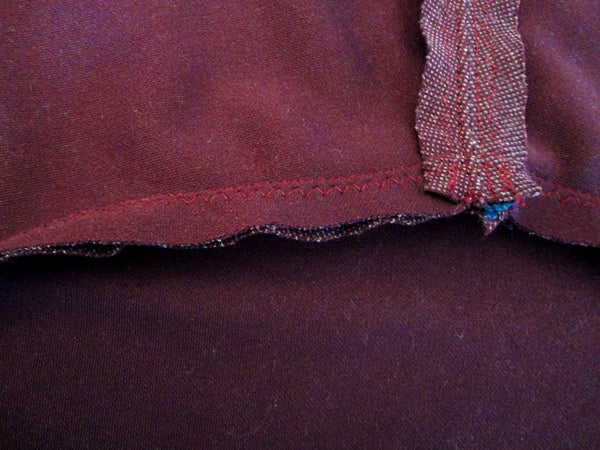
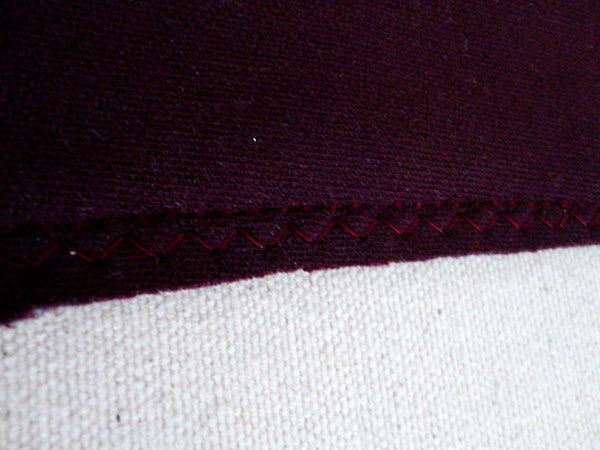
Apply the tape to the sweater Back by centering the tape over the seam line and pin the sweater Front and sweater Back with right sides together. Sorry, I didn't get a photo of the tape and fabric layers pinned. But you can see a similar photo when I show you Variation 2 in a little bit! For Variation 1, I am using a reinforced stretch stitch (otherwise known as a triple stitch) to stitch all seams. This is the lower stitch in the photo below - it looks like a straight stitch. While the reinforced stretch stitch isn't the best option for delicate knits, most medium weight knits can handle it just fine. For this stitch, the needle moves backwards and forwards to stitch over the same area three times so the stitch is very strong and can be pulled without snapping (important for knit garments!). It can wear delicate fabrics out though since the needle punches into the same spot so many times, so test it on a scrap first!
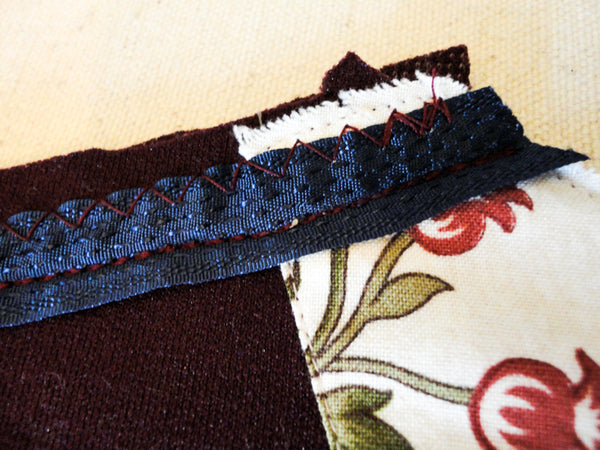
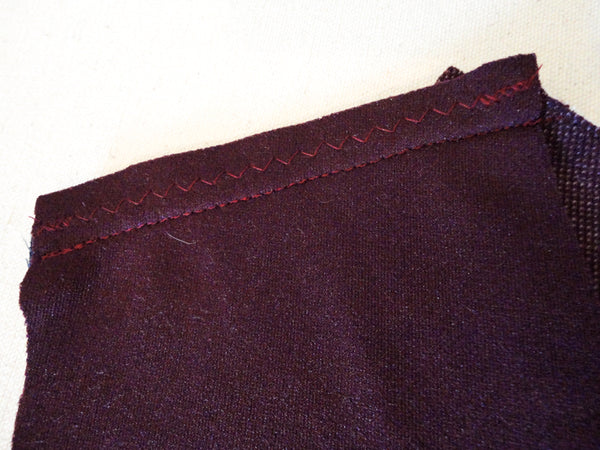
I am finishing the seam allowances with a wide zig zag stitch. If you prefer, you can use a narrow zig zag stitch to sew all your seams (rather than the reinforced stitch) and then a wider zig zag stitch to finish the seam allowance.
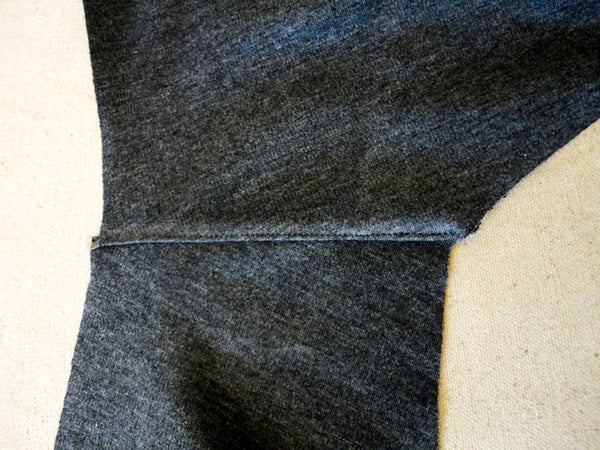
Here is how my finished shoulder seam looks:
And from the front of the sweater:
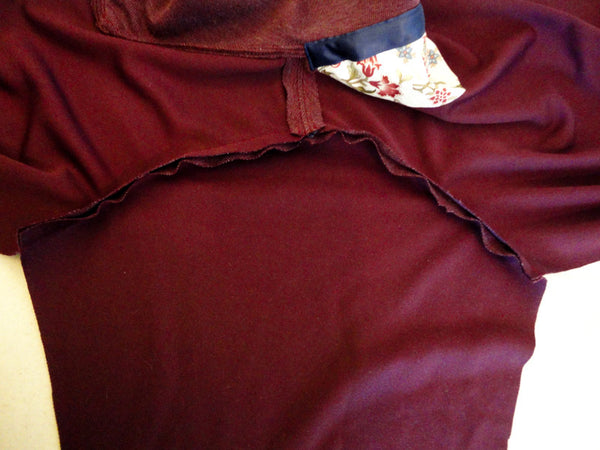
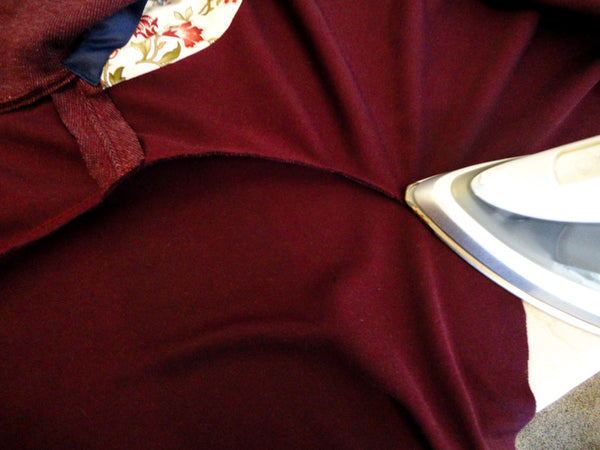
Once the shoulder seam has been sewn and the seam allowances have been finished, press the shoulder seam open.
I like to topstitch along either side of my shoulder seams to keep the seam allowances pressed flat. It looks quite pretty from the right side and helps to reinforce the shoulder seam even further to prevent it from stretching out when the sweater is worn.
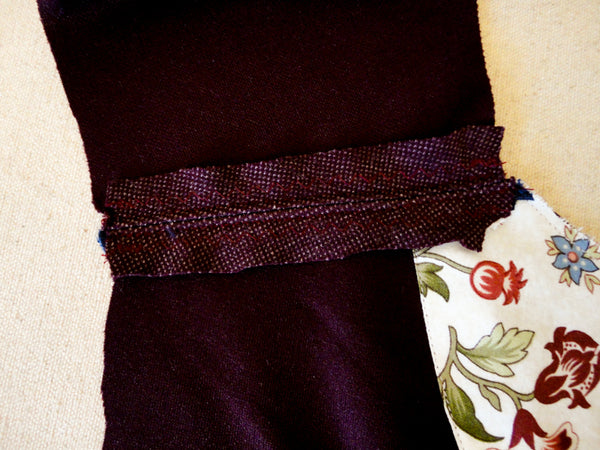
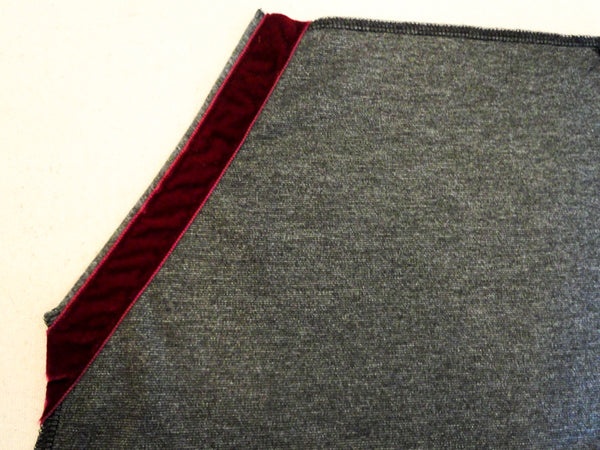
And now, on to Variation 2! For this variation, I will use Option 2 (from the instruction booklet) and apply a strip of silk lining. I'll be using my serger to sew this sweater. Here you can see the three layers (Sweater Front, Sweater Back and the silk lining) all pinned together:
Stitch through all three layers. If you are using a serger, make sure to use the 5/8" seam allowance - you will be cutting the excess seam allowance off with your serger blade.

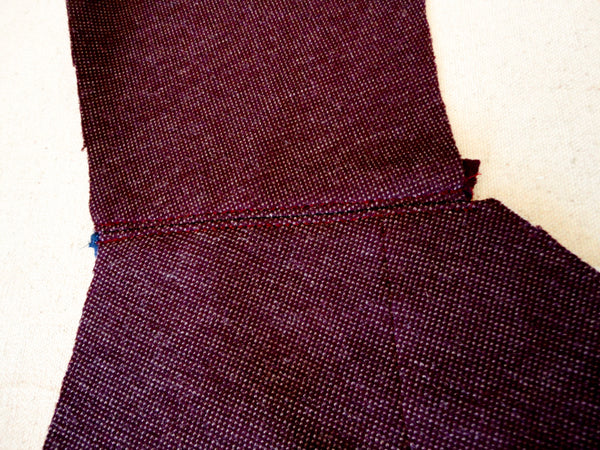
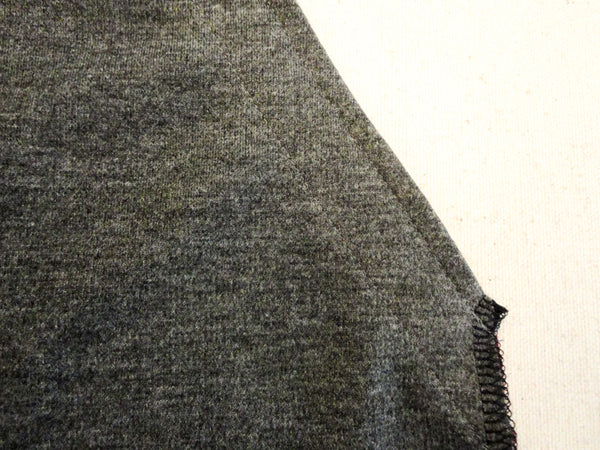
If using a serger, press the finished seam allowance towards the back (this covers the fabric or tape you've used to reinforce the seam).

I top stitched the seam along the back for this sweater but not along the front (because there is no seam allowance along the front):
Our Facings and Shoulder Seams are finished!

Finlayson Sweater Sew-Along: Day 4 - Preparing and sewing the collar and hood
Today we will be moving on to perhaps the trickiest part of this sweater - the collar or hood! That being said, it really is only tricky in the context of how easy it is to sew the rest of the sweater, the cross over collar/hood is actually quite simple.
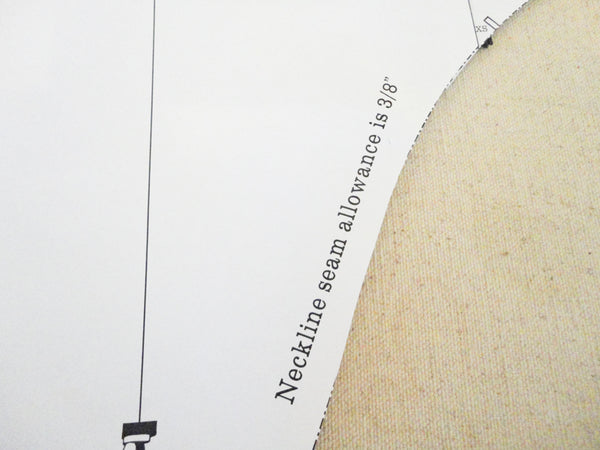
First things first, it is important to note that the seam allowance for the neckline is 3/8" rather than the 5/8" used for the rest of the sweater. We decided to use a 5/8" seam allowance for most of the sweater so that people using a regular sewing machine (rather than a serger) can sew the Finlayson just as they would sew a woven garment. For the collar, however, it makes more sense to use a smaller seam allowance which produces less bulk. That way there is less trimming involved once you have sewn your seams.
Let's begin with Variation One (if you are sewing Variation 2, scroll down considerably until you see the grey sweater!). Distinguish between your Upper and Undercollar pieces by placing a pin in one of them or marking it in some other way. I pinned my Upper Collar.
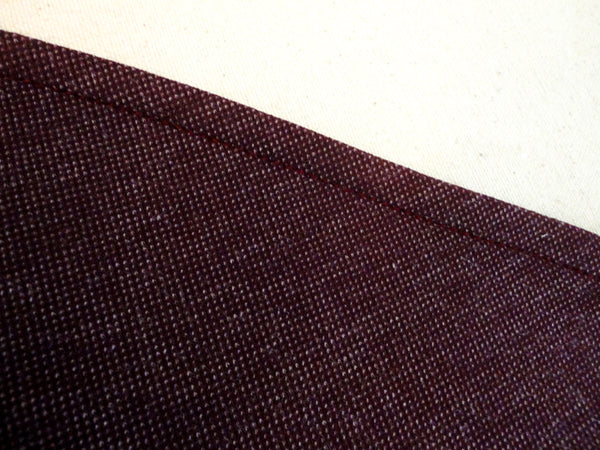
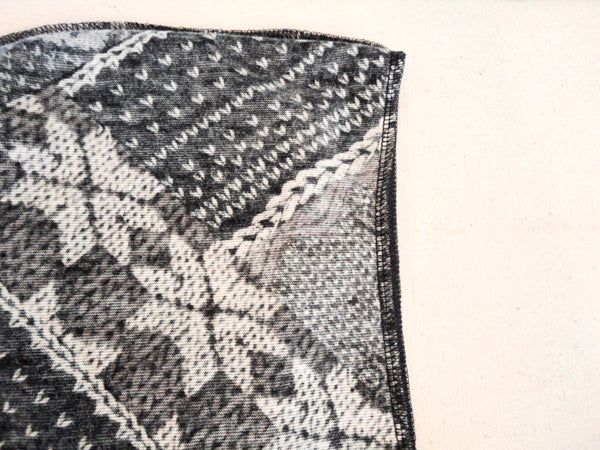
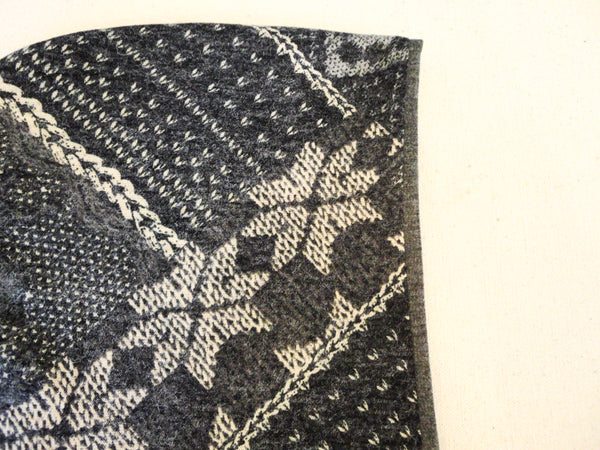
To assemble the collar pieces, place the two pieces right side together and pin along the long convex curve . Make sure to match the notch at the center and stretch the rest to fit (as the two collar pieces are shaped slightly differently to encourage the seam to roll under once the collar is finished). I stitched my pieces together using the reinforced stretch stitch and a 5/8" seam allowance (since this isn't a neckline seam).
It is a good idea to grade this seam to reduce bulk. You can do this by trimming one seam allowance to 1/4" and the other to approximately 3/8".
If your fabric doesn't seem to fray or pull and run too much, you can clip triangular notches into your seam allowance so that the curve turns right side out nicely but you might want to avoid doing this if your fabric shreds along raw edges very easily - you don't want to weaken the seam!
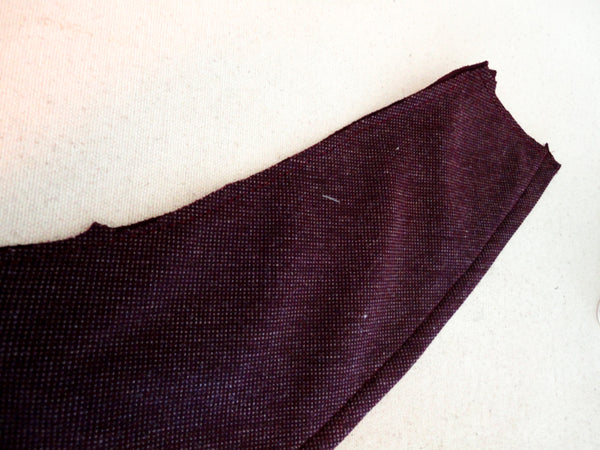
Flip the collar right sides out and carefully iron so that the seam sits slightly turned towards the under collar.
At this point you have three options - you can choose to leave the collar like this, you can under stitch the seam allowance and under collar together to help the seam stay rolled to the underside, or you can do what I have done in the photo above - top stitch 3/8" from the finished seam along the entire curve.
The last step to prepare the collar before adding it to the sweater is to baste the remaining Upper Collar and Under Collar raw edges together. You'll need to ease the layers again gently to make sure that all notches match.
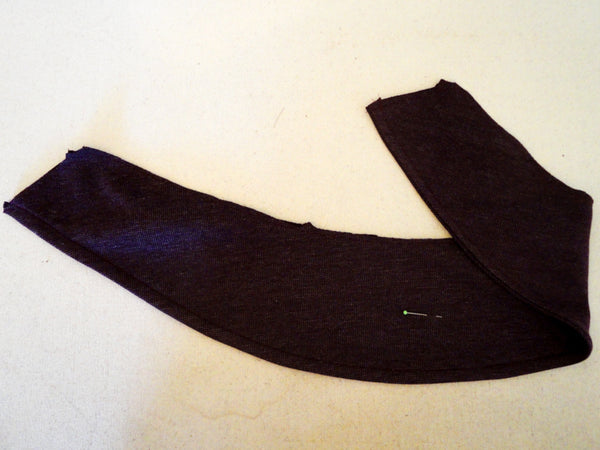
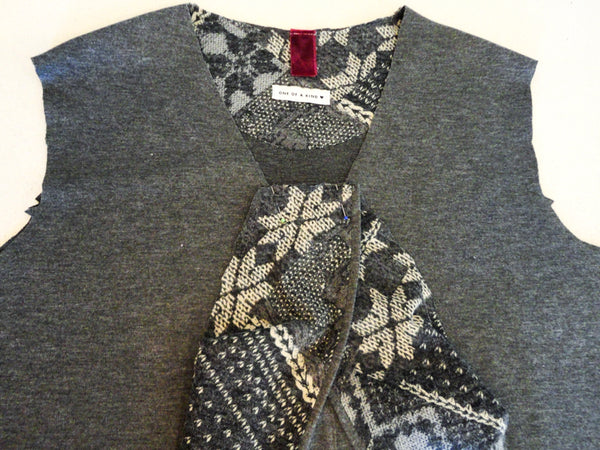
Now it's time to do a bit of origami! Place your collar in front of you with the Under Collar visible. Fold the right end inwards as pictured above.
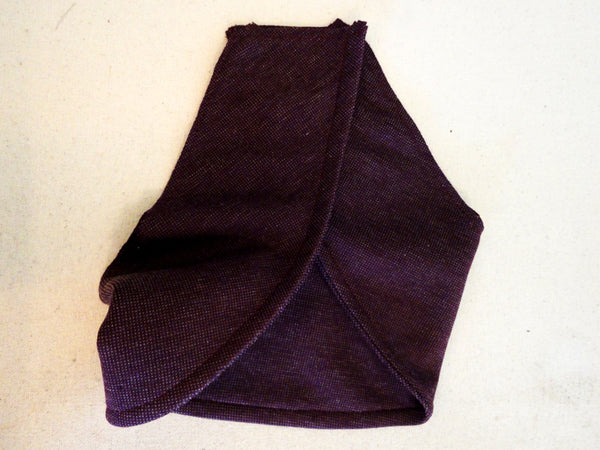
Fold the left end inwards and stack the narrow collar ends together.
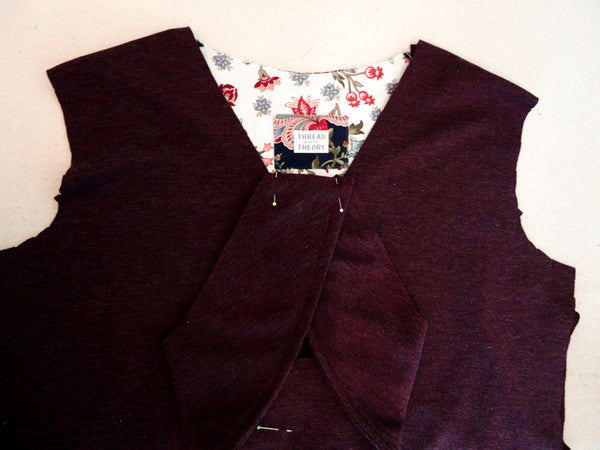
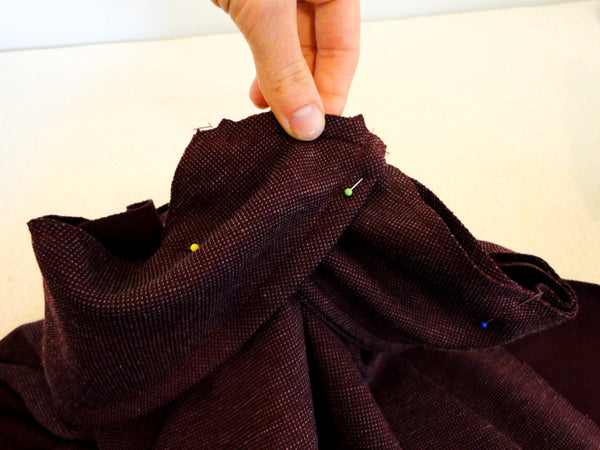
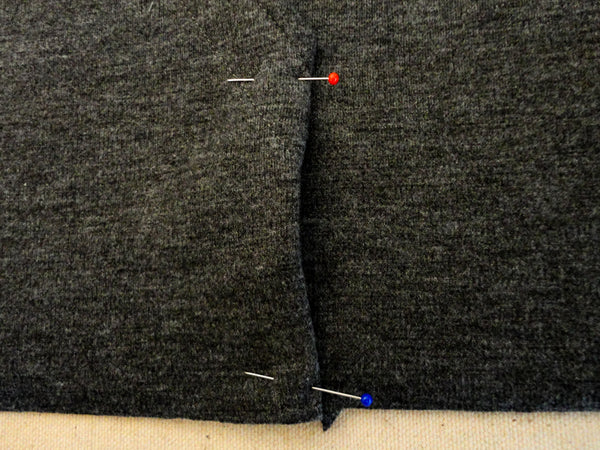
Lift up your collar and, without changing its positioning, place it on top of the sweater front.
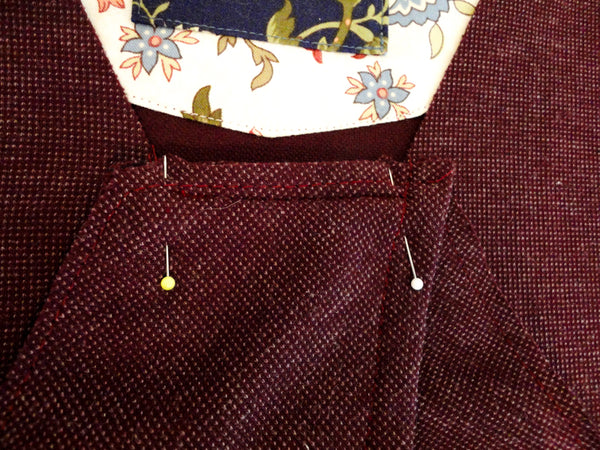
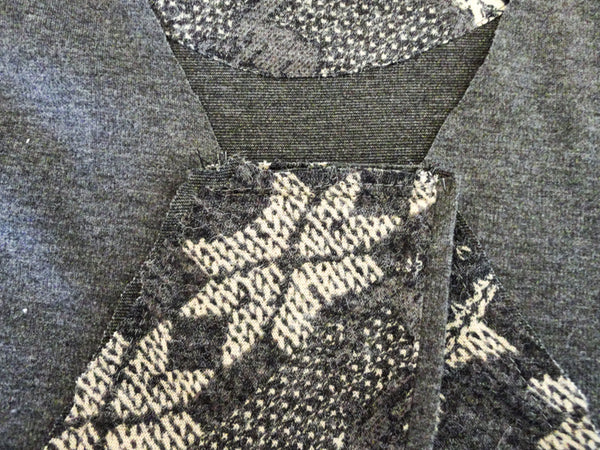
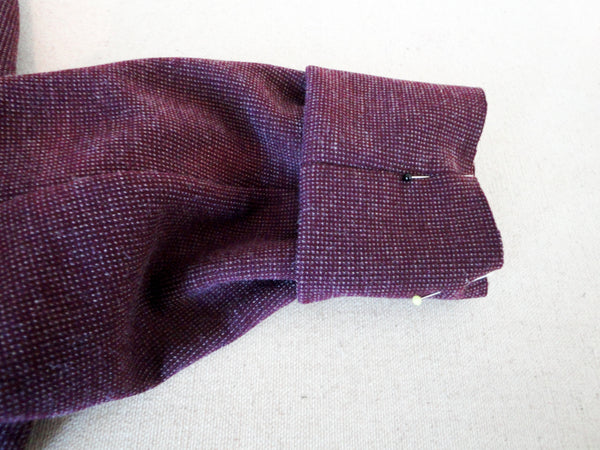
Line up the collar notches with the placement markings on the sweater front (I've placed pins at these two positions so you can see them clearly). Stitch, using a reinforced stretch stitch or just a straight stitch, from placement marking to placement marking (remember to use a 3/8" seam allowance! Your seam will start and finish 3/8" from either collar edge.
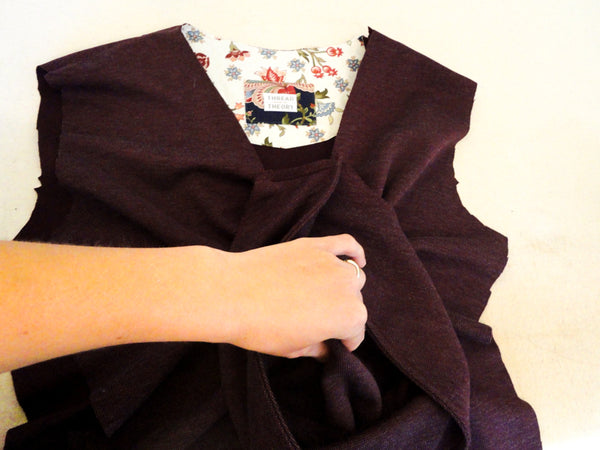
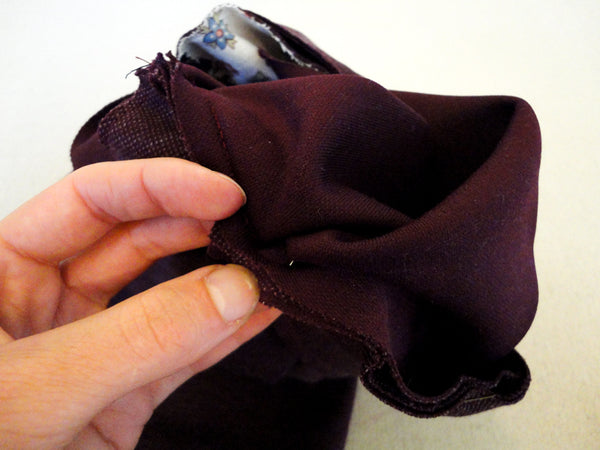
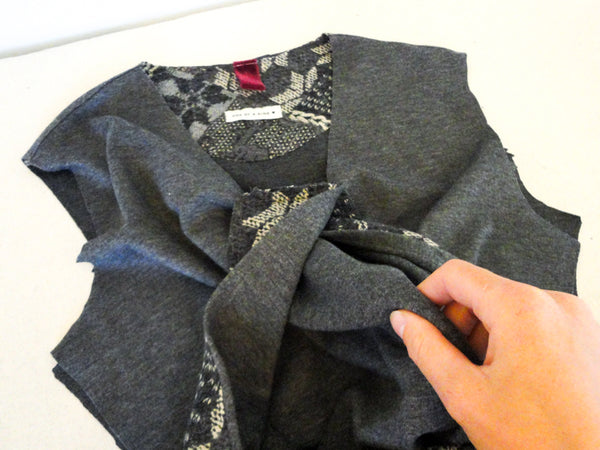
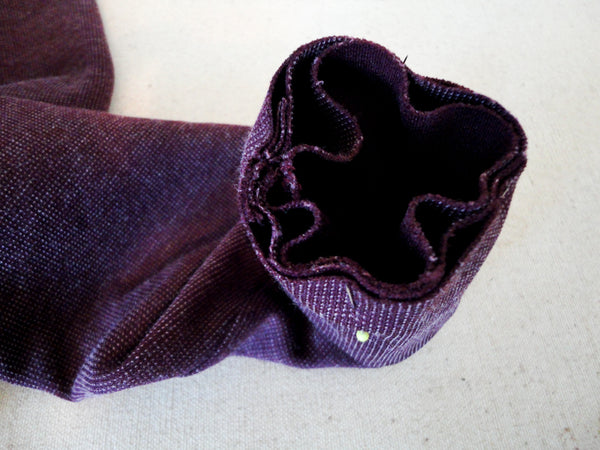
Now that the base of the collar is attached, it is necessary to re-position the collar so that it lines up with the sweater neckline. I do this by grasping the sweater through the loop of the collar (see photo above) and pulling the entire sweater through the collar loop.
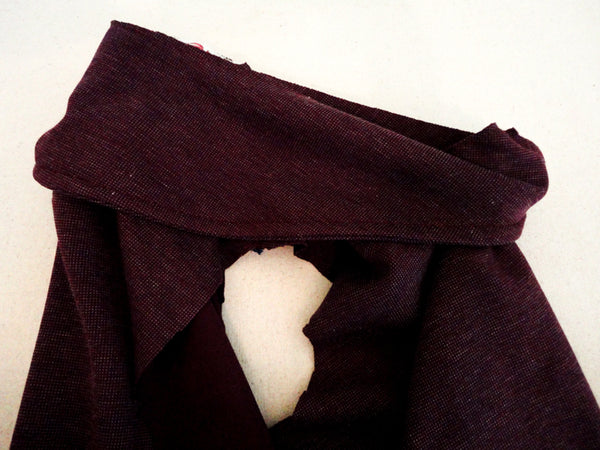
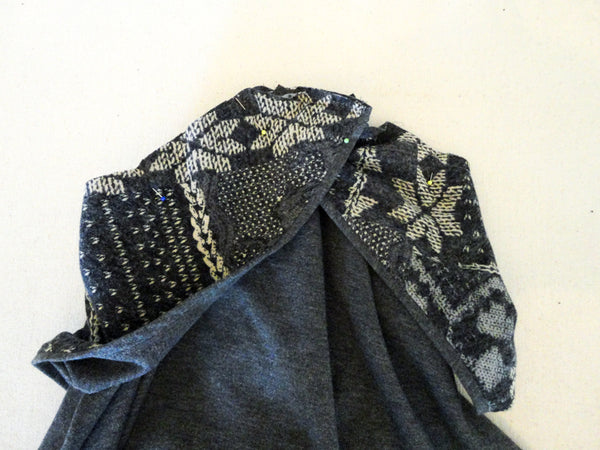
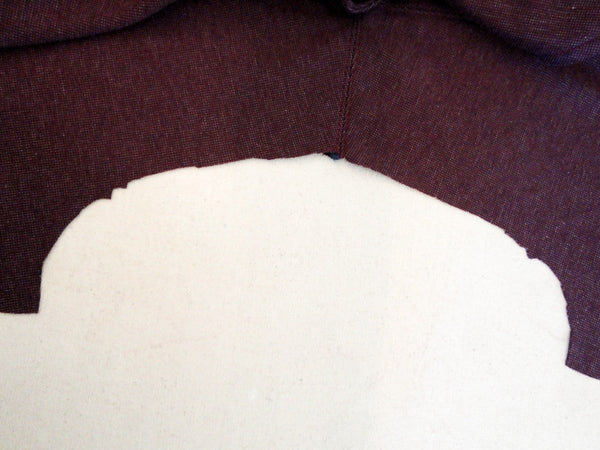
With some shifting and re-arranging, your sweater will eventually be positioned as photographed above - you can see the armholes in the middle of the photo and the sewn collar front on the right hand side. All raw neckline and collar edges are lined up together.

Above is a photo of the positioning from a different perspective. You can see the collar front in the middle of the photo and the pins mark where the collar notches match with the shoulder seams. Pin the entire collar circle in place.
At the collar front we will begin our stitching where we left off along the front of the collar. Keep in mind, when you begin and end your sewing of the collar loop, that there is quite a bit of Sweater Front fabric that needs to be kept out of the way while sewing (see the photo below). I like to sew the collar loop with the collar visible and the sweater against the bed of the sewing machine but you are welcome to sew this loop from the sweater side too (if you want to keep a close eye that the sweater doesn't get pinched in the seam!).
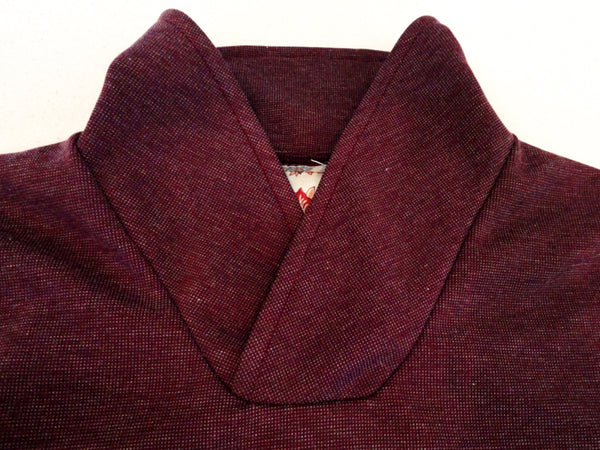
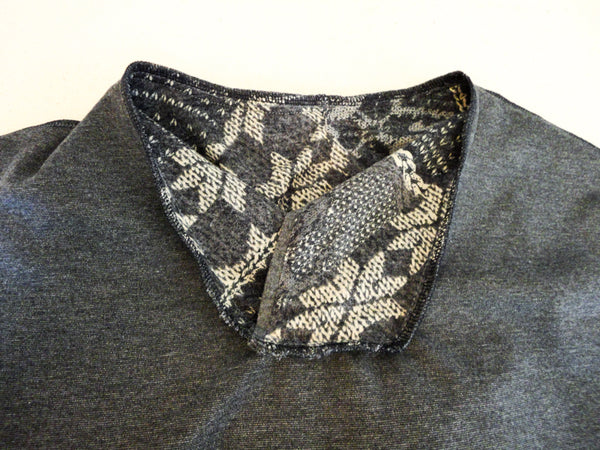
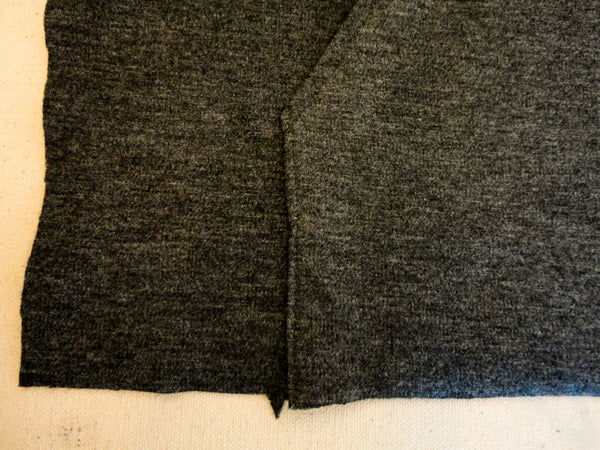
And here we have it! The finished collar (before any ironing or top stitching).

This is what the collar front looks like from the inside. You can see that my seam curves quite considerably at the corners - it should look more angular than this but I finished my front collar seam slightly too far from the collar edge. This little mistake didn't cause much harm though! With a bit of ironing and top stitching (as we will do shortly) the rounded corners looked perfectly presentable!
Trim the collar seam allowance as much as your fabric requires (depending on how easily it frays and how bulky it is). You could grade these layers to reduce bulk further if you prefer. Once trimmed, press the seam allowance towards the sweater.
As an optional way to create a flat and crisp appearance, you can top stitch the seam allowance in place all along the collar seam. I started my top stitching at a shoulder seam so that the back stitching will stay hidden under the turned collar. I top stitched 1/8" from the collar seam.

Congratulations, your sweater has a finished collar!
Now let's move on to Variation Two and sew the hood:
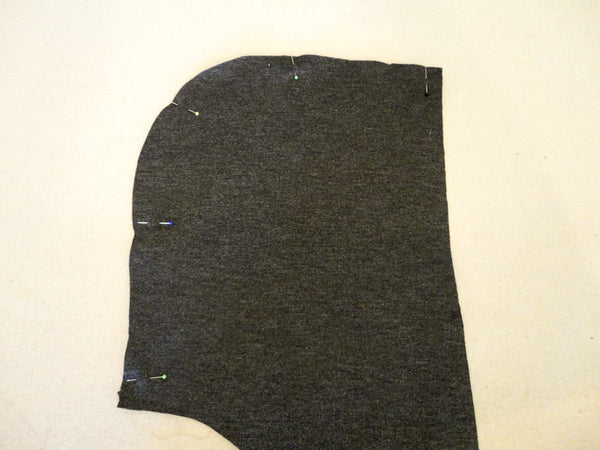
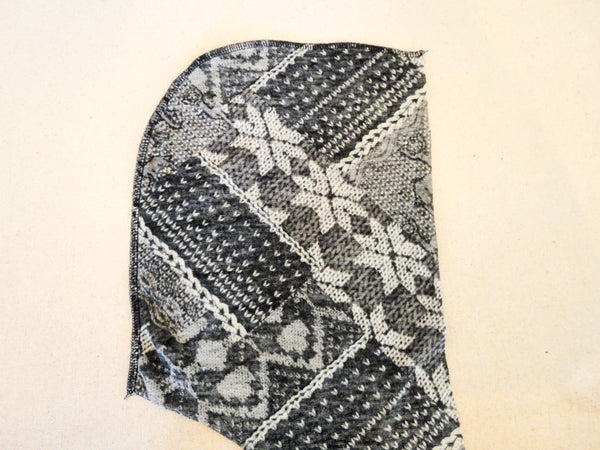
Place the Hood pieces with right sides together and pin along the hood curve.
You can do the same pinning to your lining pieces and sew both seams in one go! Since I am sewing this sweater with my serger, I simply serged these seams. You could also use the reinforced stretch stitch or a zig zag stitch for this seam.
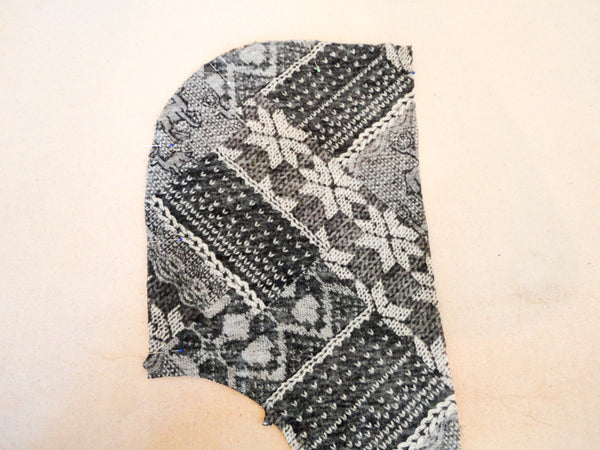
Iron the seams to one side or open depending on what type of stitch you used to sew them.
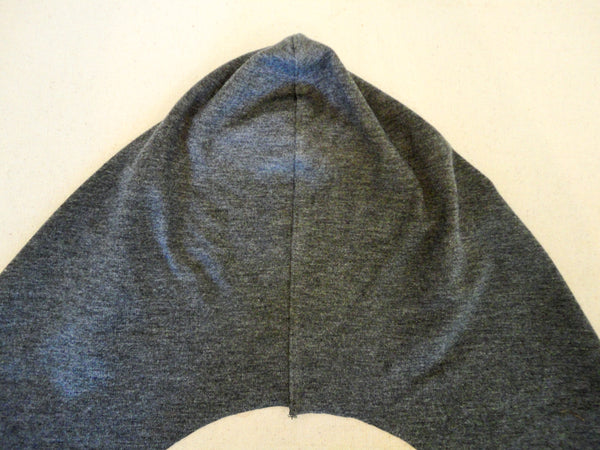
I decided to top stitch 1/8" from my seam to echo the top stitching elsewhere on the sweater. Top stitching looks so nice and crisp on this ponte de roma!
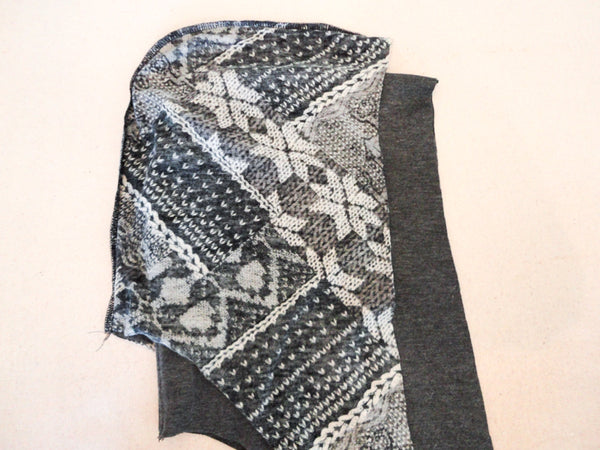
To join the lining and hood together, place these pieces with right sides together.
Pin along the long hood edge and stitch using your chosen method (I serged).

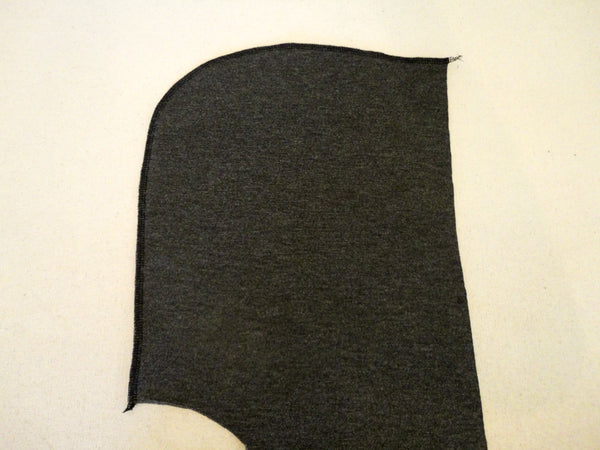
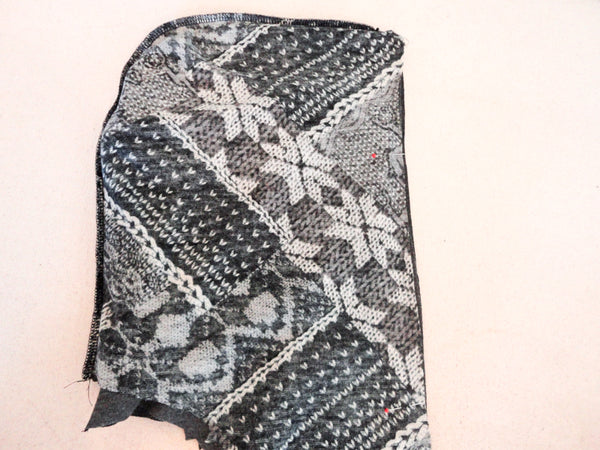
Flip the hood so that right sides are out and line up the rest of the raw edges. You'll notice that the hood piece is larger than the lining so make sure to line up the notch at the narrow base of the hood and turn the seam under to the lining side (pictured below).
I finished the hood edge by top stitching 3/8" from the hood edge (the folded fabric - not 3/8" from the seam, which is folded under).
And now it is time to finish the neckline seam. At this point we will begin stitching using a 3/8" seam allowance (I explain why at the very beginning of this post).

Pin the hood and lining layers together along the entire hood base. Baste these layers together using a long stitch. No need to back stitch!


As with Variation One, it is now time for a little origami! For more detailed photos of this folding process, refer to the collar photos earlier in the post. You will need to place the hood in front of you with the right side visible. Fold the right end inwards and then fold the left end inwards to stack the narrow collar end on top of the first one.
Without changing the hood positioning, place it on top of the sweater Front right side. Pin the narrow hood ends to the neckline base. Make sure to line up the notches on the hood with the placement markings on the sweater Front.
Stitch along the hood base using a 3/8" seam allowance - begin and end at the placement markings and notches (3/8" from either collar edge).
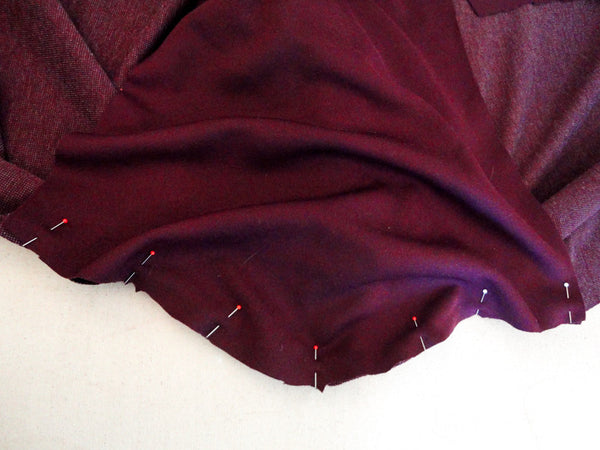
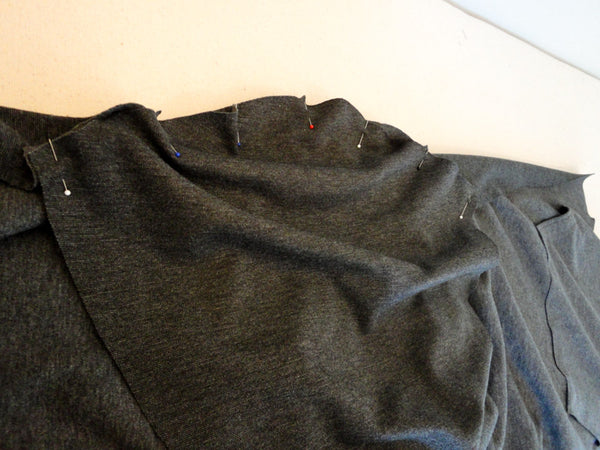
Now that the base of the hood is attached, it is necessary to re-position the hood so that it lines up with the sweater neckline. I do this by grasping the sweater through the loop of the hood (see photo above) and pulling the entire sweater through the hood loop.
Now that your sweater is through the hood loop, you'll be able to shift everything around until all the neckline raw edges of both the hood and sweater are lined up continuously. Pin everything in place matching the hood notches with the shoulder seams. Now we are ready to stitch the neckline! As I mentioned for Variation One, you will want to watch that the sweater fabric at the two front corners is free from your stitching - it is prone to becoming pinched so carefully shift the folds out of the way as you stitch.
I stitched my neckline with the serger only - but feel free to use a straight stitch or reinforced straight stitch if you want to be on the careful side (it isn't much fun to stitch-rip serging if you need to adjust your seam line!).

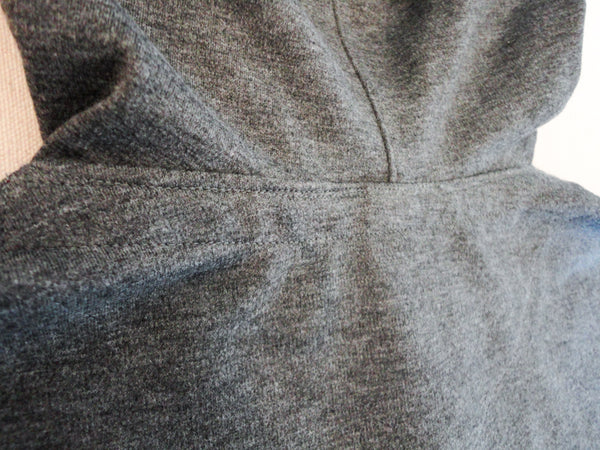
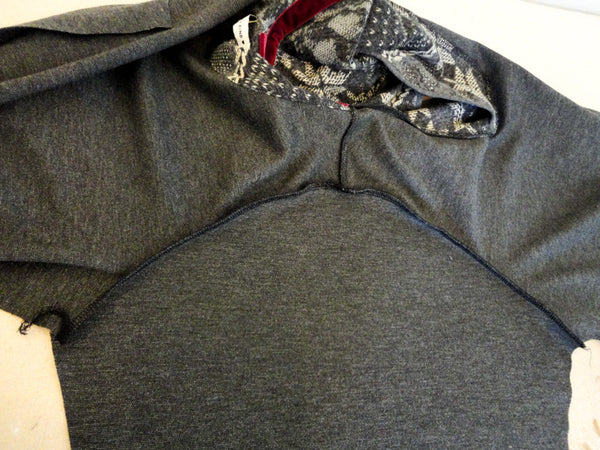
Press your seam allowance towards the sweater. To continue my theme of top stitching, I top stitched, starting at a shoulder seam, all the way around the neckline.

Doesn't that look nice? I hope yours does as well!

Finlayson Sweater Sew-Along: Day 5 - Neckline twill tape and the kangaroo pocket
Welcome to the next installment of the Finlayson Sew-along! We'll be adding twill tape (or ribbon) to our necklines today for a fancy and professional looking finish. We'll also be sewing the kangaroo pocket. I'm adding this pocket to my grey ponte de roma sweater (Variation Two) but you could add it to either variation depending on your preference.
I'm going to go over two techniques for adding ribbon or twill tape to your Finlayson Sweater's neckline. The first technique will be slightly different than the one we include in our instructions and the second technique (which I've used for the grey Variation Two) will be the same as in the instruction booklet.
This first technique is a bit simpler but also a bit less professional version of applying trim to the neckline. I stitched the ribbon directly onto the sweater without folding under either ribbon edge. This will work well if your ribbon isn't very wide (my 1" ribbon was quite wide for this technique but, since it is satin, it still managed to bend to the neckline curve fairly well) and if it's edges aren't very scratchy.
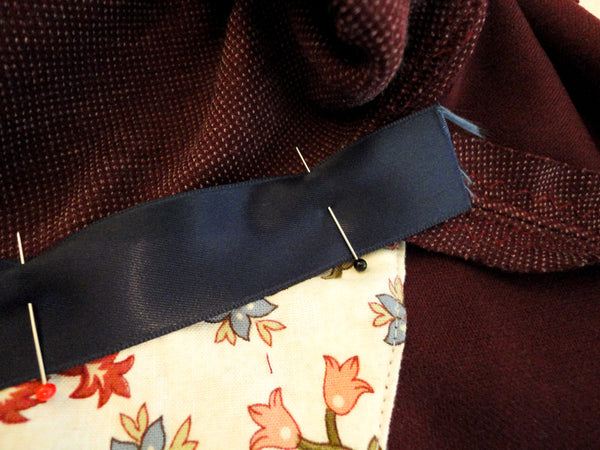
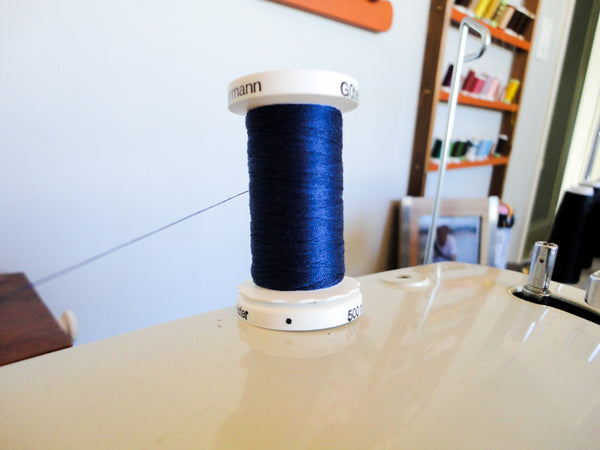
To apply the ribbon, you will need to thread your machine with a thread colour that matches the ribbon on the top and a bobbin full of thread matching the sweater on the bottom. Pin your ribbon to the neckline so that the top of the ribbon lines up with the neck seamline and the rest of the ribbon extends into the sweater below. Allow the ribbon to extend at least 1/2" past the shoulder seam on either side of the neckline.
Simply top stitch the ribbon along the neck seamline, stitching as close to the top ribbon edge as possible:
If your ribbon is too long, trim either end of it so you have 1/2" that is unsewn along the top. This is kept free to tuck under before you sew along the bottom of the ribbon (leaving no raw edges).

Pin the bottom of the ribbon and the tucked ends in place. Stitch along the bottom of the ribbon, and, if you like, stitch along either ribbon end to keep the tucked ends from slipping out (this isn't very necessary with narrow ribbons (1/2" twill tape for example) but is probably helpful with 1" ribbons like the one I used).
And there you have it! A gorgeously finished neckline!
Now I will show you the very slightly more complicated method that I included in the instruction booklet.
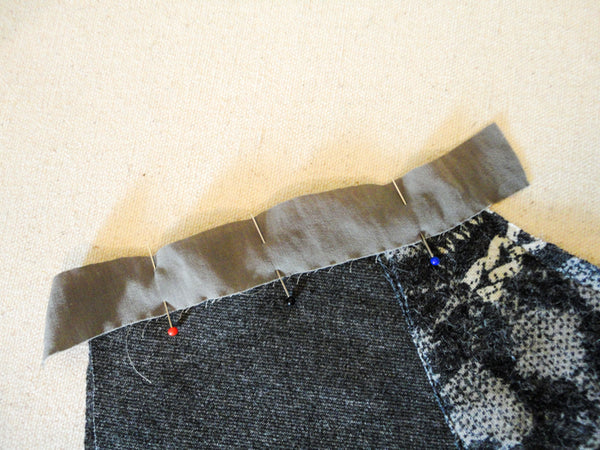
The only difference with this method is that it results in a ribbon with a tucked under top edge. This is potentially softer on the neck and creates a narrower ribbon finish which means the top stitching visible from the right side of the sweater will be closer together and thus a bit more attractive. To begin this method, pin the ribbon/twill tape to the garment with the right side of the ribbon facing the sweater and the bottom ribbon edge lined up with the neckline seam. The rest of the ribbon will extend above the sweater towards the collar.
Stitch the bottom edge of the ribbon in place using a thread that matches the ribbon on the top of your sewing machine and a bobbin of thread matching your sweater on the bottom.
Trim either end of the ribbon so that 1/2" free ribbon extends beyond the shoulder seam and stitching. Fold the ribbon downwards to cover the neckline seam allowance and fold under the 1/2" free ends.
Pin the folded ends and rest of the ribbon in place.
Stitch along the bottom and the folded ends of the ribbon. Voila, you have a beautifully finished neckline!

This is what your sweater will look like from the outside. Of course, if your twill tape or ribbon were thinner than mine (the recommended 1/2" for example) your top stitching would look much closer together.
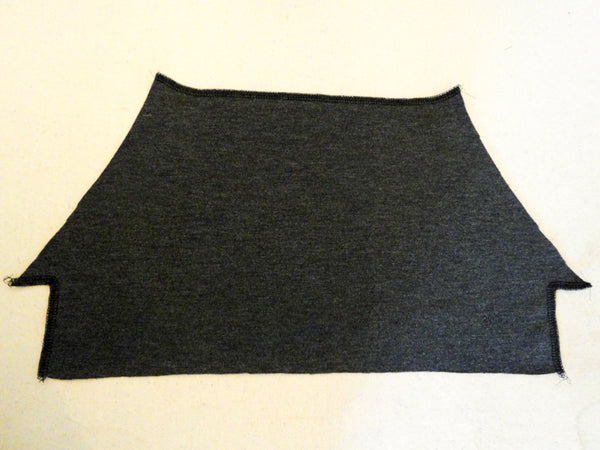
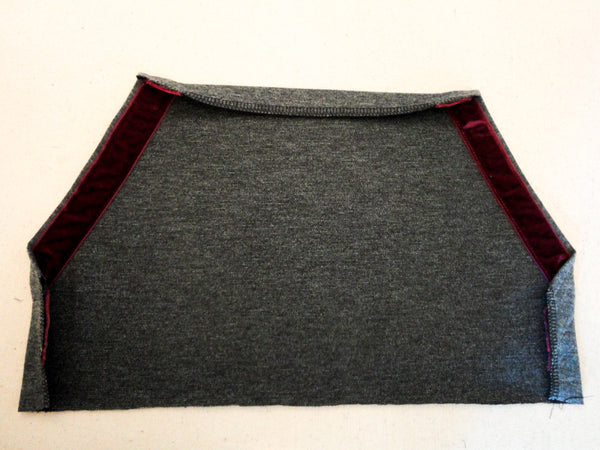
Now we'll move on to the kangaroo pocket! Finish all edges (as per the instructions) or, if you are wanting to finish only the very necessary edges, you can finish the edges depicted in the photo above. I finished my edges with a serger but you could also use a zig zag stitch.
Now fold over the slanted pocket openings (5/8").

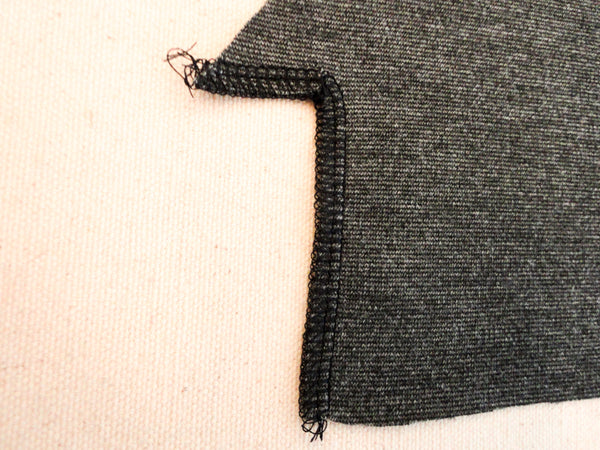
Pin your trim over the raw pocket opening edge. At first, I placed my trim centered over the raw edge but I ended up shifting it closer to the folded edge before stitching because I wanted my top stitching to be close to the edge on the outside of the pocket. You would not need to shift your trim this way if you are using 1/2" twill tape as recommended!
Stitch down either edge of the ribbon and trim any ribbon extending past the pocket.
Above is how your pocket will look from the outside!
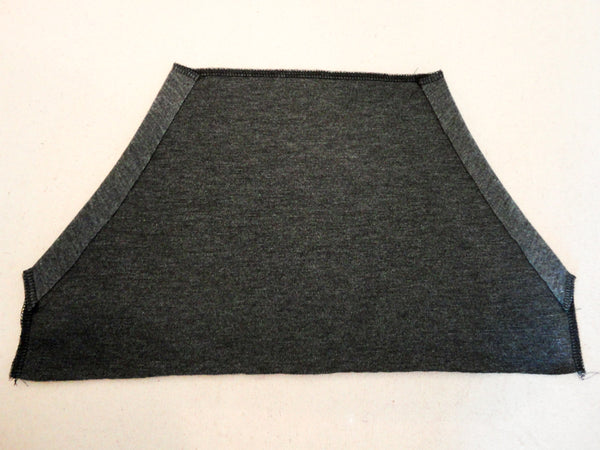
Fold under the remaining 5/8" seam allowances. You don't need to fold under the bottom edge of the pocket because it will be aligned with the bottom of the sweater front and finished when we add the hem band at a later point.
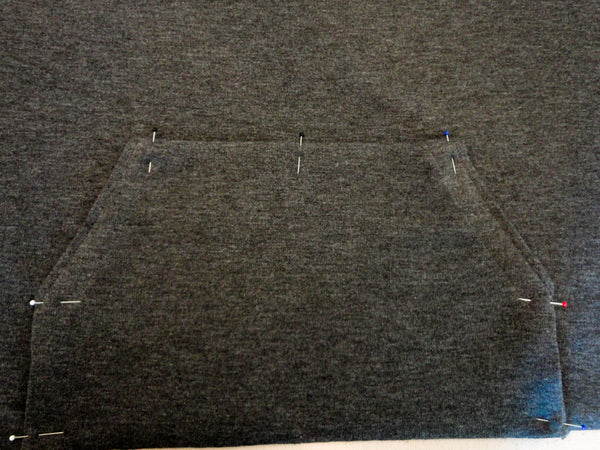
Pin the kangaroo pocket to the sweater Front matching the pocket sides with the notches along the sweater Front bottom edge.
Stitch the pocket to the sweater along the sides and top, keeping the stitching 1/8" from the folded edge. If you would like, you are welcome to baste the bottom of the pocket in place so it doesn't shift about.

Finlayson Sweater Sew-Along: Day 6 - Sewing the sleeves and side seams
Today we'll be adding the sleeves to our sweaters and sewing the side seams. You'll be able to try your sweater on by the time you're done this session of sewing!

The sleeve pieces include a double notch on one side and a single notch on the other. Double notches always signify the 'back' of a garment and, in this case, they match with the double notches on the sweater back armhole.
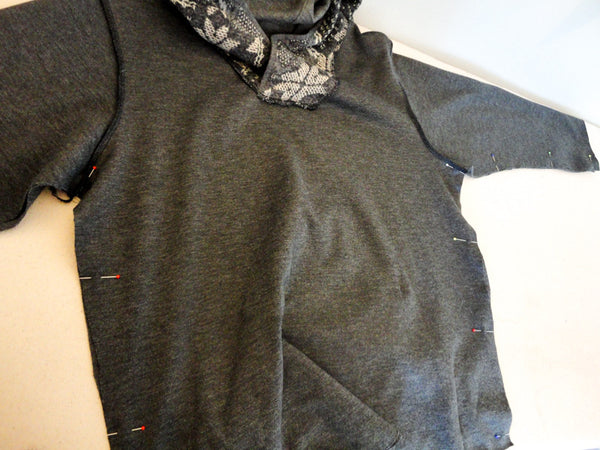
Pin the first sleeve to the sweater with right sides together and notches matching. You might want to use quite a few pins to help the sleeve contort to the shape of the armhole.
Sew this seam slowly, adjusting the fabric to keep the raw edges lined up as you go.
I sewed the seam with a reinforced stretch stitch and finished the seam with a zig zag stitch.
If you'd like, you can trim the seam allowance to reduce bulk along the sleeve seam. Press this seam towards the sleeve (as pictured below).
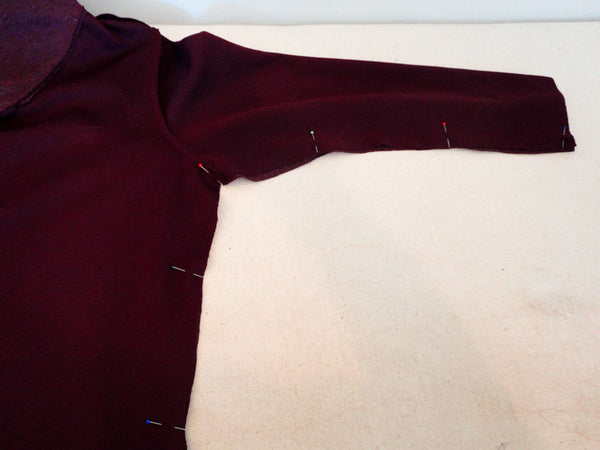
And now it's time to stitch our side seams (one of the most exciting parts of sewing a garment, in my opinion! Our sweater is finally taking shape!). Pin the side seams and arms with right sides together. Take extra special care to match the armhole seam.
I stitched the whole seam using the usual reinforced stretch stitch and finishing the seam with a zig zag stitch.

Depending on what stitch you used, you can either press the entire seam open or you can press the seam allowances towards the back.
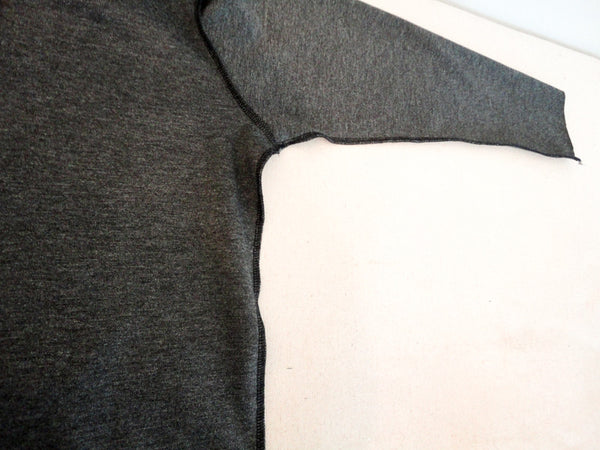
Since the sleeves and side seams are the same process for Variation One and Variation Two, I'll include only the relevant pictures to show you the serging on this version:
Press the serged sleeve heads towards the sleeve.
I also serged the side seams and pressed them towards the back:
Well, that's it for today! A fast and easy one :).

Finlayson Sweater Sew-Along: Day 7 - Finishing the cuffs and hem band
Can you believe it? Today we'll be adding our cuffs and hem band...and finishing the day with a cozy sweater to wear!
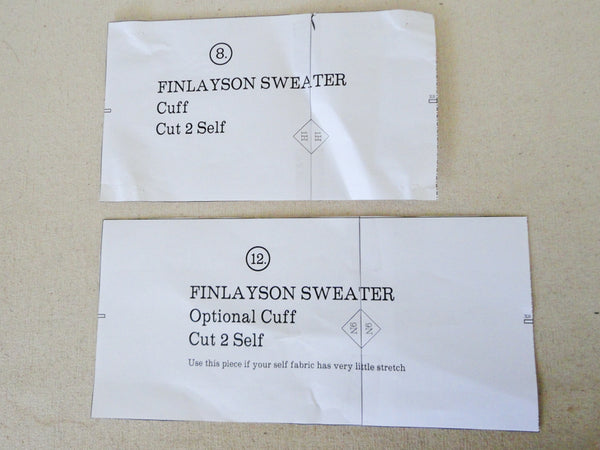
You may have noticed that we included two Cuff pattern pieces - I probably should have mentioned this second cuff piece when we cut our Finlaysons out of fabric early on in the sew-along. But, alas, I forgot to! So we'll discuss it now: We included the second, larger, cuff piece for you to use based on the extremely helpful advice of our test sewers. You may have noticed that I am adamant about the versatility of the Finlayson Sweater pattern when it comes to fabric choices. One of our test sewers noted that fleece fabrics (a great choice for a cozy sweater!) REALLY vary in the amount of stretch they contain. So that you won't be constrained in your choice of fleeces (as long as they have a little bit of stretch), we created the Optional Cuff for you to use. Cut your cuffs from this piece so that you won't have to ease so drastically when attaching the cuff to the larger sleeve...much easier to sew if you don't have much stretch to work with!
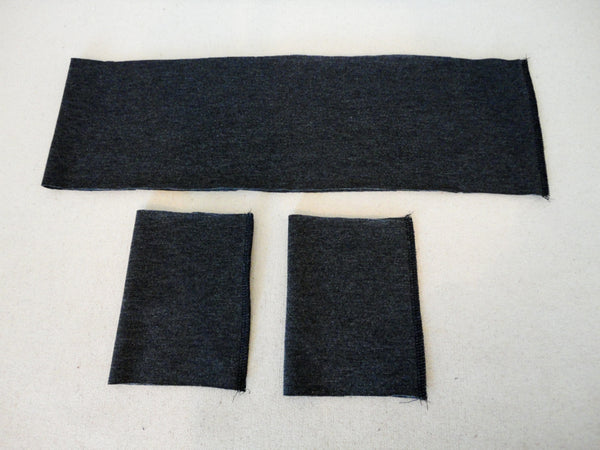
With that in mind, onward with our sewing of the cuffs! Whether you use the main Cuff pattern piece of the Optional Cuff piece, the sewing process is essentially the same:
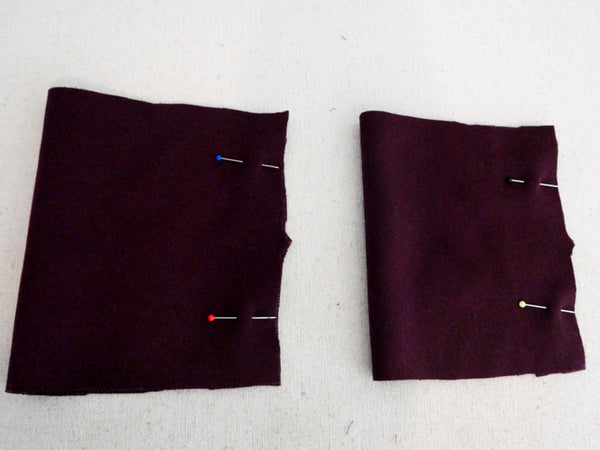
Fold your cuffs in half to match notches together. Pin along the notched edge (in the photo above, the fold is on the left hand side).
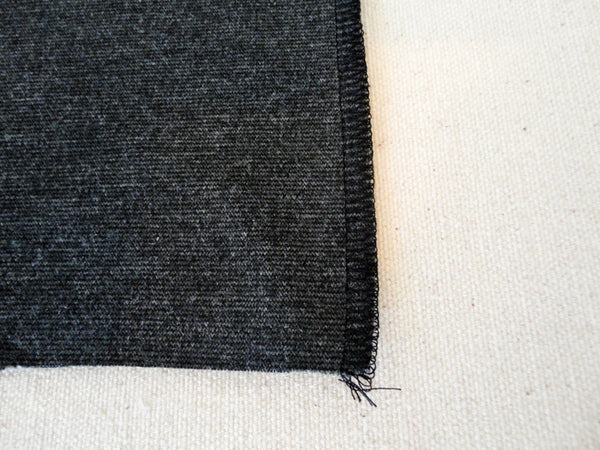
Sew along this notched seam. I used the reinforced stretch stitch as per with the rest of the sewing process for my Variation One sweater.
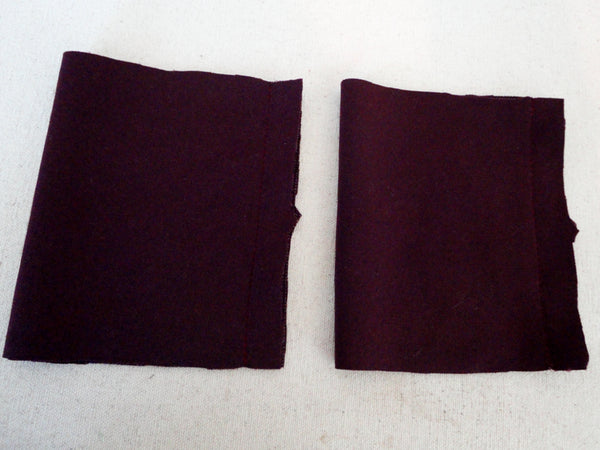
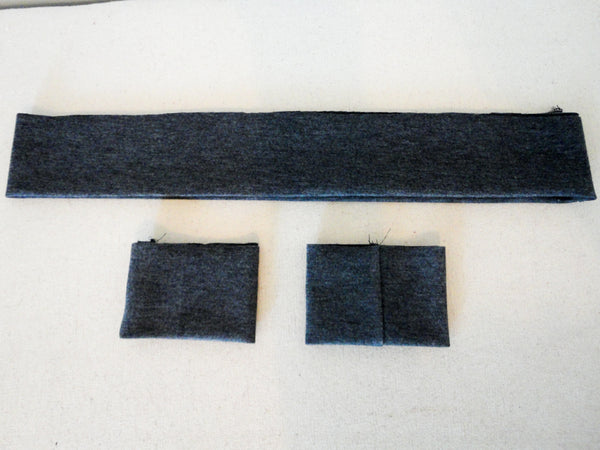
If using a stitch that allows you to open the seam, press your seam open. Otherwise, you can simply press the seam to one side.
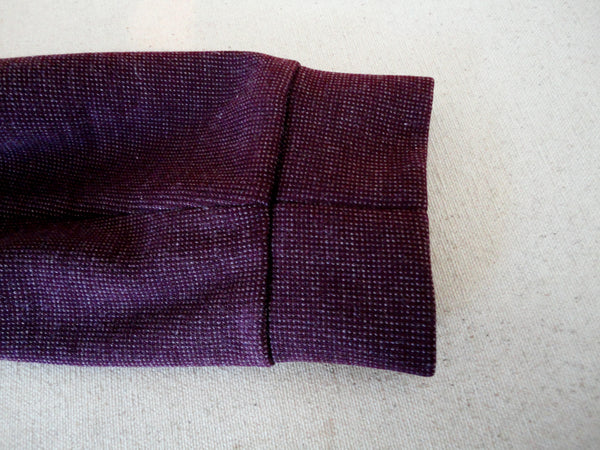
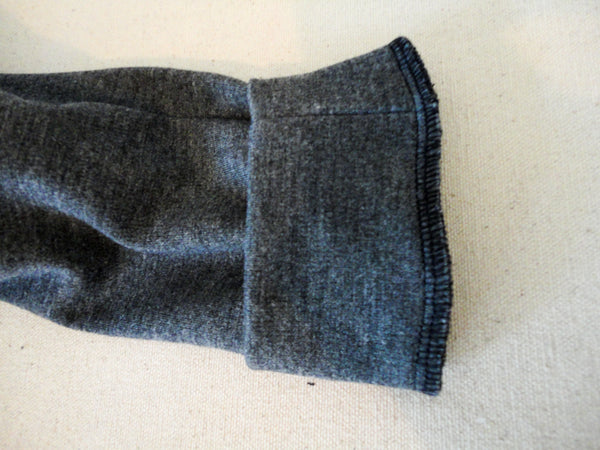
Now fold the cuff in half (so that you are folding the seam that you just sewed in half). Press along the fold - this will be the very bottom of the sleeve.
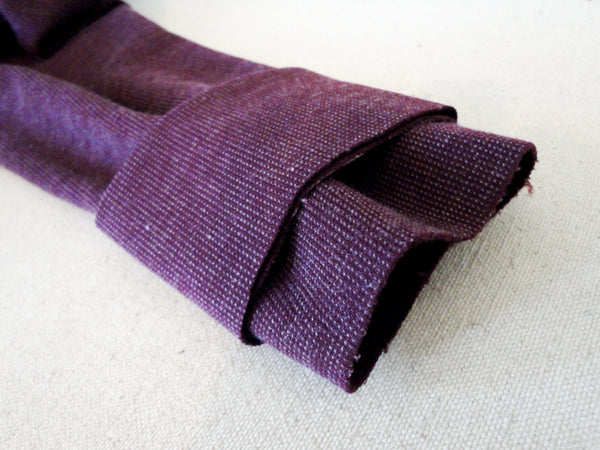
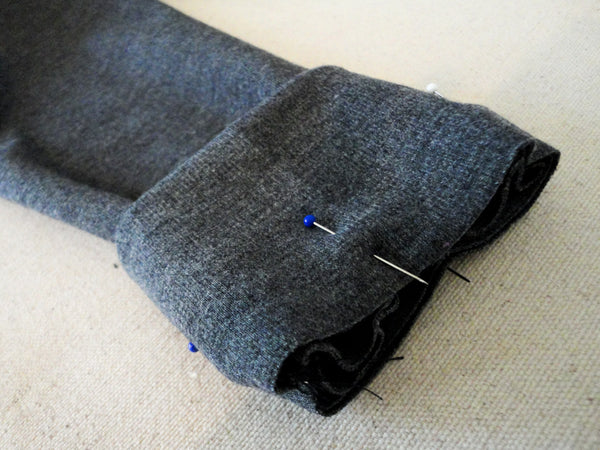
Stretch the looped cuff over the sleeve end so that all three raw edges line up (I've shifted the cuff up the sleeve in this photo so that you can see all the layers clearly).
Pin the cuff in place - be sure to line up the seams and stretch the cuff evenly around the sleeve.
In the photo above you can see how much easing you will need to do! (Now you can see why it is far easier to use the Optional Cuff piece if your fabric doesn't stretch much!).
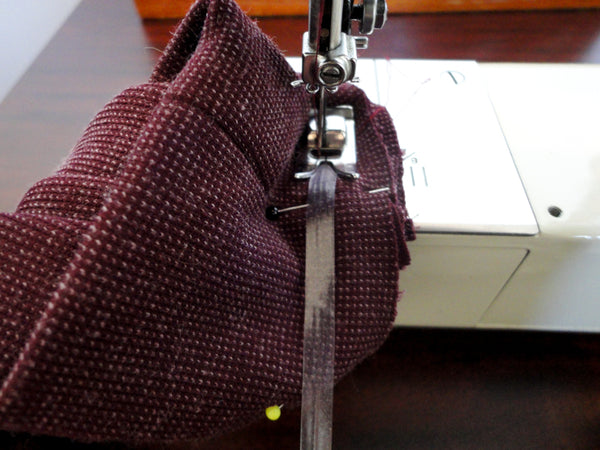
I really like to apply clear swimsuit elastic to the cuff seam because I often push my sleeves up my elbow and can't stand when my sleeves stretch out and slip downwards over and over again throughout the day. This clear bit of elastic will do wonders to prevent stretching! I have often read that you shouldn't allow your needle to punch directly into clear swimsuit elastic as you risk creating a weak point where it will snap. I have never had this problem yet, but please keep this in mind and consider using a stitch that will capture the elastic by encasing it in stitching (a super wide zig zag or serging, for example). I just used a narrow zig zag stitch!

If your fabric is loosely knit (mine isn't!) you might consider pulling the elastic slightly as you so to give more structure to the seam and fully prevent any fear of stretching out.
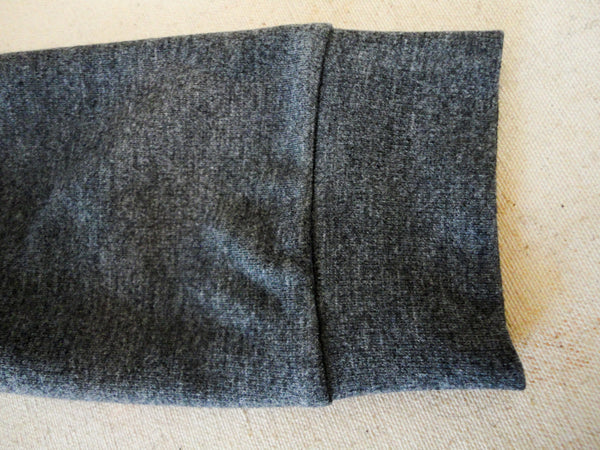
Once sewn, trim your seam allowances and press them towards the sleeve (away from the cuff).
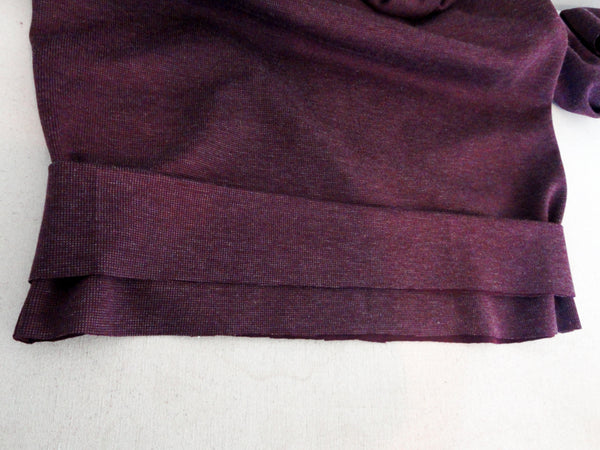
To sew the hem band, simply repeat the process that we used for the cuffs - you won't have to ease quite so much with this pattern piece though! Once you've formed a loop with the hem band, pressed the seam open and pressed the band in half length-wise, encase the sweater with the hem band and line up all three raw edges. Line up one of the side seams with the hem band seam.
I stitched my hem band using a reinforced stretch stitch and finished the seam allowance with a wide zig zag stitch.
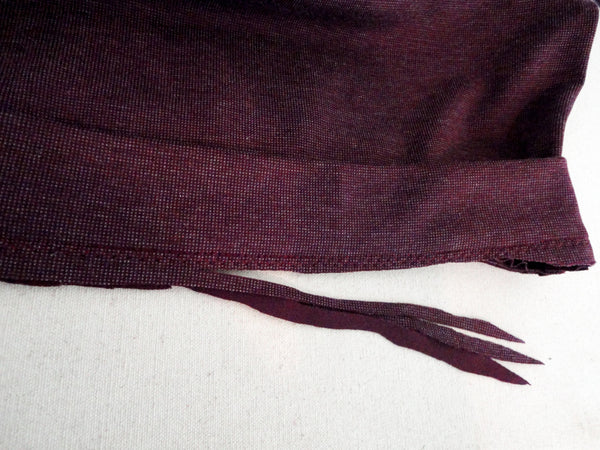
Trim your seam allowance, if desired...
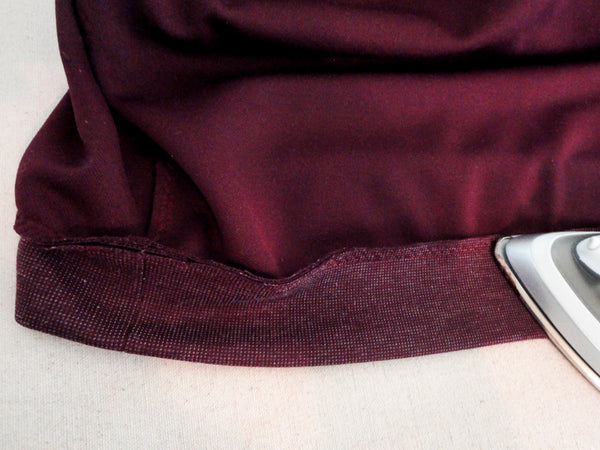
...and press the seam allowances up towards the sweater.
And we're done! If you were sewing Variation One, you are done your sweater! Congratulations!!!
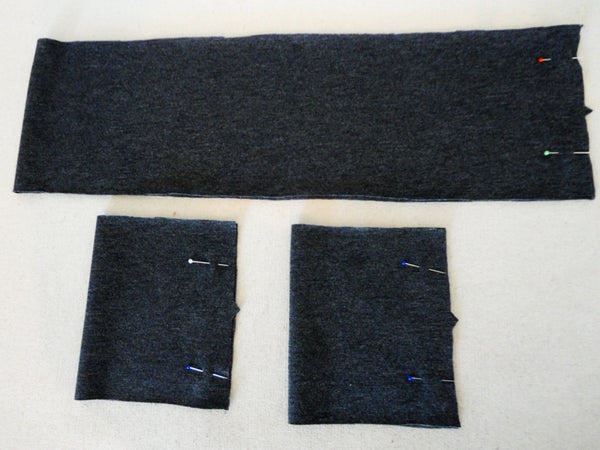
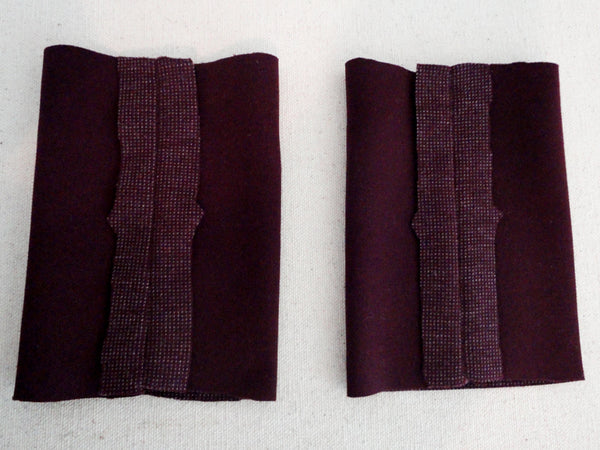
Now, onwards to Variation Two. As with the previous sew-along post, the sewing process for the cuffs and hem band are the same as with Variation One. Begin by pinning the cuffs and hem band in half (matching notches).
I serged this variation but use your preferred stitching method of choice to finish the notched seams.
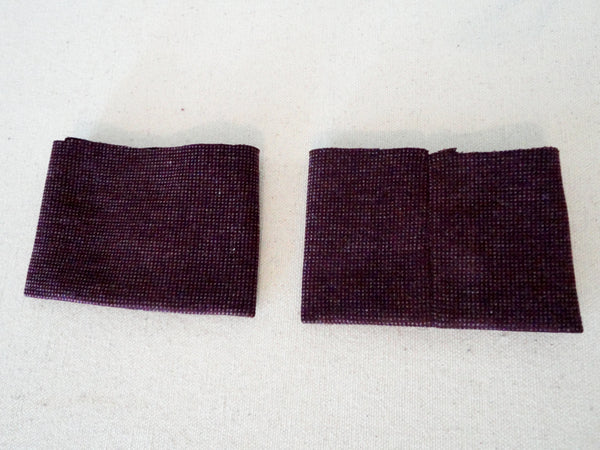
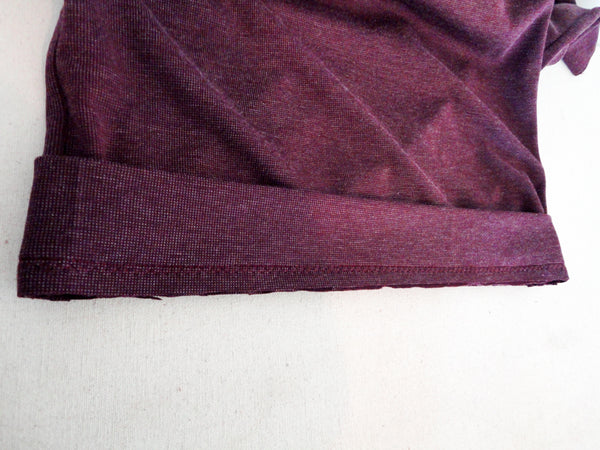
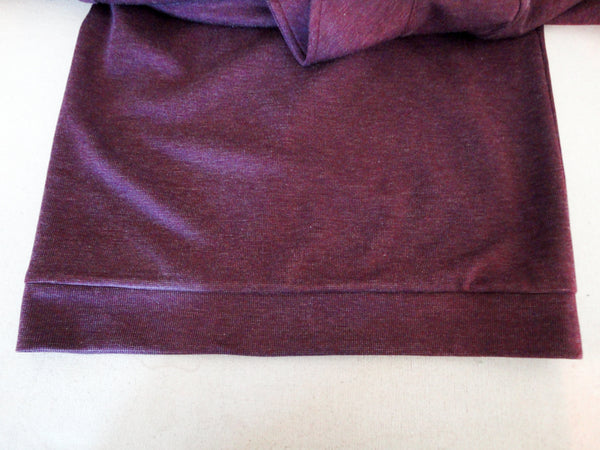
Press the seam open or to the side (depending on your stitch type) and then fold the cuffs and hems in half width-wise.
Press the hems and cuffs to create a crisp fold (which will be the bottom of the sleeves and the bottom of the sweater.
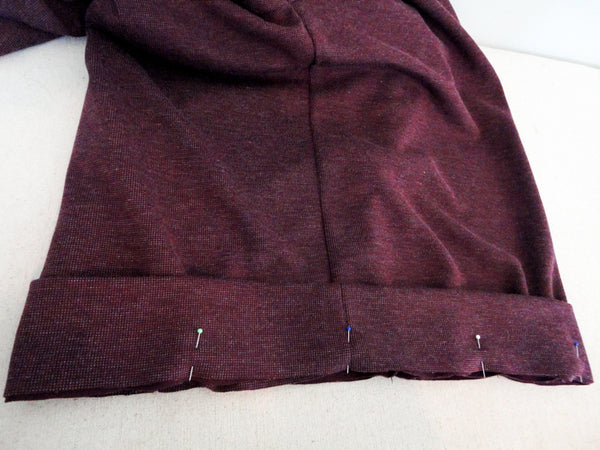
Pin the cuffs and hem band over the sleeves and sweater, matching all three raw edges.
Sew these seams - I sewed them with my serger. In case you are interested to know: My serger has trouble cutting through several medium-weight knit layers - especially when I have to cross over the extra layer of the kangaroo pocket or the sleeve and side seams - to combat this issue, I often trim my seam allowances with scissors before sewing so that only 1/4" of the allowance remains. That way, I don't need to cut off any fabric with the serger blade while sewing! Trimming first works a treat :).
And we're done Variation Two! Congratulations on sewing such a cozy and well made sweater.

Finlayson Sweater Sew-Along: Day 8 - The Parade
Today I am really excited to announce the winners of our Finlayson Sew-Along Contest! Thank you to everyone who busily sewed and submitted their entries.
Let me tell you, it was a super tough decision to choose these winners! But, we managed to whittle the choices down and, without further ado, here they are!
The winner of the Canadian Entry Prize: $30 Gift Certificate to Simplifi is Natasha for her innovative use of shoe laces!
Natasha used a printed shoe lace instead of twill tape to finish the neck seamline and the raw edges of her kangaroo pocket.
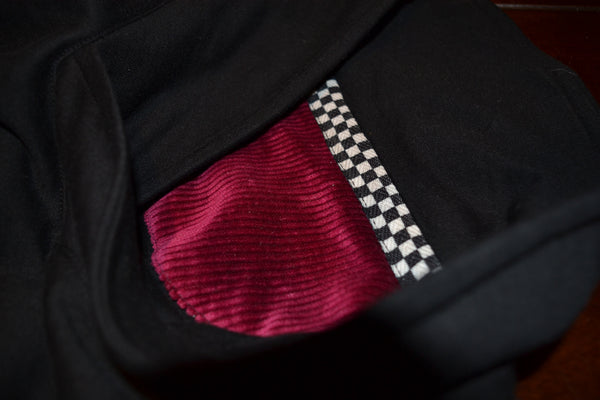
I think the result looks really professional and goes with her fabric choices perfectly (organic cotton sweater fleece and corduroy cut from a pair of old pants). I've seen all sorts of interesting printed and coloured shoe laces at department stores, shoe stores and even skate shops so I think it would be far easier to find a nice printed cotton shoe lace for your Finlayson Sweater than the same quality printed cotton twill tape (judging by what is available at my local fabric stores). Thanks for the great idea Natasha!
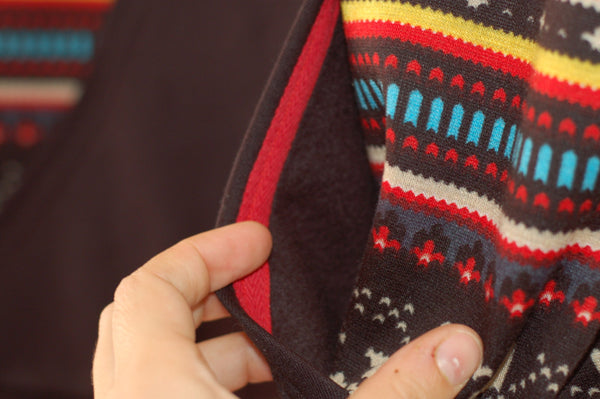
The winner of the Third Prize: A $30 Gift Certificate to Girl Charlee is Tina Wheeze for her awesome alpine sweater!

The contrast sleeves are a great way to make such a bright print less overwhelming and I really like how she used the print for the cuffs.
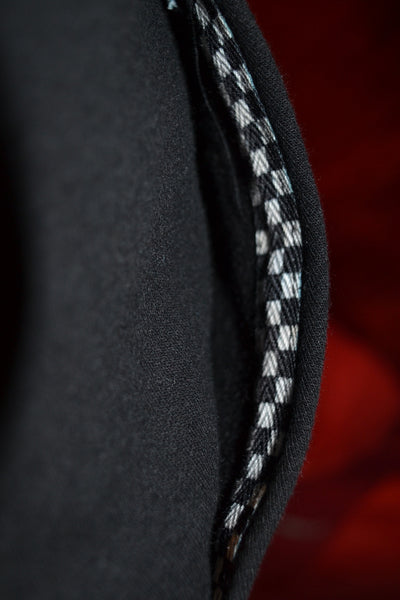
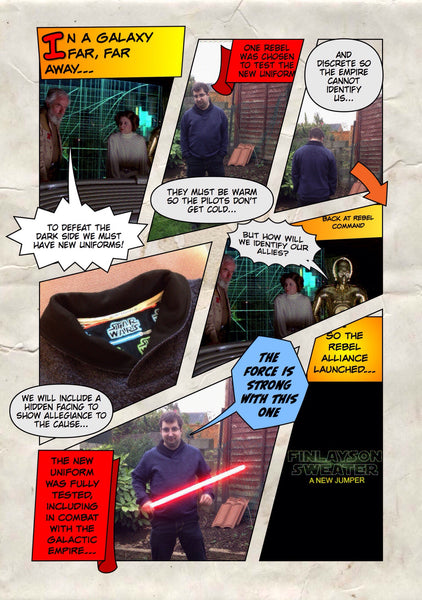
Second Prize: $50 gift certificate for Britex Fabrics, goes to Jackie for her Star-Wars themed Finlayson.
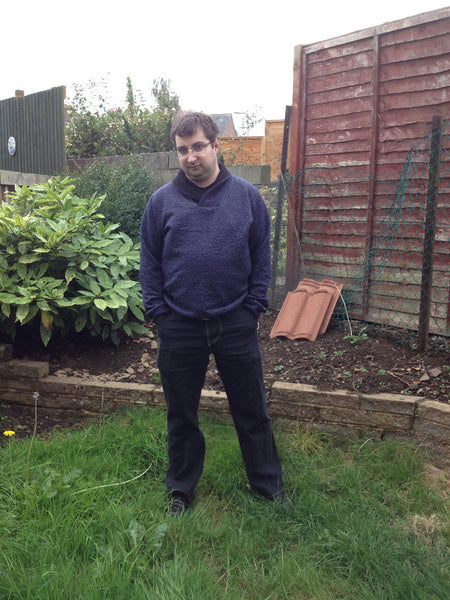
The contrast collar looks lovely paired with the textured blue knit. And I really like how she used both the twill tape and facing to completely personalize the sweater.
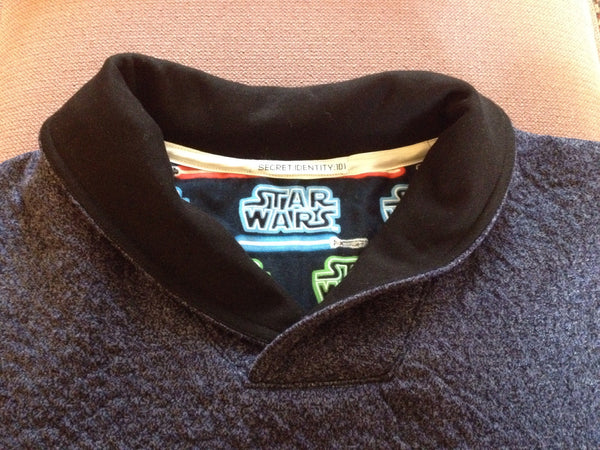
PLUS, I love the effort and humor that went into Jackie's Star Wars comic!
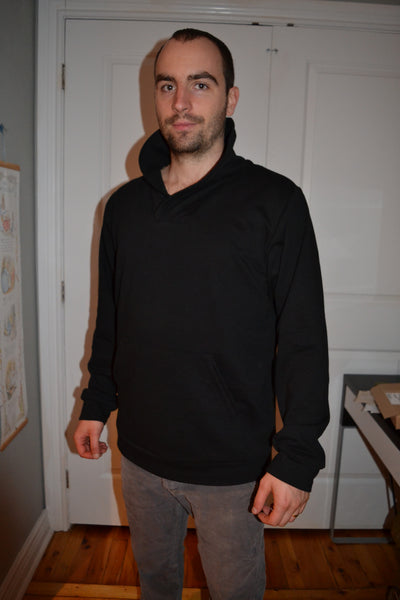
And, drum roll please! First Prize is a $100 shopping spree at Hart's Fabric and this awesome gift certificate goes to Ann Kin for her impeccably sewn Finlayson Sweater. The fabric choice is so classy, the fit is spot on and the contrast collar is such a nice detail.
Most impressive, though, is Ann's careful stitching. Just look at THAT:
Congratulations to all of the winners and a huge THANK YOU to all the participants of our Finlayson Sweater Contest!