

Sew-along with us!
Perhaps you'd like some company while you sew? We've sewn up each of our patterns and photographed each step along the way. Find the pattern you're after in the filter drop down below left.
Sew-Alongs

Eastwood Pajamas Sew-Along : Day 1 - Choose a size and variation
Eastwood Pajamas Sew-Along Schedule
Day 1: Elastic choices, adjusting for fit and style
Day 2: Cutting out fabric, sewing the optional patch pocket
Day 3: Sewing the inseams and optional mock or functioning button fly
Day 4: Pockets and side seams
Day 5: Waistband, optional drawstring and hemming
Finished - the PJ Parade
Let's start work on our Eastwood Pajamas! Today we will be discussing elastic choices as well as modifications you can make for fit and style.
Picking a Variation
First thing first, we need to pick the variation we want to sew. I've broken the pattern into three paths:
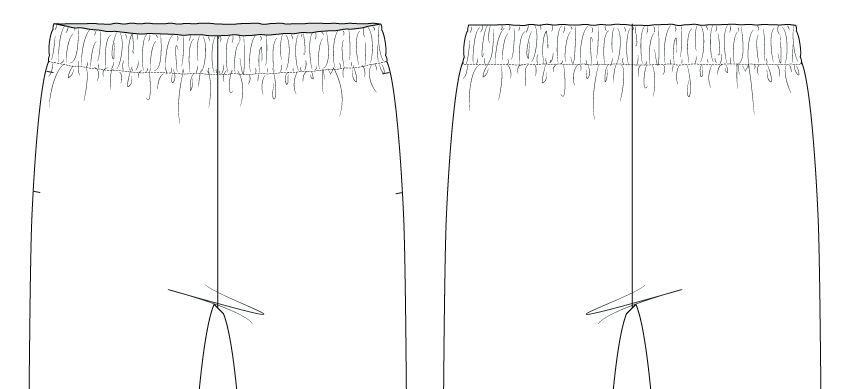
#1: Quick with few details: These are the simple drawstring pajamas that are an ideal batch sew for all the men in your family at Christmas or an excellent first time garment for a sewing instructor to walk their student through. They feature an encased elastic waist (simply fold over the fabric, stitch and then insert the elastic), inseam pockets and no extra topstitching. They do not have any sort of fly.
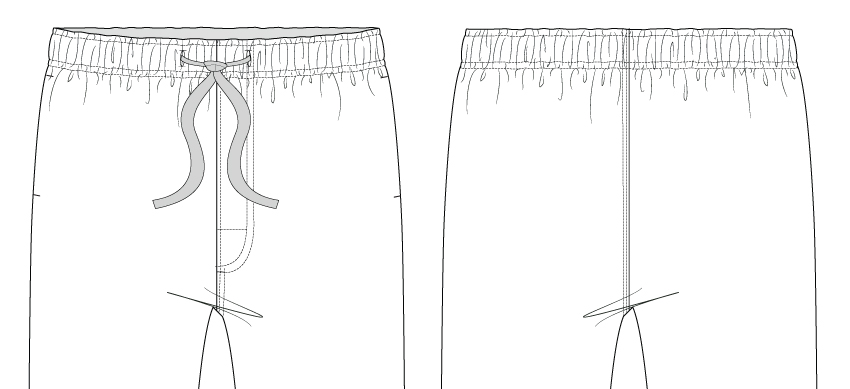
#2: A moderate amount of details: Try this variation if you want to practice your topstitching, love the look of a fly without quite so much effort (they feature a simple mock fly), and want a functional drawstring. They feature topstitching along the seat seam for added strength.
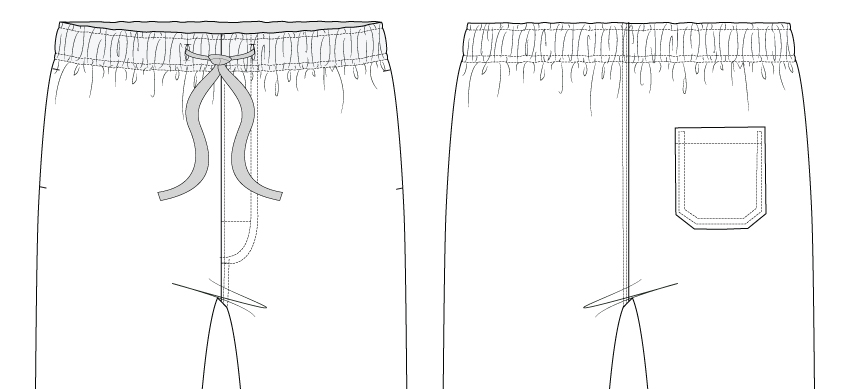
#3: All the bells and whistles: A great practice run before sewing your first pair of jeans! Add a patch pocket (just as you would for jeans), create a fully functioning button fly and then sew all the detailed topstitching included in Variation 2.
Of course, there is nothing stopping you from mix and matching - for instance, you could topstitch the seat seam on Variation 1, add a patch pocket to Variation 2, or skip the drawstring on Variation 3. Let your patience, skill level, and fabric choice help you to decide how many details you would like to add or avoid.
Choosing Your Size
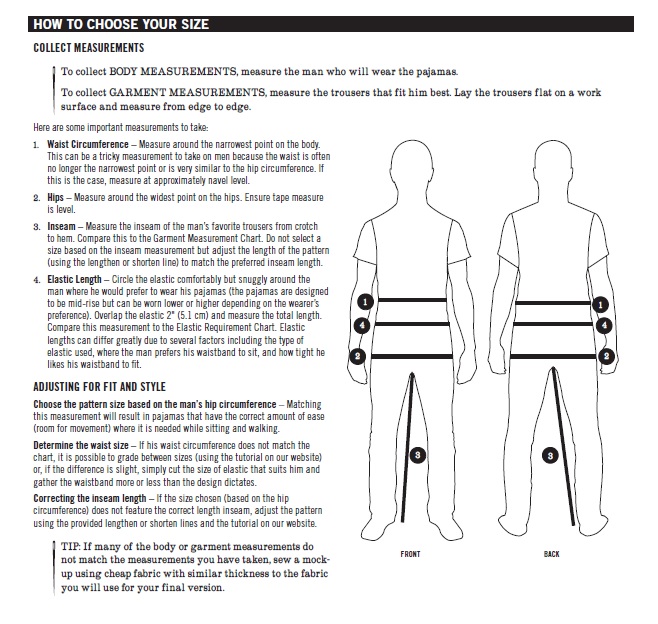
Before you choose your size for the Eastwood Pajamas, please read over the "How to Choose Your Size" section on page 3 of the instruction booklet. You'll notice that I recommend choosing your size based on the man's hip circumference. This is because the waistband size can quite readily change depending on the elastic style that you choose and how you fit the elastic to the wearer. This makes it very easy to pick a size that you know will fit well - as long as there is enough ease (room for movement) in the hips, you have plenty of wiggle room for adjustments at the waist and legs!
All About Elastic
To find the correct elastic length, refer to the Elastic Requirement Chart (below and on page 4 of the instruction booklet), but, unless your pajamas are a surprise gift, please don't stop there!
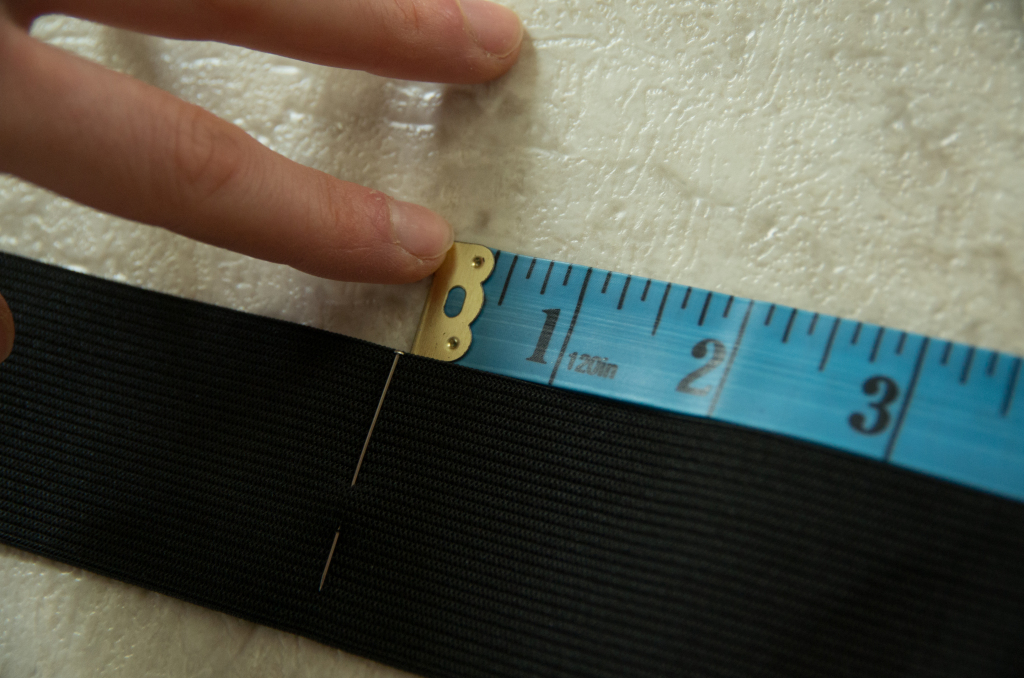
 Wrap the recommended amount of elastic around the man where he would like the pajamas to sit. People differ greatly on how they like their pjs to sit - they may prefer to sit them up higher on their waist for a close fit at the crotch or, as is more common, they may sit them quite low for an easy fitting crotch (and some people sit them so low they almost look like a dropped crotch!). One pajama pant design can be worn in many different ways...thus, you will ensure the best fit if you circle the elastic around the wearer where they like it to sit and circle it as snug as they find comfortable.
Elastic varies greatly and may stretch out as you stitch over it while topstitching to complete the waistband for Variation 2 and 3. You might like to take a scrap of elastic, fold it inside a scrap of fabric and then do some 'practice' topstitching over it. Do you notice the elastic stretching or does it retain it's shape. If it stretches longer and does not snap back once you've finished stitching, you'll likely want to choose a different, better quality elastic.
Here are some options I like for enclosed waistbands:
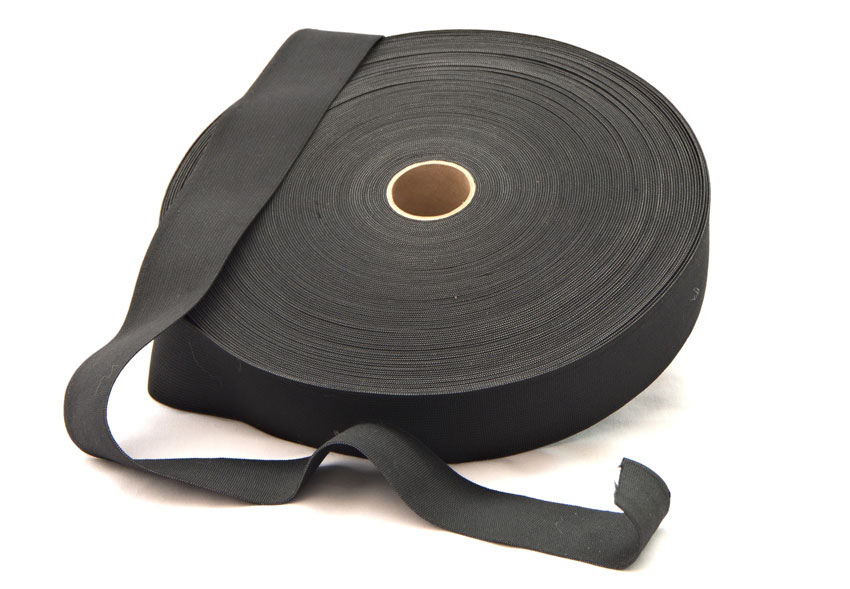
Top Choice: Woven Elastic - this is a tough elastic that is not prone to rolling. It does not become narrower when stretched and does not weaken when sewn through. Most woven elastics are intended to be sewn into casings so they are not very soft. They pair best with mid to heavy weight materials since they are so thick - a woven elastic like the one pictured would be perfect for cotton flannel pjs. The image above is from an excellent post by Craftsy explaining different types of elastics and their uses...check it out for more info!
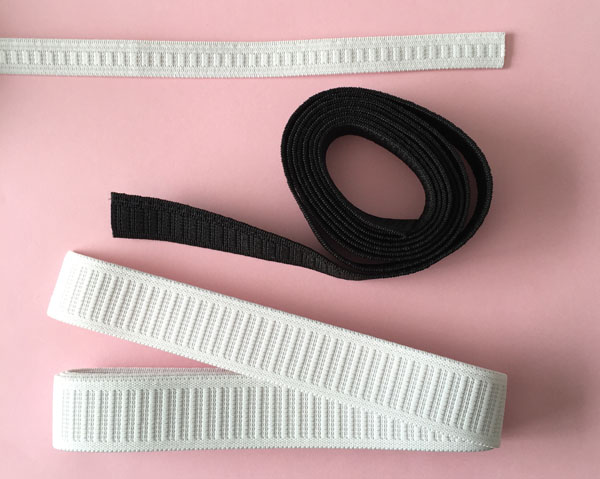
Runner Up: Knitted Elastic - a good quality knitted elastic is both soft and strong. It retains it's width when stretched and (if it is good quality) it retains it's strength when stitched through. Test a knitted elastic carefully before committing to using it (by stitching through it as mentioned above) to see if it ripples and becomes mishap-pen. The above photo is the sturdy knit elastic that we used to stock in our shop to pair with our Comox Trunks. You can find something similar here.
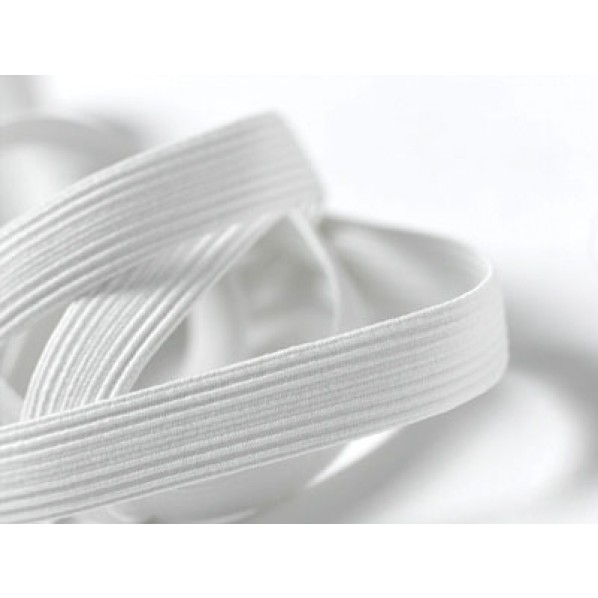
Avoid: Braided Elastic - This type of elastic loses it's stretch when it is stitched through so it is not a good choice for Variation 2 or 3 of the Eastwood Pajamas. You could get away with using it inside the casing of Variation 1 but a better choice would be woven elastic which would be far less likely to roll within your casing. Braided elastic lovely in narrower casings (elasticated sleeve hems or lingerie for instance) so, let's save it in our stash for that purpose!
Adjusting Leg Length
After determining the correct size based on the hip measurement and determining the elastic length and desired fit at the waist, it's time to check leg length. You can adjust the length of the Eastwood legs for both fit and style preferences.
Lengthening or Shortening for a full length pajama:
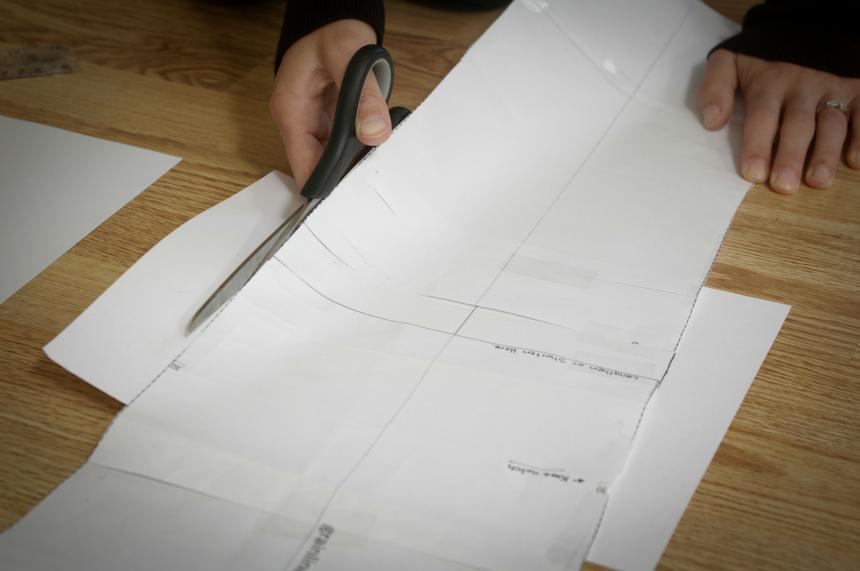
Before cutting out your fabric, be sure to measure the man's inseam. You can either measure on their body or, more accurately, you can grab a pair of the man's favorite pjs or trousers and measure those. This is more accurate because then you will be able to determine how low he prefers the crotch of his pants to sit (instead of measuring right up to the top of his leg). If the inseam on the Eastwood Pajamas differs from his preferred length, don't worry, this is an easy adjustment. Use the "Lengthen and Shorten Here" line and the tutorial on our website to adjust the pattern to his perfect length.
Shortening to create cropped pajamas:
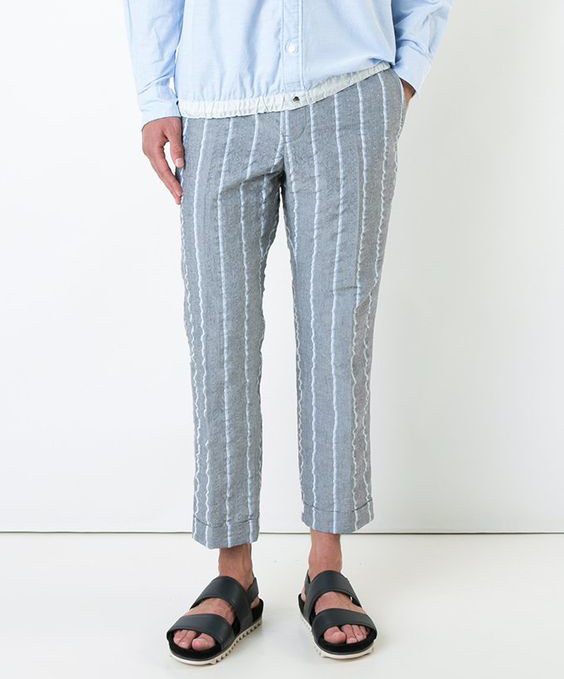
There are a few ways you could go about making breezy cropped linen pjs. The simplest is to just roll up the hem of the finished pjs to create a cuff (as per the example above from our Eastwood Pajamas Pinterest board). You could tack this in place by stitching along the inseam and side seam so that it doesn't come unrolled. Or, if you don't want the bulk of a cuff, you could shorten the PJS as per our tutorial but this time, overlap until you reach your desired inseam length. I think 4-6" should do it! Once you overlap you'll need to smooth out the lines to create a nice taper but you won't need to do anything more than this since you've preserved the hem shaping! Now, just sew as per the instructions.
Shortening to create boxers:
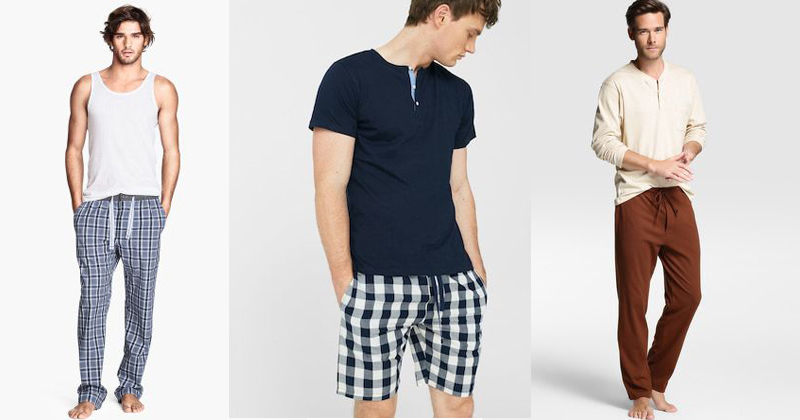
To create boxer length Eastwoods, you will need to draw a new hemline. Measure the inseam of the man's preferred boxers...it will likely be somewhere between 3-6" (the example above looks close to 6" to me). Draw a horizontal line across the front and back pattern pieces, just like the "Lengthen or Shorten Here" line. Don't cut here though! We need to add the hem. This needs to flare out to match the taper of the side and inseam. I've detailed how to do this in the Sayward Raglan Sew-Along. In that scenario we were shortening a sleeve pattern piece but the exact same steps apply! For the Eastwood Pajamas you will need to add a 1.5" hem (whereas the Sayward featured a smaller 1" hem).

Eastwood Pajamas Sew-Along: Day 2 - Cut into your fabric
Let's cut into our fabric today! Exciting!
If you are sewing with a fabric that doesn't include a directional print, you might like to try your hand at rearranging the cutting layout to save a bit of fabric. For example, I flipped one of my leg pieces upside down and was able to cut out a size XL using 1.9 m instead of 2.4 m. Your fabric use is very dependant on the size you are sewing too, this is why we broke the Materials Required chart and Cutting Layouts into two separate size groups. You will use a lot more fabric for a size 4XL than you will a XS and you likely won't be able to save fabric by flipping a pant leg when sewing anything much larger than an XL due to the width of the pant legs in proportion to the fabric.
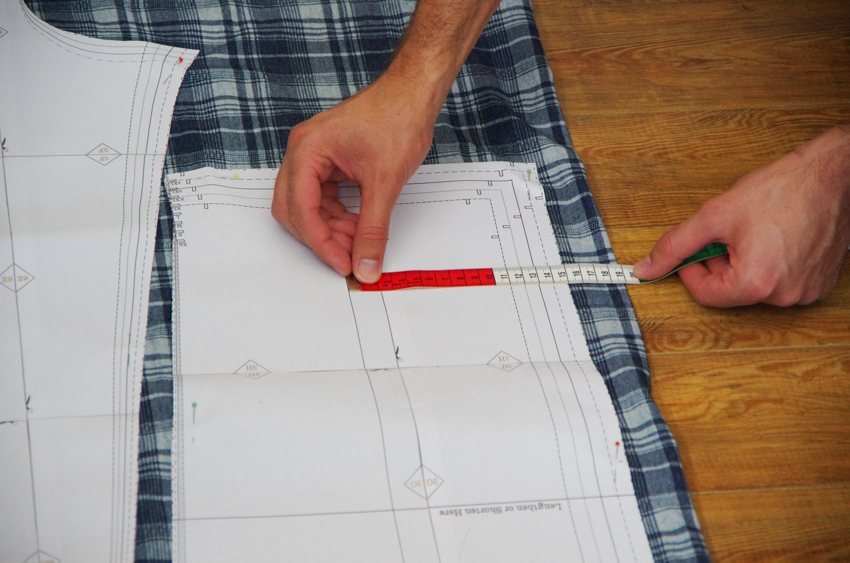
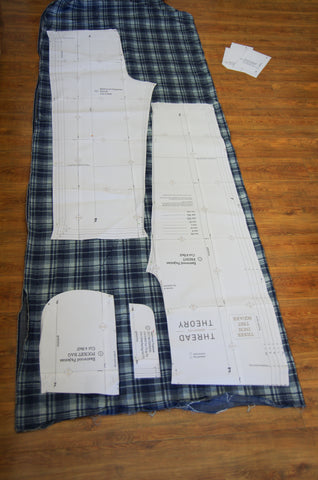
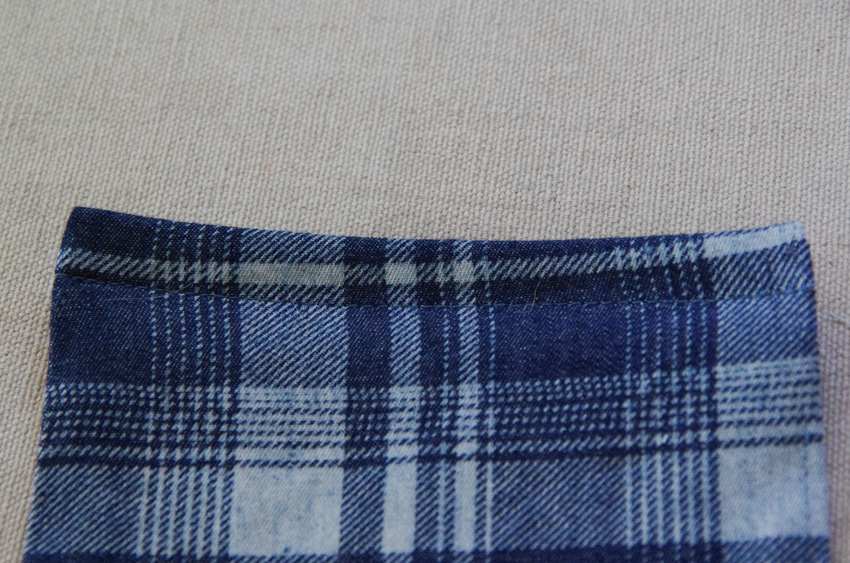
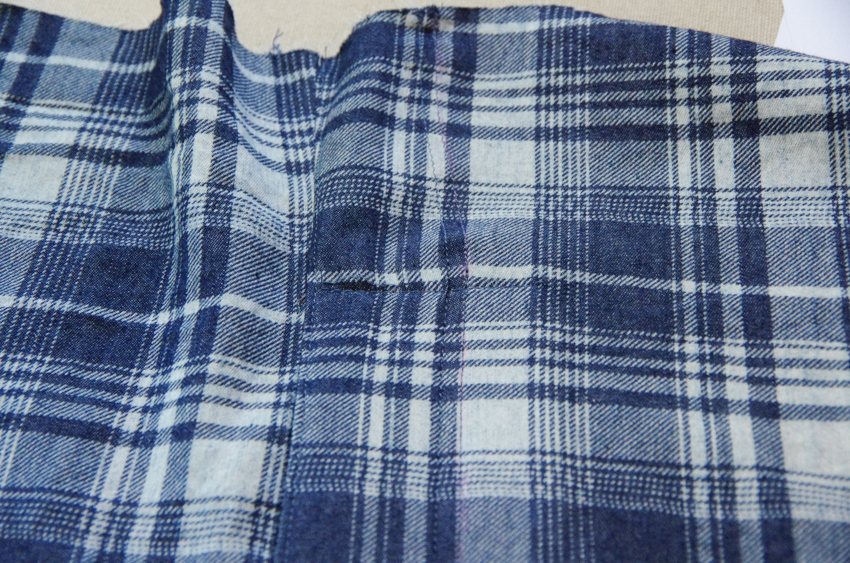
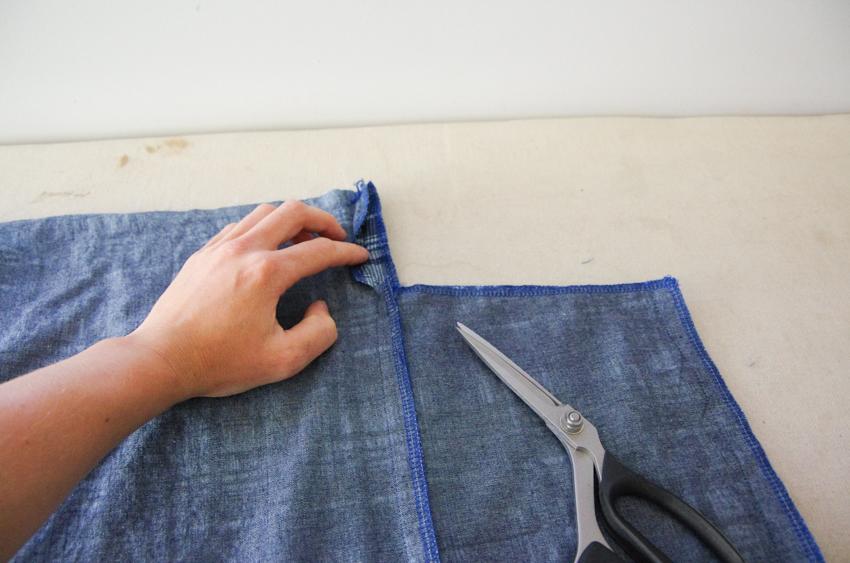
Remember, when cutting out your pieces, to measure from the grainline to the selvage or fold of the fabric at the top and bottom of each piece (as pictured above). This will ensure that you have the pieces precisely on grain which is especially important for long pieces such as pant legs. If you are sewing with a plaid, you might like to pay attention to plaid matching or avoid it as much as possible by placing the patch pocket on the bias. I decided to match the plaid on my patch pocket but I never do a very good job of this...plaid matching is not my strong suit! If you look at many store bought plaid pajamas closely you will notice that plaids are rarely matched...if you enjoy plaid matching and feel that this will elevate your finished garment above what you might find in the store, go for it! If you detest plaid matching (like me), don't beat yourself up about it and just focus on tidy topstitching and personalised details to wind up with a lovingly sewn pair of PJs!
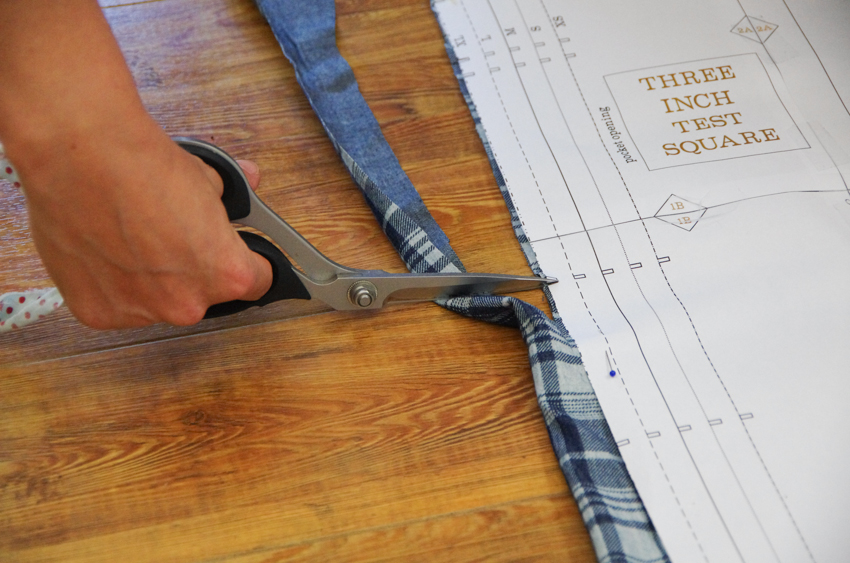
Be sure to clip into each notch as you cut out your pieces. If you desire, you can mark them by cutting small triangles outwards or by marking with chalk but these measures are not necessary with this sewing project because the seam allowances are so large and we won't be needing them uncut for things like french or flat fell seams! Simply clipping 1/4" into the seam allowance is certainly the fastest and perhaps most accurate way to mark notches.
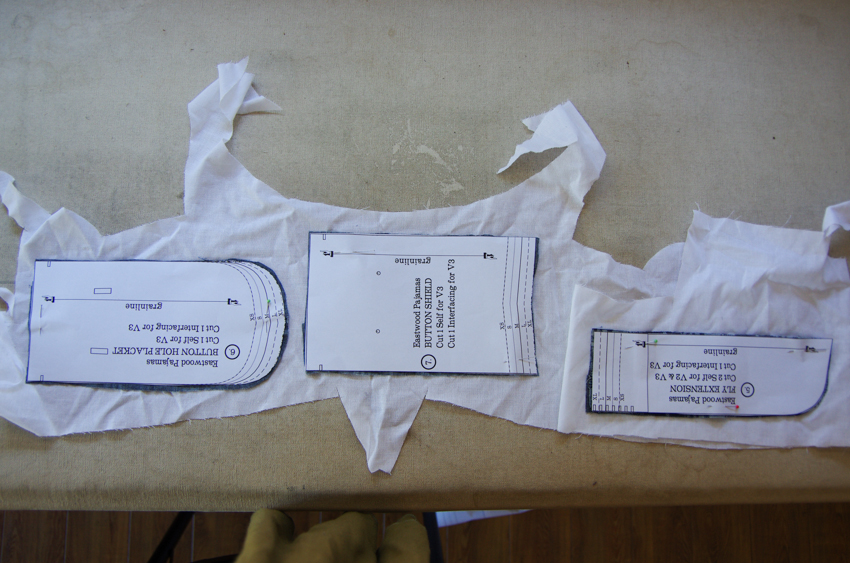
If you are sewing variation 2 or 3 (I'm sewing variation 3), you'll need to cut pieces 5, 6, and 7 from interfacing. Hopefully you can use a small scrap from a previous project rather than having to buy more interfacing...these PJs use such as small amount!
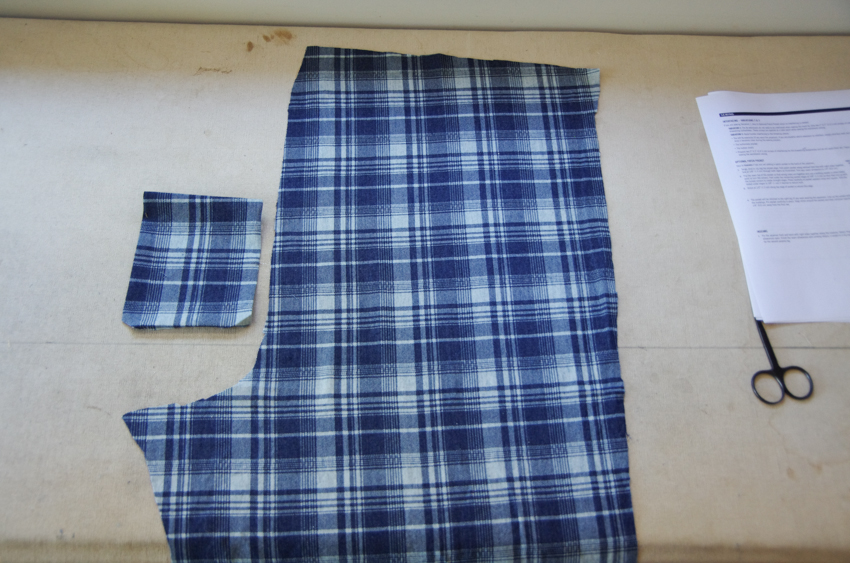
Now that our pieces are cut out, you can choose to transfer the pocket placement marking now or I will show you a quick way to place your pocket a in a bit...just keep your Back pattern piece handy (piece 2).
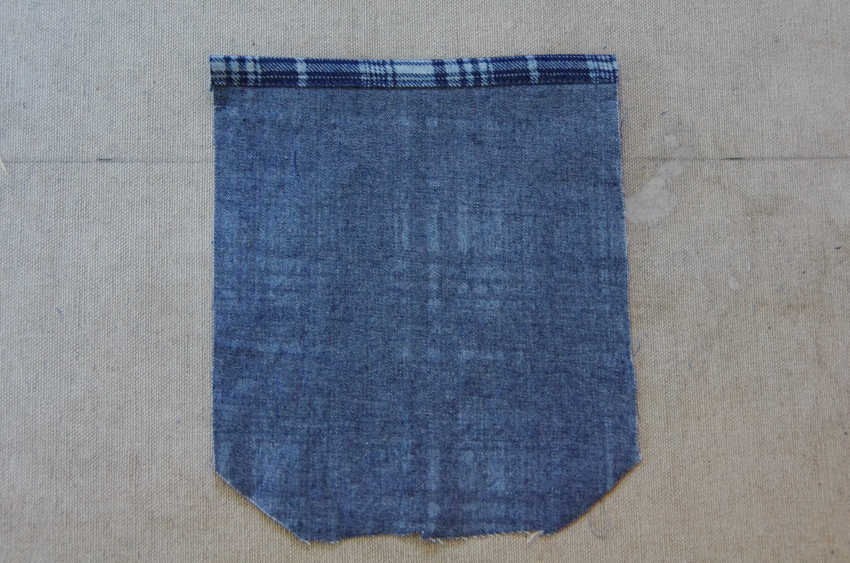
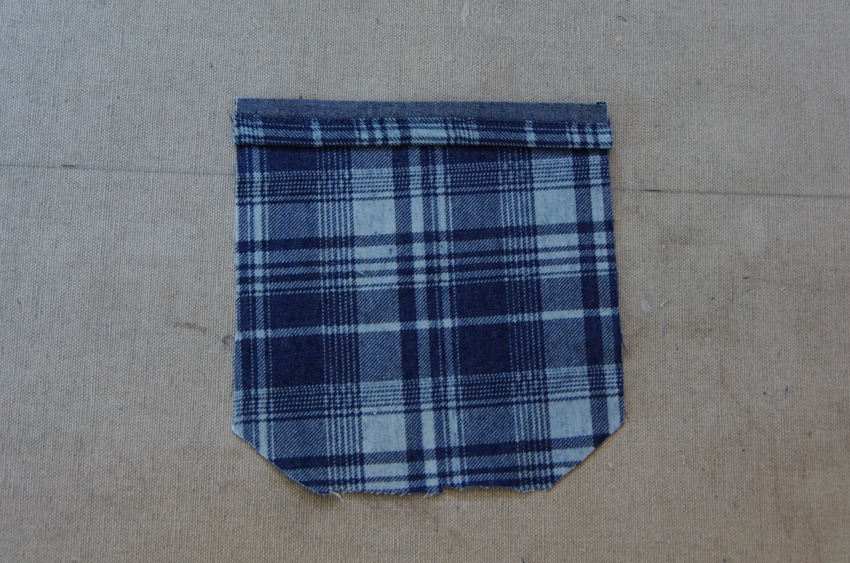
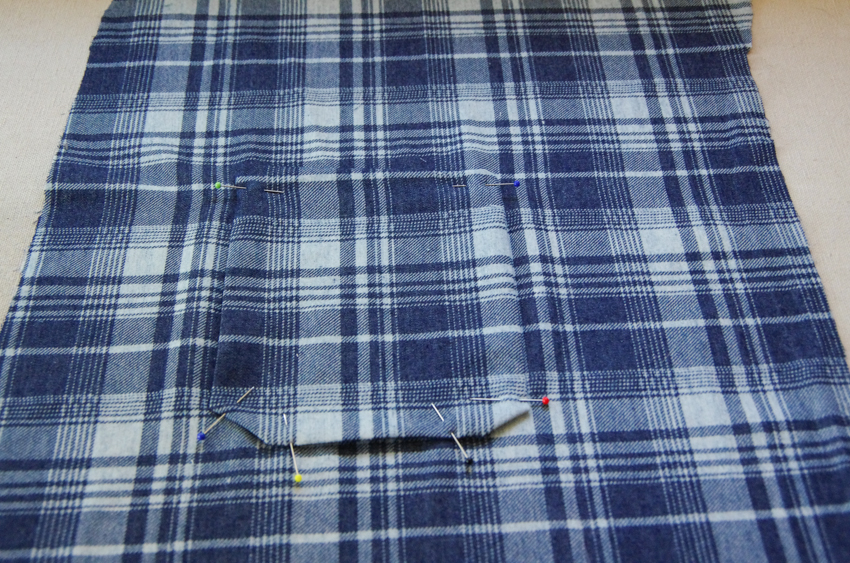
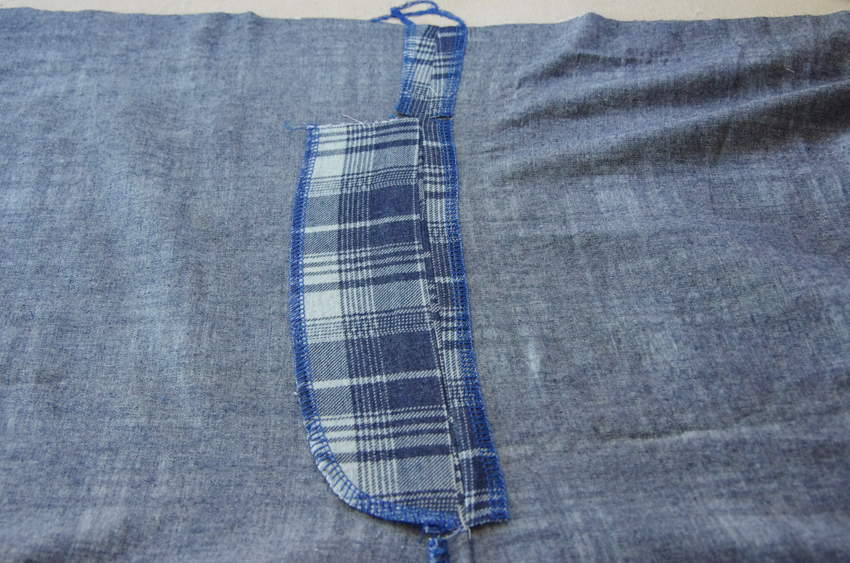
To assemble our pocket we first need to finish the top edge. You can get fancy by making some binding from one of your fabric scraps if you like. The binding does not need to be on the bias since it doesn't travel along any curves. Alternatives are serging across the top, using pinking shears or zig zag stitching.
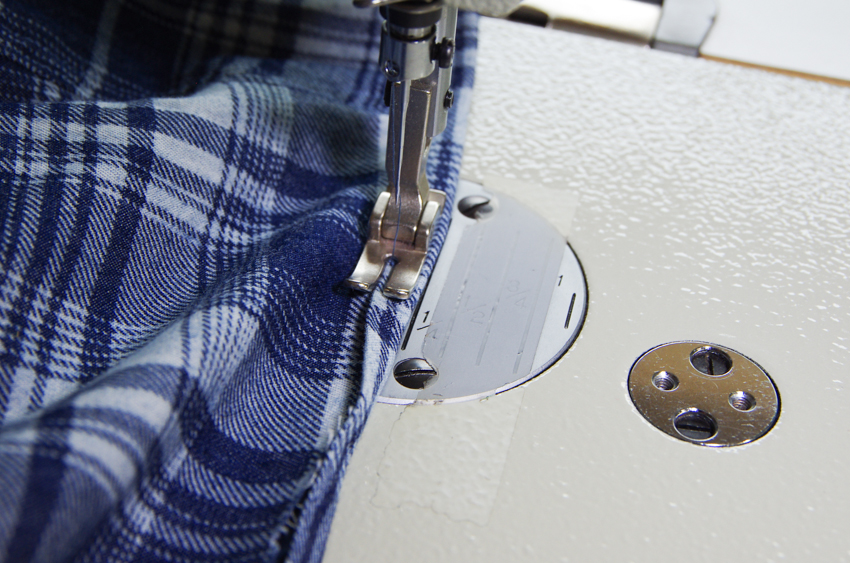
Fold the top edge along the notched fold line with right sides together. Stitch this fold in place with a 5/8" seam allowance on each side.
Trim the extra seam allowance away to reduce bulk and then flip the pocket top right side out. Use a point turner, knitting needle or chopstick to poke out the corners until they are crisp. Press.
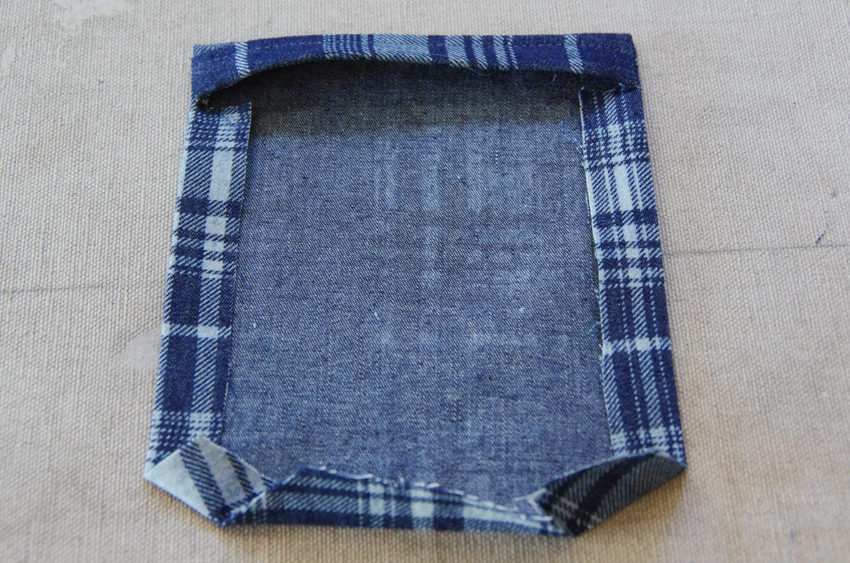
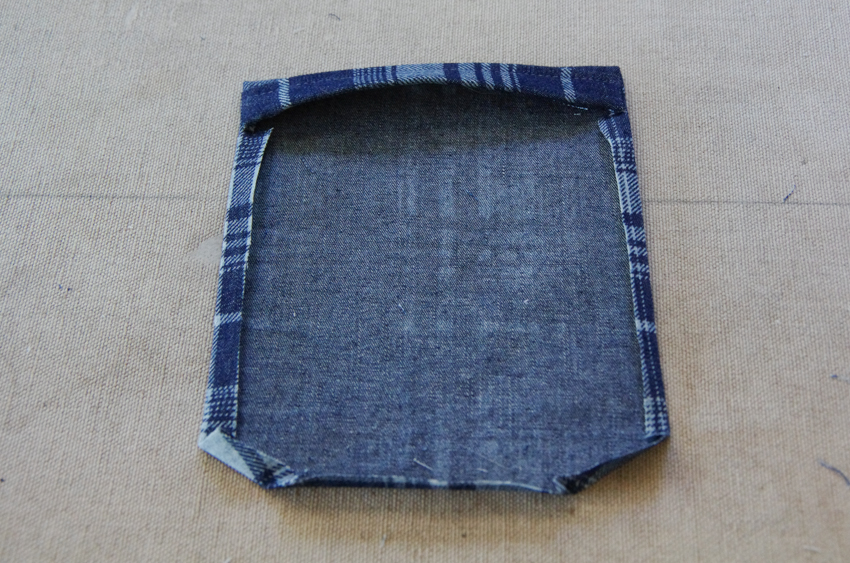
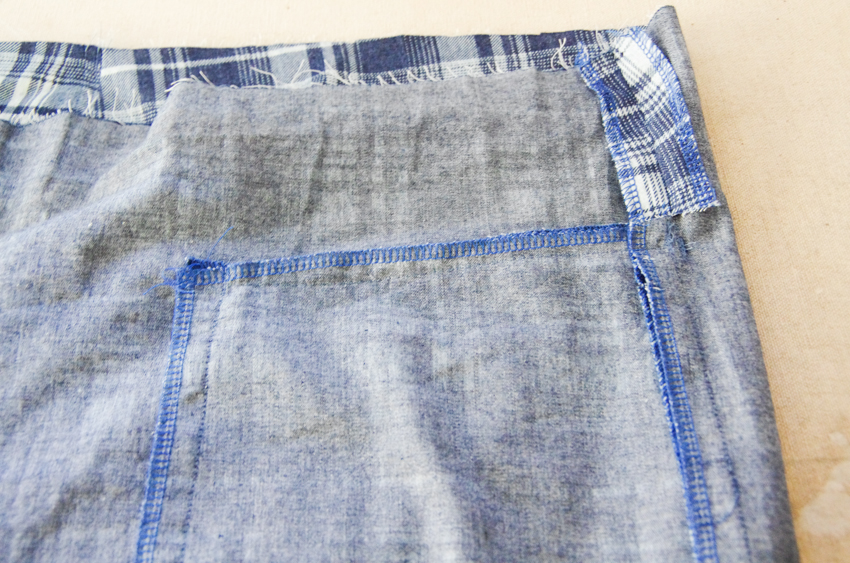
Fold under the rest of the seam allowances and press. If you would like to reduce bulk and hide the raw edges within the topstitching we will perform later, you can trim your seam allowances to 3/8" or even smaller as pictured below.
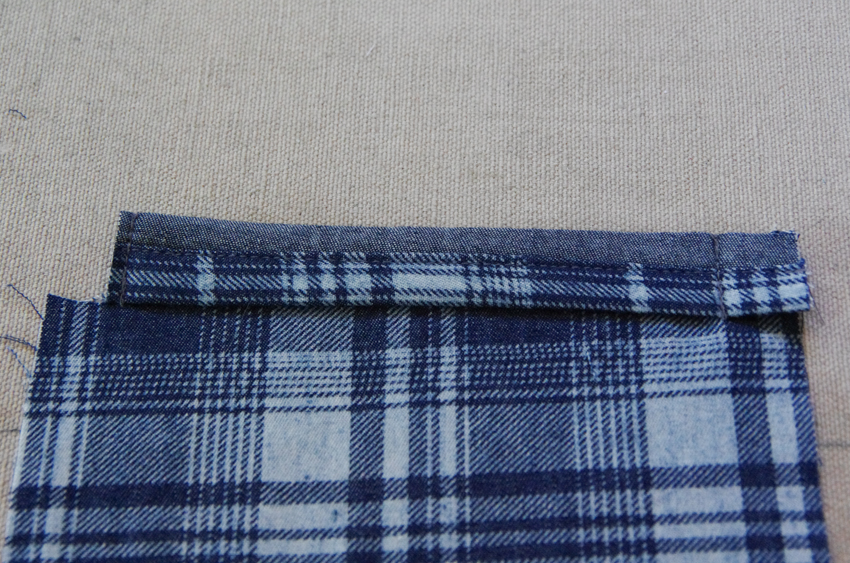
Ensure that your pocket looks nice from the right side (no bumps along the sides), and then topstitch the top edge in place at 1/2". I always forget this step until I've begun to attach my pocket to my pant leg...don't forget this like I do!
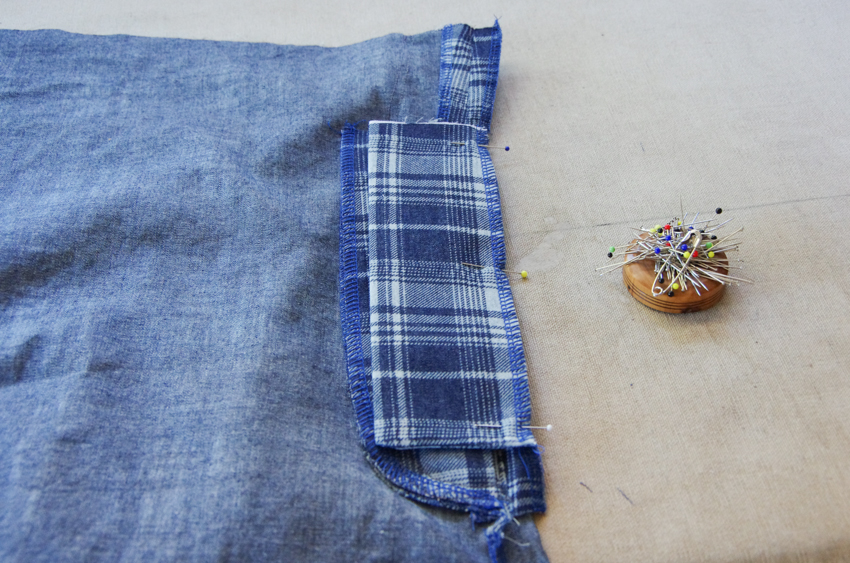
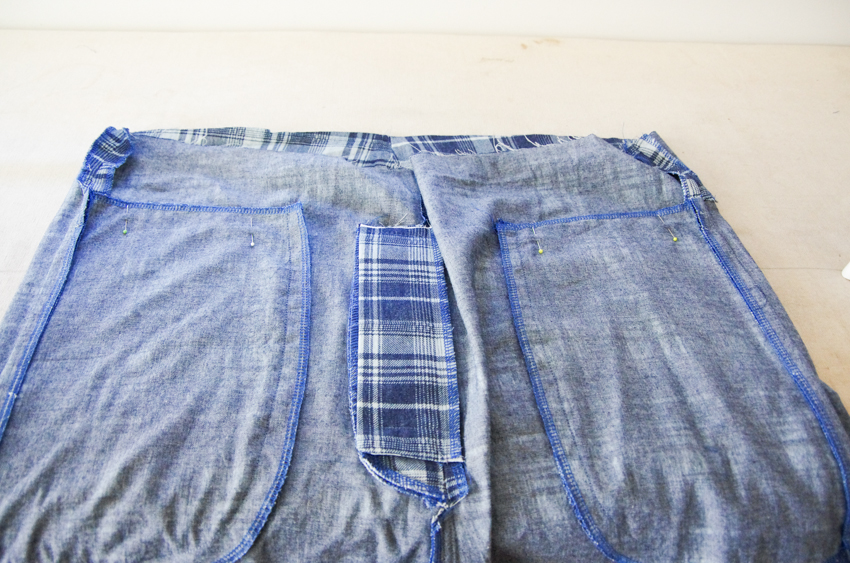
Okay, now we are ready to attach the finished pocket to the right leg (if you were wearing the pants). Lay your pant leg on your work surface. The right side should be facing you and the curved crotch should be pointed towards the left...if you double check that this is the case you will be certain that you grabbed the correct leg!
To quickly place the pocket on the pant leg, lay the pocket approximately where you think it might go. Next, lay the paper pattern piece upside down on the pant leg and pocket so that the curved crotch of the paper and fabric line up. Fold back the paper pattern piece crisply along the top pocket placement dots:
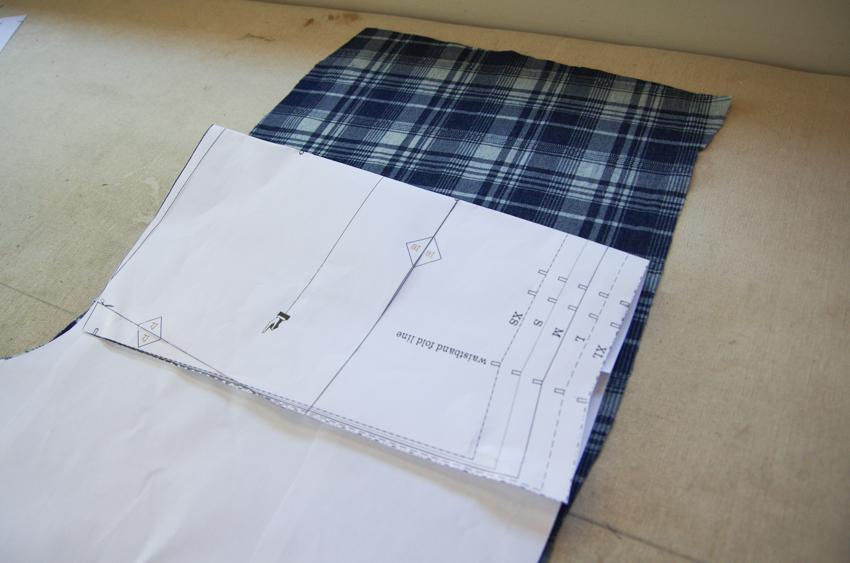
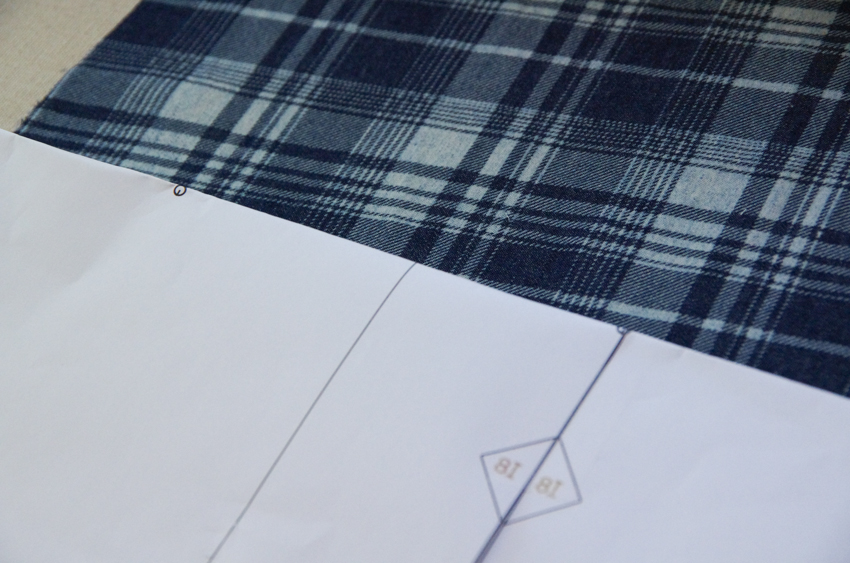
Now shift the pocket up or down until the top edge matches this paper fold. Your pocket is now placed! Remove the paper pattern and pin the pocket to the pant leg.
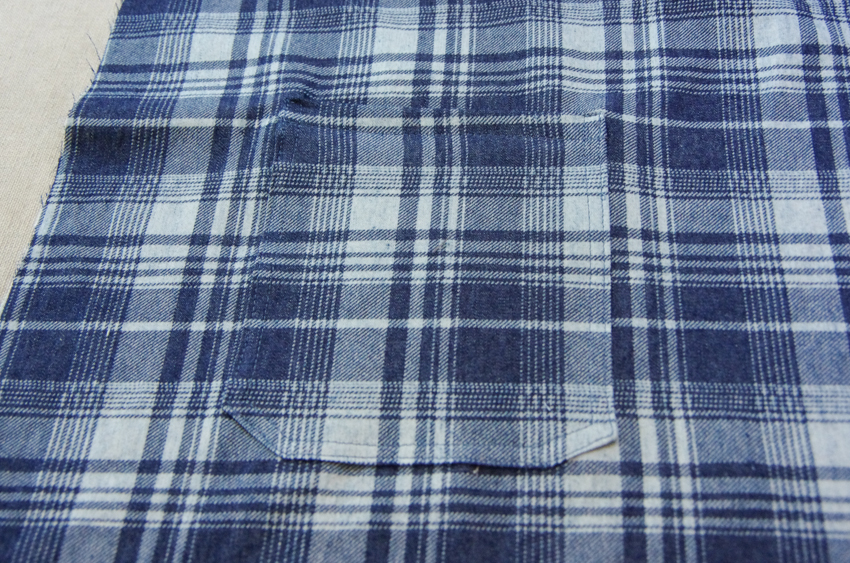
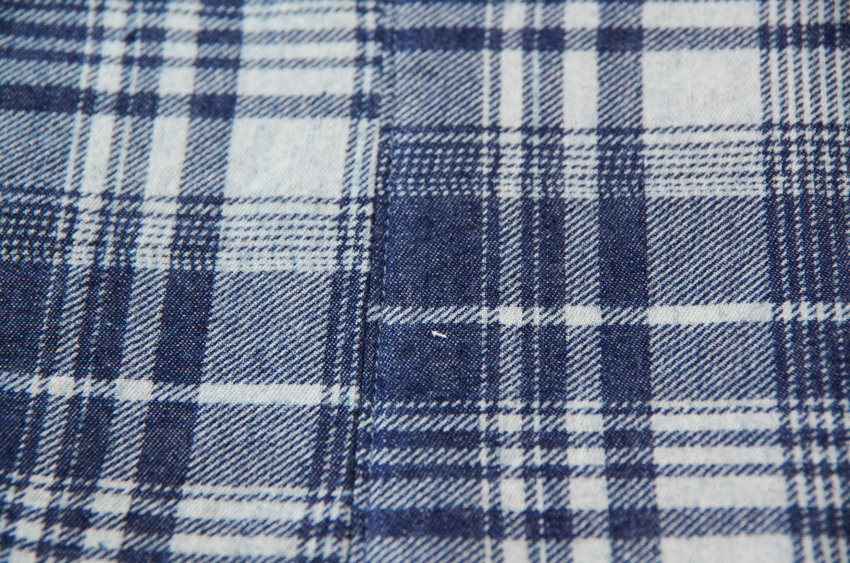
Edgestitch the pocket in place and then continue your stitching to topstitch 1/4" away from the edgestitching to make a very strong pocket.
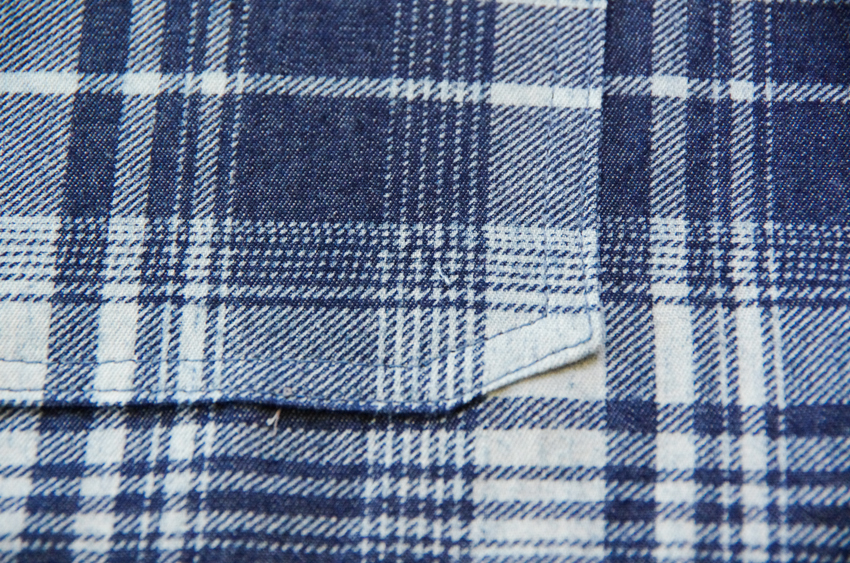
Stand back and admire your pocket! I'm pretty happy with my plaid matching in this case (it's not perfect but darn close!).
We will continue with the sewing process on Wednesday...be sure to give yourself a good long chunk of sewing time if you are stitching Variation 3 as we will be constructing the entire fly. If you are sewing Variation 1 you won't need nearly as long. I won't be walking through Variation 2 but will point you in the direction of some great mock fly tutorials if you need some extra help!

Eastwood Pajamas Sew-Along: Day 3 - Inseams and fly
With our fabric cut and patch pockets added we are ready to move on to the inseams today. No matter the variation you are sewing, proceed by place one pajama front and one pajama back with right sides together. Pin along the entire inseam.

Stitch the seam using a 5/8" seam allowance and press open. You can finish the seam allowance in whatever method you have available to you - pinking shears, zig zag stitch or a serger as I have done. Repeat this process with the second pajama leg.

Now that the inseams are sewn, our paths diverge depending on what variation you have chosen. If you are sewing Variation 1 (with no fly), simply place one of your pajama legs on your work surface with right sides up.

Add the second leg on top so that right sides are facing. Pin the two layers together along the entire curve. Ensure that the inseams are matching.
Stitch using a 5/8" seam allowance along the entire curve. Optionally, you can add strength to the crotch by stitching the whole curve once more. Press the seam open along the front and back of the curve (you won't be able to press open the crotch area since the curve is too steep, but that's ok, it is just the flat front and back that need pressing).
Variation 1's seat seam is now complete! I'm not going over Variation 2 during this sew-along (the mock fly), but you can have a look at this great tutorial by MellySews. The main difference with this tutorial is that their fly extensions are already attached to the pants front...we just need to sew ours on first.
Now, let's delve into the button fly included within Variation 3. To prepare for sewing the fly, we first need to attach the fly extension to the left pajama front (if you were wearing the pants). Before attaching it, finish the curved edge of the extension in your preferred manner (pinking, zig zag or serger).

Now place it on the pants front with right sides together and line up the bottom with the fly placement notch.
Stitch the extension in place using a 5/8" seam allowance.

Now finish the seam allowance using your preferred method again. If you are serging or zig zag stitching, be sure to catch the fly extension seam allowance while you stitch.

Don't forget to finish the right leg seam allowance too!

Press the seam allowance towards the fly extension:

Now its time to sew the seat seam. Line up the two pant legs with right sides together. Be sure to align the inseams. Pin thoroughly. Begin stitching at center back with a 5/8" seam allowance and stitch around to the bottom of the fly extension. Backstitch and then switch to a long basting stitch for the entire length of the extension. Switch to a regular stitch length and backstitch before proceeding up to the waistband.

See how the stitching ignores the fly extension and continues up the seat seam?

Clip both seam allowance at the bottom and top of the fly extension to make it easier to press the seam allowances in the correct direction. Here are the bottom seam allowances clipped:

And the top seam allowances clipped:

Press the seam allowance and fly extension open. Press the rest of the seat seam (below the fly extension) towards the left leg (if you were wearing the pants).
Flip your pajamas to the right side and edgestitch 1/8" from the seam along the entire length of the seat seam. The stitching should only be on the left leg (so you are stitching to the right of the seam when you're looking at the right side of the pj front as pictured below).
With the seat seam finished, let's prepare the rest of the fly pieces now. Bring out your Buttonhole Placket and Button Shield pieces.
Fold the buttonhole placket (the one with the curved bottom) with wrong sides together and finish the curved edge in your preferred way (zig zag stitch or serging...pinking doesn't work in this case because we need to attach the two layers together).
Before proceeding to the button shield, don't forget to finish the placket by adding a buttonhole to suit the length of your chosen button! Place the buttonhole as per the marking on the pattern piece. As always, I forgot to add the buttonhole at this point, but don't worry, I'll show you that it is still possible (but a bit finicky) to add the buttonhole at the very end when your pajamas are fully constructed.

Create the button shield by folding the piece with right sides together. Stitch along the bottom angled edge with a small 1/4" seam allowance. Flip right side out and press. Finish the long raw edge by serging or zig zag stitching.

With our pieces ready, it's time to finish the fly! Begin by placing the PJ front on your work surface with the wrong side facing you. Lay the Buttonhole Placket on top of the fly extension so that the curved edge is aligned. The Buttonhole Placket will not quite reach center front...that's how it is supposed to be, don't worry! Pin the Placket in place through all layers.

With everything pinned in place, flip the pjs so you can see the right side. Lay the Fly Topstitching Template on the left front (if you were wearing the pjs). Place the bottom of the template 1/4" up from the bottom of the extension...you can do this by feeling for the bulk of the extension with your fingers.

Trace along the curved edge of the template with chalk or a pencil. Make sure your marking tool will easily wash off of the fabric! Continue the topstitching line all the way up to the waistband edge. I like to ensure I keep the same width from center front by moving my template up and continuing to trace it.

Topstitch along the marked line. Create another row of topstitching 1/4" closer to center front.

Now we'll add the button shield. This will be stitched to the right seam allowance only. Lay the PJs on your work surface with the wrong side facing you. In the instructions I show the front spread out but in the photo below I've shown them folded in half so only the right seam allowance is visible. This is to give you another perspective - either way that you lay out your PJs, what I'm trying to show is that you must only pin your shield to the seam allowance and not to the pants front.
Stitch the shield to the seam allowance using a 3/8" seam allowance.

From the right side of the PJs, remove the basting stitches along the fly. Careful not to go too far and remove your backstitching!

You'll notice, when you open your fly, that the right front (if you were wearing the pants) has a pressed pleat. By removing this we will offset the button shield so it is not visible when the PJs are worn.

To remove the pleat, pull the button shield flat (spread the pleat apart), and then press.
Keep the button shield in place by edgestitching 1/8" from the seam on the right pant leg. Extend your stitching as close as possible to the top and bottom of the fly.

The next thing you might notice is there is still a gaping hole at the bottom of your fly...that won't do! Close off the bottom (and secure the button shield from flapping about) by stitching a horizontal line 1.5" up from the bottom of the fly.

Next, create a second row of topstitching along the seat seam extending from the waistband at center back up to the horizontal line that you just added to the fly:

Finish securing the fly pieces in place by temporarily basting across the top edge of the fly. This will later be secured when the waistband is folded over.
And there we have it! A completed button fly with three tidily sewn layers - the lowest layer holds the button, the middle layer holds the button hole and the top layer nicely conceals it all.

If you like, you can stitch your button on at this point or you can wait to add it when I do as the very last stage of constructing the PJs.

Next we will be sewing the inseam pockets and side seams! See you then!

Eastwood Pajamas Sew-Along: Day 4 - Side seams and pockets
Today is an easy day in comparison to the functioning button fly... we are assembling nice deep inseam pockets and sewing up the side seams!

Begin by finishing the side seams in your preferred manner (pinking shears, serger, zig zag stitch...you could even get fancy by binding them if you like). I've serged mine.

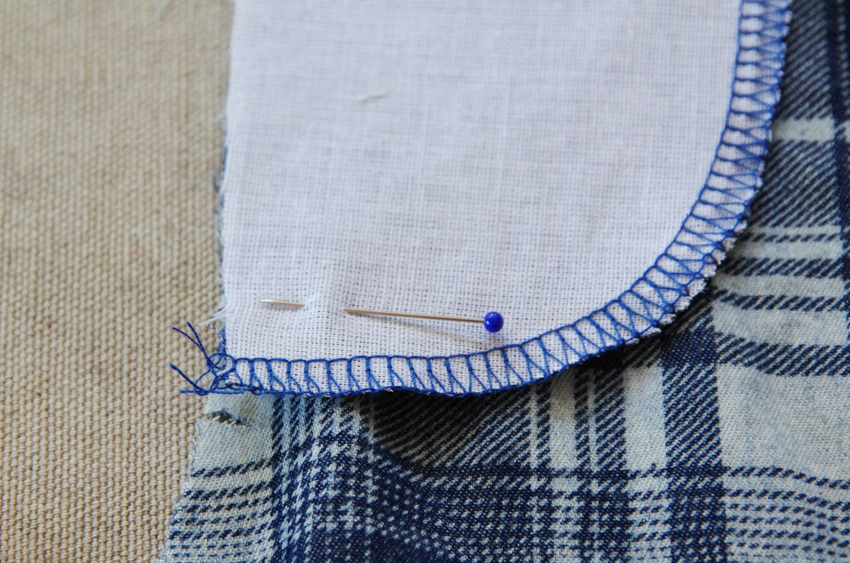
Next, finish all edges of the four pocket bags. Again, I've serged mine but pinking or zig zag is perfectly acceptable!

Line up each pocket bag to the pocket markings on the front and back of the pajamas. Right sides are together. Pin along the side seam.

Stitch the pocket bag to the pajamas using a scant 5/8" seam allowance. We want this to be a little smaller than a full 5/8" seam allowance so that the stitching does not interfere with a future step.

Press the seam allowance towards the pockets (or, worded differently: Press the pocket bags away from the pajama legs).

Pin the pajama front and back with right sides together. Pin the entire length of the legs and ensure both the hem and waistband are lined up. As I mention in the instruction booklet, you'll notice that the angled waistband differs on the front and back. It is important to manipulate the fabric so that the raw edges line up even though the two pieces aren't the same shape.
We will stitch the side seams and pockets in three steps:

I like to begin with the longest stretch first: Stitch up from the hem and end at the bottom pocket notch...this is the single notch part way up the side of the pocket bag.

Backstitch thoroughly to make a strong pocket opening.

Next, stitch around the pocket bag beginning at the bottom corner of the pocket - make sure to begin your stitching right on the stitching line that you created in the last step. Stitch up to the top of the pocket and backstitch (you don't need to stitch across the top of the pocket as this will be enclosed within the waistband).

Stitch down from the top of the waistband until the top pocket notch - this is the double notch.

Backstitch thoroughly.

Flip the pajamas over so you can cut into the back seam allowance at the top and bottom of the pocket bag.
This will allow you to press the waistband seam allowance and pant leg seam allowance open. Do this now!

Turn the pajamas right side out and press the pocket bag towards to front of the pajamas.

I like to do this from the right side of the pajamas so I can ensure the side seam looks crisp with no folds.
Turn the pjs inside out once again and pin the pockets in place along the top. Use a long basting stitch to sew them in place so they don't flap around in the next steps.
Finish your pockets by adding a bar tack at the top and bottom of the pocket opening on the front of the pajamas. This bartack will go through the pajama front and the pocket bags (not the pajama back). An attractive looking bartack can be made with a narrow zig zag with almost no length so that the stitching is very dense.

I was using my industrial machine for this project so I simply backstitched thoroughly since my machine only performs a straight stitch. No matter the stitch style, this will really help to increase the lifespan of your pjs if the wearer likes to put his hands or phone in his pockets.

Next, we proceed to the waistband and hemming which means we will be finishing our pajamas!

Eastwood Pajamas Sew-Along: Day 5 - Waistband and finishing details
Today is the last day of our Eastwood Pajamas sewing process! Time to tackle the waistband and the finishing details.

Let's begin by binding the raw edge of the waistband. You can use 1.5 m pre-made double fold binding if you like, or you can make your own! Regardless which option you choose, feel free to use any finished width you prefer working with. In the instruction booklet I explain how to make a narrow binding with a finished width of 3/8". To do this, begin by cutting a 1.5 m long strip of fabric measuring 1 1/4" wide - this doesn't need to be on the bias, I just tore along the grain to get a straight line.

Fold in each edge 1/4" and press. You can use a bias tape maker to make short work of this step if you like! I just pressed by hand.

Fold your strip more or less in half and press. I like one half to be larger than the other, this way, I can sew from the narrow side and be sure that I caught my wider side with stitching.
Beginning at center back, apply your binding to the waistband. I simply sandwich the waistband in the binding and then stitch with small adjustments as I go...I find pinning narrow binding to be too finicky and this way leads me to better results.

When you circle the waistband and arrive once again at center back, you'll need to trim the excess binding but leave yourself 1-2" of overlap.

To enclose the final raw edge, open up the binding and finger press the raw edge over. Close the binding once again and finish your stitching. The waistband is now tidily bound!

If you plan to add a drawstring, it is necessary to prepare the buttonholes before proceeding with sewing the waistband. Begin by placing a 2" X 2" scrap of interfacing over each buttonhole marking. Make sure the buttonhole markings are transferred in a visible manner. I refreshed my markings on top of the interfacing with pink chalk and stitched my buttonholes from the wrong side of the garment.
While completing the waistband buttonholes I also added the fly buttonhole that I forgot earlier. This is a nice time to add it if your buttonhole function is time consuming to set up...this way you can tackle all three buttonholes at once! As you can see in the photo above, I just pushed the other layers of the fly out of the way and added the buttonhole to the middle layer.

I usually stitch my buttonholes twice, use a Clover buttonhole chisel to open them, and then stitch them once again to enclose any fraying fabric or threads.
Now we move on to installing the elastic! If you are sewing Variation 1, use your favourite trick to insert the elastic into the casing - perhaps you have a certain tool you like to use (we have a number of them in our shop) or you like to attach a safety pin to your elastic so you can feel the ridge of metal through the fabric layers as you bunch your elastic along. Those sewing Variation 2 or 3 can follow along with what I do here:
Begin by turning the waistband under at the notch (2 1/4" from the fabric edge). Press. Sorry, I forgot to snap a photo of this step! The photo above is from a little later in the sewing process. It shows my PJs with the elastic added and pins in place...but you can still see what the folded over waistband looks like.

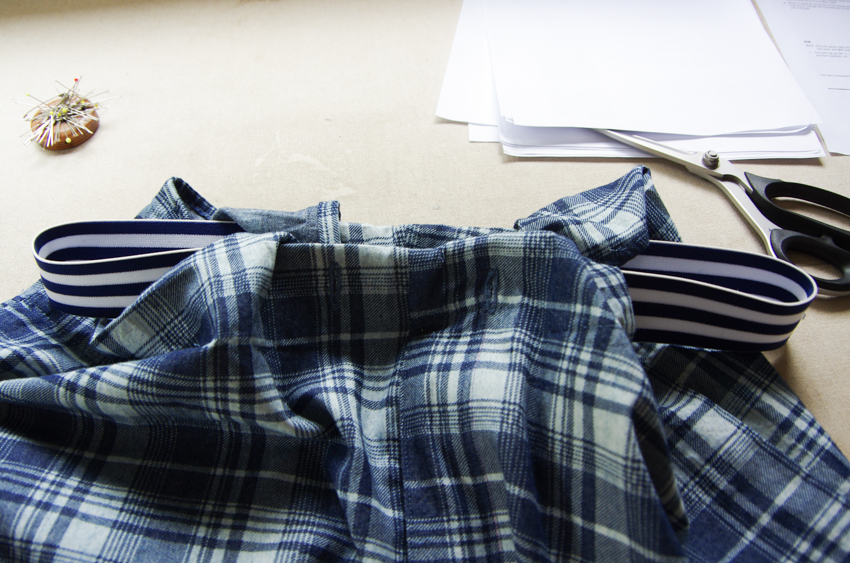
Cut your elastic to length using the provided chart or by wrapping it around the prospective wearer. If you are not following the chart, be sure to add 2" extra to your custom size for overlap! Overlap 2" as pictured above (on an elastic sample I made while developing the pattern) and stitch a square with an X through it to securely create a loop.
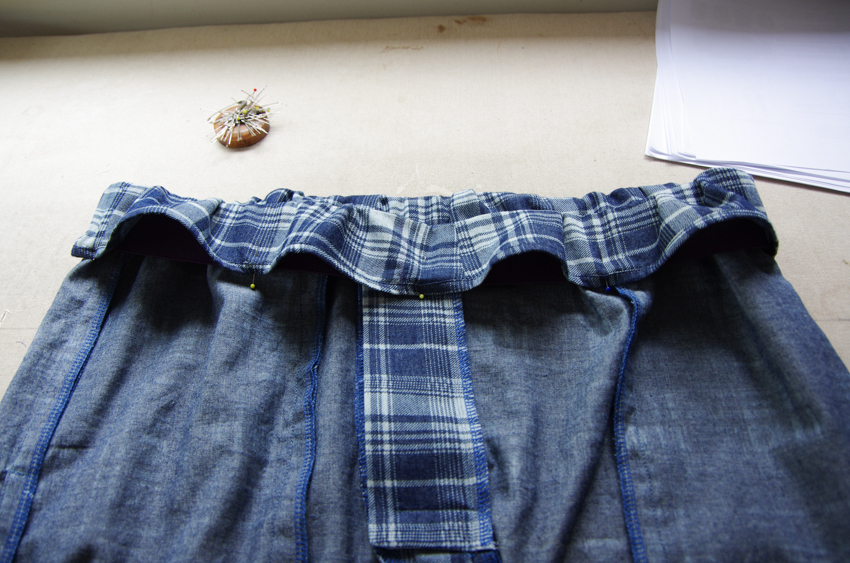
Insert the elastic between the waistband layers. Pin it in place as follows: First, divide the elastic in half and pin it in place at the center back and center front seam. Next, divide the elastic in quarters and pin it in place at the side seams - you can see I've just divided the elastic in quarters but have not yet inserted it at the side seam in the photo above.
Divide each pinned segment in half so the excess fabric is evenly distributed. Pin. You can see there is quite a lot of excess fabric!
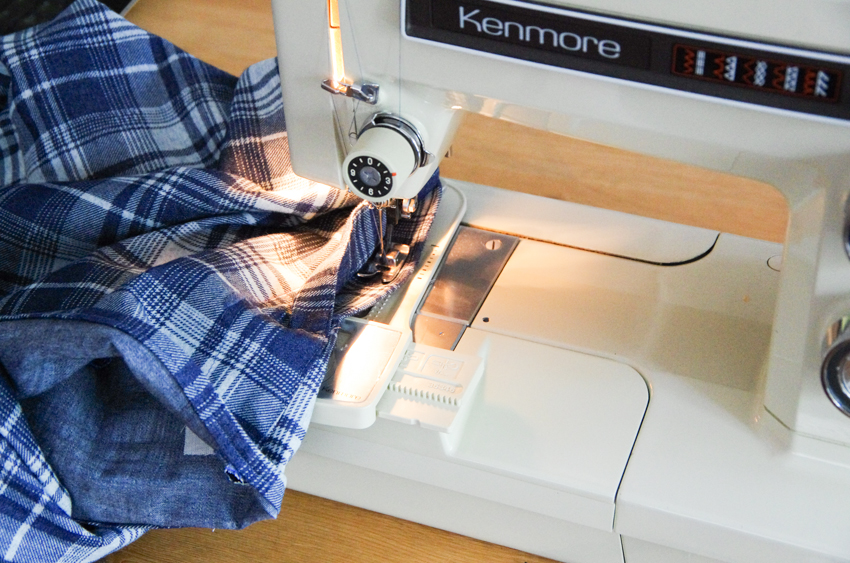
From the right side of the pajamas, create the first stitching line 1 3/4" from the top of the waistband. This will be below your elastic and just above your binding. Don't stitch over the elastic during this step and make sure to pull the fabric taut as you stitch so as not to create puckers. To keep your elastic in place, keep your pins in if possible...if you can't without stitching over the heads, take them out as you go and re-pin before the next line of stitching.

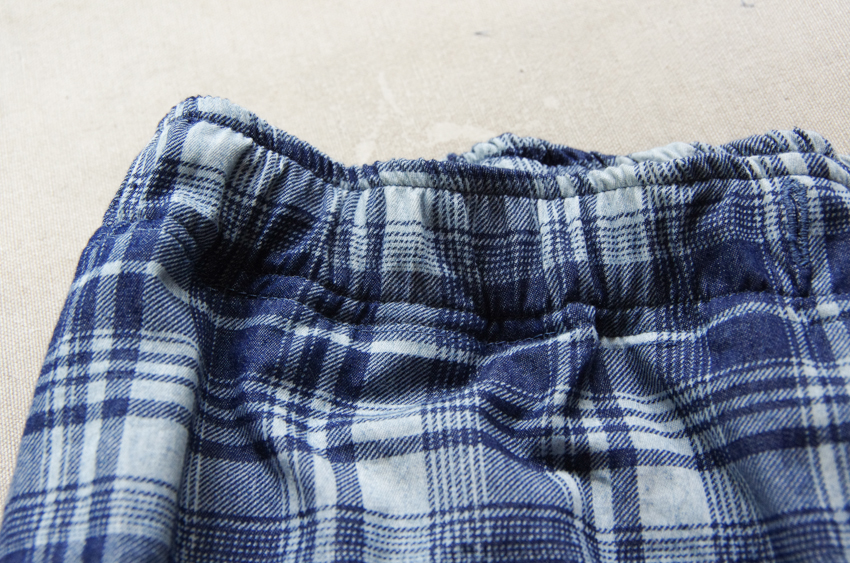
Create the next row of stitching 1/4" up from the first line. This time, you will be stitching on the elastic. Stretch the fabric very taught (this will also stretch the elastic) as you sew. Above you can see how the fabric looks before I stretched it taut and below you can see how it should look once taut:
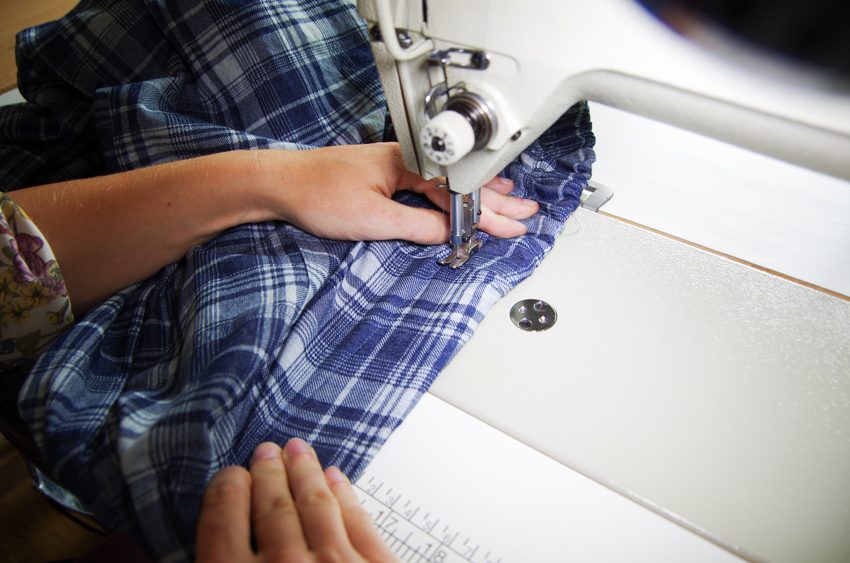

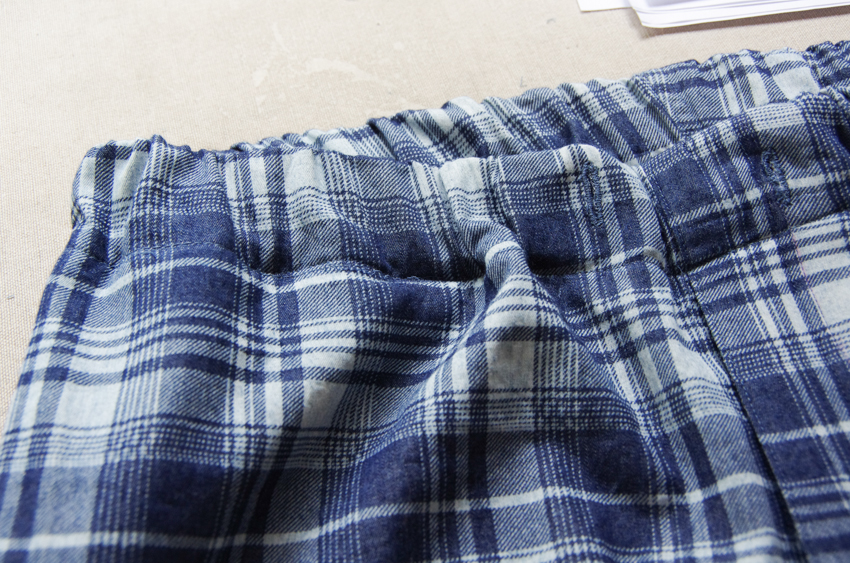
Add a third row of stitching 1/4" from the top of the waistband to completely secure the elastic.
If you aren't adding a drawstring, your waistband is now finished! To add a drawstring, begin by cutting 1.7m of twill tape, grosgrain or cording. I'm using a cotton grosgrain ribbon for my drawstring.

Finish the ends as suits your material - stitch or knot cottons and melt man-made materials to prevent fraying.

Insert the drawstring through one of the buttonholes using a safety pin clasped onto the end of the ribbon as something for you to feel for as you guide the ribbon through the casing.

Remove the fly and pocket basting, tie your drawstring in a bow and your PJs are beginning to look VERY close to finished!

Hem the PJs by folding up the raw edge 3/8". Press.
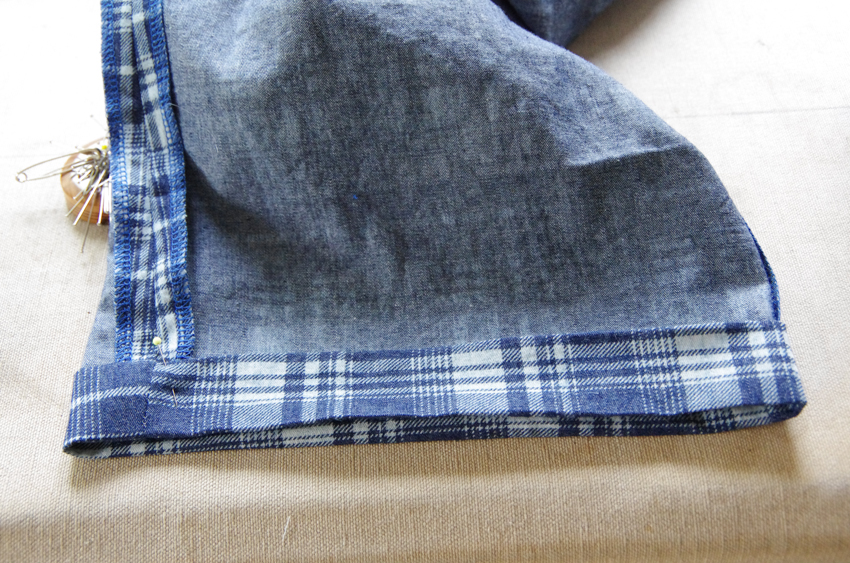
Fold up again, this time using the hem notch as a guide (your finished hem will be just over an inch wide). Edgestitch the hem and then topstitch 1/4" away from your first line of stitching.

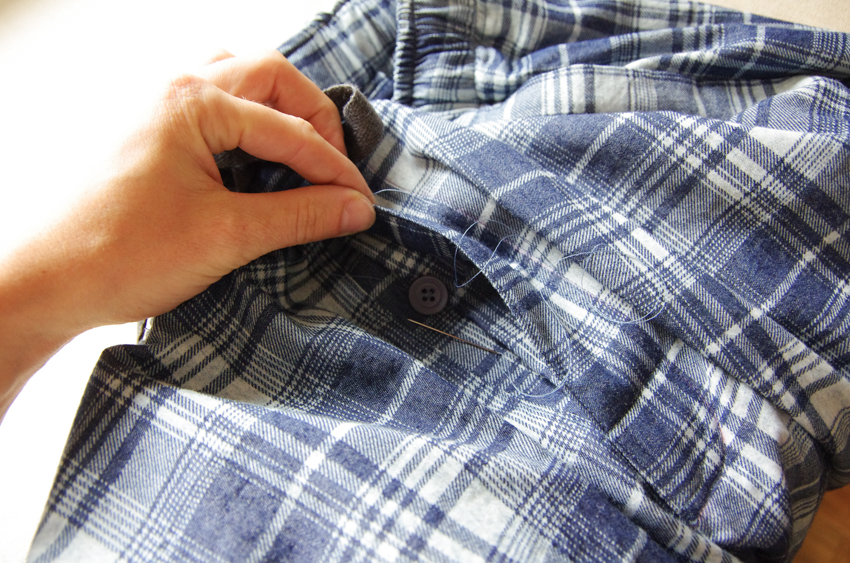
If you've left your handstitching until last (as I am wont to do), now is the time to add your fly button! Add it to the innermost layer of the fly to correspond with the buttonhole.
And there we go! Our Eastwood Pajamas are finished!


I hope you enjoyed this sewing process! Thanks for joining me.

Eastwood Pajamas Sew-along: Day 6 - The Parade
A few of you who sewed along with me have submitted your finished Eastwood Pajamas for today's parade...and there is a definite theme going on: Linen and shorts for summer!
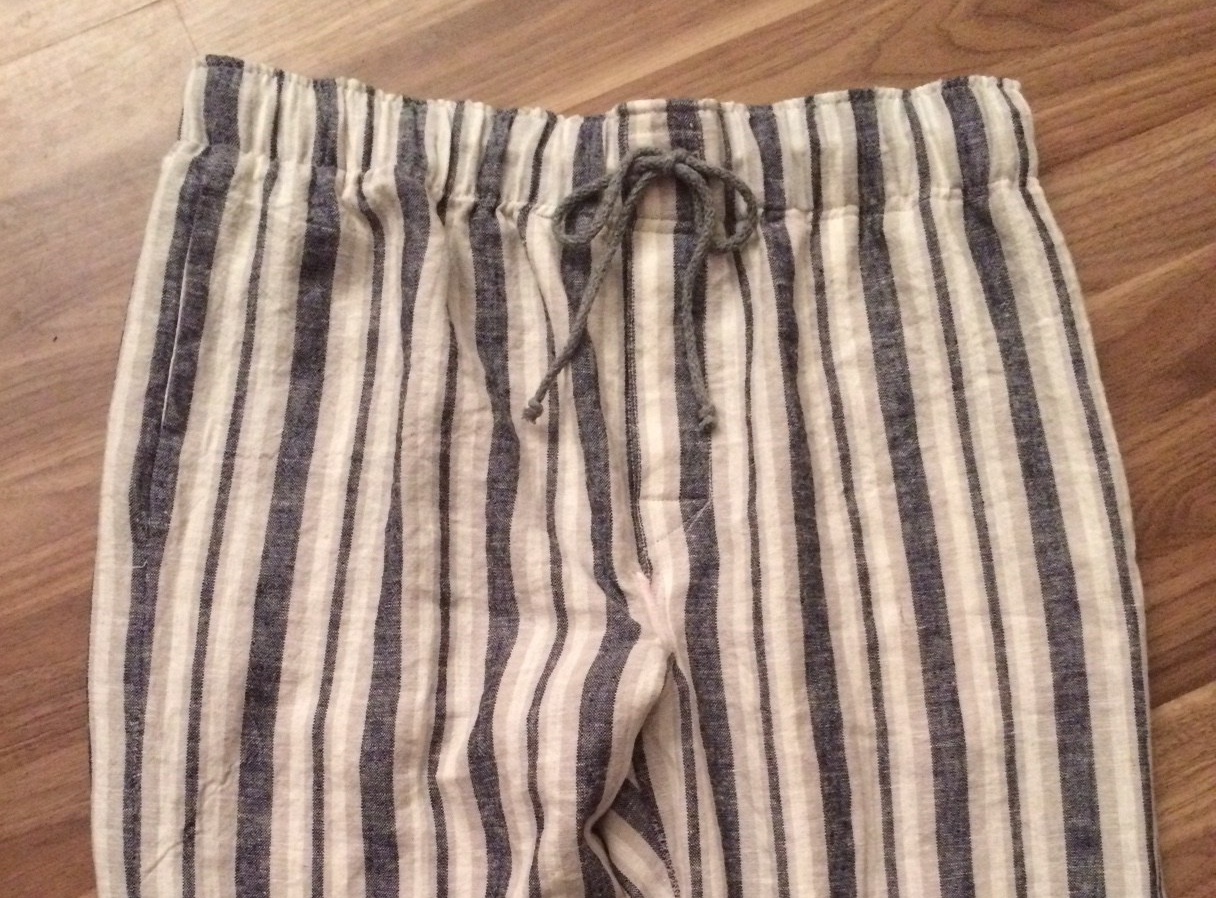
Nick sewed these striped linen pajamas with cotton cording. What a perfect color match he managed with that cording! He reports (by email) that next time he sews with this style of linen he will try out french seams since the linen frays so much. This would be a lovely way to finish the inseams and side seams when sewing with very light weight fabrics. Heavier fabrics could benefit from bound seam allowances if you have the patience!
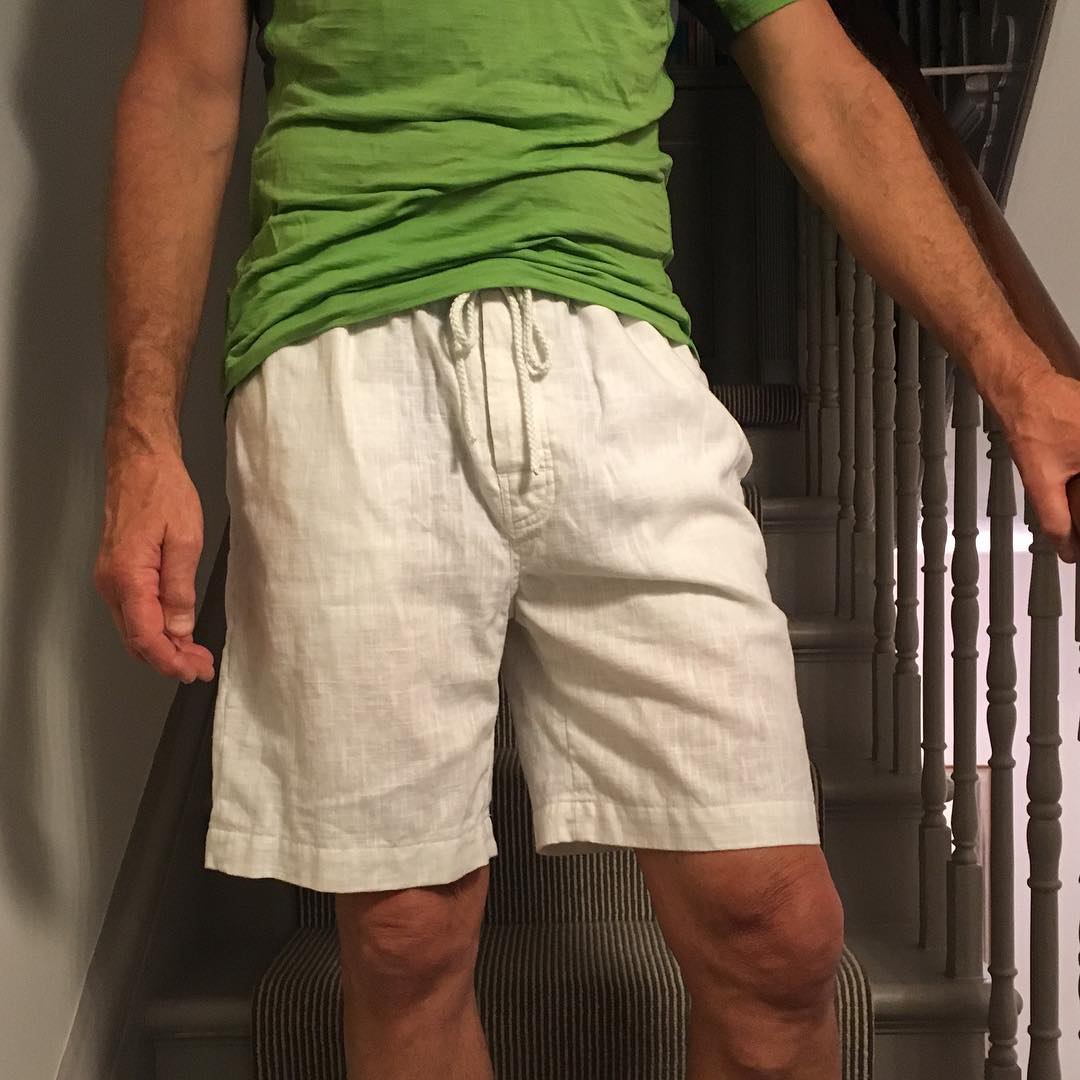
Liz sewed this pair of white linen Eastwood shorts for her husband and reports that her son is now waiting for her to sew some for him! It looks like she did a lovely job of that fly topstitching.

Lastly, Susanne was able to use up a small scrap of Dr. Who fabric that she treasured to make her son some tardis boxers! They used only 34" of a narrow 45" fabric that she found on Spoonflower. She reports that she made a size medium and cut a 6" inseam plus hem allowance.
These three busy sewists will be receiving our upcoming pattern release for free as a thank you for sewing along with me these last couple of weeks!
