

Sew-along with us!
Perhaps you'd like some company while you sew? We've sewn up each of our patterns and photographed each step along the way. Find the pattern you're after in the filter drop down below left.
Sew-Alongs

Grading the Sayward Raglan Up or Down for a Perfect Fit
I jumped for joy when Thread Theory asked me to test the new Sayward Raglan pattern – finally, a classic but fashionable design that would work for my husband! The options out there for plus-size menswear are just awful, and I’m so glad that Thread Theory has stepped in to fill that gap.

Once I saw the size chart though, I realised that my husband is just out of the 4x size range. No problem though! It’s simple to grade a basic pattern like this up or down a size, and today I’m going to show you how.
You will need:
- the Sayward Raglan pattern (although the same approach could be used on the Comox trunks, free Arrowsmith undershirt, or any other simple knit pattern)
- a clear quilting ruler
- marker or pencil

Let’s start grading!
There are many ways to grade up a pattern. For a simple knit pattern like the Sayward, I’m going to show you a straightforward method that will give a good result going up or down 1 or 2 sizes without too much fuss. If you want a more precise method for more complex patterns, I recommend this Craftsy class!
Step 1: Measurements!
Take measurements, and compare them to the size chart. The key thing here is to look at how many inches you’ll want to add or subtract to make the pattern fit!

In this case, I want the chest and shoulders to be about one size bigger, which means I’ll want to make the sleeves one size bigger too so that the seams match up nicely. In the waist and hip, I need to add an average of 6″ of ease. If I was adding that much to a children’s pattern, I would worry about distorting the proportions, but on a shirt for a big guy, it won’t be a problem.
At this point, you’ll also want to pay attention to height, and any fit preferences like extra length, shorter sleeves, etc.

Step 2: Grading up or down a size!
It’s time to lay out your pattern and start adjusting! The process is the same if you are grading up or down.
Essentially, we are going to continue the grading rule for the existing sizes to create a smaller or larger size. The way the existing sizes are nested will be our guide for how much to add or subtract!

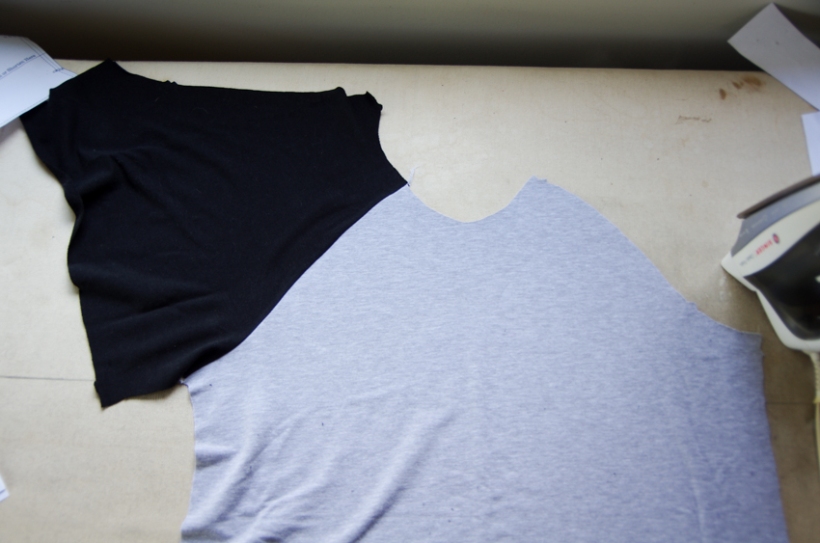
In red, I’m grading the shoulders and sleeves up one size. I look at the distance between size 3x and 4x, and draw a new line the same distance out to create a 5x. In blue, I’m grading down to an XXS.
The process is the same for the front, back, and neckband. Pay attention to when the nested pattern lines get closer together or further apart along a curve!

3. Adding or Subtracting Ease
If one part of the shirt needs more or less ease, like the arms or torso, you may want to do more than just grade up or down the existing proportions.
For example, I only needed to grade the top part of the shirt up 1 size, but I want to add about 6″ of width from the underarm down. That means I need to add about 1 1/2″ to the front and back side seams.
To add ease, I straightened out the side seam, and simple drew a straight line down from the underarm to add more width. You could do the same in reverse to make the shirt slimmer.

(Side note: As a plus-size women, I often make similar adjustments for my pear-shaped figure. I might add a wedge to the side seam or centre front/back which results in a fun, swingy shape. For a traditionally masculine fit though, I chose to keep the side seams in this shirt straight and vertical. In sewing there are so many ways to approach each adjustment, so just keep the wearer’s preferences in mind!)
This is the point to adjust things like height, sleeve length, or neckline! For my version, I’m going to add 3″ in length and 2″ to the sleeve length because my husband prefers that look.

4. True the Seams
The final step whenever you adjust a pattern is to cut it out and make sure that all the seams still match up nicely.

Compare the front and back to each other to make sure the shoulders, side seam and length are identical on both pattern pieces. This is basically your chance to catch any errors, like adding more to the front than the back! Lay the curved raglan seam over the front and back pieces and “walk” them together to make sure the seam lines match. (Remember that the seam allowance is 5/8″, so that is where the length needs to match!)
I added a 1/2″ wedge to the sleeve side seams to help balance the extra width I added to the torso of the shirt, and I’ll ease any extra width as I sew. With a knit pattern, a few millimetres here or there won’t matter!
5. Sew!
If you have made significant changes to the pattern, it is always a good ideas to sew a quick trial version in cheep fabric. I made my tester version in slightly-sheer turquoise crinkle knit, which you can imagine was quite a look! Once you know your adjustments are right, then sew it up in nice fabric.
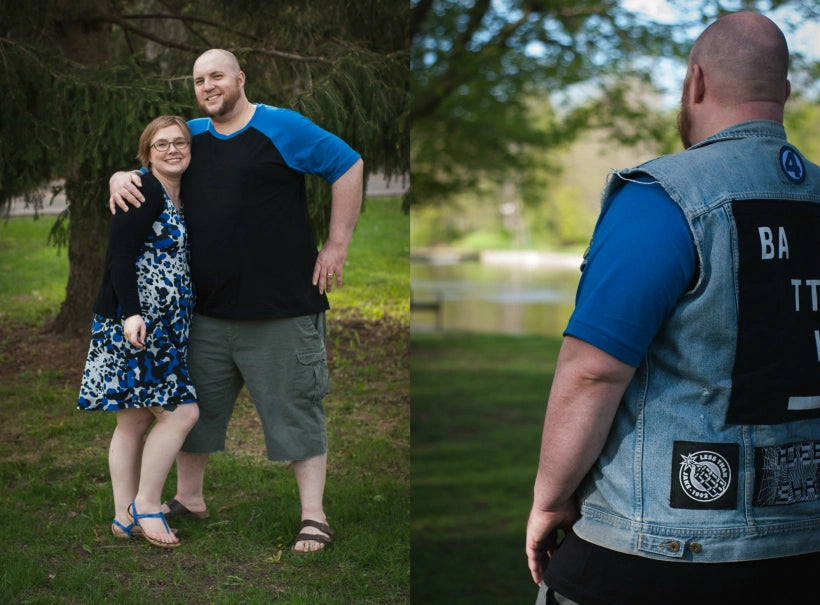
Here’s the finished Sayward Raglan!

We are both really happy with it! Raglan sleeves are new for him, but I think they look great. He likes the neckline and length, but wants another inch on the sleeves next time. I’m pleased with the fit in the torso – not too tight, but also not too baggy.

The great thing about a basic tee like this is you can perfect that pattern to reflect the wearer’s preferred fit and style. Jamie is an avid Fantastic Four fan (that’s an FF tattoo on his arm, and on my leg too), so he chose the team colours of royal blue and black. The fabric is a 95% cotton/5% spandex blend, which was a pleasure to sew!
And here’s how he’ll often wear it – layered with his “battle vest” covered in the nerdiest patches and pins!
So there you have it – the Sayward Raglan graded out to a 5x, and tailored to the wearer’s taste!
Once you’ve used this method a few times, you may find you don’t need to use a ruler and draw out your adjustments. I tend to grade up or down on the fly as I cut the paper pattern, or as I’m cutting out fabric. It just depends on your comfort level with grading and sewing knits!
Do you grade patterns up or down for yourself or others? It’s a useful skill for getting the most out of patterns, either as children grow, or to make one pattern work for many different figures! I’d love to hear how you approach grading, or if this tutorial works for you!
Coming up later today, we will actually sew the Sayward…perhaps the quickest part of this sew-along! See you later!
Sayward Raglan Sew-along: Parade
This is the day I look forward to every time I create a sew-along: The parade of your finished garments!

Aiden’s version of the Sayward Raglan really excited me when it popped up in my Instagram feed…you wouldn’t know it from looking at the finished garment but it has actually been constructed using old upcycled t-shirts gifted to him by one of his brothers! You could do the same easily (and very affordably!) – just grab two old t-shirts from your closet or the thrift store and cut around any holes or tired screen prints when you place your pieces. Choose t-shirts larger than your preferred size to ensure you have lots of fabric to work with. Depending on how you place your pieces, you may even be able to avoid stitching the main hem!

Rachel was one of our test sewers – she stitched up a long sleeve variation of the Sayward for her husband. The body is French Terry and the sleeves and neck band are jersey. She was stash busting when she chose her fabrics which caused her to use two different fabric weights. I was pleased to see that this worked out very nicely!

Amy sewed this yellow jersey Sayward (which she blogged here) while pattern testing and her husband obligingly modelled. As you can see, when the Sayward is sewn in a solid color, the raglan seamlines are not necessarily very noticeable and it presents as a very classic looking t-shirt – great for layering!

Another of our testers, Tracy, sewed tees for both her husband and her son in a drapey polyester blend knit and a 100% cotton knit respectively. I found this comparison of fabric types was very useful to help fine tune my description of recommended fabrics in the instruction booklet. She was not satisfied with how the neckline drags and drapes on her husband’s shirt but liked how it worked for her son – I think this is all down to the drape of the fabric…men’s tees fit best when the fabric does not drape heavily against the body. Regardless, I think both tees look excellent and very wearable! Thanks for your feedback and for emailing this photo, Tracy!

Amber tested our pattern from the perspective of a novice sewist (and very talented knitter! You can view here work here.) and I was thrilled to have her feedback on stitching the neckline. She found the neckline stretched out when she applied the binding and gave excellent feedback about how I might elaborate within the instructions to avoid this confusion for a novice…so you can thank Amber for the clarity of the instructions on the final pattern! I believe she had plans to remove her stretched neckline and reattach it using her new sewing skills. Don’t worry if your neckline doesn’t turn out the way you like on your first try – it is fixable and you will find every attempt at stretching your binding without stretching the body of the shirt will become easier and more successful! You may also find that a small amount of undesired stretching settles itself after the first trip through the wash.

Last but not least, Cassie sewed this bold floral raglan for her husband and emailed us this photo – his measurements were several inches smaller than our smallest size so the resulting fit is looser than our intended fit – so this is an excellent example of how forgiving knit garments can be, especially with raglan sleeves! Even though the shirt is technically ‘too large’ for her husband, the fact that there are no shoulder seams or armscye extending too far down the shoulder results in a shirt that looks as though it fits intentionally loose. Her husband suits a larger neckline too (it looks modern and trendy)! I think raglans would be a great option to sew as a surprise gift (one which you can’t measure the recipient beforehand) because the raglan seams result in a garment that will appear to fit a broad size range.
Thank you to everyone who tested our Sayward Raglan and to those of you who have shared your finished projects! I look forward to seeing many more Saywards as we near Father’s Day. #saywardraglan
Sayward Raglan Sew-along: Day 3
This afternoon we are sewing our Sayward Raglan. This post will walk you through each step with photos showing construction using a serger and construction using a variety of stretch stitches on a regular sewing machine. Let’s dig in!

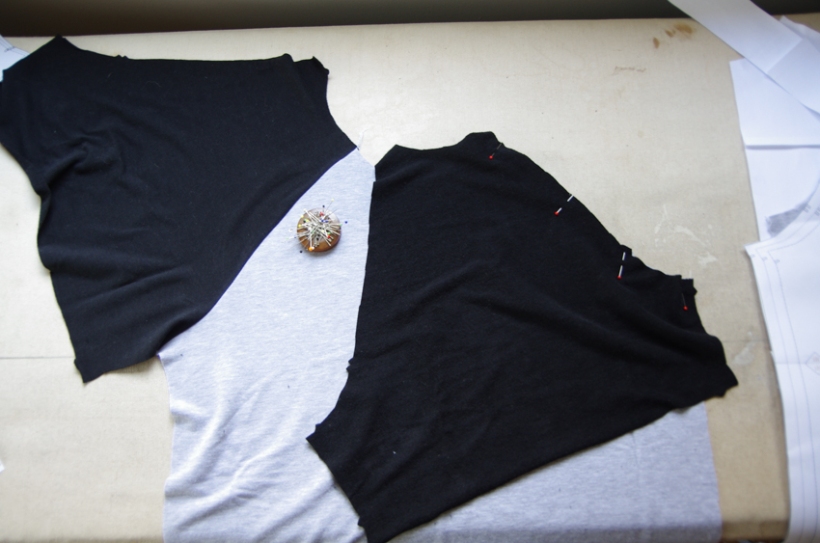
Your raglan should now be cut out from fabric – I like to clip my notches outwards when sewing with knits to avoid creating runs in the fabric (think of the runs that develop when pantyhose are snagged – similar runs can develop in knits).

Begin the sewing process by laying out your shirt front on your work surface with the right side up. Place on of the sleeve pieces on top with right side down. You will know you have your sleeve aligned correctly if the raglan seam with the single notch lines up with the single notch on the shirt front (note that double notches usually signify the back side of a garment).

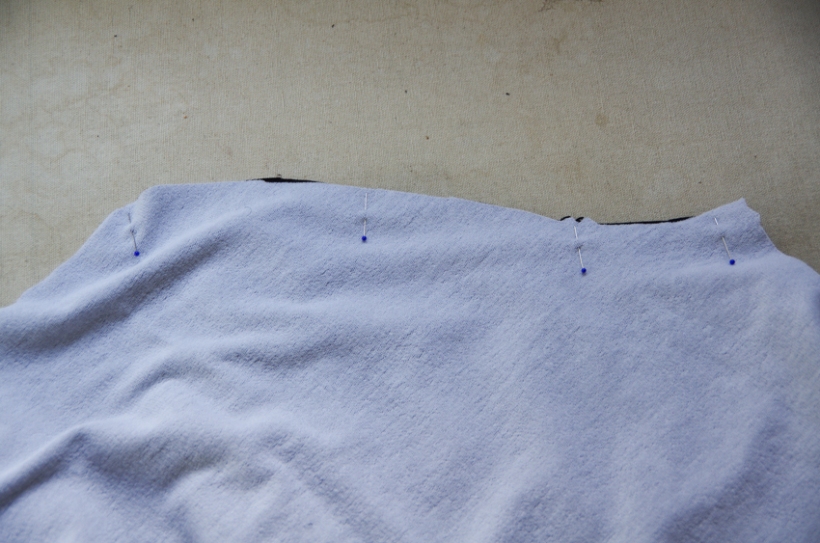
Pin the sleeve seam thoroughly so the notch lines up.

Stitch the seam using a 1.5 cm (5/8″) seam allowance. If you are using a serger, this means you will need to trim off the extra fabric with the serger blade.
If you do not have a serger and are instead using a stretch stitch on your regular sewing machine, here are how some examples of stitches you might use:

A simple zig zag stitch works great. Play around with the stitch length and the stitch width by sewing together two small scraps of fabric to create a practice seam. You want to find the sweet spot where the stitching is not very visible from the right side of the garment when the seam is pulled open and it also is nice and stretchy. If your zig zag is too wide, you will see puckers that almost look like holes on the right side of the garment. If your zig zag is too long, it will behave more like a straight stitch and not have very much stretch.

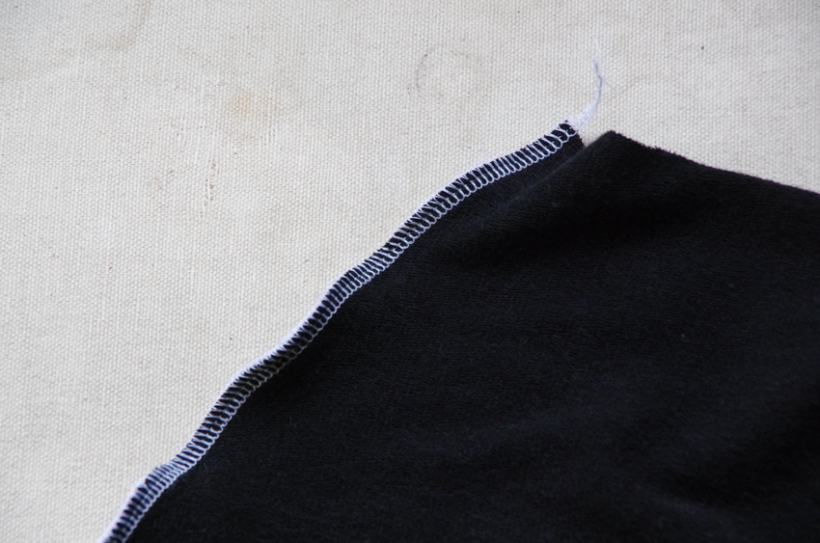
If your machine is able to do a triple stretch stitch, this is a great option of loose fitting knit garments stitched from sturdy and strong knits. The machine simply goes back and forth over the same straight stitch three times. This makes the stitch very strong so your seam will not snap. This isn’t a good option for delicate knits though since the seam will be stronger than the fabric itself! This means that, when stretched, the fabric is at risk of tearing while the seam stays perfectly intact. When I use a triple stretch stitch I like to finish the seam allowance with a zig zag stitch as you can see above. I then trim the excess seam allowance to make things look tidy and to reduce bulk. You can choose to finish the seam allowances together (like a serger would) and press them towards the back, or you can create a separate line of zig zag stitching on each seam allowance and press them open (this takes longer but creates less bulk at seam junctions).
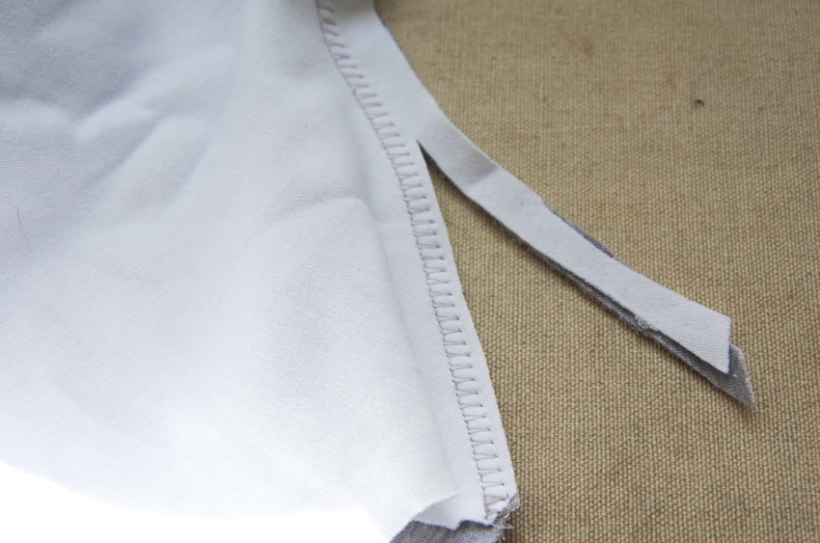
Some regular sewing machines feature awesome stretch stitches such as the one above (they vary in appearance from machine to machine). This one features a straight stitch broken up with a wide and short zig zag. If you trim the seam allowance before stitching, the zig zag will actually enclose the raw edge of the fabric to create a finish similar to a serger. I still like to trim afterwards though since knits don’t really fray much.
Once your raglan seam is sewn, press the seam allowance towards the sleeve (or open, depending on your preference). Repeat this process with the second sleeve:
Below you can see my serged seam allowances on the wrong side of the t-shirt – they are pressed towards the sleeves.


Now we are ready to add the shirt back! Leave your shirt laying right side up on your work surface with the sleeves spread out. Place the shirt back with right side down and line up one of the raglan seams. This time you will be matching the double notch. Pin thoroughly.

Pull the back over to the other sleeve and line up this raglan seam as well (again matching the double notches). Pin.

We are ready to sew the back raglan seams! Use the same stitch style as you did for the front seams and again, press the seam allowances towards the sleeves (or open).

It is beginning to look like a shirt already!

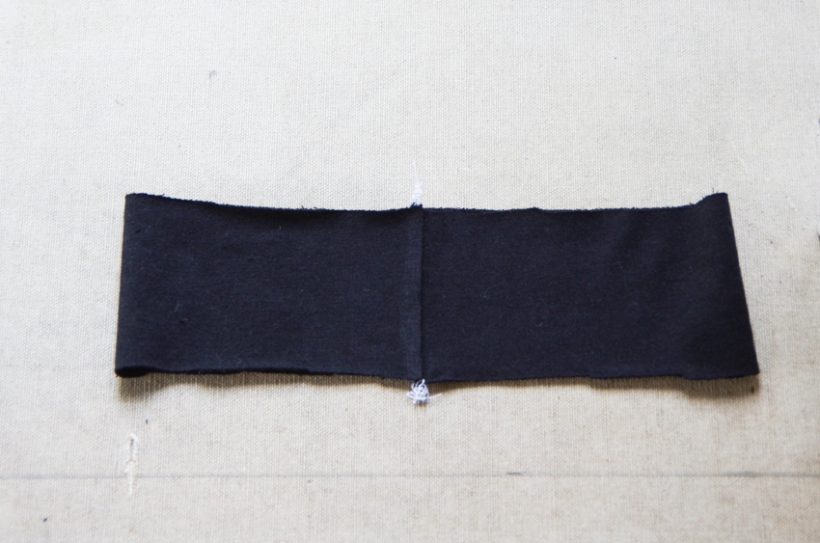
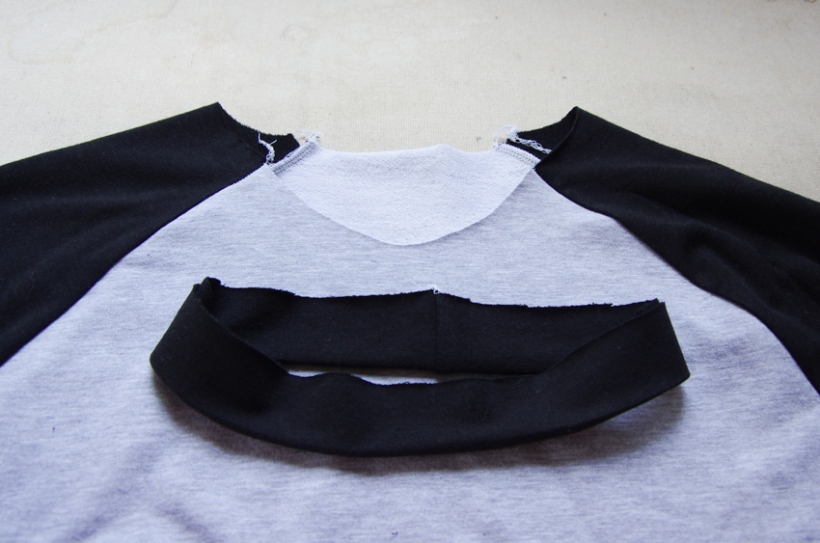
Now it is time to add the neck band. Fold your neck band piece with right sides together and align the two short ends. Pin.

If you like, you can baste the neck band closed at this point and continue following the directions below, all the while using a long basting stitch until your neckband has been sewn to your t-shirt. This is a great way to test the neckband to see if your fabric drapes heavily and drags the neckband until it is too large – this is a common problem with jersey blends but it is any easy one to fix if you do a test fit with large basting stitches. You can simply remove your basting until you are back to this step in the instructions. Sew the neck short ends using a larger seam allowance to create a smaller neckband. When the smaller neckband is stretched to fit on to the neckline, the tension created by the stretching will help the neckline to keep its shape.
The neckband is perfectly drafted to suit stable knits like interlock though, so I’ve proceeded directly to serging here!

Press the seam open or to one side (depending on the stitch style you used). You now have a loop:
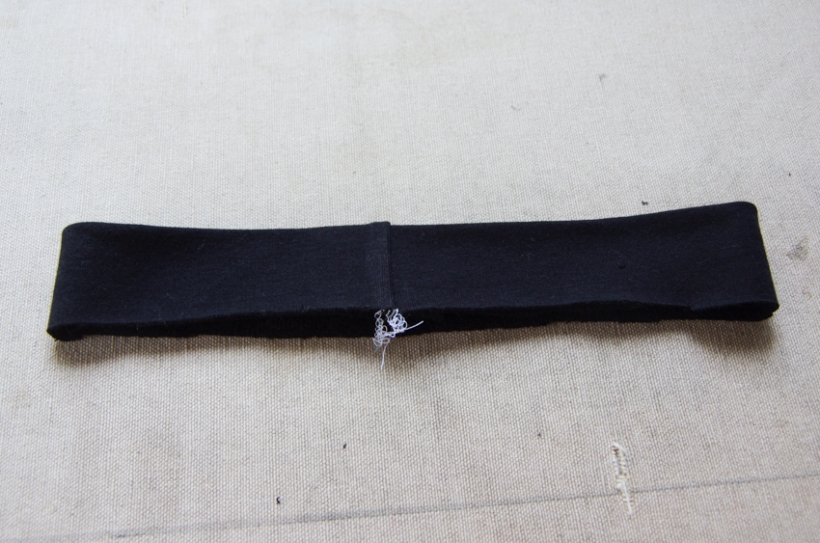
Fold your loop in half so the raw edges meet and wrong sides are together. Press.

It is now time to apply the binding to the t-shirt neckline! You can choose where you would like to position your binding seam – in the photos below you will see I’ve placed it at centre back. If you prefer, you could position it so it lines up with one of the back raglan seams. This is just a matter of style preference and does not effect the shape or fit of the neck band.
Divide your neck band in half. Line up one half (in my case, the neck band seam) with centre back. Line up the other half (which I’m pinching in the photo below) with centre front. Pin at these points.

Now divide the neck band in quarters. Align each quarter (where I’m pinching in the photo below) half way between the raglan seams.

You will notice that the binding is smaller than the shirt neckline. You’ll also notice that the front binding will need to be stretched more than the back binding to fit the shape of the neckline. Both of these observations are excellent! The small circumference of the binding will stop the neckline from gaping. The extra tension on the shirt front will ensure a shapely neckline where it is most likely to sag.

Stitch around the neckline loop using a 1.5 cm (5/8″) seam allowance. If you would like a slightly tighter crew neck than our pattern is designed to include, an easy solution would be to sew the binding with a smaller seam allowance (1 cm or 3/8″ for example). This will result in a wider neck binding and a tighter neckline.

You can see in the photo above that I began and ended my stitching at center back. This is a great idea if you plan to cover this part of the seam with a garment tag – your untidy backstitching or serger overlap will be nicely hidden! If you will not add a tag, it is a good idea to start your stitching at one of the raglan seams so it is not so obviously visible.

Press the seam allowance towards the shirt body and sleeves.

If you want to prevent the seam allowances from flapping around and also, if you would like to add more structure and stability to your neckline, you can finish off your neckline by circling it with a stretch stitch. This stitching catches the seam allowance so that it is permanently pressed in the correct direction. You can also trim off any excess seam allowance to create a tidier finish.

If you would like to stitch on a garment tag, place it at centre back and topstitch it down across the top and bottom. You could even stitch around the entire rectangle. Remember to keep your stitching as neat as possible because the shape that you stitch will be visible on the back of the garment.


Now that the neckline is complete, we can do a final fit and head on to the side seams. It is very easy to fine tune the fit of the Sayward Raglan. Try the unfinished shirt on the recipient with the shirt inside out.


Pin up the side seams and sleeve seam trying to keep your pins along the seam line as accurately as possible. If you are frustrated by the pinning or worried you will poke the wearer, you could also baste the seams together with a long stitch length before he tries it on.
At this point, you will be able to see if you need to take in the sleeves a little (i.e. sew them with a larger seam allowance) or perhaps taper to a smaller seam allowance at the waist and hips to give him a bit more room in the body.
If you are able, take the garment off the wearer with the pins still in so that you know exactly where you need to sew (now that your seam allowances are no longer consistent!).
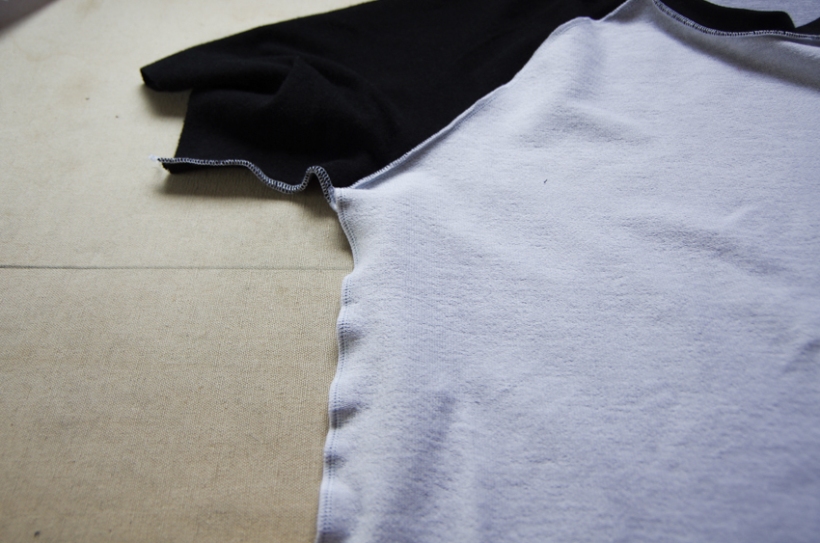
Sew the entire sleeve and side seam in one go. Make sure that the underarm seam is aligned as perfectly as you can. Also ensure that the raglan seams remained pressed the way that you intend.

Press the seam open or towards the back depending on the stitch style that you chose.
And now we hem! My favourite way to hem hefty knits such as this terry is to serge the edge and then press the fabric under at the hem notch. The instruction booklet shows you some other options to choose from too (particularly suited to lighter weight knits). If you would like to follow along with this photographed method but do not have a serger, don’t worry! You could simply zig zag the raw fabric edge.
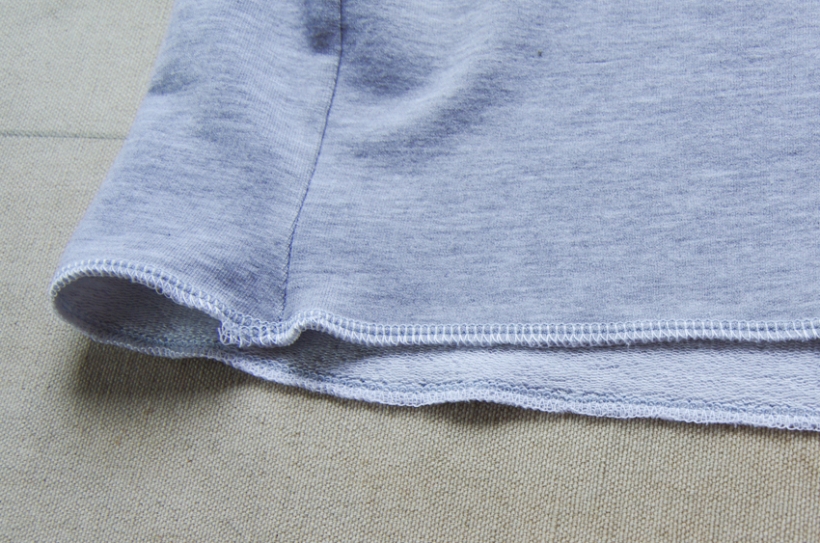
Once the raw edge is finished, fold the fabric edge up once at the hem notch. Pin thoroughly.

The same process applies to the sleeve hems:

Stitch around the hem using a zig zag stitch. In the photo below, I am stitching from the wrong side of the garment. I also like stitching from the right side of the garment.

The advantage of stitching on the wrong side of the garment is that you will have likely placed your pins on this side (so they are easier to take out as you sew) and that it will be more obvious if you are wavering off the edge of your hem or if your hem is puckering as you sew.
The advantage of stitching on the right side of the garment is that you can see how your finished results appear. You might also find that your fabric moves along more smoothly with both layers being moved along at an equal pace…at least this is what I find with my machine!
Test out both options on a scrap piece of fabric to see which side you prefer to sew from. It is essential that you do not stretch either layer of fabric while sewing since this stretching will result in a twisted hem or hem that ripples. Don’t worry, a tiny bit of stretching will likely snap back into shape after the first wash!

And here is what your finished hem will look like! While you would never see a zig zag stitch on a manufactured garment, I think it looks professional and does not seem at all noticeable or distinguishable from a coverstitch hem when worn.

And that’s it! A couple hours of sewing and your Sayward Raglan is complete! If you have already whipped one up and would like your photo shared on Friday’s blog post, please email it to me at info@threadtheory.ca or use #saywardraglan on social media. I can’t wait to see your t-shirts!
Sayward Raglan Sew-along: Day 2

So we are about to start on our Sayward Raglan sewing project but first we need to choose our size and make any fit and style adjustments we might need!
Choosing your size:

Within the instruction booklet I included a detailed explanation and diagram showing you how best to choose your size. Let me walk you through it! (Open image in a new tab to see it full size…and feel free to skip down to our fun pattern hacks if you are comfortable choosing your size without assistance!)

Under How to Choose Your Size you will see an explanation on how to collect body and garment measurements. While body measurements are most essential, we always include garment measurements for our patterns as well, this way you can compare them to existing garments to see if the Sayward will end up with the fit and style that you or your recipient are used to wearing. Let’s illustrate this point with scenarios:
Scenario 1:
For instance, you may be excited to sew a raglan and find that the body measurements perfectly match the size L but, when you measure a favourite t-shirt, the garment measurements match our size XL…well, this is an excellent indicator that the man you are sewing for might prefer a looser fit than the Sayward is designed to produce! In that scenario, simply make the executive decision to sew XL and produce a Sayward that fits differently than we designed, or, sew the L and push the boundaries of your prospective wearer (if he is interested in trying a new fit).
Scenario 2:
When collecting Body Measurements you might find that the chest, waist and shoulder width, hips and height of your recipient do not match a single size on the chart. For instance, his chest measurement may suit our size M, his waist may be size M, his shoulders size S and his hips size L…and then his height might match 4XL…it’s certainly possible to have these results! In a scenario like this, the chest measurement is the most important since this is where the raglan is most fitted and where it is the most difficult to adjust.
Choose our size M pattern but then manipulate it to ensure it matches the recipient’s shoulders, hips and height. This isn’t as tricky as it might sound! Here is how I suggest you approach this particular scenario:

Accounting for size S shoulders: You can simply sew with slightly larger seam allowances when attaching the sleeves to take in a bit of extra fabric at the shoulders (use a larger seam allowance for the sleeve but not for the body since you don’t want the body to be any smaller at the chest). Always make smaller changes than you think you need since you can remove more fabric but you can’t easily add fabric back in once seam allowances are trimmed!

Accounting for size L hips: Before cutting out your fabric, grade to a larger size at the hips to suit your wearer. Here is a tutorial I made for the Jedediah Pants to show you how to grade between sizes. Alternatively, you can just taper to a smaller seam allowance as you sew down the side seam towards the hem.
Accounting for size 4XL height: This is a big change that you will need to do before cutting out your fabric since you will be adding lots of length to the pattern pieces. Slice along the lengthen and shorten here lines and follow our tutorial on lengthening a pattern. You might like to double check a t-shirt that your wearer likes to see exactly how much length to add to the Sayward (measure the Centre Back Length as I describe in the instruction booklet). Perhaps he likes a t-shirt longer or shorter than the Sayward is designed to fit…so don’t just rely on his height! Refer to the Garment Measurement chart too!
So now we’ve covered how to use our measurement charts and adjust the Sayward Raglan for fit, please stay tuned for tomorrow’s special guest post. It will be about grading to a larger (or smaller) size than our pattern offers – perfect for men who fall just outside of our available size range but would still love a Sayward Raglan!
Fun Pattern Hacks:

Okay, let’s move on to adjusting the Sayward Raglan to suit style preferences. This is the fun part! I’ll be covering how to create 3/4 length sleeves and how to add a Henley placket.
Add 3/4 Length Sleeves to the Sayward Raglan


This is an easy adjustment to create a very classic look. Before cutting out your fabric, bring out your Sleeve pattern piece (the long sleeve version).
Measure your recipient’s arm to find out exactly where he would like his 3/4 length sleeve to end. Measure along the seam from underarm to the desired finished length. Ensure that his elbow is ever so slightly bent as it would be when he is standing relaxed.

Remember that the Sleeve pattern piece includes 1.5 cm (5/8″) seam allowances. Whenever you manipulate pattern pieces, it is most accurate to mark in your actual seamlines – do this now along all edges by measuring in 1.5 cm (5/8″) at various points and then connecting the dots.

Measure from the underarm seamline down the arm to your desired length. Draw a horizontal line at this point – this is your new finished hem length.
Now it is time to add the hem allowance. You will notice on the original pattern piece that the hem allowances features an angle. This angle adds width to the bottom of the hem so when you fold up the hem it will match the taper of the sleeve. We need to replicate this at our new hemline.

Hold up your sleeve pattern piece to a window (tape it there so it does not shift). Place another piece of paper over the 3/4 length horizontal line. Measure up from the line 2.5 cm (1″). Trace the angled line.

Flip your piece of paper over and slip it under the Sleeve pattern piece. Use the light from the window to trace the angled hem onto the original pattern. Add the seam allowance back on to each side of the hem allowance (the outer red lines in the diagram above).
Cut off the extra sleeve length that you no longer need.
Now you can cut out your 3/4 length sleeve and sew it up exactly as per the instructions!
Add a Henley Placket to the Sayward Raglan

First of all, you will need to download a placket pattern piece – Free Placket Sewing Pattern! It creates the same style of placket that you see on our Strathcona Henley. Print it full size with no scaling and check it is the correct size by measuring the 3″ test square.
Now, using the Sayward Front pattern piece, draw a vertical line at center front of the neckline measuring 13.7 cm long (5 7/16″). This is where you will position your placket.
Head to our tutorial on sewing a Henley placket.
Once your placket is complete, attach the Neck Band as follows (this is an excerpt from our Strathcona Henley instruction booklet. Be sure to open the image in a new tab to view it full size):

And there you have it! Our classic Sayward Raglan turned in to a versatile Henley like this perfect example from The Gap!

You are now ready to cut out your fabric. I have a VERY detailed post on cutting out a t-shirt – while I used the Strathcona Henley pattern for this tutorial, everything I mention applies perfectly to our Sayward Raglan.
Stay tuned for our guest post on grading tomorrow and I will be back for the final sew-along post on Wednesday when we will be sewing the Sayward!
Sayward Raglan Sew-along: Day 1


What do these three photos have in common? You’ll soon find out!
Welcome to the first day of our Sayward Raglan Sew-along! This will be a short and sweet sew-along that will have you finished your raglan by next Wednesday…it’s that easy and quick to sew this style of tee!
Day 1: Today we will have a look at some ready-to-wear inspiration and talk about fabric choices.
Day 2: We’ll go over fit and style modifications and then cut out our fabric.
Day 3: We’ll sew it all together!
Next Friday: We’ll share some of our pattern tester’s Saywards and maybe a few of your finished projects too.
Let’s get started!

The raglan sleeve style is said to have been developed by Lord Raglan and his tailor after his arm was amputated as a result of an injury sustained during the Battle of Waterloo in 1815. This sleeve style allowed for easier dressing as an amputee and also resulted in a greater range of movement for sword use (and, later on in history, for all manner of sports, most notably American baseball!).

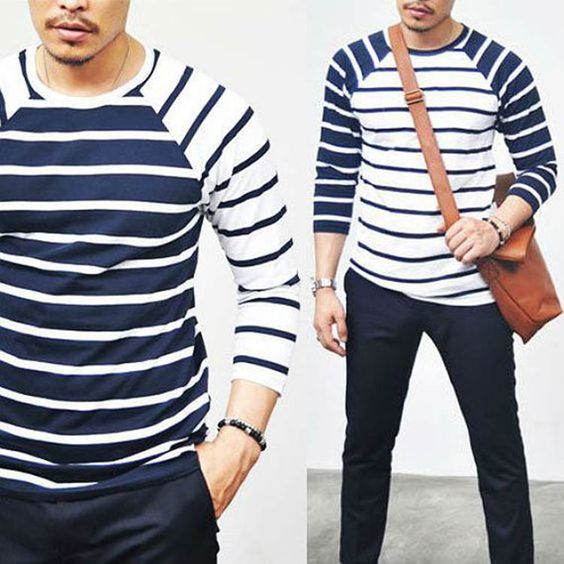
Now we’ve had a small glimpse at how the raglan developed historically, let’s look at how it is worn today. Raglan sleeves are now commonly seen on knit sportswear but are also used on casual daily wear for both men and women. All of the RTW images below come from our Sawyard Raglan Pinterest board.
I can imagine the Sayward sewn in a thick and cozy terry or interlock:


A versatile cotton jersey:


Or in high-tech blends to create performance sportswear:

Color-blocking can be approached in a number of ways. Within the instruction booklet I provide information on how to color block to create this style (sleeves and neck band are the same color while the body is a contrast color):
But you could also get creative by colorblocking differently:


While there are many suitable fabric choices for the Sayward Raglan, here are my top 3 picks with my reasoning:


Fabrics: 1. Organic Cotton Interlock from Organic Cotton Plus 2. Elk Grove Organic Cotton Interlock from Organic Cotton Plus 3. Josi Severson Organic Cotton Interlock from Organic Cotton Plus
Cotton or Cotton/Poly Interlock:
This fabric is of medium body which makes it easy to sew – it does not curl as much as jersey at the edges and it is more stable than most knits (it sews somewhat like a non-stretch woven material). It is also wonderful to wear because it is thicker than the jersey used for most t-shirt manufacturing these days. It will wear well for many years to come and will feel soft and luxurious against the skin.


Fabrics: 1. Organic Cotton Spandex Striped Jersey from Simplifi 2. Nordic Night Organic Cotton Elastane Jersey from Simplifi 3. Whale Pod Organic Cotton Elastane Jersey from Simplifi
Jersey (with no spandex or less than 6%):
Jersey is thin and will result in a very professional feeling t-shirt because it is what most men are used to wearing. If you pick a cotton jersey, you may be able to find one that is quite crisp and stable (especially if no spandex or other substrates have been added). Watch out for slinky jerseys that drape against the body when worn – these will result in a sagging neckline and a form hugging t-shirt with a distinctly feminine appearance. I find most rayon blends have too much drape for a men’s t-shirt and bamboo blends should be felt in person before committing to them since they can also drape quite heavily. A great benefit of choosing jersey is that it is widely available in fun prints!


Fabrics: 1. Bamboo Cotton French Terry from Blackbird Fabrics 2. Organic Cotton Terry from Simplifi 3. Light Weight Organic Cotton French Terry from Organic Cotton Plus
French Terry:
A great choice for those new to knits since it doesn’t curl or shift while sewing. Watch out for terry fabrics with loose loops on the wrong side because those can be messy (the loops fray off at the cut edges and make a lot of dust in the sewing room) to sew with and can catch on watches or nails when the shirt is being taken on or off. A French Terry will produce a warmer Sayward that can be worn as a t-shirt or layered atop another t-shirt as a light sweater.
Have a question about colorblocking, styling or fabric choice? I’d love to help! Just comment below or email me at info@threadtheory.ca.
Now it’s time to purchase, wash and dry your fabric so you are ready to cut out your Sayward on Monday! Have a nice weekend!
