Sew-along with us!

Perhaps you'd like some company while you sew? We've sewn up each of our patterns and photographed each step along the way. Find the pattern you're after in the filter drop down below left.

Bamberton Shorts Sew-Along: Day 1 - Gathering Materials and Choosing a Size

Bamberton Shorts Sew-Along: Day 1 - Gathering Materials and Choosing a Size

Welcome to the Bamberton Shorts Sew-along! We hope you'll enjoy making these wonderfully comfortable shorts. No matter the variation you choose you have some satisfying construction processes ahead of you.
First let's go ahead and select which design details you plan to sew:
Will you work on some welt pockets? Or add flapped patch pockets? Would you like a knit waistband (soft and comfortably casual, coordinating or contrasting with your main material) or woven (more structured, easier to match exactly to your main material)? Would you like to add contrast details by picking a secondary color for your side panels and even pockets or waistband?
The Bamberton Shorts are best sewn in light to medium weight woven fabrics. Their gathered waistband and wide legs makes them unsuitable for stiffer/heavier weight materials such as canvas. Avoid anything that is too crisp so that the gathers will sit nicely. Batiste, lightweight twills and even quilting cotton will work nicely.
Try a summery seersucker:
An elegant linen:
A sporty quick-dry material:
The Bamberton Shorts are available in two formats in our shop - a women's/curvy pattern and a men's/straight pattern. They feature the exact same design details with the only differences being the body measurement charts they were drafted to fit and the inseam length. The men's pattern has a longer leg than the women's pattern. Both patterns can be easily adjusted to have any inseam length you prefer!
There is a line that you can use to slash and spread or shorten the pattern and instructions included on how to do this within the booklet.
Within the women's and men's patterns are two seperate patterns - one for a smaller size range and one for a larger range. Have a close look at the charts below to find the pattern that suits your dimensions best:
If your hip and waist ration differs from any of the Body Measurement charts above, not to worry! We have graded these patterns to include MANY sizes and nested the pattern pieces in such a way that you can easily grade between the sizes that match your waist an hip measurements. There are also many fitting suggestions within the instruction booklet.
Now that you've decided on a style and size, let's gather the rest of the details before we begin to sew. Aside from fabric, as discussed above, you will also need to select the following notions:
  • Ribbed Knit Material (if you've chosen to sew a knit waistband): Look for 1X1 ribbing that is quite thin. Anything thicker than t-shirt weight will result in a waistband that is too bulky. If you're choosing a knit waistband for comfort, I'd recommend finding something made from bamboo or a bamboo/cotton blend...so soft!

  • Pocket Lining Material: This can simply be your main/self fabric or you can have fun by adding a secret print (quilting cotton or other thin material) or something suited to your intended purpose for the shorts. For example, if you're sewing quick-dry activewear or swimwear you could look for a mesh material that keeps your shorts light and quick-drying.

  • Elastic: The pattern calls for 3/4" elastic which is narrower than the finished waistband. The elastic fits within the drawstring channel so the area above and below the elastic is left unstructured for a very casual looking effect and a comfortable unconstrained feeling when worn. If you prefer a more structured waistband you can choose elastic up to 1 1/2" thick to fill the entire waistband and provide more firm support around the waist. Simply widen the drawstring channel topstitching to match the width of the elastic you chose. Look for braided elastic and, if you are sewing the shorts as swimwear, look for chlorine resistant elastic specifically. If you have a woven elastic in your stash this could work too as long as it isn't especially thick and rigid. The main aim is comfort here!

  • Interfacing: Any light to medium weight woven interfacing will work! It is used to add structure to the drawstring buttonholes and some of the other small design details.
  • Drawstring Cord: The cord you choose can really alter the look of the finished shorts. If you're after something beachy and summery, choose a double woven 5mm cotton cord and simply knot the fraying ends. If you'd like to create activewear, search for something flat like a shoe lace (in a pinch, if you want to shop local and can't find the cord you are after, simply repurpose two shoelaces by sewing them together to create your cord. The seam where they join will be hidden in your drawstring casing).

  • Thread: Remember to select thread colors to suit each of your contrast details unless you want visible topstitching!
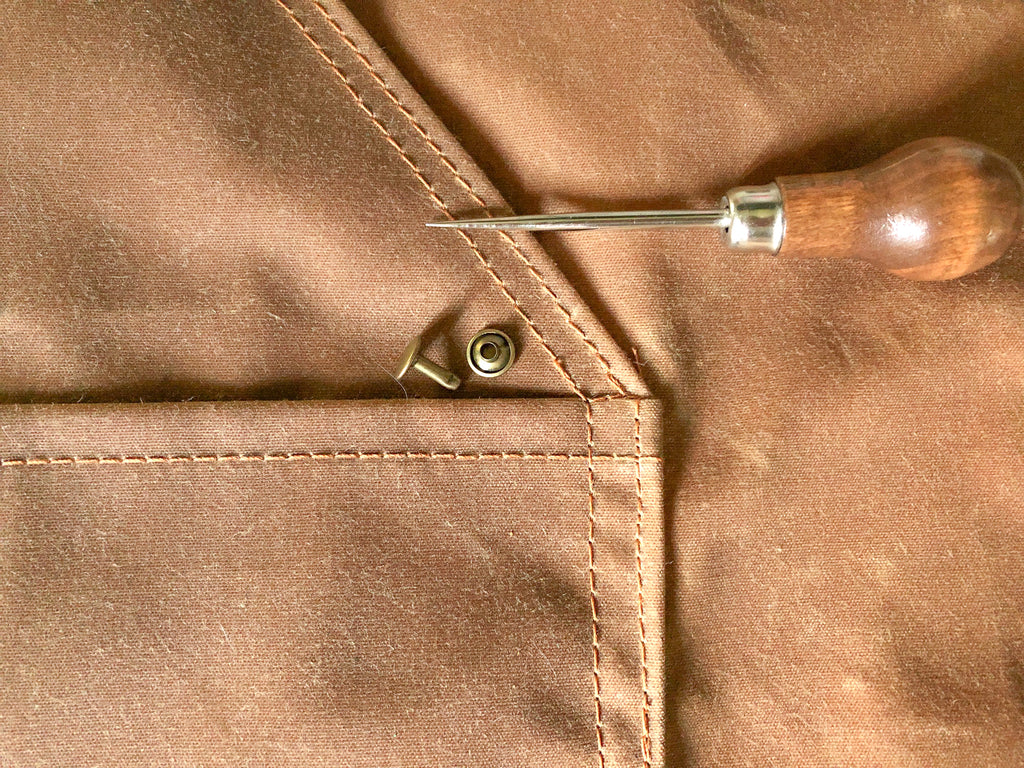
  • 2 Buttons (for the patch pocket variation): Any flat style of button measuring 5/8" will work here. Avoid anything with a shank and much depth as these buttons will be sat on!
  • Aglets (optional): If you are knotting your drawstring ends you will not need aglets. Likewise, if you are using shoelaces, your aglets will already be installed. There are many styles of aglets or drawstring end caps. You could even add beads to the end of your drawstrings to contribute to the overall style of the shorts!

June 05, 2024
Bamberton Shorts Sew-Along: Day 2 - Back Welt Pockets

Bamberton Shorts Sew-Along: Day 2 - Back Welt Pockets

Today we begin sewing our shorts. First, apply your interfacing to the pocket facings and waistband. Next, add interfacing to the relevant pocket pieces. This post will be all about the welt pockets, please skip ahead to Day 3 to learn how to sew the patch pockets.
Prepare the welt pocket bags by first finishing the edges of your welt facings with a serger or zig zag stitch. Alternatively, you could fold under the long raw edges 1/4-3/8" but keep in mind this will add some bulk.
Position the facings onto the pocket bags (wrong side of the facing against the right side of the pocket bag) using the notches to guide you. Pin and edgestitch them in place.
Next, prepare the shorts back pieces for the pockets by transferring all the necessary markings. I like to use a regular pencil for this but, depending on your fabric choice, you may need to use a light colored chalk or a washable fabric marker or even basting stitches in a contrast thread for this marking.
Double check that your welt markings are drawn at exactly the same position on both shorts by lining up the shorts with right sides together and peeking to check that the markings align perfectly. You woul not want to create shorts with one pocket higher than the other!
Now we can prepare the actual welt pieces by folding them in half with wrong sides together. If you like to keep the welts from shifting around you can optionally baste them within the seam allowance as pictured above. The less moving parts we have to work with in the next few steps, the better!
Place the welts on the shorts back with raw edges together centered over the welt markings. Note that the welts are longer than the drawn marking. They should be centered over the marking.
To stitch them in place, use a very short stitch to slow yourself down and allow the stitching lines to be very precise. Make the stitching lines match the penciled in marking as precisely as possible.
Push the raw edges of the welts out of the way and cut across the center of the welt markings. Cut a diagonal to each corner. Snip as close to the last welt stitch as possible as this will create crisp corners later on.
Push the welt flaps through the opening you just cut. The end result will be that the raw seam allowance is on the wrong side of the shorts back and the folded welt edges are now facing each other.
Press the welt pieces and pocket opening to form a neat rectangle. From the right side it will look as above and from the wrong side it will look as below:
While the pocket looks finished from the outside, there are some more very important steps to go! Let's secure the welt in place now. Fold the shorts back to expose the small triangle on each narrow end of the welt. Stitch veritcally across the triangle. You can see in the photo that we did this stitching after adding the pocket bag. In the instruction booklet we have you do it before. Either works!
Now it is time to add the pocket bag. On the wrong side of the shorts, flip up the bottom welt and pinch all raw edged layers. You will be sewing only these layers to the pocket bag. Let the rest of the shorts fall away from these pinched layers.
To attach the pocket bag we will be working with the end farthest from the pocket facing (the bottom of the pocket bag).
Place the pocket bag under the shorts with the right side up. Pin it to the bottom welt seam allowance that we exposed by pinching earlier.
Stitch across the entire seam allowance. Press the pocket bag away from the welt opening:
Flip to the right side of the shorts and edgestitch through the welt/shorts/pocket bag along the bottom of the welt. You can see below that we edgestitched along the sides at this point too. It is better to wait until the pocket bag is complete to stitch along the side of the welt so please ignore this stitching for now!
Back on the wrong sides of the shorts, fold up the pocket bag along the notch. Press along the new bottom of the pocket. The pocket facing should be centered over the welt opening.
Pin the pocket edges together (keep the shorts back out of the way for this step).
Stitch the pocket bag edges and finish with a serger or zig zag sittch. Baste across the top of the pocket bag and shorts to keep it in place.
From the right side edgestitch around the rest of the welt pocket through all layers (including the pocket bag).
And there you have it! A functioning and attractive welt pocket that won't sag due to all our careful stitching efforts!
June 05, 2024
Bamberton Shorts Sew-Along: Day 3- Back Patch Pockets

Bamberton Shorts Sew-Along: Day 3- Back Patch Pockets

Today we are sewing the back patch pockets for Variation 1 and 3 of the Bamberton shorts. Before we begin, make sure that two of your four back pocket flaps are interfaced.

Assemble the flaps by placing one interfaced and one non-interfaced flap with right sides together. Repeat for the second flap. Sew around the sides and bottom edge using a 5/8" seam allowance. Reduce bulk if needed by grading one seam allowance shorter than the other and by clipping the corners.


Flip the pocket flaps right side out and press crisply. Finish them off by topstitching and/or edgestitching. Depending on the look you are after for your shorts you might like to complete your shorts with minimalist edgestitching 1/8" from the pocket flap edge (and then repeat this style of stitching whereever topstitching or edgestitching is called for. This is a great look for color blocked shorts and swim shorts in particular.

To create a more rugged look, add a second row of stitching 1/4" inwards. This is called topstitching. It is a great choice aesthetically for hiking shorts and any shorts sewn with a more rigid and sturdy fabric.

Complete the flaps by creating a vertical buttohole to suit the size of your chosen button.

Let's move on to the patch pockets themselves. Above you can see we've finished the raw edges of the pocket. This is optional and is a nice way to prevent wear on the pockets if they will be used often as the constant in an out of a phone or wallet can fray unfinished edges.

Turn under the pocket hem along the first notch. Turn under again at the second notch to create a wide hem. Press.

Stitch across the pocket opening hem to secure it. Our instructions suggest stitching from the right side of the pocket to ensure the most attractive stitching on the outside of the garment but you can also stitch from the wrong side if you are happy with how your bobbin stitches are performing.


Turn the remaining edges under using 5/8" seam allowances. Press thoroughly.

Place the pocket onto the shorts back using the pocket placement markings. I like to pin the pockets in place and then hold the two shorts back pieces with right sides together to ensure that the pockets are exactly aligned with each other.

Stitch around the pocket sides and bottom using 1/8" edgestitching and the optional extra row of topstitching. If only adding edgestitching, you can add a sturdy upper corner to your pockets by completing your edgestitching with a small triangle shape as pictured above.

Add the flap above the patch pockets by placing it pointed up with the right side of the flap (the more attractive side of the buttonhole) facing the right side of the shorts. Align the raw flap edge with the top of the pocket. Stitch 5/8" up along the pocket flap markings.

Trim the excess seam allowance from the pocket flap. Press the pocket flap down.

Stitch the pocket flap down by edge stitching and top stitching across the top of the flap. This will also enclose the raw seam allowance.


Repeat this process for the second pocket and flap. Add the buttons to your pockets at the marking. And now your pockets are complete!

June 05, 2024
Bamberton Shorts Sew-Along: Day 4 - Back and Front Seat Seams

Bamberton Shorts Sew-Along: Day 4 - Back and Front Seat Seams

Today we will complete the back and front seat (or crotch) seams on our Bamberton Shorts.
Begin by aligining the two shorts back pieces with right sides together. Stitch along the curved seat seam using a 5/8" seam allowance. Finish the seam allowances together using a serger or zig zag stitch.
Press the shorts back open with the seam allowances towards the left back. Stitch them in place by edgestitching from the right side of the shorts back. Optionally, add a row of topstitching 1/4" away for a faux flat fell seam. This creates a more rugged appearance reminiscient of jeans.
Now it's time to complete the front seat seam. This will be sewn at the same time as a mock fly.
Begin by placing the shorts fronts right sides tigether. Pin along the fly and seat seam and then stitch along the edge (following the curve of the fly) using a 5/8" seam allowance.
Next, mark the true center front using the notch at the waistline. This can be marked with chalk or a pencil and ruler. The line will extend from the notch down to the bottom of the curved fly and will meet with the stitching you just completed.


Sew along this center front line and then stitch the entire center front and seat seam a second time for added strength in this high wear area.

Open up the shorts front and position them on your ironing surface with wrong side up. Press the mock fly and seam allowance towards the left front (if you were wearing the shorts).

Flip the shorts over so the right side is visible. Use the stitching template to mark the fly topstitching on the left front of the shorts (this is currently on the right side of your work surface).

Topstitch along this J-stitch line to secure the mock fly in place. Next, complete the seam underneath the fly by edgestitching 1/8" from the seam. Optionally, match the faux flat fell seam on the back of the shorts by adding a row of topstitching 1/4" from your edgestitching.

Next we will be assembling the fronts and backs along the inseam and side seams!


June 05, 2024
Bamberton Shorts Sew-Along: Day 5 - Front Pockets, Side Panels, Inseam

Bamberton Shorts Sew-Along: Day 5 - Front Pockets, Side Panels, Inseam

Today's a big day of progress! We will be sewing the front pockets, side panels and inseam.
Let's begin with the front pockets. First, ensure that your pocket facings ae interfaced.
Next, finished the curved facing edges with your chosen manner such as a serger, zig zag stitch or even folding under the raw edge and pressing. If you choose to fold under you will want to sew a line of basting stitches along where you plan to fold. Next, clip into the seam allowance up to the basting stitch along the curve. This extra step will make pressing under the raw curved edge much easier!
Next, place the facigns on the pocket bags. Position the pocket bags wrong side up on your work surface (the striped fabric shown here didn't have an obvious wrong side but if your pocket lining material does, it works great to place it facing down so that the finished pockets will have colorful linings visible from the inside of the shorts. This is a nice surprise when the wearer goes to put their shorts on.
Notice that the angled pocket opening on the pocket bag is pointed down. Pin the facings in place and then edge stitch around all facing edges.
Now we can attach the pocket bags to the shorts front. Match the shorts front right side with the pocket bag wrong side. Pin along the angled pocket opening. Notice that the facing is now on the bottom.
Stitch the angled pocket opening using a 5/8" seam allowance and then trim and/or grade the seam allowance to reduce bulk.
Press the seam allowance and pocket opening away from the shorts. Ensure that the pocket opening stays crisp (and the pocket bag isn't inclined to roll to the outside of the shorts) by understitching 1/8" from the seam as shown above.
Fold the pocket bag towards the shorts so the pocket opening appears as it will on the finished shorts. Lastly, finish off the pocket opening by edge stitching along the opening through the shorts and pocket bag layers. You could optionally skip the edge stitching or add a second row of top stitching depending on the look you are after.
To finish the pocket bag, flip the shorts front over so you are looking at the wrong side. Fold the pocket bag up along the fold line (wrong sides together). As per the diagrams in the instruction booklet, you are now looking at the right side of the pocket bag fabric and the facing is on the inside of the pocket. Below is another view with the pocket bag pulled away from the shorts front. We are looking here at the other side of the pocket bag (the side without the facing):
Pin and stitch along the vertical pocket bag side. Finish the seam allowance using a serger or zig zag stitch.
From the right side of the shorts pin the top and side of the pocket bag in place to match the raw edges of the shorts front. Baste. Repeat for the second pocket and they are now functional and finished!
Let's move on to the side panels.
Position one side panel against the shorts front or back with right sides together (the bag is pictured here, the front is shown in the instruction booklet - both work as the first step!). Pin and stitch using a 5/8" seam allowance. Finish the seam allowance using a serger or zig zag stitch.
Press the panel away from the shorts back (or front). Add your desired edgestitching or topstitching along the panel to secure the seam allowance to the panel and create a sporty look.
Add the other half of the shorts (front is pictured here, back is pictured in the instruction booklet). Pin the panel and shorts front with right sides together. Stitch using a 5/8" seam allowance in the same manner as before.
Press the seam allowance towards the side panel and edgestitch and/or topstitch again.
Repeat this process for the second panel to create a full loop.
Now it is time to sew the inseams!
Position the shorts front and back with right sides together and the inseams align. Particularly focus on lining up the seat/crotch seam. Pin thoroughly.
Stitch using a 5/8" seam allowance. Check the seat/crotch seam line up and then press the seam allowance towards the back of the shrots. Finish the seam allowance using your preferred method. You can do edgestitching and even topstitching along this seam if you like though it is easier to make small fit adjustments later if you do not.
Flip your shorts right side out and they are ready for the waistband next!
June 05, 2024
Bamberton Shorts Sew-Along: Day 6 - Waistband, Hem

Bamberton Shorts Sew-Along: Day 6 - Waistband, Hem

We will have finished shorts by the end of today's sewing progress!
Let's create the waistband.
Begin by preparing your drawstring buttonholes. Make sure the small rectangle of interfacing has been applied over the button hole markings. This stabilizes the knit or woven material to make the button holes easier to sew.
Apply the buttonholes and cut them open.
Place the front and back waistband pieces right sides together. Sew the side seams using a 5/8" seam allowance.
Fold the waistband in half along the fold line so raw edges are matching. The fold is now the top of the waistband. Press.
Next we will add the elastic and drawstring casing. We do this with topstitching. If you are using a woven material for your waistband, keep your stitch length as is. Our sew-along sample is sewn using linen for the main shorts and a matching rib knit for the waistband (so comfy!). To ensure the stretchy ribbing doesn't cause the casing topstitching to snap it's a good idea to use a fairly long stitch length or even a stretch stitch if your machine has this option. A zig zag is also a possibility but keep in mind that it will be very visible on the finished garment.
As you can see below, Adrianna chose a long stitch length with a very narrow zig zag:
Sew the topstitching along the drawstring casing markings. Start near one of the side seams. When sewing the bottom row, leave a 2" opening so you can insert the elastic later. If your elastic is wider than recommended you will need to use your elastic to determine new topstitching lines. The topstitching should create a channel that is equal to or slightly wider than the elastic width:
Cut your elastic to the recommended lenght (your waist measurement minus 3") or circle the elastic around the wearer's waist (where they intend the shorts waistband to sit) and ensure the elastic is comfortably snug (remember it needs to hold up the weight of the shorts). Add 1" to this measurement and cut to length.
Insert the elastic using a safety pin to pull it through the channel.
Overlap the elastic ends 1/2" and stitch securely. Distribute the waistband material evenly along the elastic. Stitch the 2" opening closed.
Insert the drawstring in the same manner (but through the buttonholes instead).
Add the waistband to the shorts by placing them right sides together and the raw edge of the waistband aligned with the raw top edge of the shorts. Pin thoroughly at center front, center back, the side seams and then to ensure even distribution between these points. Keep the drawstring pulled away from the waistband seam.
Stitch carefully to avoid creating tucks in the shorts or waistband material. Flip the finished waistband up and press the seam allowance towards the shorts.
Depending on fabric choice, the seam allowance can cause a considerable amount of bulk. To reduce this bulk, finish the seam allowance and then edgestitch it in place from the right side of the shorts.
Add knots, beads, aglets or even a toggle to your drawstring and your shorts are just about complete! We've only the hem left to sew.
To create the hem, press the raw edge under 1/2".
Press the hem under again at 1". Pin.
Edge stitch and optionally topstitch to complete the hem.
Give your shorts a final press if needed and try them on! Time to head to the beach!
June 05, 2024