

Sew-along with us!
Perhaps you'd like some company while you sew? We've sewn up each of our patterns and photographed each step along the way. Find the pattern you're after in the filter drop down below left.


Sew-Alongs

Jutland Pants Sew-along: Day 1 - Materials
Welcome to the Jutland Work Pants Sew-along! I (Adrianna) look forward to guiding you through creating your pants! Depending on the variation you choose, the supplies you need will differ slightly. You also have several fabric options, whether you want your pants to be more rugged, casual, or athletic. Let's begin by examining some useful tools.
Valuable Tools to have on hand:

- Tailor's Clapper: A tailor's clapper is a great tool to add to your sewing space or you can improvise with materials you have on hand (Morgan's grandmother used to run freshly steamed seams over the edge of her sewing table to flatten them further). The clapper helps to set seams when pressing to give a nice flat finish. You can also use the clapper on bulky seam areas to flatten the fabric to get under your presser foot more easily.

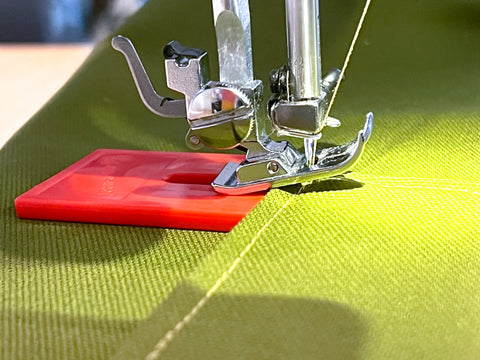
- Seam Jumper: The seam-jumper or Jean-a-ma-jig tool is crucial to sewing over bulky seams on a home sewing machine, even heavy-duty machines. The Jean-a-ma-jig helps to raise the presser foot when stitching so it doesn't get caught on a seam ridge. You can also improvise with a thick piece of cardboard or other sturdy material cut to the necessary shape.
Notions
- 1/2" - 1" (1.3 - 2.5 cm) diameter button (jeans button or sewn on).
- 6" (15 cm) zipper, preferably metal.

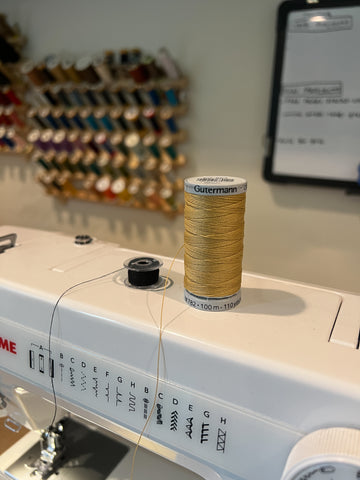
- Thread: You will need regular polyester thread (which is stronger than cotton) . Choose something to match the color of your fabric. You may also want optional thicker topstitching thread in a matching or pleasing contrasting color. You could try Gutermann Extra Strong Thread, which is less thick than topstitching thread. This allows you to skip the hassle of re-threading the machine each time you need to topstitch as it can be used for seams and topstitching. My machine is never pleased when sewing with thick thread (it binds up when I backstitch), so I prefer to switch back and forth to ensure that my seams are strong and backstitched securely before I topstitch them. If using topstitching thread, it is essential to only use topstitching thread on the needle side of your machine and regular thread in the bobbin. Most machines do not handle topstitching thread in the bobbin.
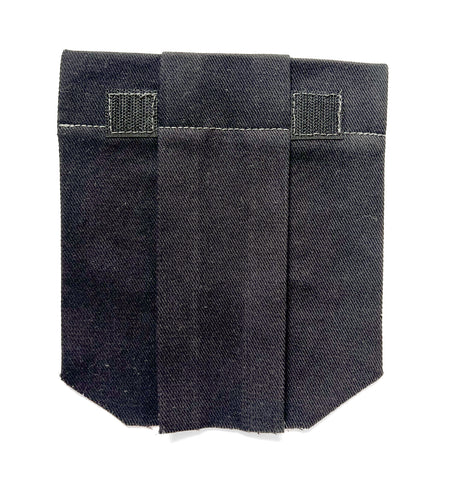
- Variation 2: Hook and Loop (Velcro) for the cargo pockets

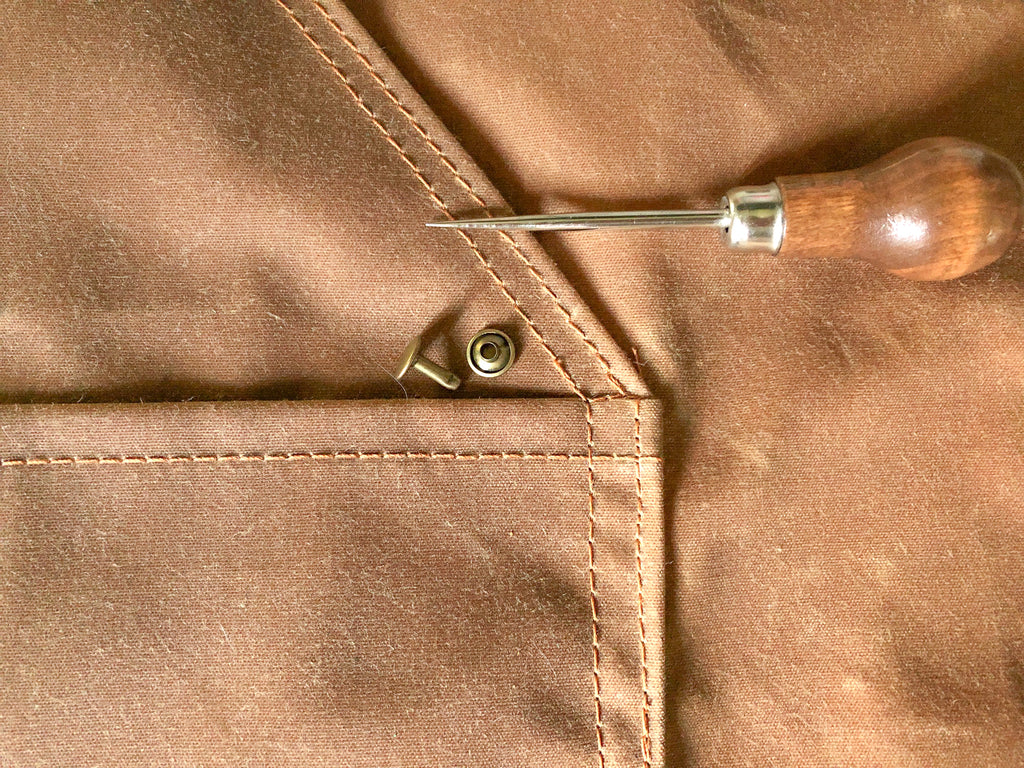
- Optional: If you are wanting the rugged look of waxed canvas but haven't sourced a factory-waxed material, you can apply Otterwax or similar fabric wax to canvas fabrics to make them water resistant.

- Optional: Rivets for a more rugged look.
Okay, let's move on to discussing our actual fabric options! As you'll see, the Jutland Pants are a very versatile design with the choice of fabric dictating whether the end result is suitable for activewear, workwear, or a casual daily wardrobe.
FABRIC
- Variation 1: Trouser weight wovens (light to medium weight) such as twill, corduroy, wool blends, denim, and gabardine.

Corduroy from Black Bird Fabrics

8oz Cotton Twill from Merchant & Mills
- Variation 2: Trouser weight wovens similar to Variation 1 or materials suited to the intended use of the pants. For example, choose water-resistant cotton or synthetic blends designed for active wear (such as Ripstop) if creating hiking or mountain biking pants.

Ripstop from Fabric Wholesale Direct
- Both Variations: Pocket linings such as broadcloth, quilting cotton, or other substantial, tightly woven cotton or cotton blends.
- Optional Lining: Choose a lightweight material suited to the intended purpose of the pants. For example, choose a cozy flannel material if you are sewing work pants for winter construction. If you are sewing waterproof hiking pants, choose a lightweight mesh or cotton that will be comfortable against the skin and wick away sweat.

Flannel Shirting from Black Bird Fabrics
- Lightweight Woven Fusible Interfacing: You will need lightweight interfacing for the facing, waistband, fly, and optional cargo pocket flap pieces. Choose a lightweight woven or knit fusible interfacing. Depending on the sturdiness and thickness of the fabric you use for your pants, you might not want any additional stiffness from interfacing. Choose a lightweight woven or knit interfacing to reinforce the fabric without adding stiffness.

Fabric Sources
Canada
Fabrications Ottawa is a great online shop with a stock of Cone Mills US-made S-gene denim in multiple weights!
Blackbird Fabrics - an online shop just across the water from me! Caroline often has an excellent selection of denim in stock and occasionally gets in a supply of coveted Cone Mills.
Core Fabrics - Heather-Lou is known for her excellent women's jeans patterns. She stocks jean-making kits, including all the notions you need and high-quality denim. They often sell out fast, but you might be in luck snagging a non-stretch fabric kit since these are less in demand than the stretch denim needed for her Ginger Jeans pattern.
Simplifi Fabric - An online shop focused on organic and ecologically friendly fabrics! They have a great selection of denim and canvas.
USA
Stylemaker Fabrics - An organized selection of denim in various weights and amounts of stretch.
Britex Fabrics - They have a few well-priced Japanese selvage denim worth a peruse!
Bolt Fabric Boutique - They have a range of canvas, denim, twill, and water-resistant fabrics that are always stocked.
Fancy Tiger Crafts - An excellent array of denim from various manufacturers - all well-labeled so you can compare the differences. I like the US-made bull denim choices in particular. Bull denim is dyed after weaving to produce a uniform color (whereas regular denim features an indigo warp thread and white weft thread).
Harts Fabric - A comprehensive selection of quite affordably priced denim. I especially like the look of the wide denim, which would save a lot of fabric when cutting out men's larger sizes.
UK
Merchant & Mills - An extensive range of high-end denim very suitable for men's jeans - you might like to make a mock-up first due to the price point of these quality fabrics!
Empress Mills - Some very affordable denim in a variety of weights. A great way to test out a pair of jeans without a considerable investment!
Croft Mill - Another selection of affordable denim and some interesting choices, including prints, pre-washed, broken twill weave, extra wide, etc.
Preparations
Before we continue with the sew-along, make sure to pre-wash your fabric.
You do not need to wash your fabric if you are using a pre-treated or specialty outerwear fabric, such as water-resistant canvas. Instead, follow the fabric care guides for your fabric.

Jutland Pants Sew-along: Day 2 - Choosing a Size & Fit Options


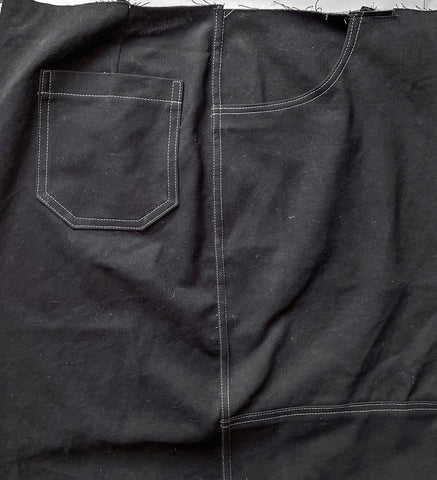
Jutland Pants Sew-along: Day 3- Assemble Front Legs


Jutland Pants Sew-along: Day 4- Assemble the Back Legs


Jutland Pants Sew-along: Day 5 - Sew Inseams and Sideseams


Jutland Pants Sew-along: Day 6: Sew the Fly


Jutland Pants Sew-along: Day 7 - Belt Loops and Waistband

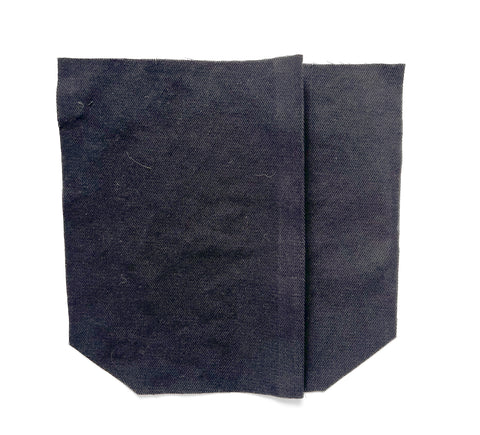
Alternatively, you could make a tube sewing with a 3/8" (1 cm) seam allowance and right sides together, flip and then press before topstitching. This method would be best for lighter fabrics, as flipping the tube right side out can be frustrating when using heavier twills or denim!


sides together (there is no proper right side for the belt loops –
choose the side where the topstitching looks nicest). Baste the belt loops to the waistline at 1/2" (1.3 cm)


Jutland Pants Sew-along: Day 8 - Hem and Finishing Details
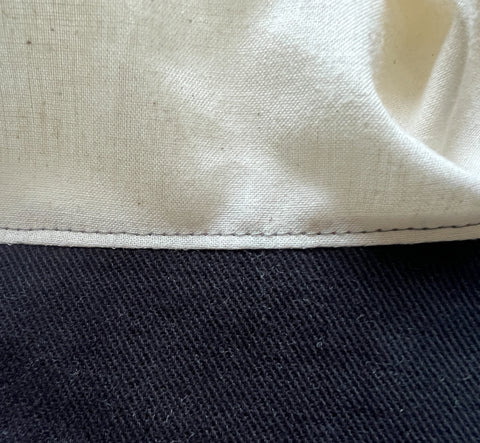
Stitch 1/8" (0.3 cm) away from the folded hem edge.


