Sew-along with us!
Perhaps you'd like some company while you sew? We've sewn up each of our patterns and photographed each step along the way. Find the pattern you're after in the filter drop down below left.


Sew-Alongs

Comox Trunks Sew-Along: Day 1 - Schedule
Welcome to the Comox Trunks Sew-Along. Each post will only involve about half an hour of sewing which makes this a great sew-along to follow if you are fairly new to sewing and a little overwhelmed or if you have a really busy schedule.
- April 4th: Choosing your fabric and elastic
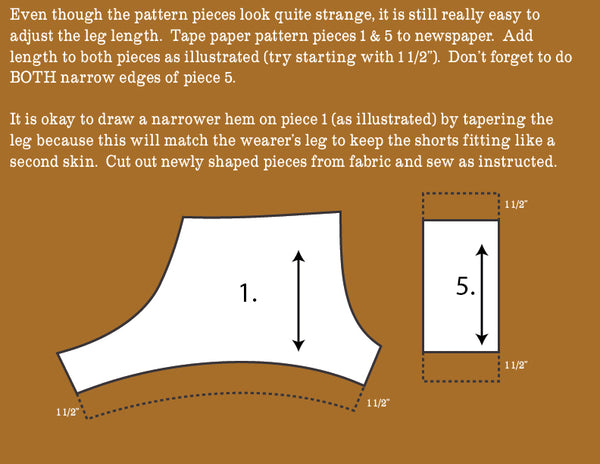
- April 6th: Picking a size and ideas for customizing (lengthen the legs, enlarge the front cup, create narrower legs, or remove the right exit fly)
- April 8th: Cutting out your fabric and preparing your machine
- April 10th: Sewing the trunks front
- April 12th: Sewing the trunks back
- April 14th: Hemming the trunks
- April 16th: Attaching the elastic waistband (or adding a fabric covered waistband) – We’re done!

Comox Trunks Sew-Along: Day 2 - Picking a size and ideas for customizing
Welcome to Day 2 of the Comox Trunks sew-along!
Do you have your fabric picked out? You still have time to pre-wash it as we won’t be cutting out the pieces until Tuesday, April 8th.
Today we are choosing a size and later in the post I will show you some ideas I and a few other sewers have had regarding how to customize your trunks for the perfect fit and style.
First off, when choosing your size, it is important to realize that it is largely the elastic waistband that determines the fit of the trunks. Everyone has slightly different proportions to their waist, hips and butt and they may also have preferences to how tight or loose they like elastic waistbands to be (underwear are a very personal thing!). Also, there are many types of elastic which have different amounts of stretch to them. If the elastic you choose stretches more or less than our sample elastic did, you will end up with a different fit than we did!
I recommend using our body measurement guide to choose the size for the fabric portion of the trunks as you normally would for a sewing pattern but then wrap the elastic directly around the wearer to choose the length of your elastic. We have provided guideline measurements for the elastic in our “Materials Required” chart in case you prefer to use our estimates (if the trunks are a gift, for example), but otherwise, this is how you figure out how much elastic you will need:
1. Take a length of elastic and wrap it around the wearer’s upper hips (where their boxer elastic normally sits) making sure to wrap it as tight as they would like it to be when they wear the boxers. The elastic should have to stretch very slightly so that their trunks stay up!

2. Mark this length and then add 3/4″ to the length for your seam allowance (two seam allowances of 3/8″).

3. Compare your resulting measurement with our elastic measurements in the “Materials Required” chart. They should match ours or be fairly close. When you sew your trunks, you may have to ease or stretch the top edge of the trunks slightly when attaching them to the waistband. Don’t worry if this results in a few ripples – one the wearer puts them on they will stretch out to perfectly suit their body (due to their custom-fit elastic waistband!).
Now that we’ve determined the amount of elastic we need, here are a couple tips about choosing a size.
1. The trunks are drafted with negative ease. This means they are smaller than the wearer’s body so that they fit like a second skin. For our plus-sizes though (size 39-45) we have graded the pattern differently so that the wearer has more room in their trunks (the grading is larger and the sizes expand wider than the other sizes).
2. Our waist measurements correspond to the wearer’s natural waist. This is approximately at naval level and is NOT where the trunks will end up sitting (those would be some high-rise trunks!).

That’s it! Now lets move on to some ideas for customizing the fit and style. I have four different ideas and would also love to hear your suggestions (leave a comment below with tips and questions!).
Idea #1: Lengthen the legs: Some people may feel a little under-dressed in such tight fitting skimpy little trunks :P That’s an easy fix – simply lengthen the legs for a more conservative pair of shorts! Here is how you do this:
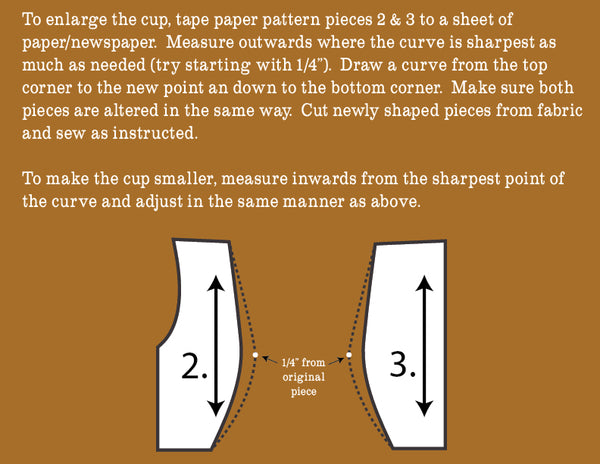
 Idea #2: Enlarge the front cup: Are you sewing for someone who is generously endowed? Our trunks have what I would describe as a “solid medium” size cup. You can very simply enlarge (or decrease) the size of the cup by altering the curve of the front pieces as follows:
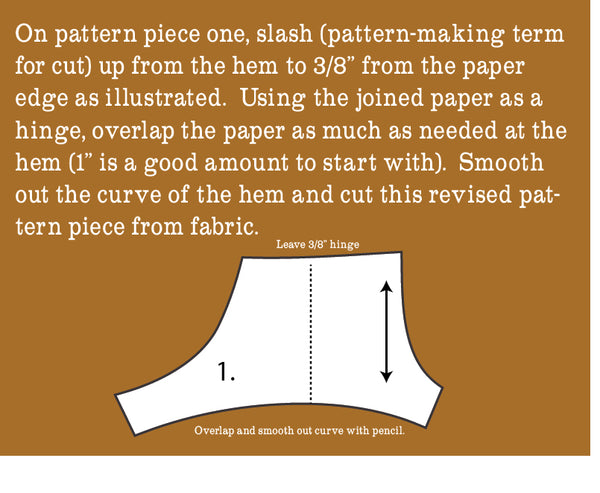
Idea #3: Create narrower legs: Does your wearer have skinny legs? They may be comfortable with the extra room in the legs (after all, no one wants to feel constricted by their undies) but if they would like the second-skin fit that these trunks are designed to have, you can adjust the pattern piece as follows (note that this must be done to the paper pattern rather than the fabric since these trunks don’t have a side seam!):
 Idea #4: Remove the “right exit fly”: This is my favourite idea and is one that has generated some very hilarious discussions at our latest family gathering. I gave my brother-in-law a pair of Comox Trunks for his birthday at a large dinner party. Quickly one of the female dinner guests commented, “Does anyone actually use those tiny little front openings???” I must say that I didn’t really have an answer! We included them as part of the design because they are so commonly found on modern underwear and I didn’t want our design to lack something that ready-to-wear clothing normally has. Fortunately, my brother-in-law had a very confident answer: When in dress uniform/fancy attire (at his job, for example) his shirt has been very carefully ironed and tucked in. In a scenario such as this he, with out a doubt, goes “through the gate.” In casual uniform/regular clothes he is not constricted by his tucked in shirt and most certainly goes “over the fence.” HAHA! As you can imagine, his knowledgeable explanation of the matter, complete with specialized metaphors, gave us quite a laugh :).
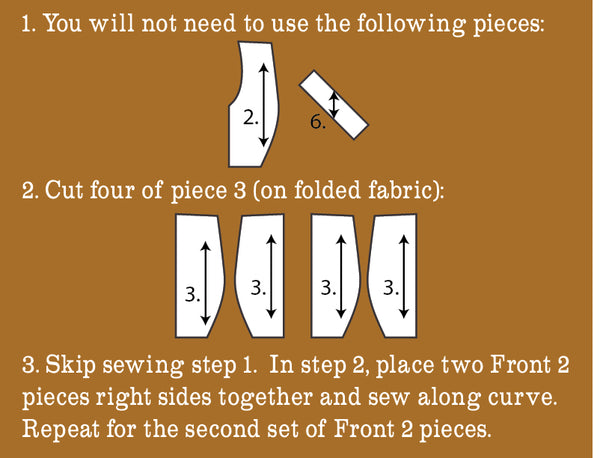
If you see no reason to go “through the gate”, you can save yourself some sewing time by removing the bound entry. Simply adjust the sewing process as follows to create a completely closed front cup (I still recommend keeping it double layered so that the shorts provide nice coverage and are hard-wearing):

Do you have any other ideas to alter the design or fit of the trunks? It’s fun brainstorming these sorts of things for a pattern that isn’t very common. At first examination the design, with it’s unusual seams and close fit, seems quite un-alterable but hopefully you now realize that this is not the case! The Comox Trunks can be altered to create all sorts of menswear underwear styles and can be made to suit the many individual requirements men have for their undies.

Comox Trunks Sew-Along: Day 3: Choosing Your Fabric and Elastic
Welcome to the first day of our Comox Trunks Sew-Along! Today I will be giving you some tips and a photo guide to choosing your fabric and elastic. Here are the supplies I have gathered together to sew up some Comox Trunks:
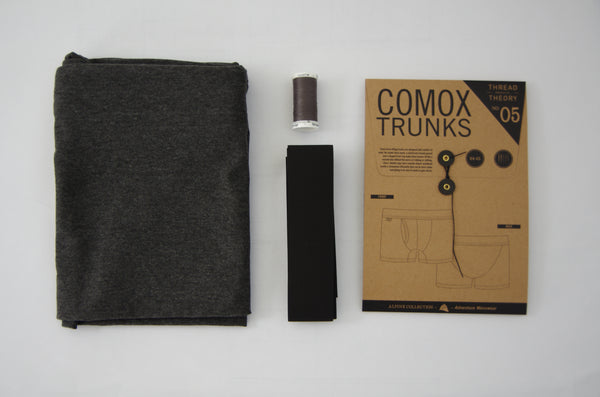
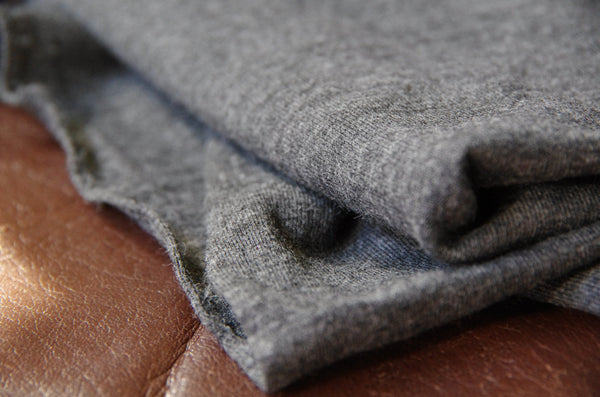
As you can see, the fabric I have chosen is a lightweight charcoal coloured knit. It is comprised of bamboo and cotton with a touch of spandex. It is available as part of our Comox Trunks Supplies Kit along with the black elastic.
If your local haberdashery only has a small selection of knit fabrics, don't worry, you still likely be able to find something that will work for your Comox Trunks. The Comox Trunks will end up fitting best throughout a long day of wear if you pick a fabric with at least a small amount of spandex content. The spandex adds resiliency to the fabric to help prevent your trunks from growing baggier and saggier throughout the day.
Here is a close up examination of the bamboo/cotton jersey that we include in our Comox Trunk kits. It is deliciously soft and thinner than most t-shirt style knits. It is strong though and has just enough spandex content that it works perfectly for the trunks:
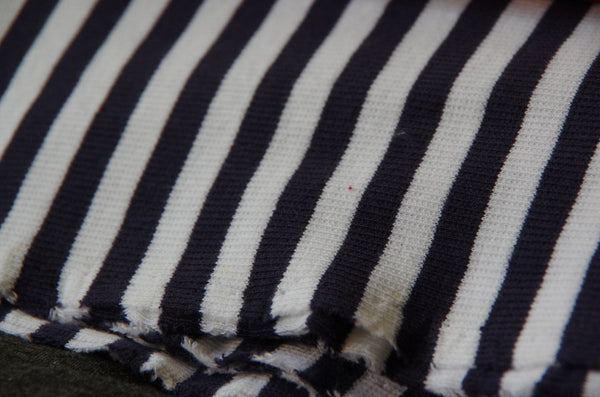
While it might be difficult to find a bamboo blend knit in your local fabric store, most fabric stores have at least one or two bolts of t-shirt style knits. These are medium weight knits that usually have a high cotton content. Here is an example of this (a medium weight striped t-shirt knit comprised of 95% cotton and 5% spandex):
A more stable (and thus easier to sew!) form of the t-shirt knit is also commonly found in fabric stores. The one I found is this red "Sport n Play" actionwear T-knit Jersey which is comprised of 90% cotton and 10% spandex. This is a great choice for people who are new to knits because it has a lot of stretch (so your tight fitting garment will stay tight fitting) but is also thick enough and tightly knit enough that it won't warp and become misshapen while you sew:
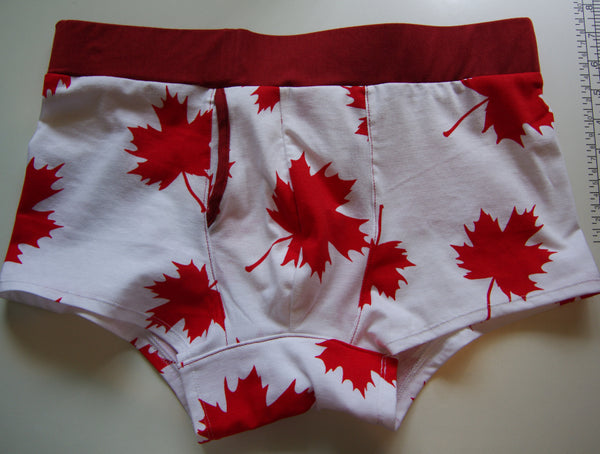
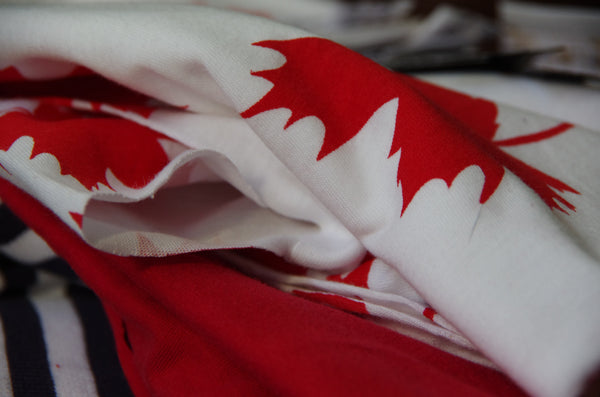
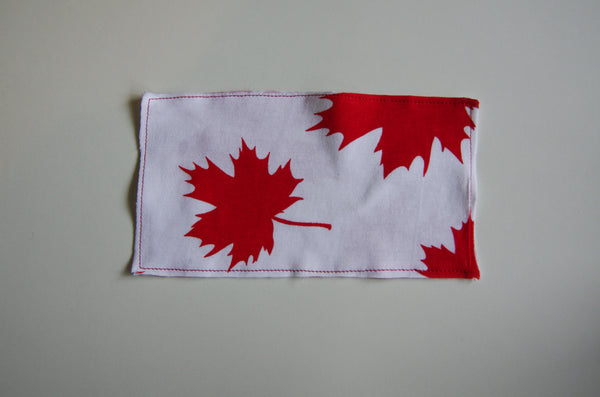
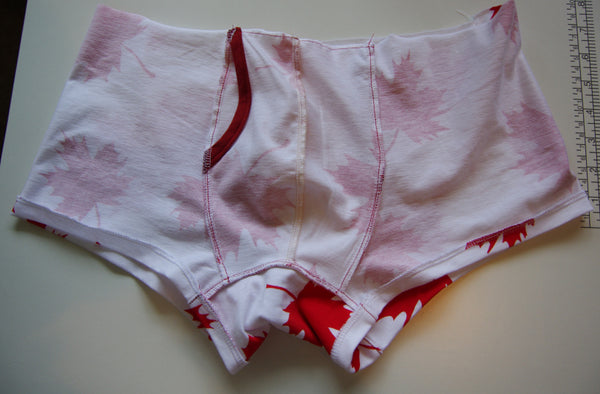
 Lastly, as you saw in the photos of the prize pack that I showed the other day, I picked up a novelty Canadian maple leaf knit which was simply labelled "mixed fibres." It doesn't have as much elasticity as the other fabrics but has still worked well for the trunks:
Since the trunks only need a small piece of fabric and a short amount of time to sew, if you are in doubt about your fabric choice, why not try out a few types so that you will become more confident with sewing knits in the future (armed with your Comox Trunks sewing knowledge, you'll be eager to start sewing all sorts of comfy knit sweaters and dresses!!!)
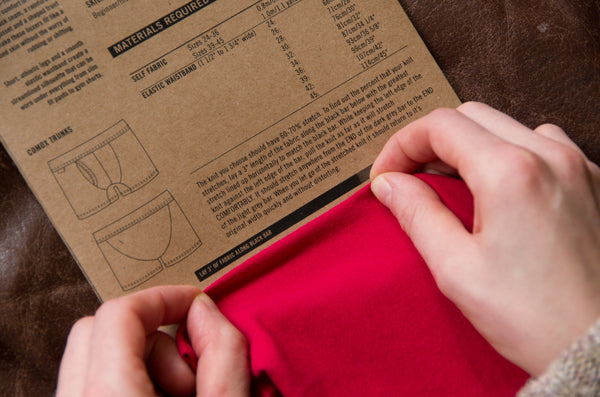
To figure out if your prospective fabric has enough elasticity, use the handy knit guide in the instruction booklet (and also on the back of the envelope if you purchased the tissue version of the pattern).
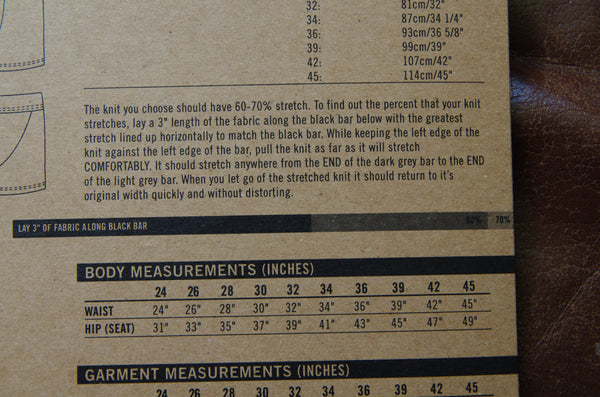
To use this guide while standing beside the bolt of fabric in the store, lay down the guide on a table (or have someone hold it for you) and unroll a length of fabric to work with.
Since the Comox Trunks require a material that stretches in all directions (in other words, a fabric with 4-way stretch), you can test either the length or width of the fabric first. Just remember to test the other direction after!
Hold a 3" length of fabric up to the black bar and mark and keep the left hand (which is pinching the fabric) stable and still at the edge of the bar.
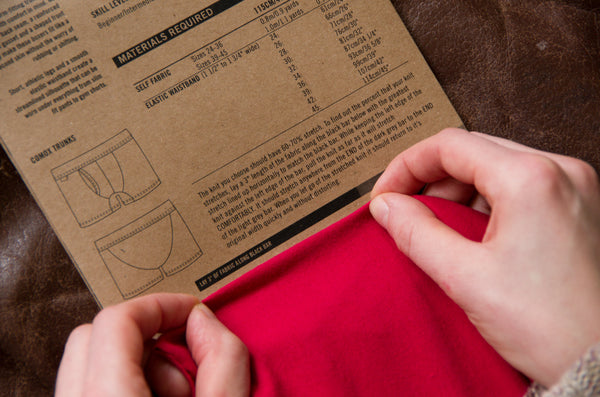
Stretch your right hand and the fabric to the right until the fabric has stretched as far as it easily wants to go (don't use all your strength, you will be able to tell how far it naturally wants to stretch). If your right hand and the pinched end of the 3" chunk of fabric are now within the lightest grey section of the bar, the fabric you have chosen has enough stretch to be made into Comox Trunks!
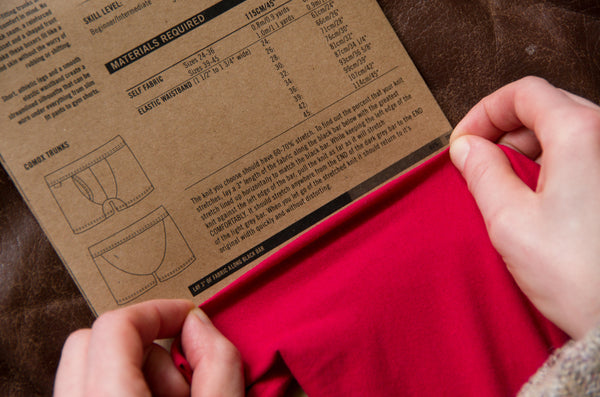
One last thing you want to check is how quickly and completely it 'bounces' back to its original position. If your fabric looks stretched out or warped when you release your right hand then it does not have enough spandex content and resiliency to maintain its shape once made into the trunks.
Now that we've found a suitable fabric, its time to move on to choosing an elastic!
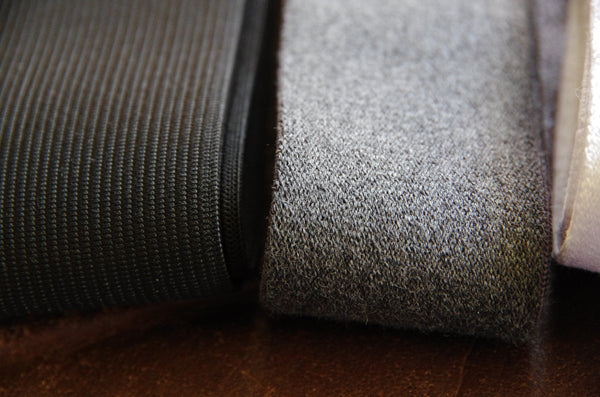
The elastic I am using (the same elastic that is included in the kits) is firm without being scratchy. It is not soft on one side as some ready-to-wear underwear elastics are (both sides are the same texture on this elastic) but it is very strong and will likely survive many washes before it begins to ripple. If you are sewing these trunks for someone with extremely sensitive skin we will be covering how to create a soft fabric casing for the elastic later on in the sew-along!
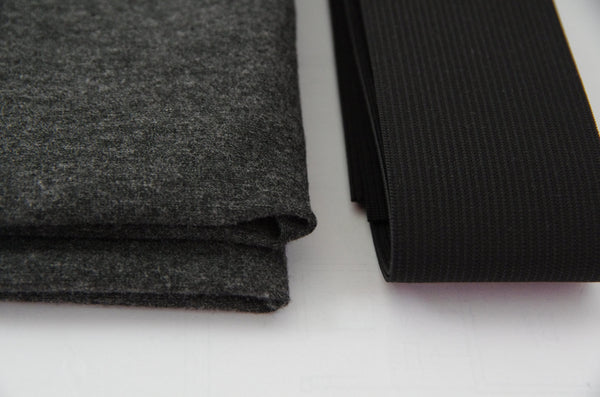
While the pattern calls for 2" elastic, it is perfectly acceptable to choose something wider or narrower. I like the look of the 2" band and Matt thinks that this width produces the comfiest results (narrower elastics can sometimes create the feeling of a little more pressure against the skin). It is very common to see trunks with 1" to 1/2" elastic bands so go ahead and save a bit of money by choosing a narrower elastic if you desire!
The plush elastic that I picked for the sew-along prize pack is 1 1/2" wide and is quite thick. It is very soft on both sides. Here you can see how the two types compare:
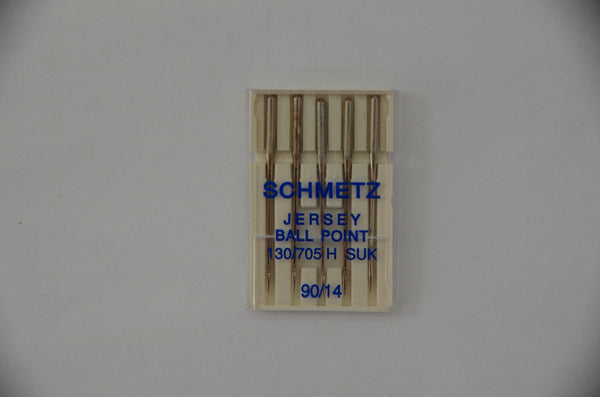
While you're at the fabric store, don't forget to pick up a needle suitable for sewing knits. You can sew the entire project using a ball point needle or stretch needle. If you like using a twin needle, you can buy one of those for the hem and for attaching the elastic waistband. These are the ball point needles that I use:
Have any questions about what supplies you will need? If you are hesitating over a fabric or elastic choice, I would love to give you my opinion - just leave a comment or send us an email (info@threadtheory.ca)! Join us again in two days to pick a pattern size and to contemplate any customisation you might like to do!

Comox Trunks Sew-Along: Day 4 - Cutting out your fabric and preparing your machine
It is officially Day 3 of the Comox Trunks sew-along and today we are finally going to start working with our fabric! Today we will be cutting out our fabric and preparing our sewing machines to work smoothly with thin knits. By now you should have gathered together your pre-washed knit fabric, corresponding thread, a length of medium weight pre-shrunk knitted elastic (elastics will normally specify on the roll/packaging whether they have been pre-shrunk or not...if they aren't it is advisable to wash them with your fabric as that's what you'll be doing when the trunks are finished, after all!). You should also have picked your size.
If you have not yet chosen your materials, have a look at the fabrics and elastics I suggest throughout this post.
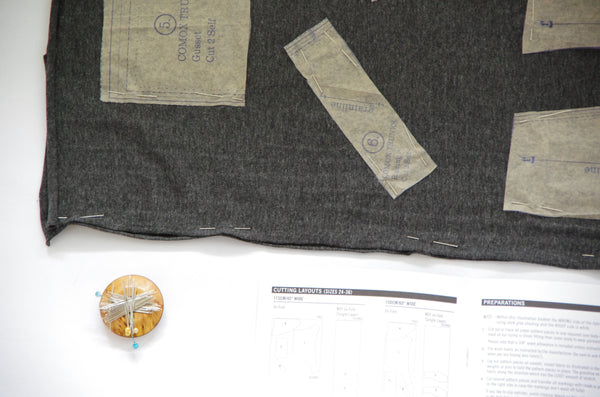
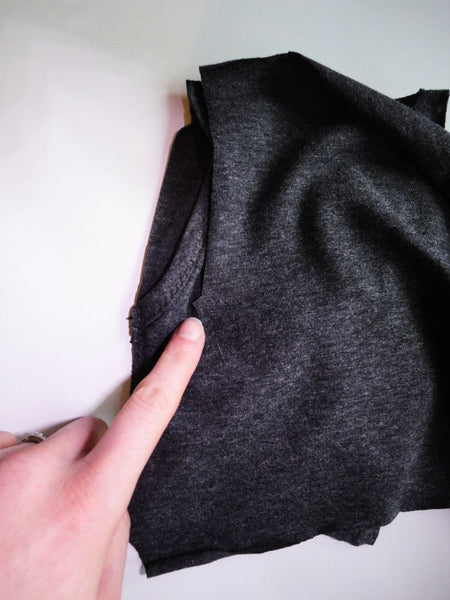
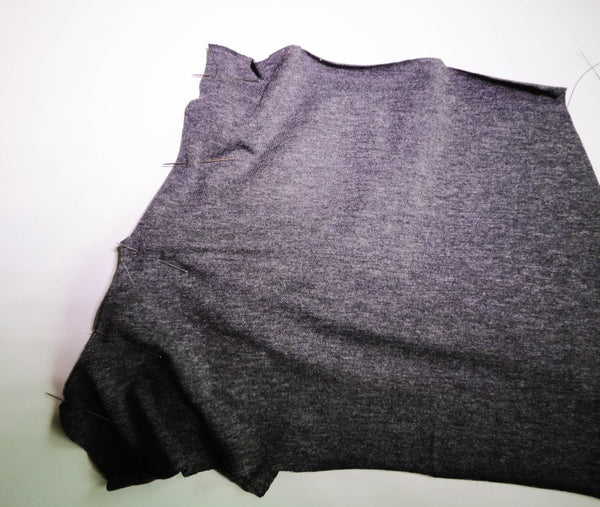
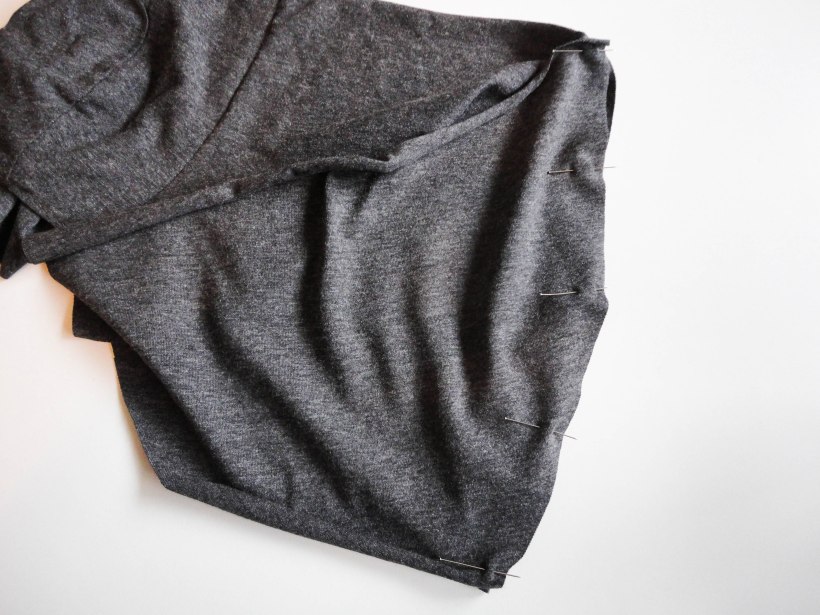
Okay, let's begin! Lay out your pre-washed fabric by folding it in half and matching up the selvages. I like to pin the selvages together, especially with knits that are prone to curling, so as to ensure that all the pattern pieces will be properly lined up with the grain of the fabric. See how the knit likes to curl?
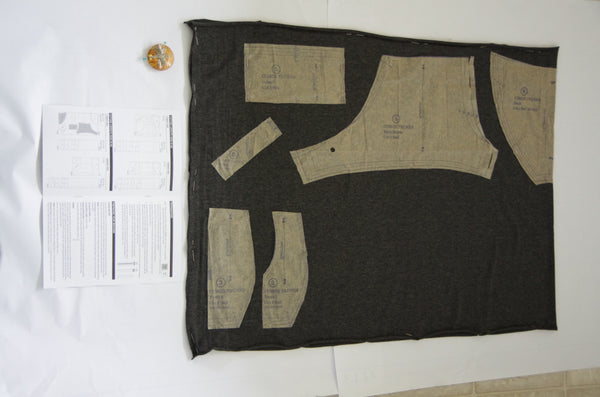
In the first edition of our printed instruction booklets, I have made fabric layouts that specify you should cut pattern piece 2 and 3 on a single layer of fabric. We've since revised these layouts so that this is no longer necessary - simply cut them on the folded fabric along with all the other pieces so as to create two 'mirrored' versions of each piece.
The only pattern piece that needs to be cut 'on the fold' is piece 4 which is the back of the trunks. Cutting this on the fold will result in a single fabric piece that is double the width of the paper pattern piece.
Also, if you are using a fabric with 4 way stretch which is a recommended fabric choice for these trunks (this means that the fabric stretches length-wise and width-wise), you don't necessarily need to cut piece 6 (the binding) on the bias. We placed the grainline in this manner so that you have the option to use contrast colours or prints for your binding regardless of if they are 4-way or-2 way stretch (or even a woven fabric if you are feeling adventurous!).
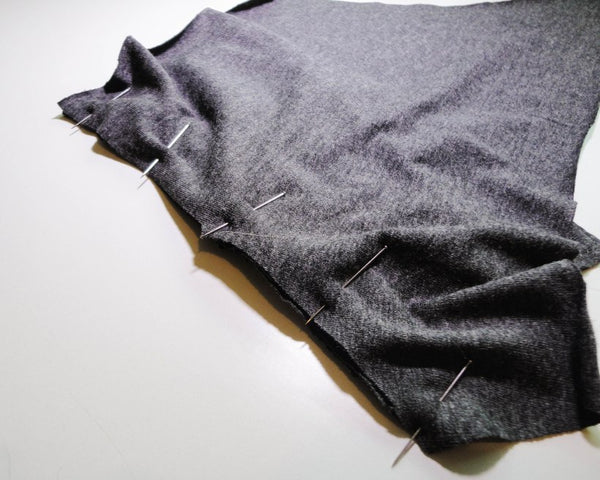
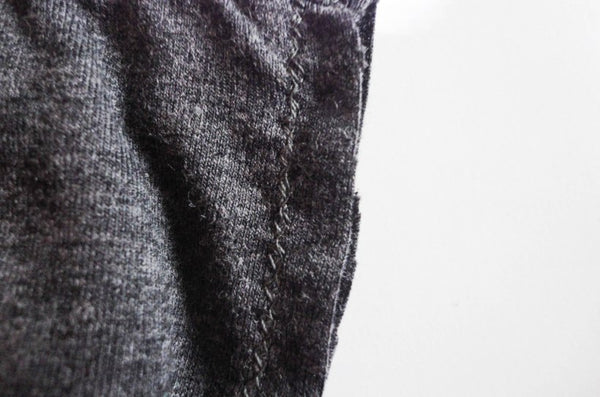
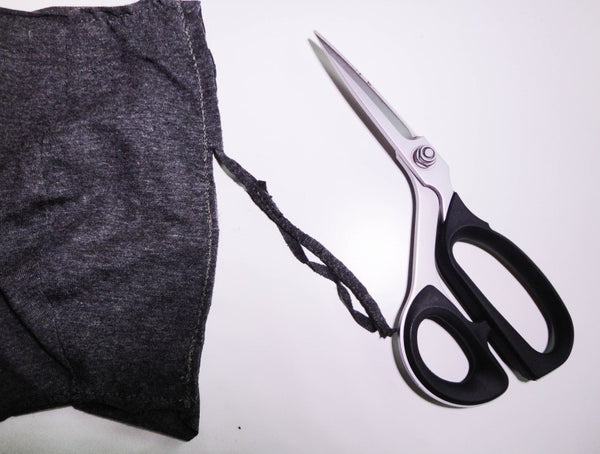
When cutting out your fabric, mark notches by clipping triangles outwards our using chalk or a pin. Avoid clipping into the seam allowance partly because it is quite small (only 3/8") but mostly because some knits have a tendency to run when nicked (even after you've sewn the seam).
Here's a close up of the little notch I made:
Now that all of our pieces are cut out, its time to set up the machine!
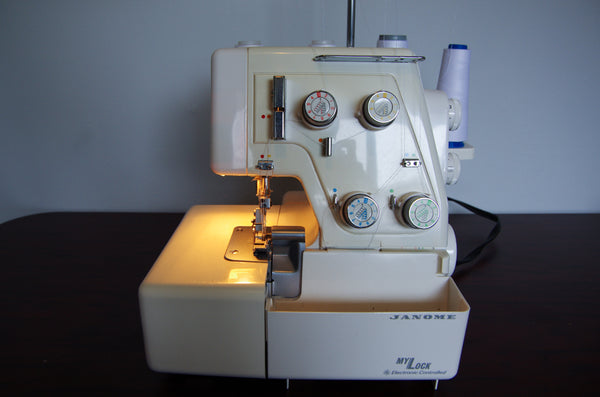
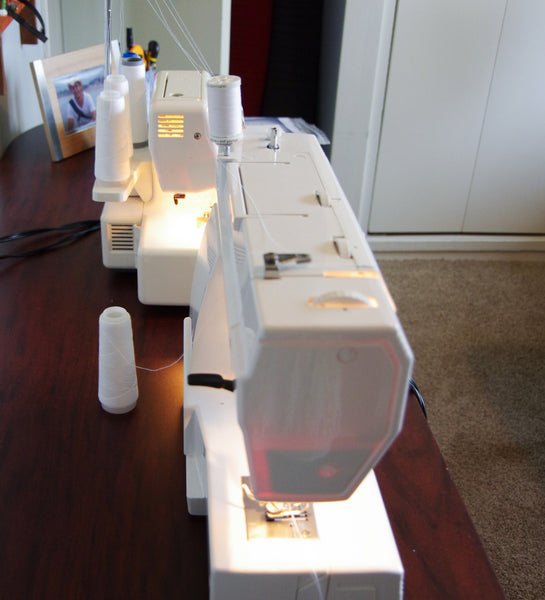
For this sew-along I am sewing one pair of trunks with my regular domestic machine:
...And a second pair of trunks using my serger:
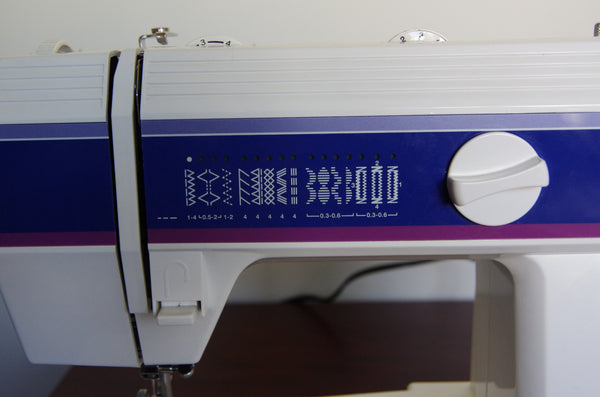
This way, you will be able to see how to construct your trunks with any available machine. It is well worth your while to play around with the settings on your machine with a scrap of your fabric until the machine works smoothly and your stitches are even. My little domestic doesn't have a huge amount of stitch options but I find the zig-zag stitch works well for the main seams with a narrow width. Also, it really helps to adjust the presser foot pressure so it is lighter than normal.
Also, I like to use a ball point or stretch needle when using knits. After all of our careful cutting of outward notches it would be a shame to cause a run in the fabric because the sharp needle has snapped some of the fibres!

This next picture is not very clear but hopefully you can see how I played around with adjusting the width of the zig-zag stitch. After creating a seam of varied zig-zag widths using two layers or knit I pulled open the layers to examine which width of zig-zag was the most invisible from the right side. If your stitch is too wide you will see threads and ripples on the right side of the garment - not good!

Here are the settings that I found worked best on the charcoal jersey for my machine (remember that the number scale and settings are different on every machine so don't be tempted to blindly use my numbers....test test test on your scraps!):
When I use the reinforced straight stitch for seams that need lots of strength (this works well on some knits but it is too rough on delicate knits and can cause holes because the needle punches the same area three times):

When I use the zig-zag stitch for major seams:


I didn't take photos of my serger's settings because it turned out that the stitches looked best on the Maple Leaf fabric that I used for my serged sample when I set the Differential Feed to "0". You might notice in the instruction booklet that I mention you should adjust the Differential Feed when sewing knits. I think this wasn't necessary for the Maple Leaf knit because it has very little stretch and acted more like a woven.
If you are confused about what I mean by Differential Feed, you need look no farther than this excellent blog explanation to have this dial de-mystified!
Are you raring to get sewing yet? We'll get started on Thursday by sewing the trunk front which is the most fiddly bit of this really fast project. Looking forward to it!

Comox Trunks Sew-Along: Day 5 - Sewing the trunks front
It’s time to get sewing! It’s nice to have our machines already set up after the last post so that we can get right into the fun part today!
Firstly, we have to prepare our two strips of binding. For my charcoal pair I went with self binding but for my Maple Leaf pair I used a contrast dark red – feel free to experiment with different combinations!
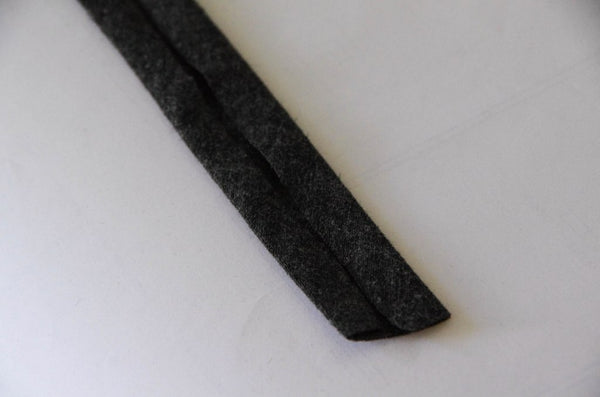
Start by folding each long edge into the middle and press:
 Fold this segment almost in half. I like to make one “half” just a touch wider than the other so there is less chance of me missing the bottom layer of the binding sandwich in the next step (because that is SO frustrating…especially since knits are a bit tricky to un-pick).

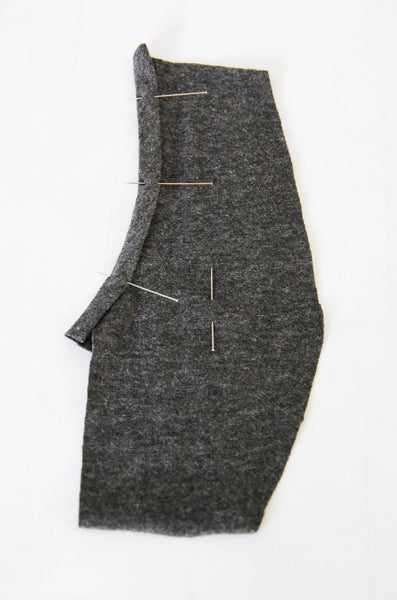
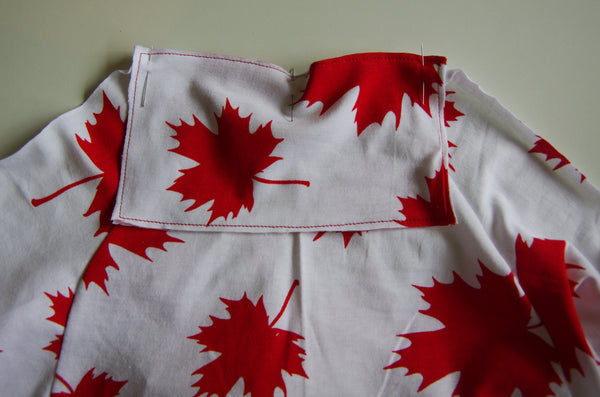
Once your binding is pressed, pin it to both Front 1 sections along the sharp curve. Keep the narrower side of the binding facing you so that when you sew along the edge of it, the wider binding will be underneath the fabric and will be caught easily. In the printed instruction booklet I state: “DO NOT treat the two Front pieces as mirrored pieces.” Since we revised the cutting layout, as mentioned in this post and in the errata section of our website, you will now be treating these as mirrored pieces. Sorry for the confusion! The PDF pattern has been revised so if you are using the PDF instruction booklet, align your Front Pieces as illustrated (mirrored).
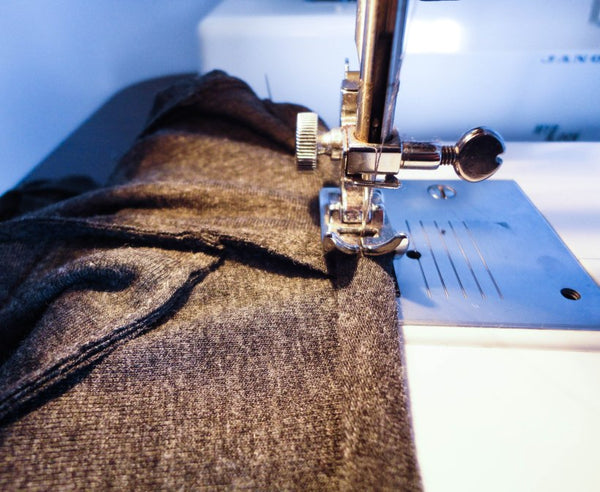
Now it’s time to sew the binding to Front 1. Before I show how to do that, I have a handy little tip that has saved me much sewing strife. It is a good habit when sewing both knits or wovens to start a seam with your needle down in the fabric. I must have lost this good habit somewhere along the way (I remember being taught to do it!) and so was continuously frustrated when I began to sew knits because my machine seemed to “eat” the knit at the beginning of seams about 50% of the time! It would suck the thin knit down into the bobbin chamber and create a huge mess. This problem was eliminated when I put my needle in the full “down” position before I even get my foot near the peddle to start the seam. If this tip helps save at least one person the frustration I felt when beginning to sew knits I will be thrilled to hear it!

And here is our attached binding. I used a zig-zag stitch for this version but you could also use a straight stitch or reinforced straight stitch as the binding itself doesn’t need to stretch:

Here you can see a close up of the stitching:

The binding is a little longer than the curve (especially if it has stretched while you sewed it. Just trim off the little bits of excess:

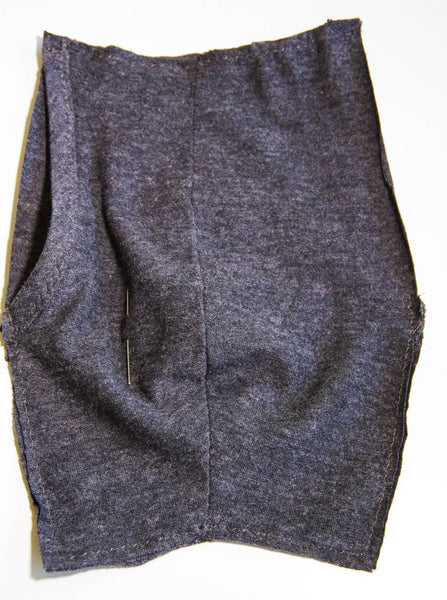
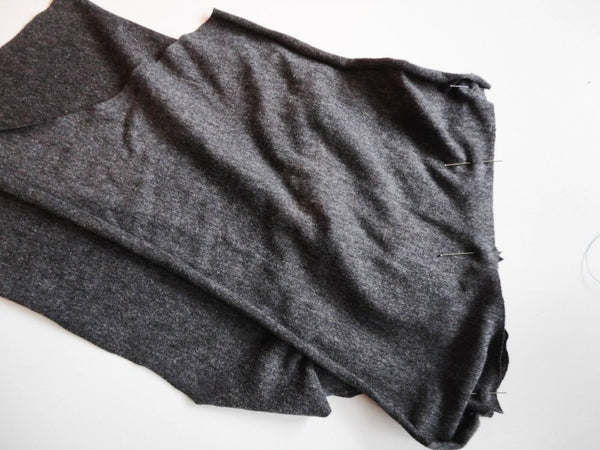
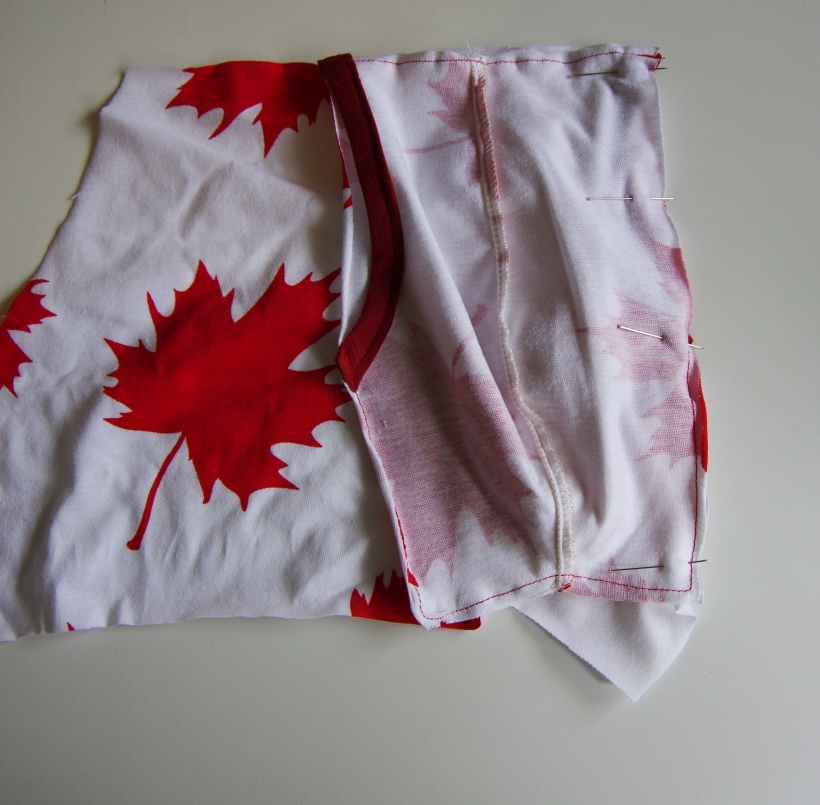
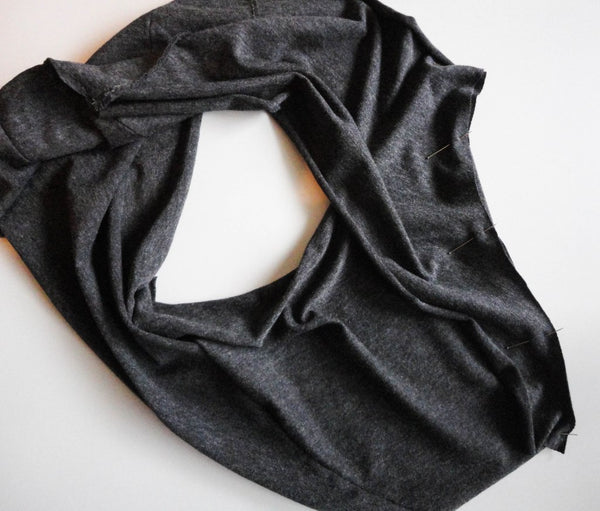
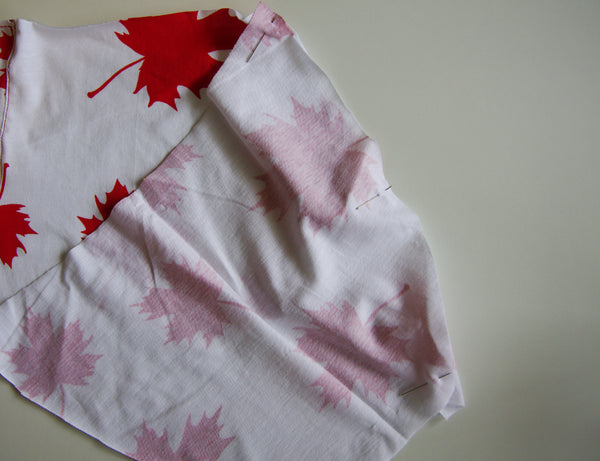
Now it is time to attach Front 1 to Front 2. Align with right sides together and pin along the long curve. From this point onwards I will include photos of both the charcoal pair that I’ve sewn with a regular machine and the Maple Leaf pair that I sewed with a serger:


Note that I sewed the binding to the front of the serged pieces after I sewed Front 1 and Front 2 together – you can sew the binding on either before or after, whatever you prefer!
By the way, look at my Maple Leaf placement! I was chatting with Sophie from TwoRandomWords about how I had forgotten to worry about pattern placement when I cut this pair out and was sad that I wouldn’t end up with the Canadian version of the classic fig leaf across the trunk fronts…to my surprise, luck would have it that the leaf lined up almost perfectly!

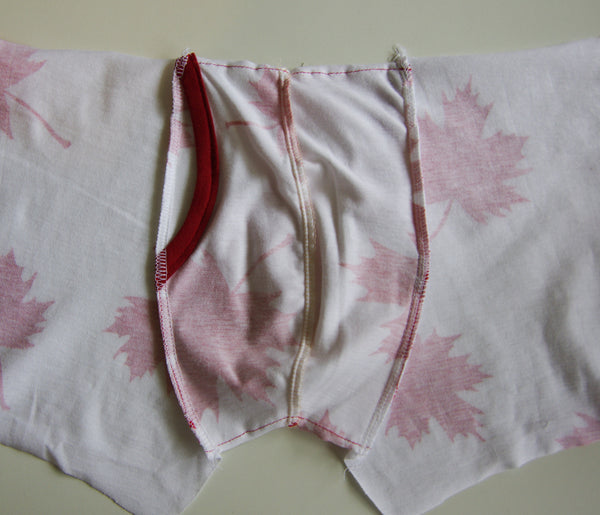
Now that the two layers of the front are assembled, we can sew them together to create the right exit fly. In the first version of the printed instructions the cutting layout would lead to front sections that are sewn with WRONG sides together (a nice way to eliminate a raw seam from the inside centre front of the trunks but this will lead to the wrong side of your fabric peeping out of the fly). Our revision instead instructs you to sew the two fronts with RIGHT side facing WRONG side. Here is how it will look:


When you go to baste these pieces together, remember to ensure that the bound edge is curved out of the way as much as possible – the hole needs to be open wide enough to allow for use ;).
I zig zagged within the seam allowance around the edges. You could also use a long straight basting stitch but then you’ll probably have to remove this stitching later on so that the seams can stretch without snapping threads:

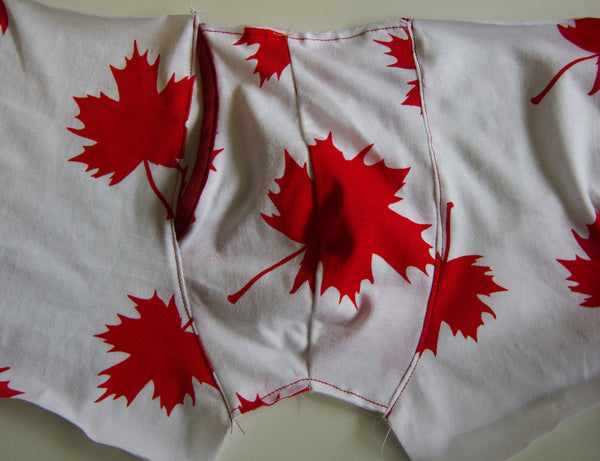
I used a straight stitch for my serged version since it would be trimmed off by the serger later anyways:


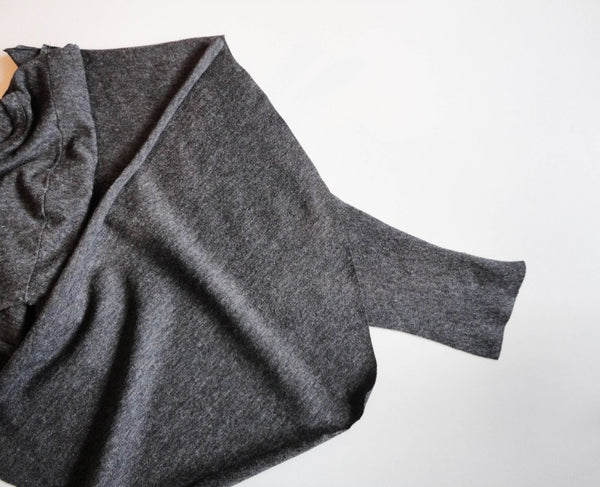
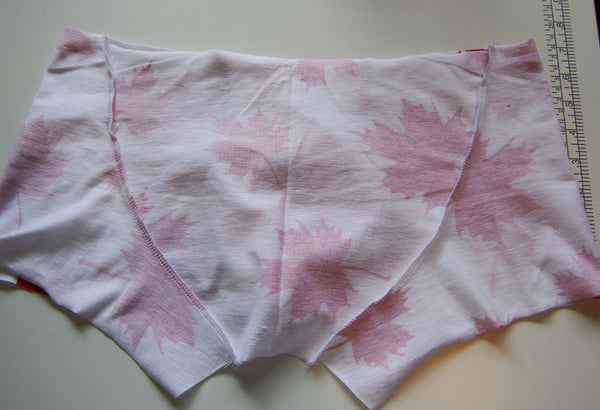
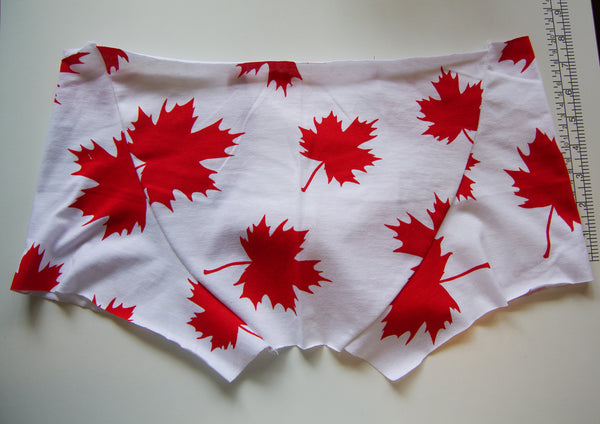
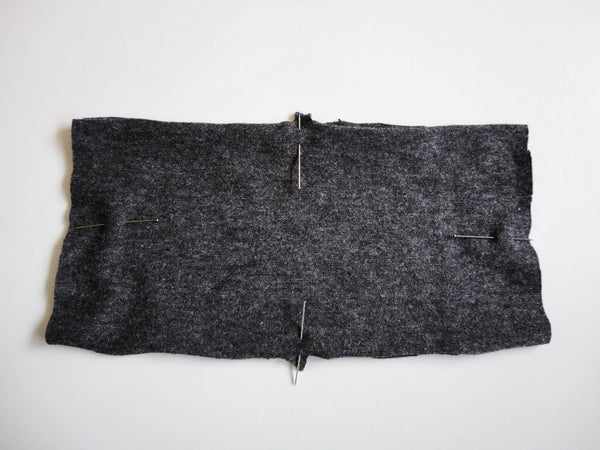
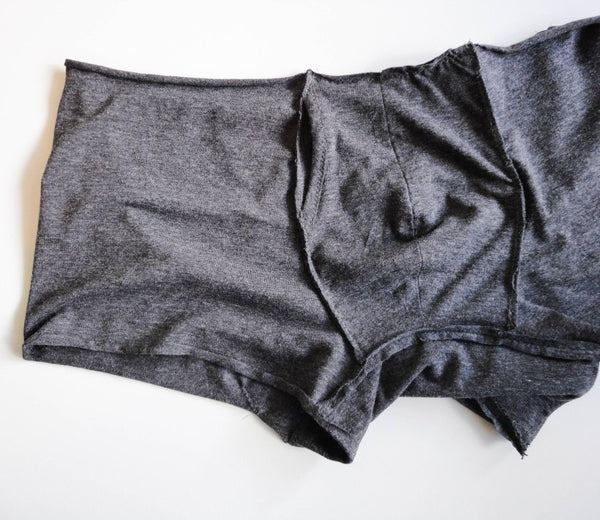
Comox Trunks Sew-Along: Day 6 - Sewing the trunks back
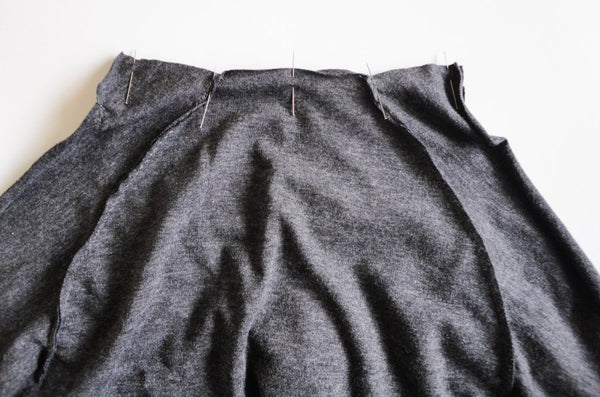
Today we are going to make big progress with our trunks – I have this post labelled ‘Sewing the Trunks Back’, but really, before we can really call the backs of these undies done, we need to have pretty much the whole trunks assembled. That may sound like a large task, but really it is just four curved seams and a quick rectangle! Here comes the first two curved seams:
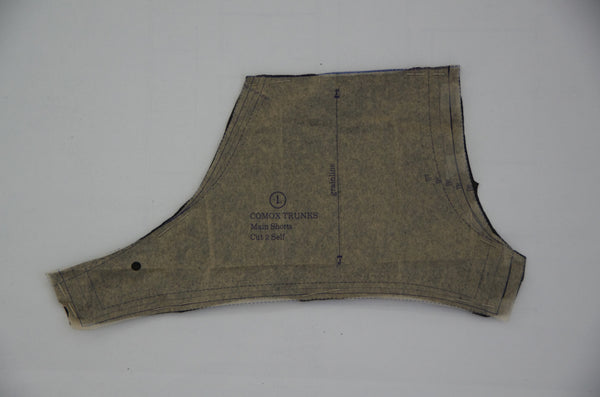
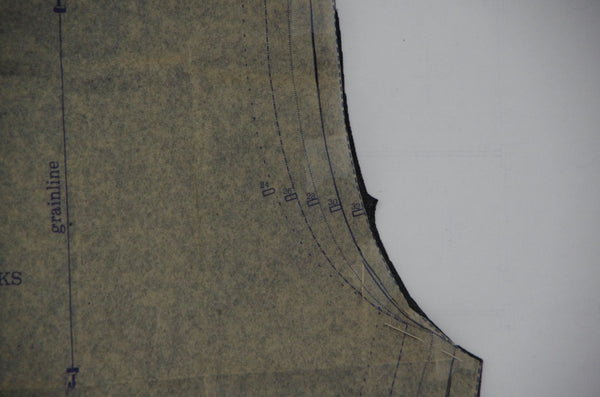
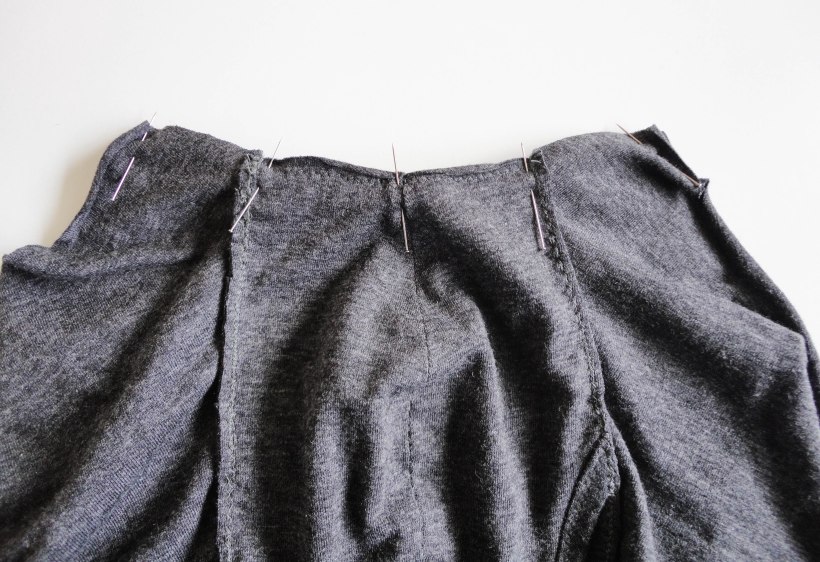
It’s time to attach the trunk Front to the Main Shorts – the biggest two fabric pieces in your pile. You’ll notice that the smallest curved section on this piece has one notch. This will line up with the bottom of the bound fly as I point out below:

Pin the Front and Main Shorts with right sides together along this notched curve. Here you can see the notch near the centre of the curve:

And in this photo you can get more of a sense of how you will have to ‘reshape’ the Main Trunks curve when pinning it to the opposite curve of the Front:
I sewed this seam using a zig zag stitch and then, for good measure and extra strength, sewed over my seam again. This is how the seam looks from the Main Shorts side:

And from the trunks Front side:

 And this is what my multiple layers of zig zag stitch looks like!
 I like to trim the seams even though the seam allowance isn’t very big (only 3/8″) because it allows me to make everything tidy looking and even and reduces a little bit of the bulk.

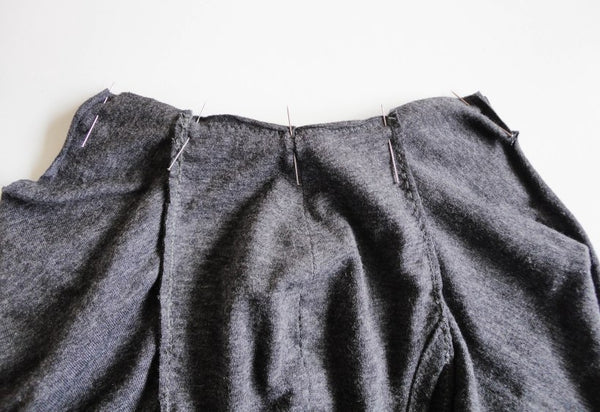
Now we need to attach the second Main Shorts piece the same way that we did our first piece:


 I pressed the seam allowances away from the front and didn’t finish them (aside from the trimming). This light jersey doesn’t fray and the seam allowances tend to roll up tidily and softly so I thought that the less stiff thread that could potentially cause rubbing, the better! If you are using a material that tends to fray you could finish these seams with a second wider row of zig zag stitching.
 To serge these seams, it is the same process as we just covered (minus the trimming). Here is what it will look like if you choose to use the serger:


When serging, it is perfectly okay to leave your seams looking like they do in the photo above, but I thought you might be interested to see the topstitching that I decided to do along these seams to ensure that the serged seam allowance remains pointing away from centre front and lies flat against the body (see photo below). I ended up using a simple straight stitch because my reinforced straight stitch was causing the fabric to slide around and I couldn’t keep the top-stitching from wobbling all over the place. On other fabrics the reinforced straight stitch worked really well for me and I find it is a great way to do top-stitching on many knits. I didn’t mind using a straight stitch on these trunks though because the fabric doesn’t have much stretch anyway so I don’t think Matt will end up with broken stitches when he wears these.

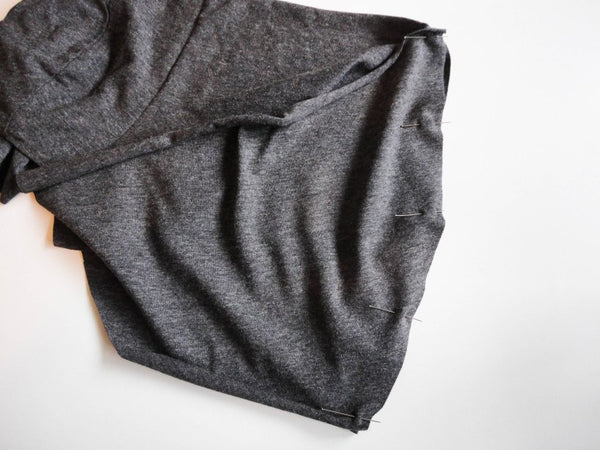
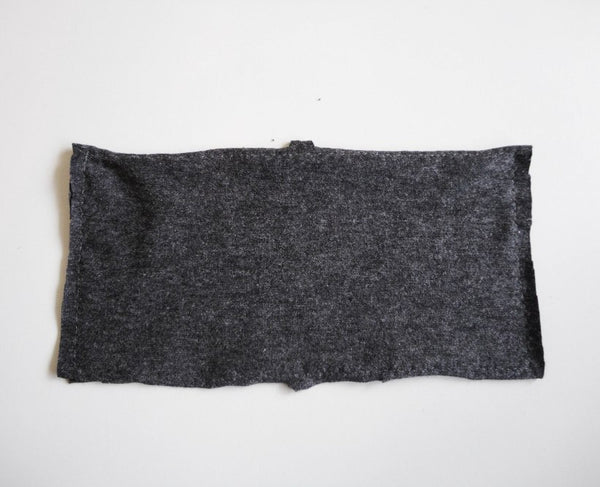
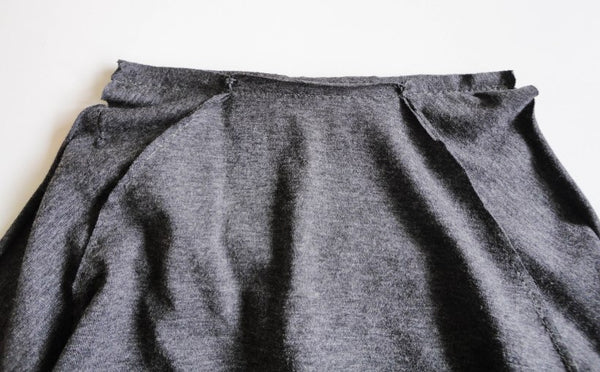
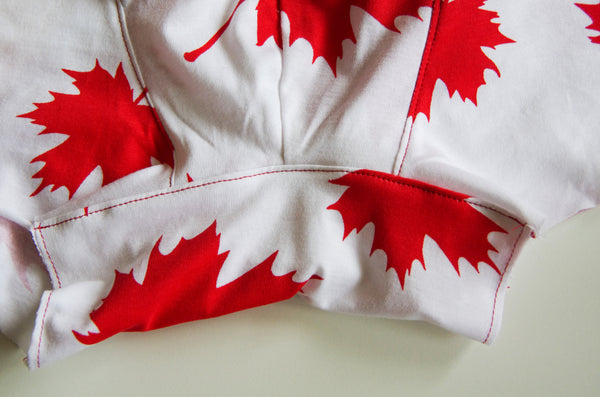
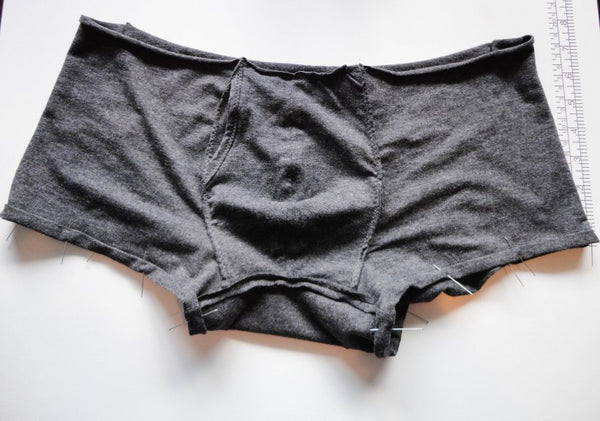
And now we move on to attaching the Back piece! This will attach to the other long curved edge of the Main Shorts:


As you can see, below, the Main Trunks curve and the Back curve are opposite just like the front and will take a bit of pinning before they line up.
I sewed this seam twice again using the zig zag stitch. Might as well make it extra strong!

And then I trimmed the seam just like we did for the front. I pressed the seam towards centre back.
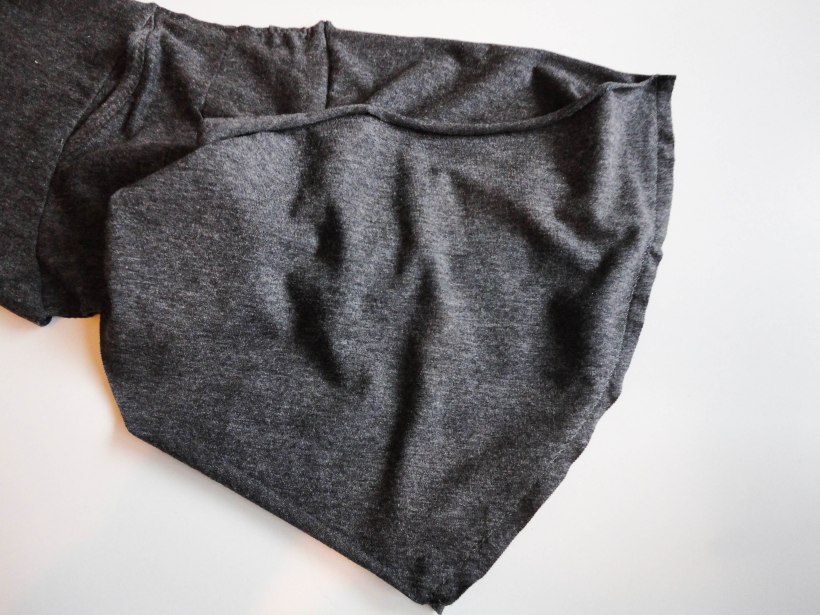
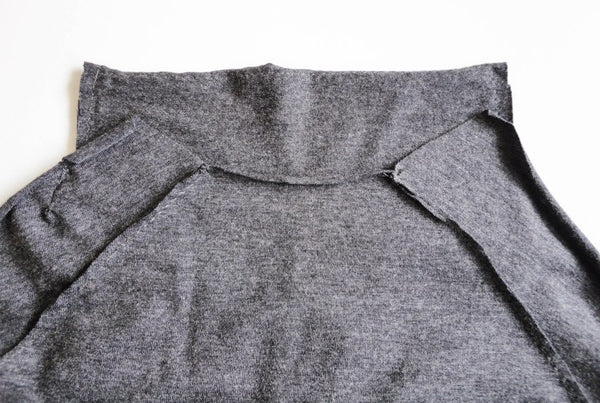
 And now we have to repeat this process with the other back seam to create a closed loop!

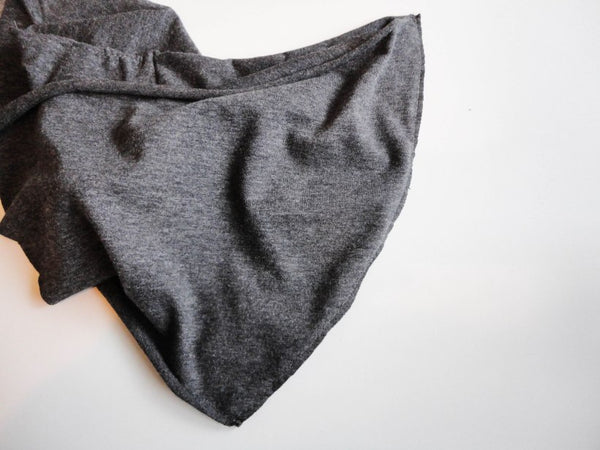
Would you look at that? The trunks are starting to resemble trunks :).


If you’re using a serger, the back process is again very similar to using a domestic machine:

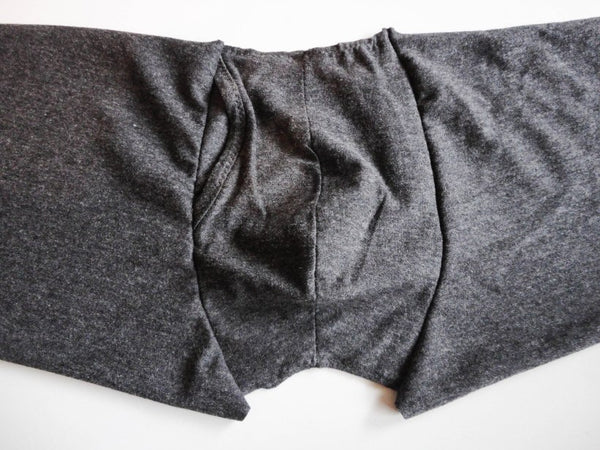
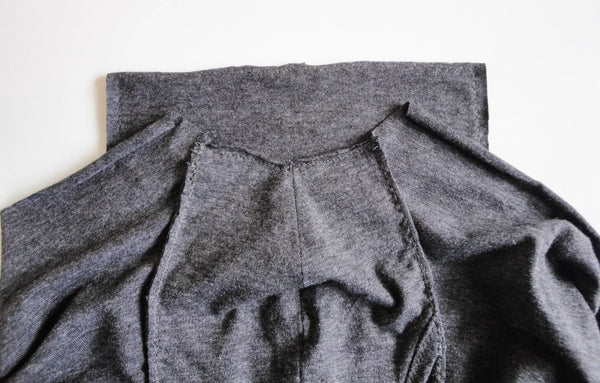
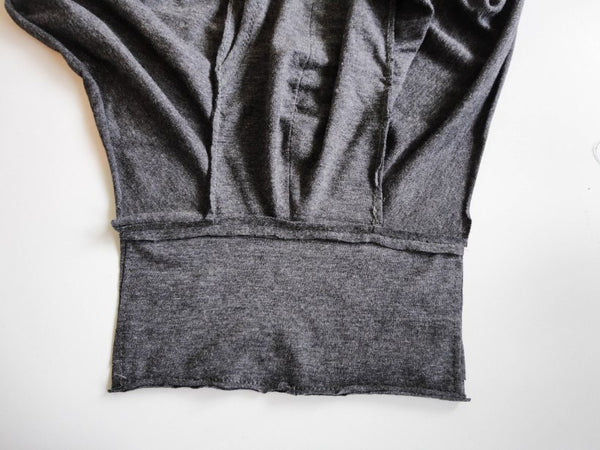
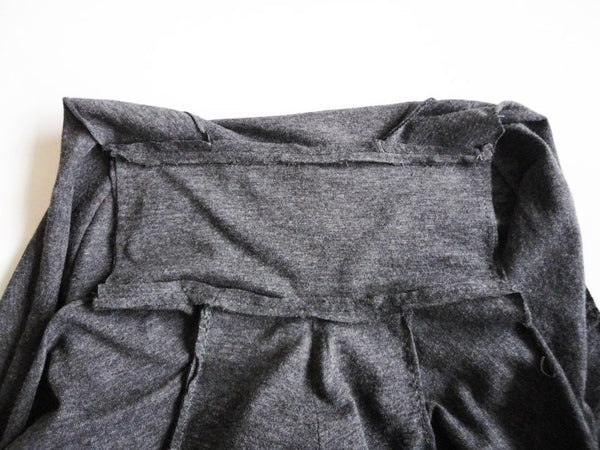
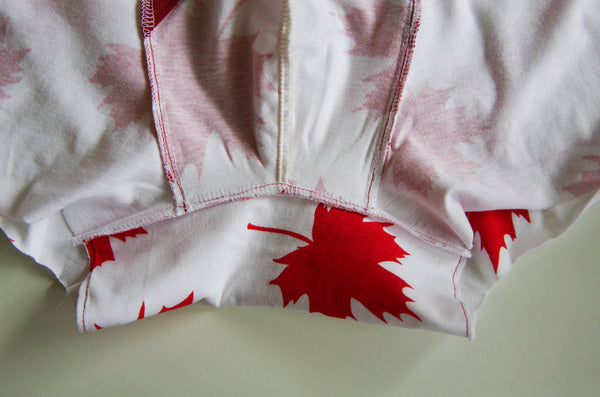
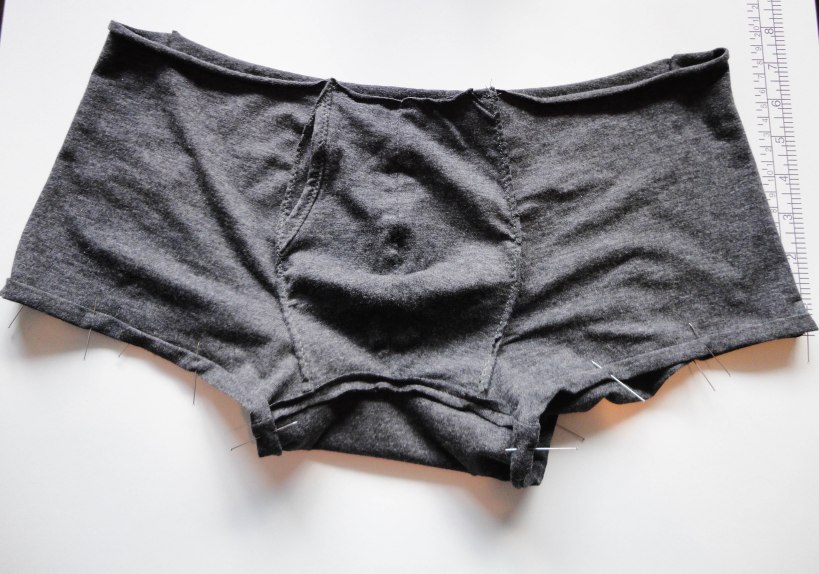
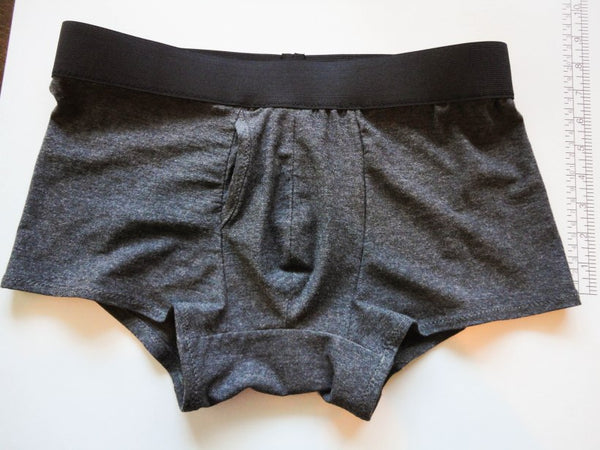
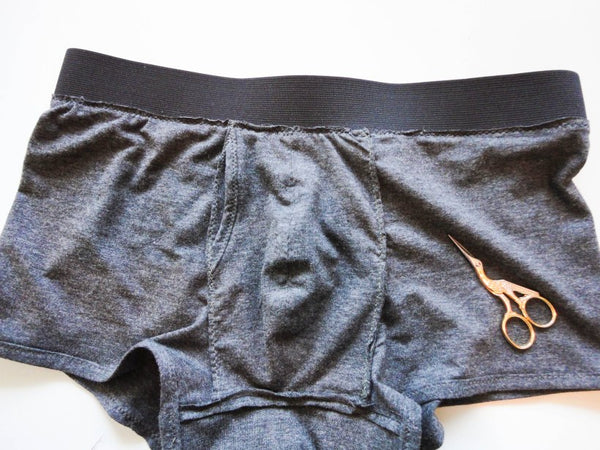
Now, the last step for today is to create and attach the gusset. While the word ‘gusset’ might intimidate you a little but really, a gusset is just a piece of material that is sewn into a garment to make it wider or stronger (in the case of the trunks, our gusset performs both jobs!).
Our gusset is formed from two rectangle pieces that are double layered for extra strength:


Pin the two pieces with wrong sides together and notches matching.

Baste around the outside. I used a zig zag stitch within the seam allowance but you could also use a long, straight basting stitch and just remove it after the seams are sewn.

Now our gusset is ready to attach to the trunks to create wider legs! Line up your main trunks so that the centre front seam lines up with the notch on the long edge of the gusset:
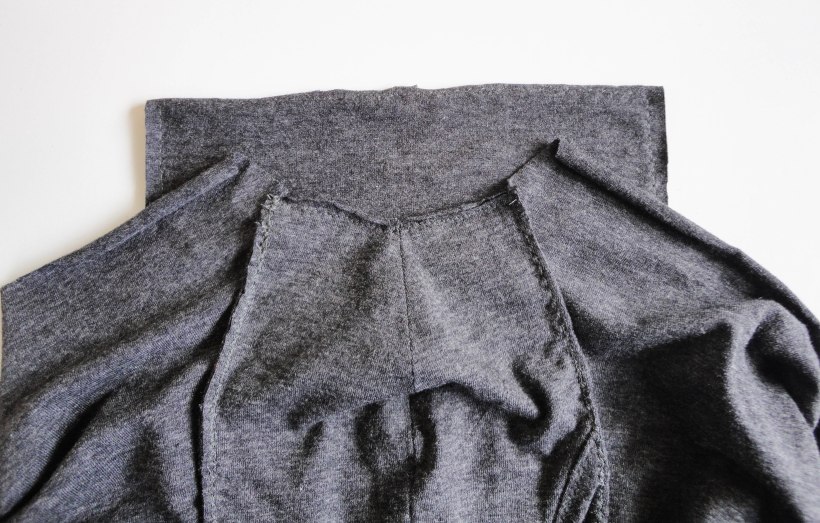
I used two layers of zig zag stitching once again and then pressed the seam open.

Now we can move on to the back seam! This time the notch lines up with Centre Back.


And, once the seam is sewn, it again gets pressed open. You can trim both of these seams if you like or you could finish them with a wide zig zag stitch.
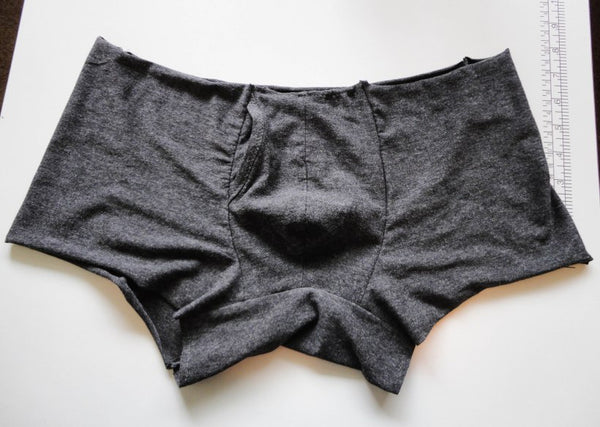
And here is how my trunks look at the end of today’s sewing session…now that’s progress!

If you’re using a serger, you will still need to baste the two gusset pieces together with a domestic machine. I used a straight stitch to baste because I knew it would be trimmed off by the serger in the next step so wouldn’t interfere with the ability of the seam to stretch.
And now we serge the two seams:

I pressed the serging in towards the gusset on both sides:

And then, because this is an area that is quite likely to be sensitive to rubbing, I topstitched the seam allowances in place to keep them flat (again, it is advisable to use a stitch that can stretch such as the reinforced stretch stitch or even a small zig zag stitch but I didn’t do this because my fabric really doesn’t stretch too much):

Are your shorts coming along nicely? In two days we will be hemming them! And then it’s on to adding the elastic waistband and…the hardest part of the whole sew-along…finding a model on which to photograph your shorts for the contest ;P. Happy sewing!

Comox Trunks Sew-Along: Day 7 - Sewing the hem
After all of the progress during the last sew-along session, today we’ll just be sewing the hem. Easy peasy! I’ve sewn the charcoal pair using Option 2 from the instruction booklet (a double fold hem finished with a zig zag stitch) and the maple leaf version is hemmed using Option 1 (a serged edge and a twin needle) so you can examine my process and choose which method you prefer.
For the zig-zagged option, start by folding up the hem about 1/4″ and pressing:

Fold the hem again, this time about 3/8″ and press. Pin as you press and don’t slide your iron along the fabric, instead, lift it up and press down – this way you won’t ‘drag’ the fabric with you and twist the hem (a common issue when hemming thin and stretchy knits).
 I changed the settings for my zig zag stitch slightly for the hem to make a larger, stretchier stitch. I increased the length ever so slightly and increased the width to match the length. This zig zag stitch will be very visible so it is nice to have a very even looking stitch.
I like to start sewing on a seam, especially one that isn’t very visible from the front, so that the back stitching doesn’t look obvious or messy. In this case, I started on the back gusset seam. As you can see, I chose to sew from the inside of the trunks so I could make sure that I was perfectly catching the folded hem. This isn’t necessary if you are a perfectionist and have a perfectly even hem – you could sew from the outside and keep an even distance from the bottom fold and know that you are catching the top fold the entire time. As you might guess from my approach, I don’t trust myself to have a perfectly even hem (especially with knits that like to shift around a lot!) and so find it saves me a lot of headaches and stitch picking to just sew it from the inside.

And here is the finished zig zagged hem! Super easy!


If you choose to try out the twin needle hem, the key is to make sure your twin needle is functioning smoothly before starting to sew – test on scraps until it is jam-free and even. My machine doesn’t really like working with a twin needle since my tension disks are quite faulty – it will be chugging along beautifully for a couple centimetres and then all of a sudden jam into the biggest snarl you could imagine…ug…regardless, I managed to sew the darned hem after starting and stopping a million times (don’t be scared away by my experience, I have had many snarl-free twin needle sewing experiences…just never on this silly machine!).
Many people like finishing their hem with only a twin needle since the stitch made by it forms a zig zag on the underside of the fabric that nicely encloses the raw edge. Of course, this requires you to have a lovely even hem and precise stitching. To save myself the worry that my raw edge wouldn’t be totally enclosed, I simply serge first and use the twin needle to stitch below the serging.
Here is my serged edge folded up once:

And here is my funny little double thread set up! I have two thread holders on the top of the machine but when I use both of those, the first tension disk doesn’t engage properly and I can’t get a single nice stitch. Placing a serger cone of thread behind the machine seemed to work well enough though:

The twin needle gives a lovely finish that is strong and very professional looking. Voila:


Well, that’s it for today and our next post will be the last one for the sewing segment of this sew-along! Are you looking forward to finally finishing your trunks? We’ll be adding the elastic waistband and I will also be discussing some ideas for adding a fabric covered waistband if that is more your style. See you in two days!

Comox Trunks Sew-Along: Day 8 - Attaching the elastic waistband
By the end of today’s post you will have finished Comox Trunks!
Today we’ll be attaching the elastic waistband.
First, I will show you the method included in the instruction booklet to create an exposed elastic waistband as you would find on most store-bought trunk style underwear.
After that, I’ll show you my attempt at a fabric covered elastic waistband. ***Full disclosure – I’ve somehow managed to avoid sewing fabric covered elastic waistbands my entire sewing-life and so am not sure if my technique is the best one available. You might have some tips for me about how to make this process smoother :) ***
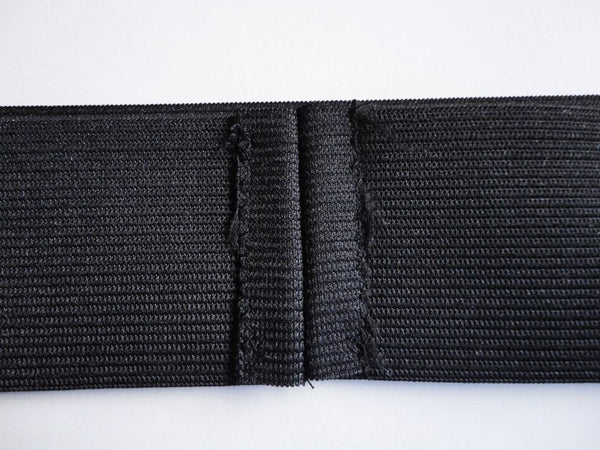
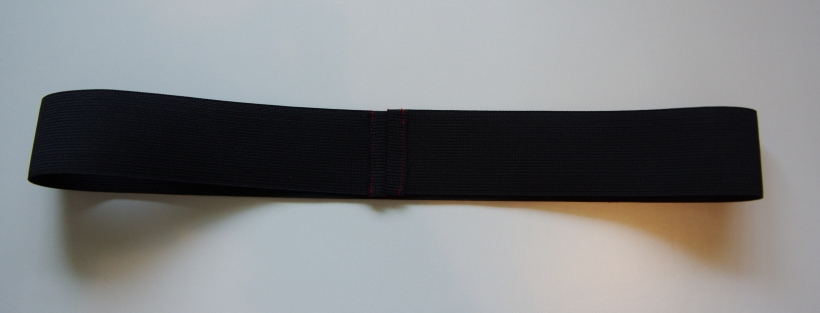
Okay, lets get started on our exposed elastic waistband. First, we need to form a loop by sewing the two narrow edges together. I used a reinforced stitch for this but you could also use a narrow zig zag (and sew over the seam at least twice) or even a straight stitch if you sew over it several times to ensure that your threads won’t snap when the elastic stretches.
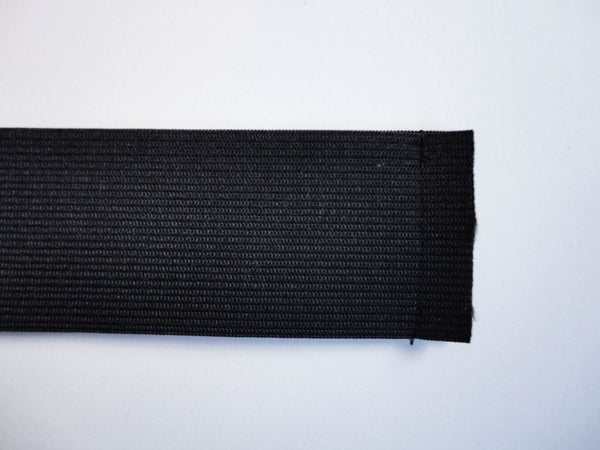
And here is our loop after I’ve pressed open the seam allowance:
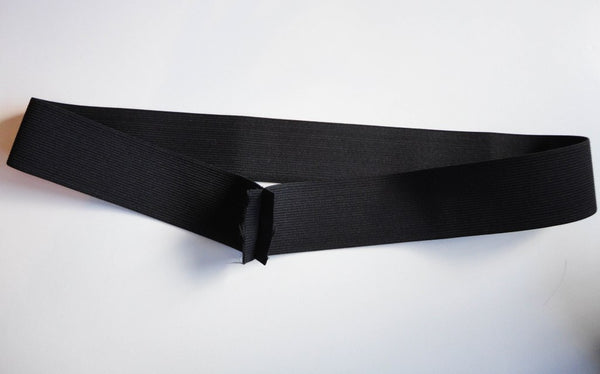
I like to force the seam allowances to lay flat by zig zagging them to the main elastic. This will help prevent them from being too scratchy.

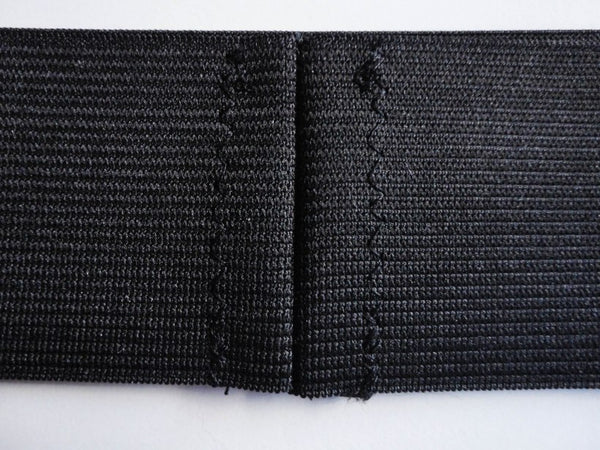
This is how the trapped seam allowances appear from the inside of the waistband:
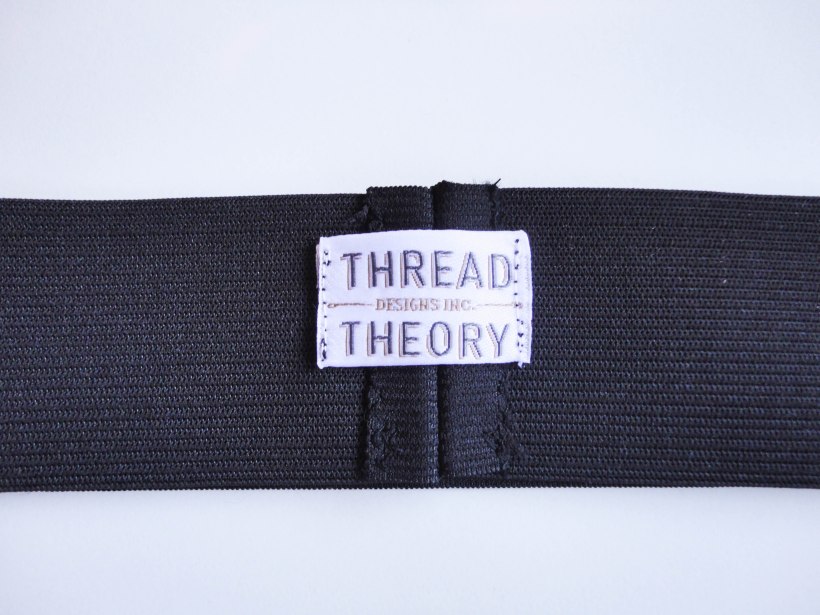
 In the instruction booklet I give two options for attaching your garment tag (which comes with the paper sewing pattern). I’ve gone with my favourite option. While I am all for proudly displaying our brand on the exterior of our garments (lol I hate clothing with visible brand names usually but it’s a different story with my own brand :P) I prefer to place the tag over the elastic seam allowance. Our tags are nice and soft so they’ll provide one extra layer between the wearer and the scratchy seam allowances. If you don’t have a garment tag you could use a fabric scrap or ribbon instead.

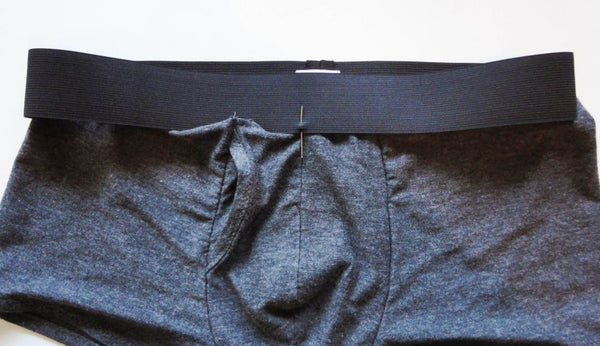
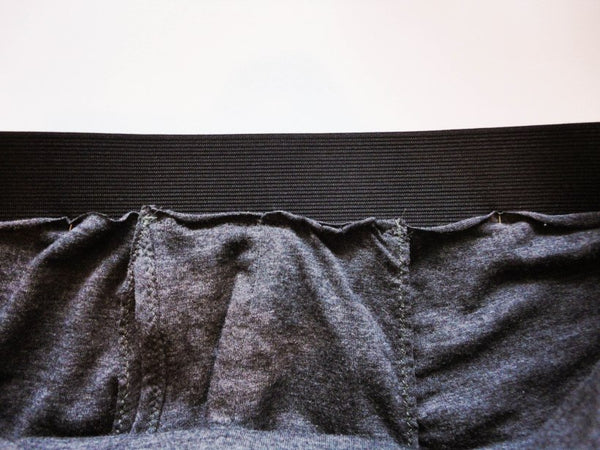
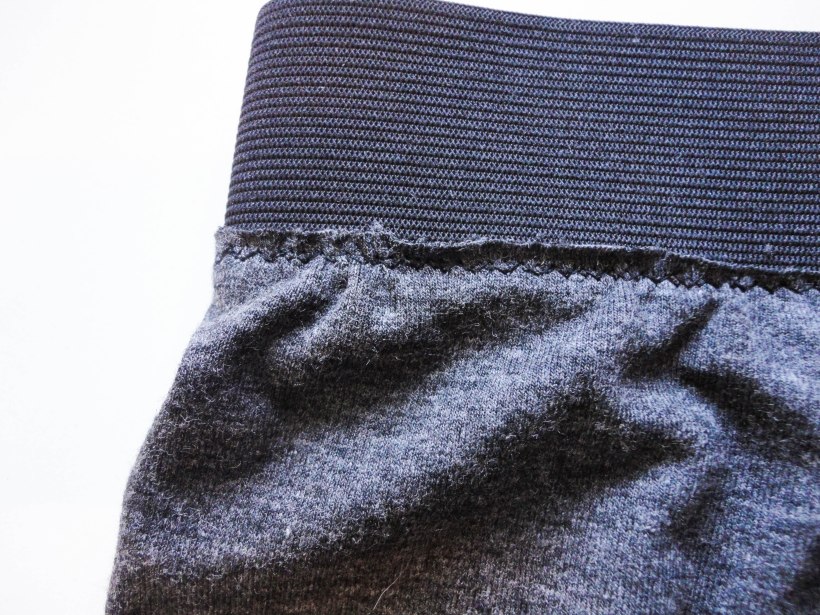
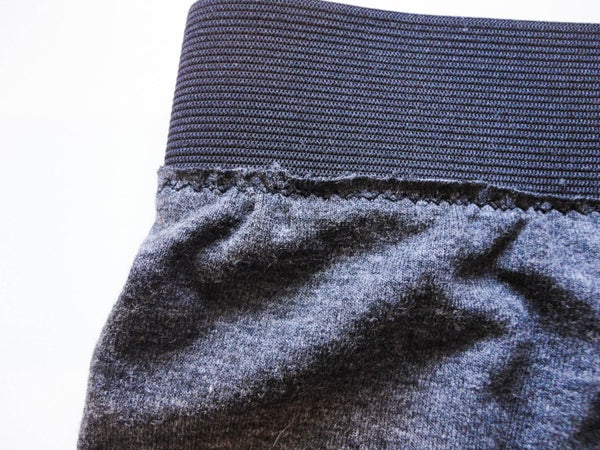
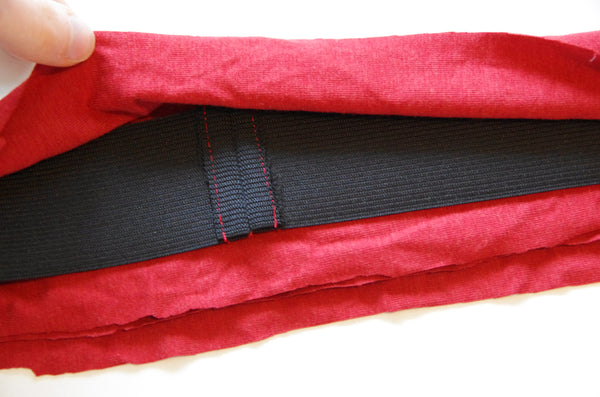
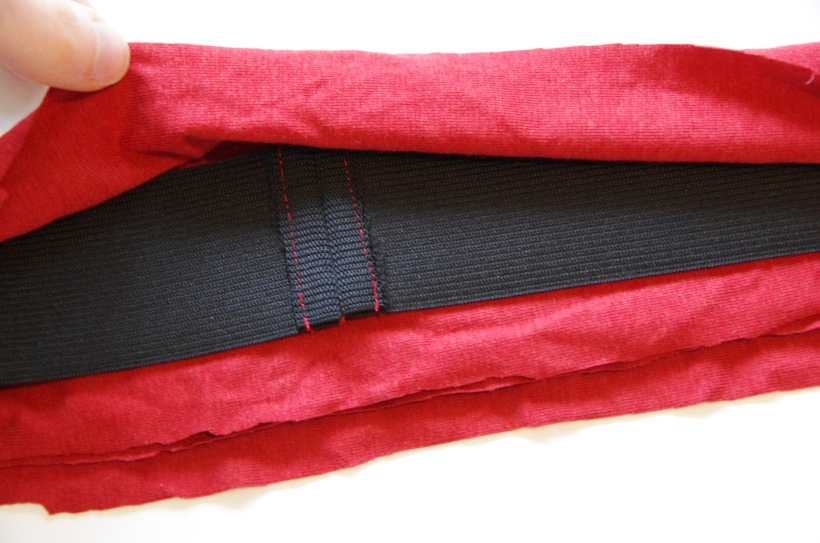
 And now it’s time for us to add the waistband to the shorts. This step is very straight forward (indeed, it can sometimes be a little confusing to people because they are expecting it to be more difficult!). All you need to do is line up the trunks and elastic exactly how they will look when they are finished and then sew them in place! Here is how to line them up:
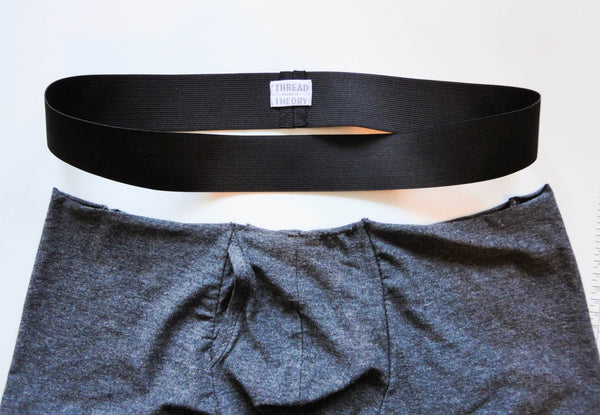
You will need to line up the right side of the shorts with the wrong side of the elastic so that the elastic overlaps the fabric 3/8″. The elastic is the outermost layer. Position the elastic seam at centre back and pin in place. Also pin centre front.
 At this point, I like to divide the elastic in quarters and place pins where side seams normally would be.

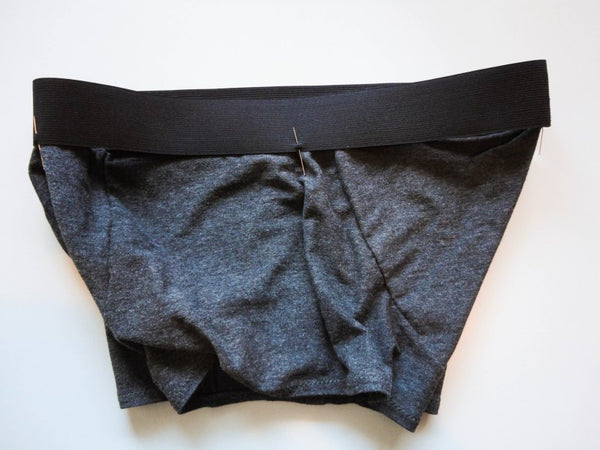
I then place pins between each of my four pins to result in eight pins that evenly distribute the trunk fabric around the elastic.

Here, you can see how this will look from the inside once you have placed your pins:
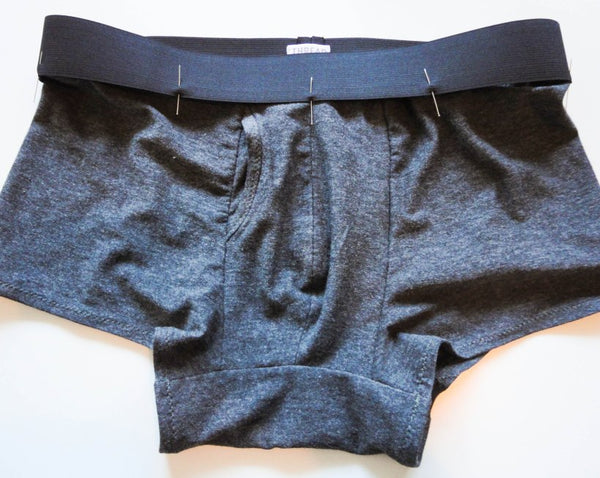
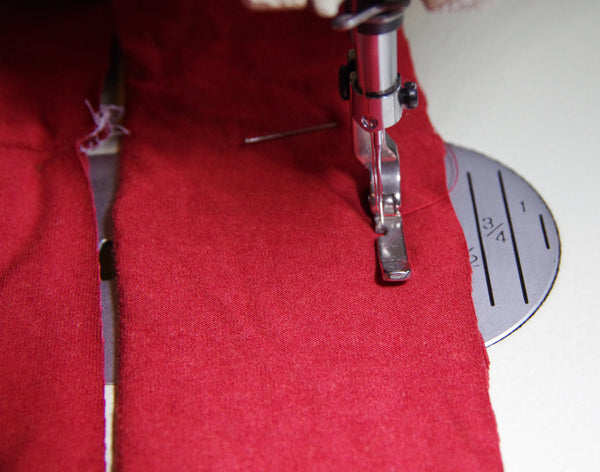
 And now it is just a matter of stitching the two layers together! I used a zig zag stitch but you can also use a twin needle for a lovely professional finish. You will need to stretch the elastic slightly as you sew to ease in the excess fabric. Depending on whether you created a custom fit waistband or not (by wrapping it around the wearer to determine the length needed) will depend on how much easing you need to do.

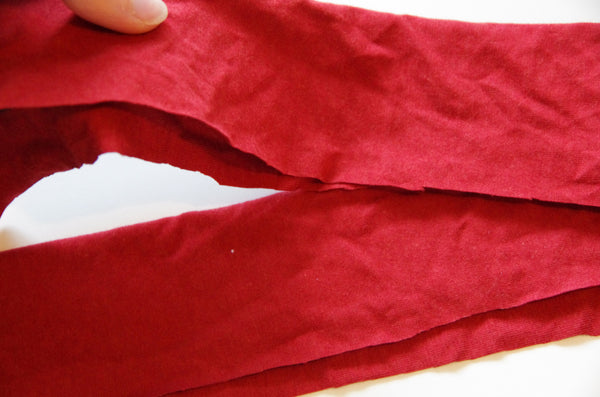
Don’t worry if the fabric looks a little gathered in areas by the time you are done (see mine below – especially in the front area) because this will stretch out when the wearer puts the trunks on and sit perfectly smoothly.

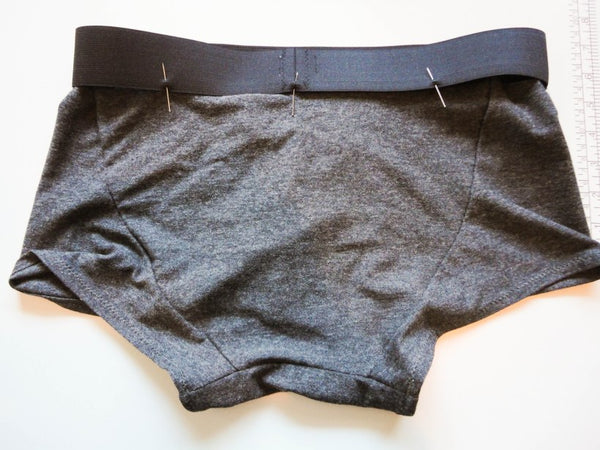
I went over my zig zag stitch a second time for added strength. You could even do this a third time if you wanted because of all the seams in these trunks, this is the one that is under the most pressure and is the most likely to snap.


Once I finished stitching I cleaned up my seam allowance by trimming the fabric closer to the zig zag stitches.

Wahoo! Our trunks are done! (Unless you are holding out for the fabric covered waistband of course).
Here is what I did to create a fabric covered waistband:
I sewed the elastic into a loop as I explained above (including stitching the seam allowances flat).

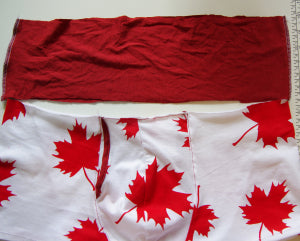
Next I needed to create a fabric loop that could sandwich the elastic and still have enough seam allowance to attach to the trunks. To create this, I cut two rectangles of fabric (you could cut one long rectangle if you only want one seam, I just didn’t have enough scrap fabric to do this). The rectangles each measured as follows: The length of your elastic loop (i.e. roughly the width of your trunks) plus two seam allowances + double the width of your elastic plus two seam allowances.
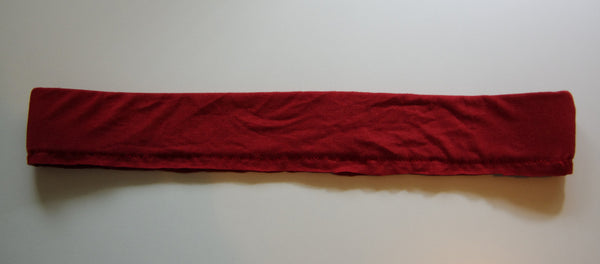
Sew the narrow edges together to form a tube and you will end up with this:
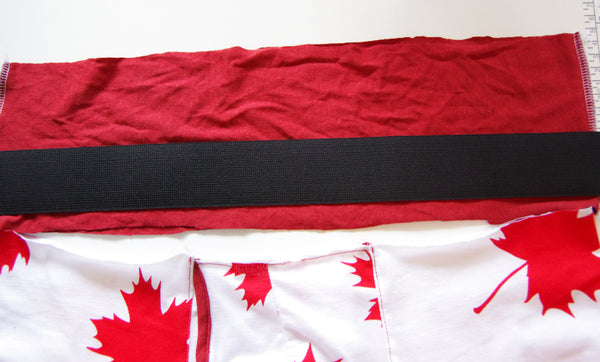

And here is a better view so you can see how the fabric tube relates in size to the trunks:
Now sandwich the elastic in your fabric by folding the loop in half over the elastic (with wrong sides together).

To keep everything lined up, you can baste the fabric loop closed along the bottom. I used a zipper foot so that I could get close enough to the elastic to prevent the elastic from sliding around.

Here is the elastic-stuffed and basted loop:

Now I pinned the elastic/fabric loop to the trunks with right sides together and the seams lined up at either side.
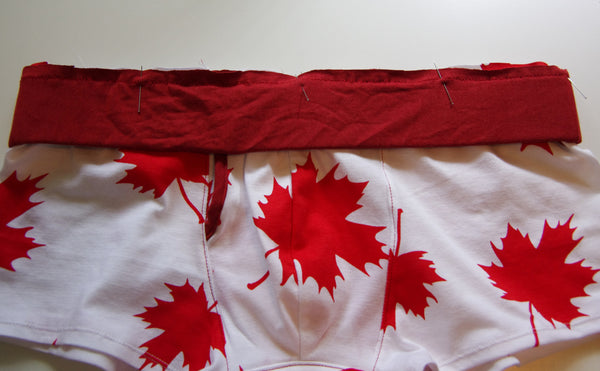
And I serged the entire loop. This is more or less effective – the only problem is that you can’t get very close to the elastic edge with the serger so the fabric waistband looks a little floppy and loose. The only way to create a narrower fabric tube would be to leave a hole in the tube and thread the elastic into it AFTER the tube is attached to the main trunks.
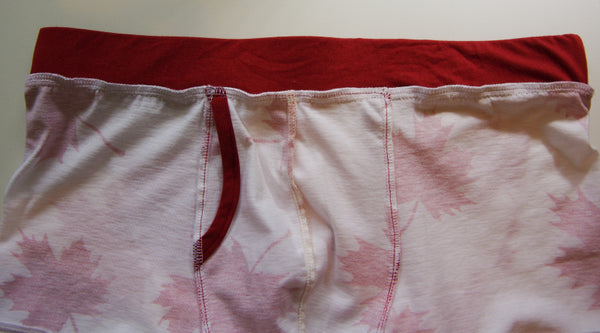
 I just used the reinforced straight stitch and a zipper foot to stitch closer to the elastic:
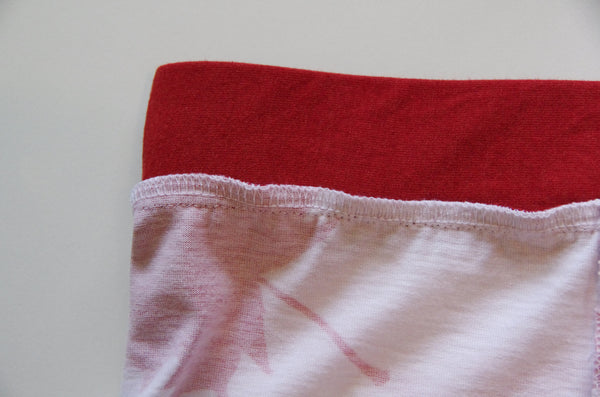
 And there we go, finished trunks with a super soft and comfy fabric covered waistband!