Sew-along with us!

Perhaps you'd like some company while you sew? We've sewn up each of our patterns and photographed each step along the way. Find the pattern you're after in the filter drop down below left.

Fairfield Button-up Sew-Along: Day 1 - Schedule & Supplies

Fairfield Button-up Sew-Along: Day 1 - Schedule & Supplies

Welcome to the first day of the Fairfield Sew-Along!  We will be sewing our Fairfield button-up shirts in time to give as Father’s Day gifts if you would like.  Here is how the sew-along will be spread out:

Monday, May 16th (today!): Gather your supplies.

Wednesday, May 18th: Choose your size.

Friday, May 20th: Create a custom fit: Part 1 & 2

Monday, May 23rd: Cut into your fabric, match plaids or prints.

Wednesday, May 25th: Apply interfacing, sew the button placket.

Friday, May 27th: Pocket and pleat or darts.

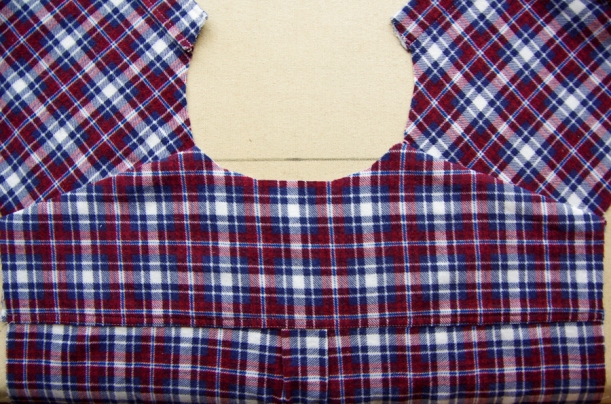
Monday, May 30th: The yoke – using the burrito method.

Wednesday, June 1st: The sleeve placket.

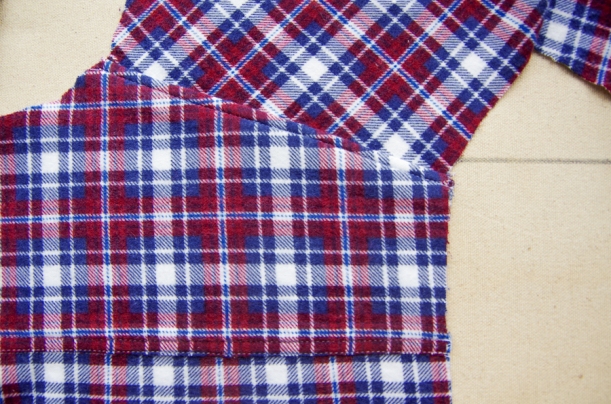
Friday, June 3rd: Optional sleeve tab and attaching the sleeve to the body.

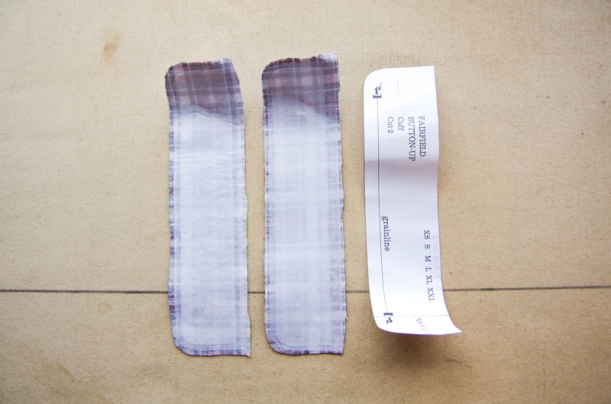
Monday, June 6th: The cuffs.

Wednesday, June 8th: The collar.

Friday, June 10th: The Hem and Buttons – we’ll be done!

Friday, June 17th: A round up of finished Fairfield Button-ups in honor of Father’s Day.


Don’t worry if you fall behind – this is a pretty fast pace for those just learning to sew a shirt.  Take your time and enjoy the process!  These posts will remain available for your reference on our website and blog indefinitely.


Let’s begin by talking about the supplies you will need for your Fairfield Button-up:

Fabric


Stonemountain & Daughter Fabrics, a gorgeous fabric shop both online and in Berkeley, California, have kindly provided us with two different shirtings to use during our sew-along.  (By the way, “shirting” is just fabric of any sort that you think will make a nice shirt…I remember when the word “shirting” really intimidated me!).  Let me introduce these two shirtings to you:


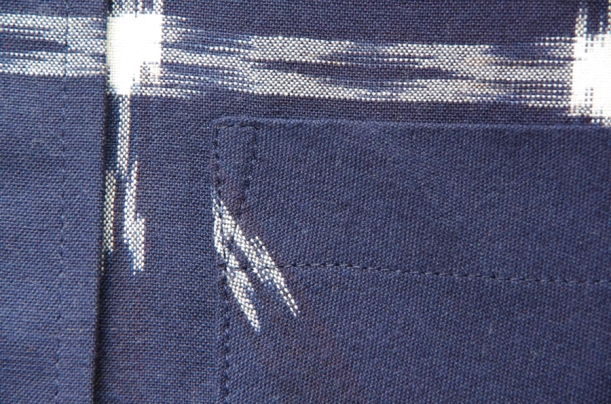
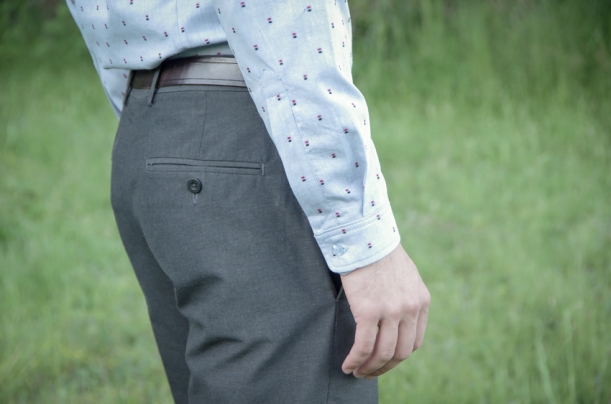
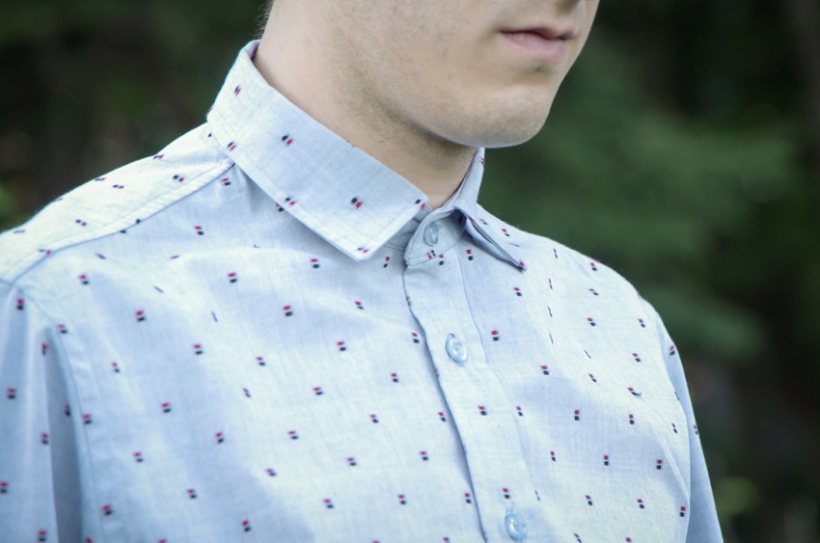
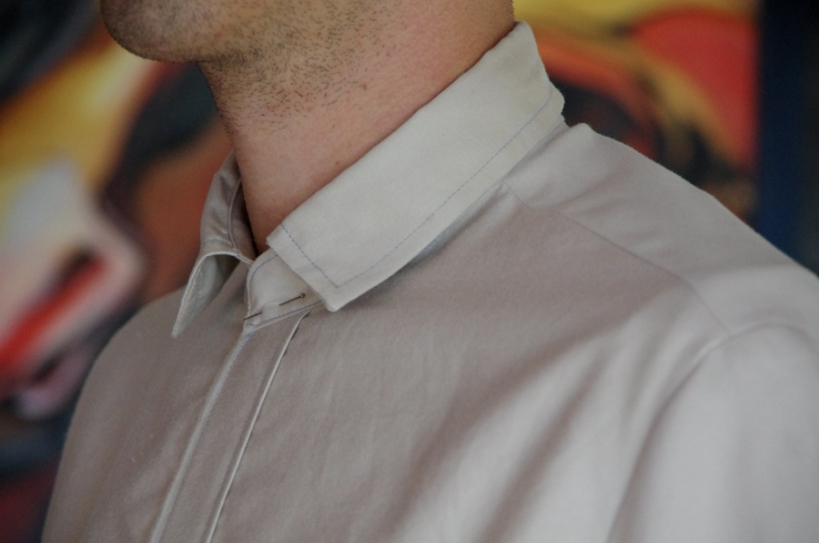
Meet: A gorgeous chambray with black and red slubs.  This fabric is called “Sailor’s Dobby Chambray.”  When this fabric arrived I was so excited to use it that I ended up making it into a sample for the website photos!  I’ll still be including some shots of this shirt throughout the sew-along (close ups of seams and darts) but there won’t be any process shots due to the fact that the fabric was barely out of the parcel before it became a shirt.


I love how crisp this fabric presses and how light weight the finished shirt is.  It is most definitely a dress shirt rather than a casual shirt.  One reason why it feels this way is due to the light weight of the fabric.  The fabric is 100% cotton and weighs 2.75 oz per square yard.  To give you an indication of how light this is, our buffalo check shirting is a beefy 5.25 oz per square yard!  Light weight fabrics are always a good choice for shirts suited to formal attire.


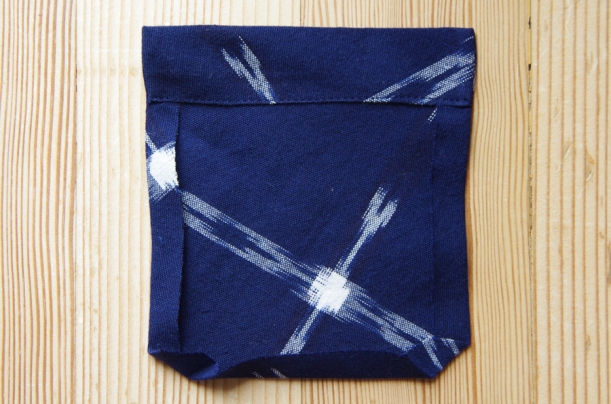
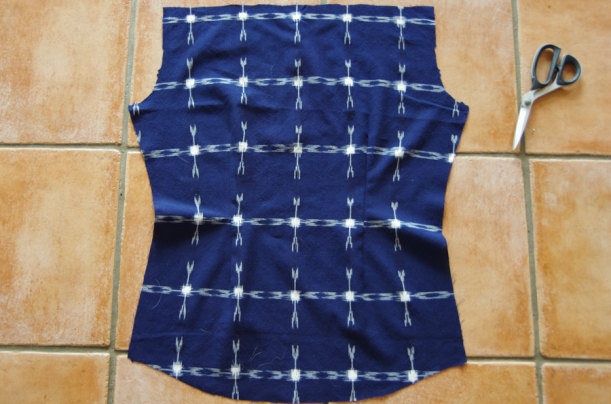
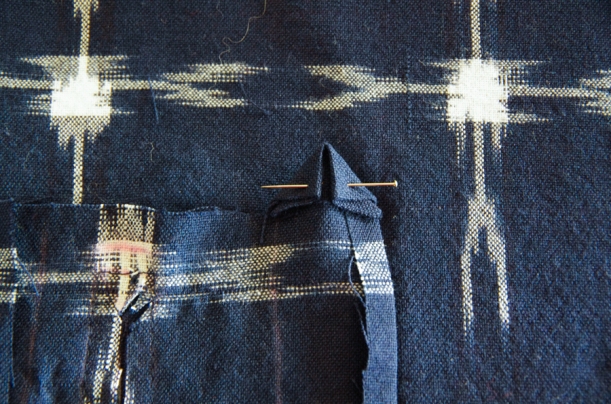
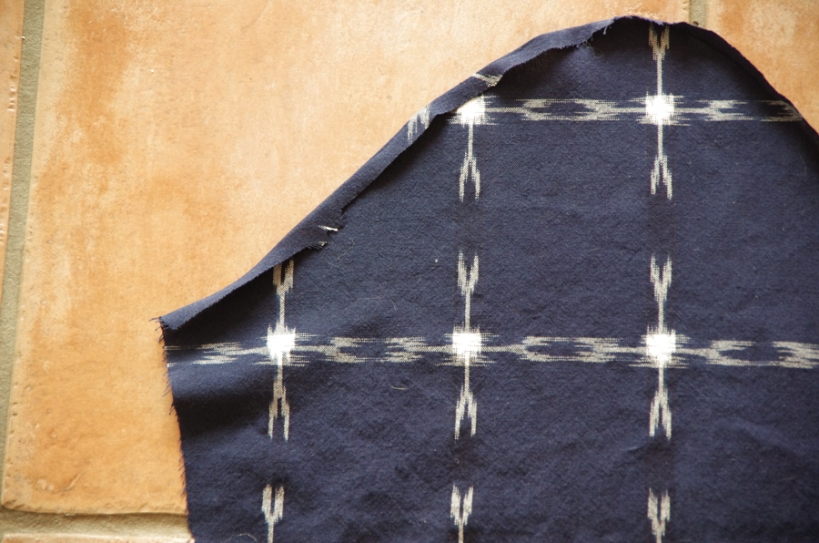
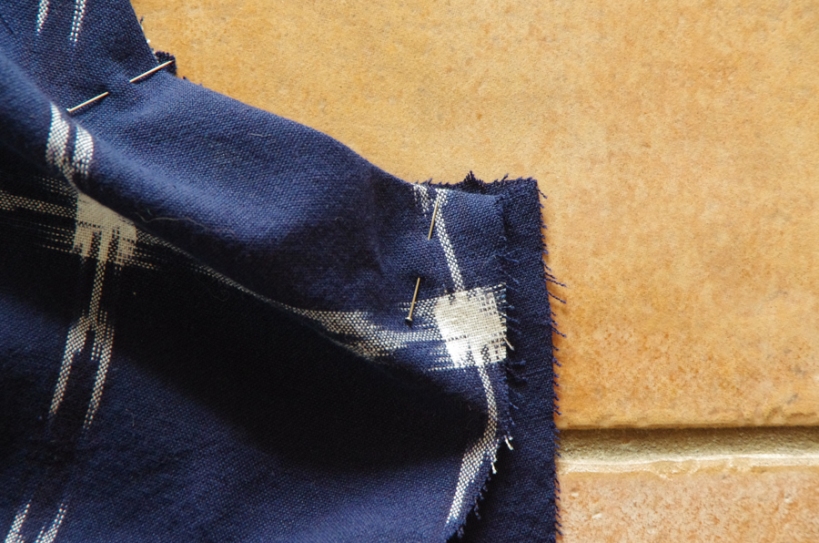
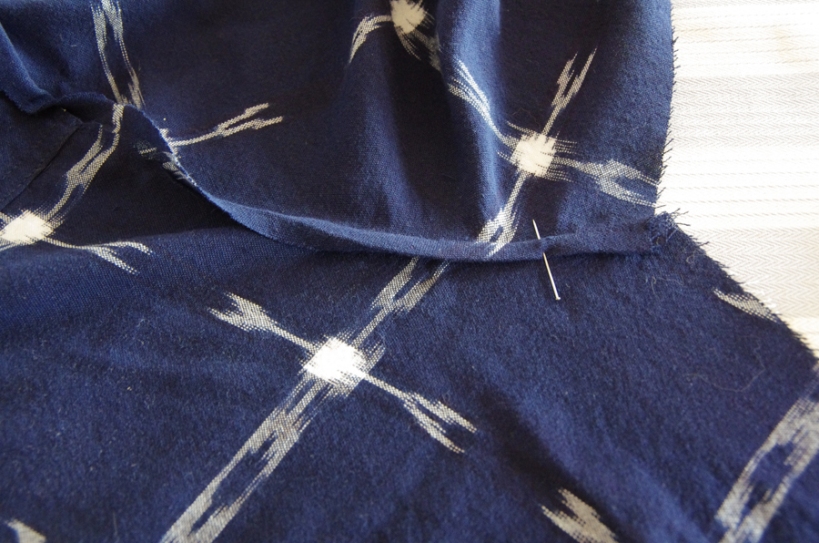
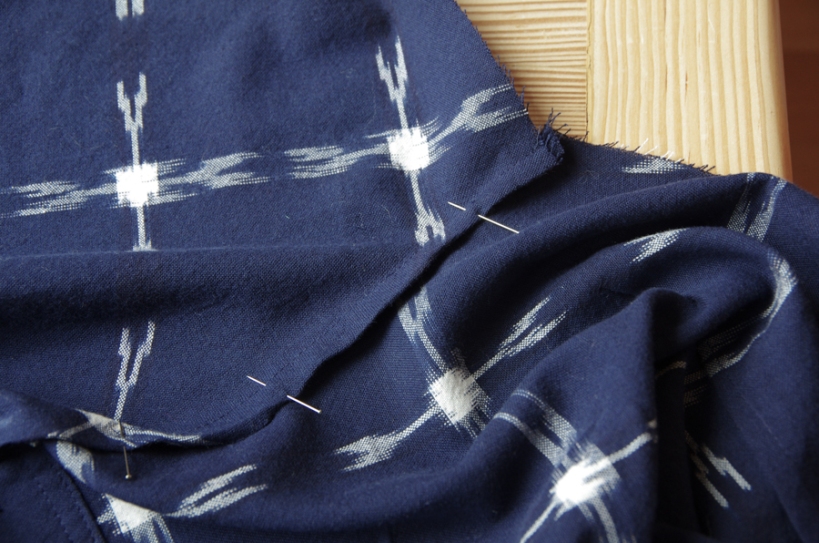
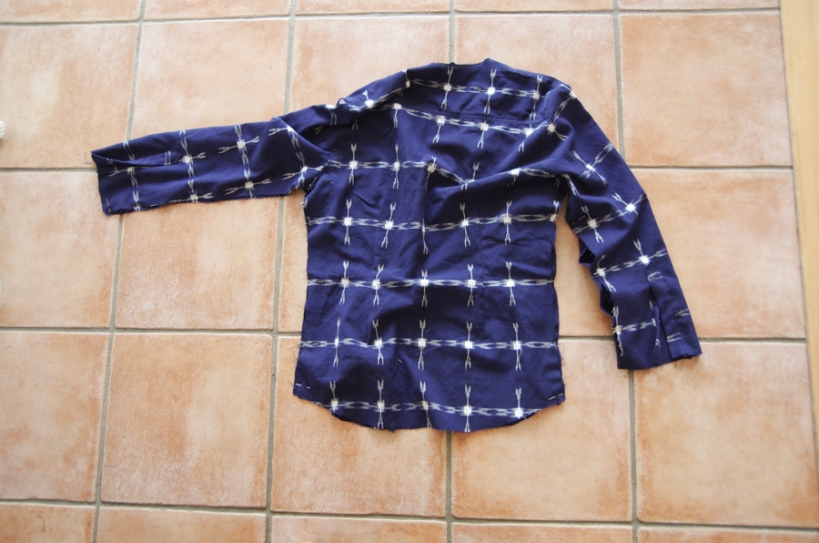
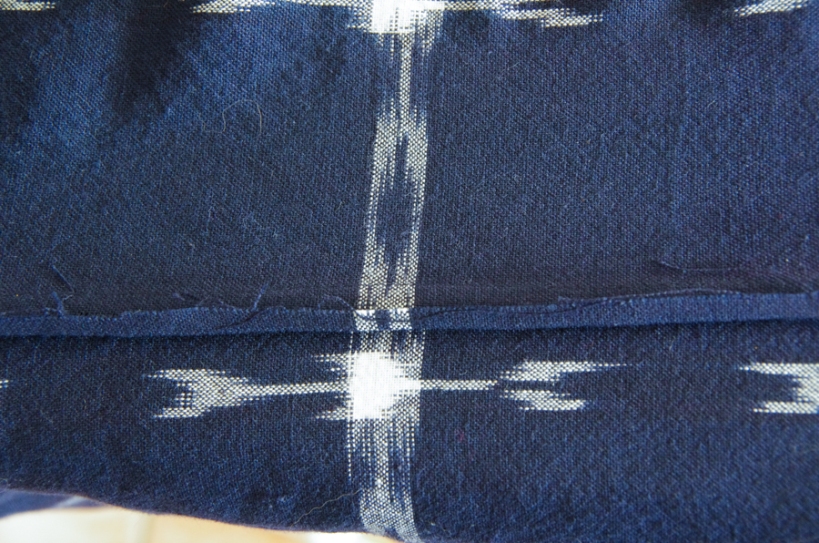
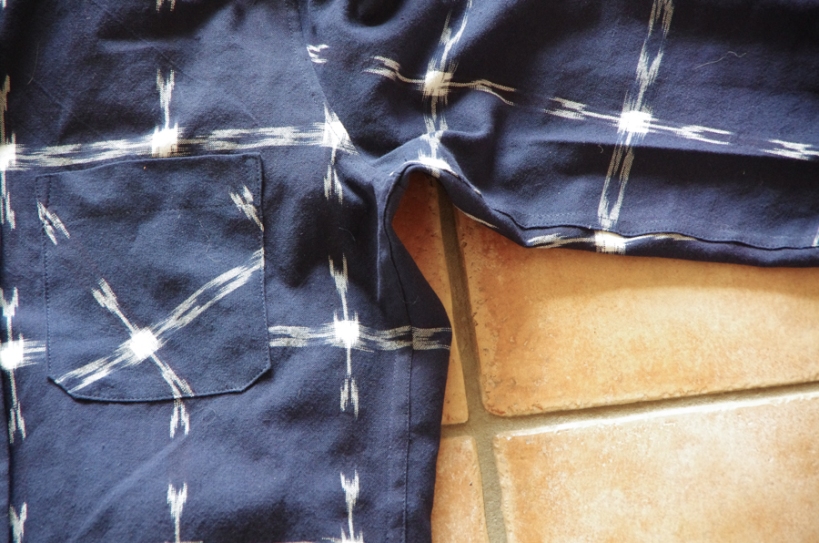
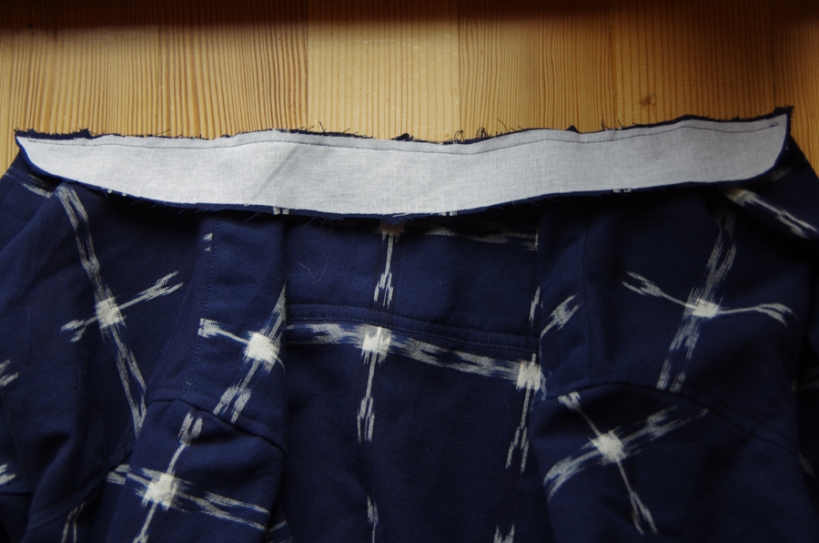
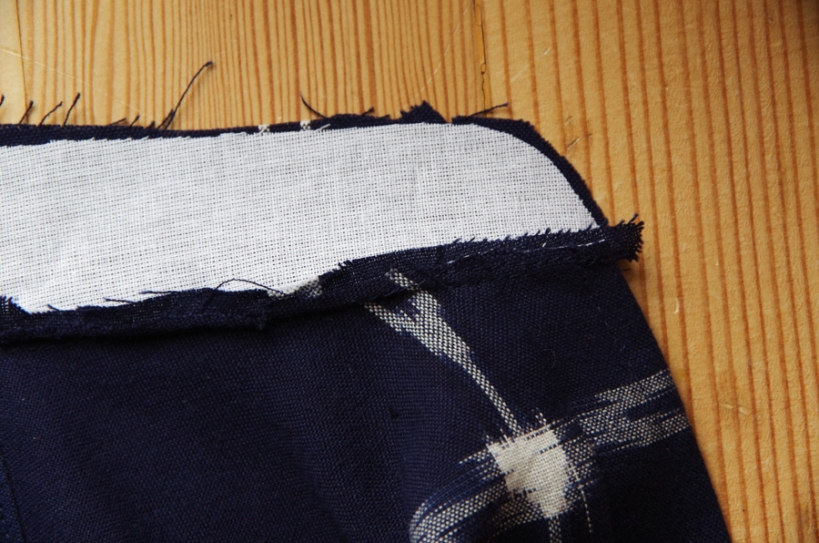
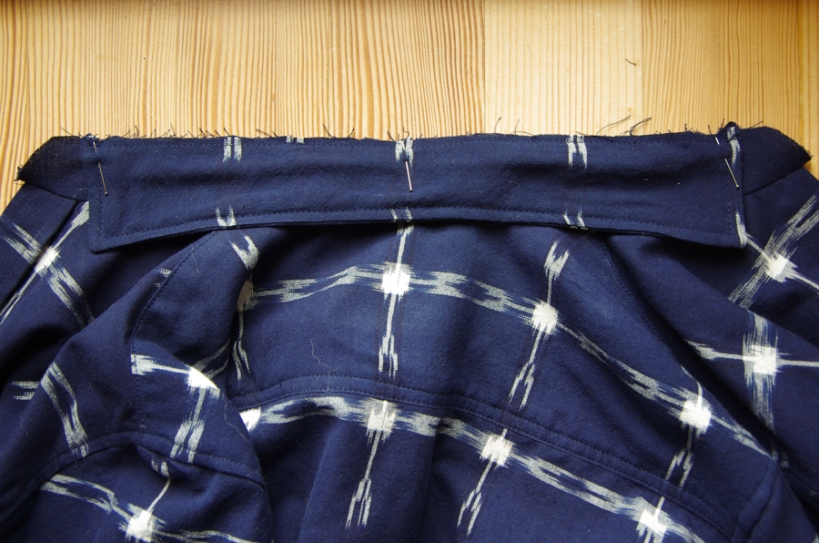
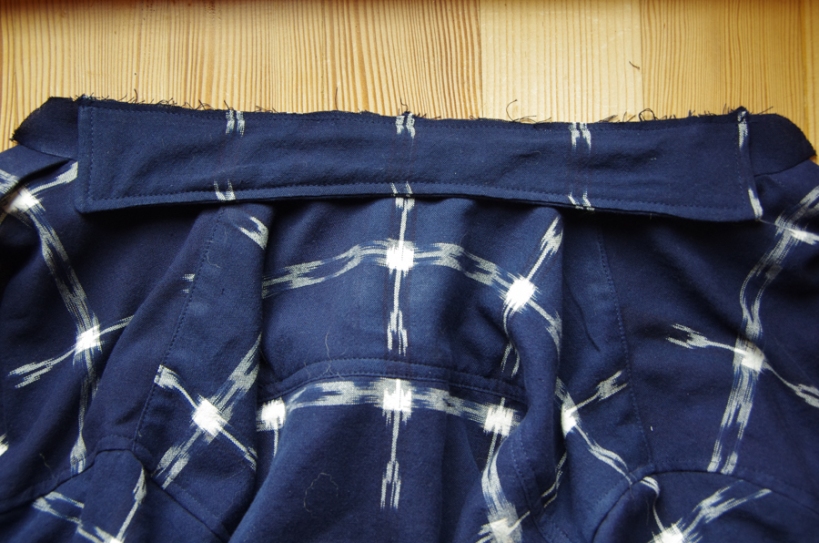
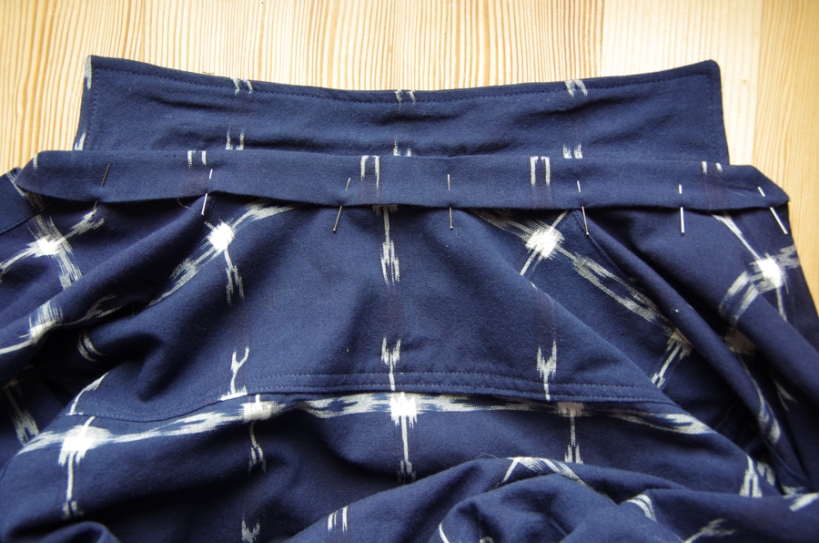
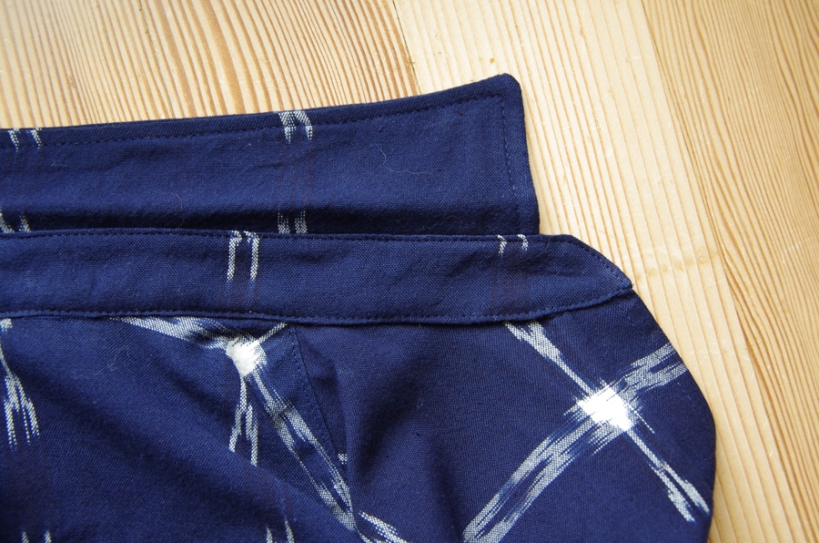
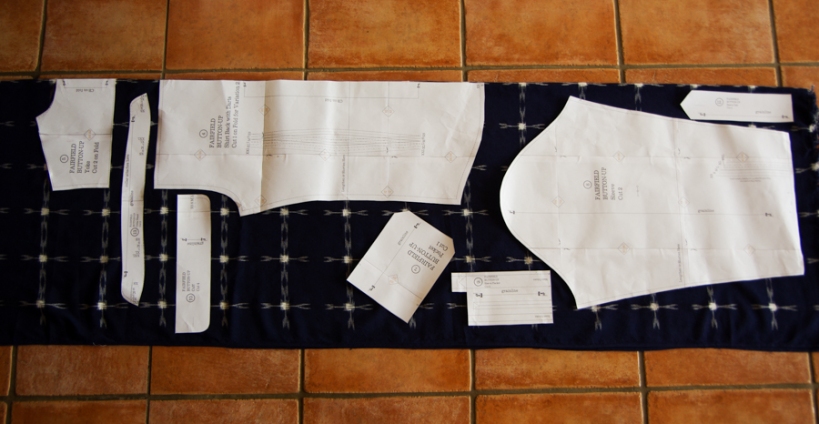
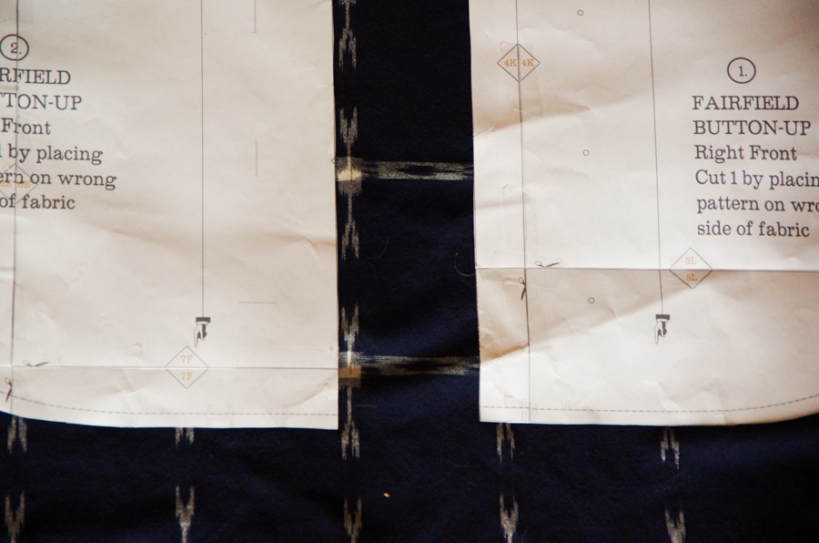
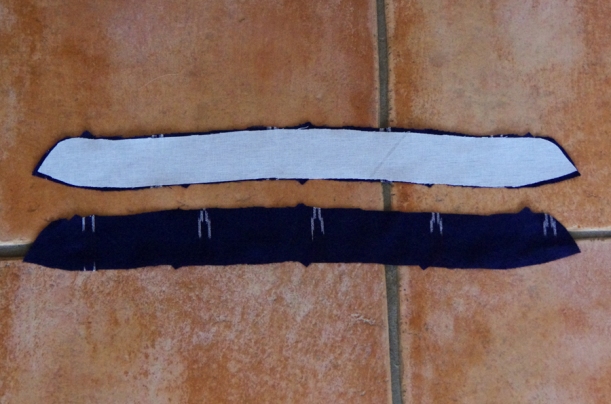
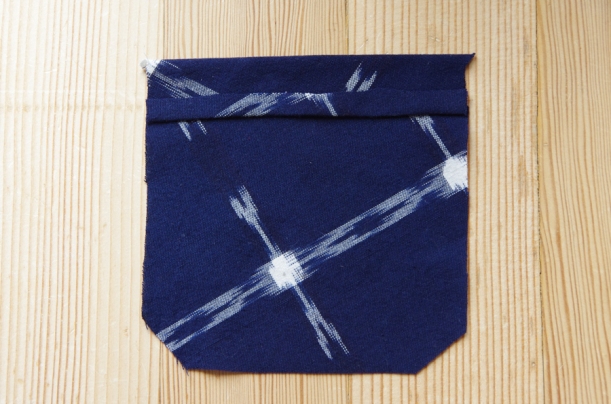
The second fabric is an Ikat from the section specifically devoted to Ikats in Stonemountain & Daughter’s online shop.  It is called “Dakota Arrows Ikat” and is a navy broadcloth featuring a white woven arrow design.  I was pleased to find that the navy did not run into the white arrows when I washed and dried this fabric.  An exact weight for this fabric is not given on the website but I would estimate that it sits squarely between the chambray and our buffalo check brushed cotton.


This large scale print will be a great example to use when showing you my pattern matching tricks.  I plan for this shirt to be quite casual – I can imagine it worn with a pair of brightly colored summery Jedediah Shorts or with some cream colored chinos.


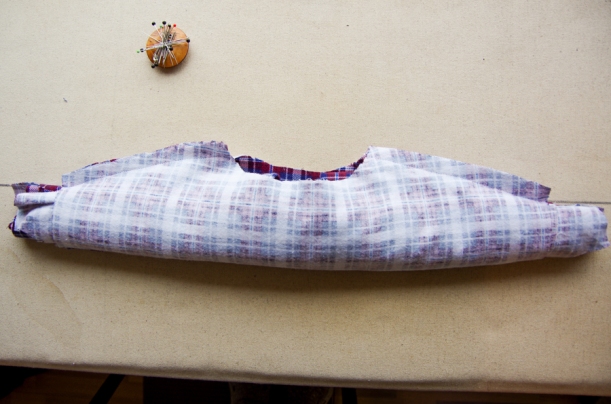
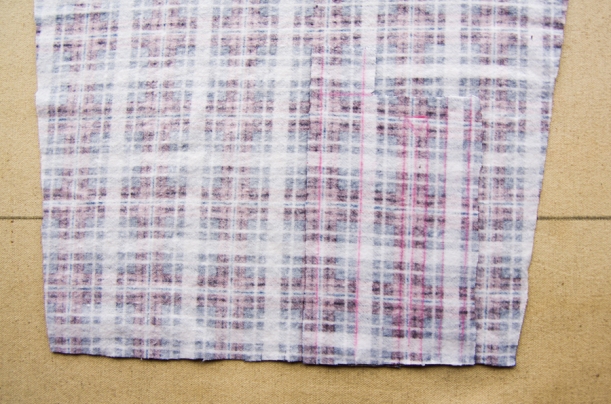
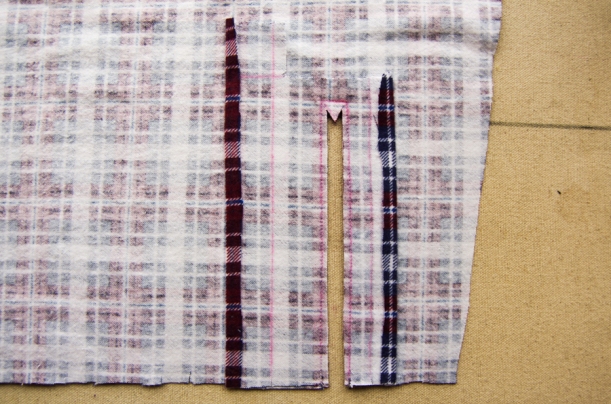
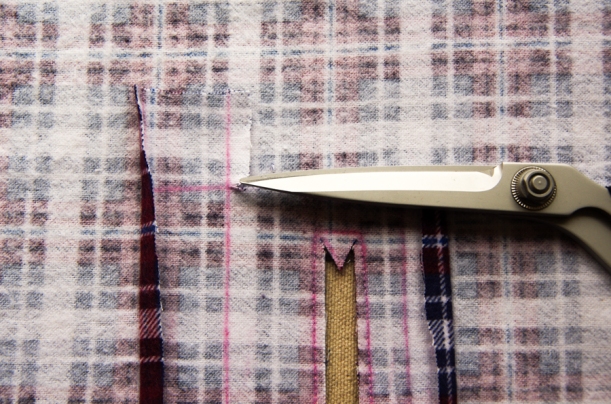
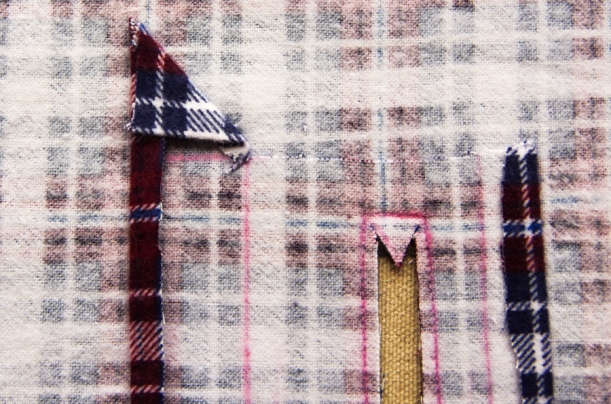
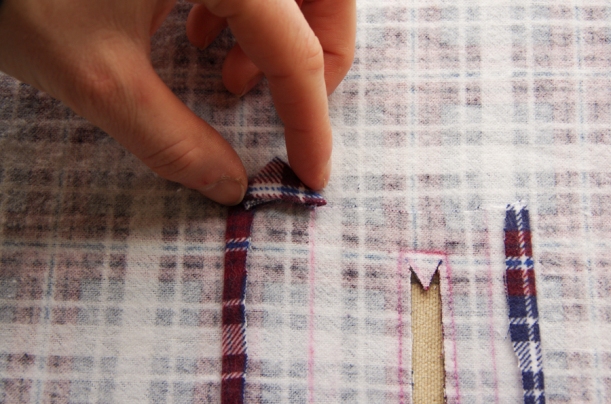
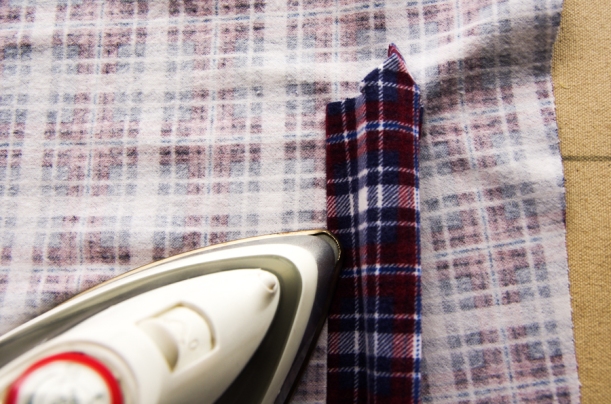
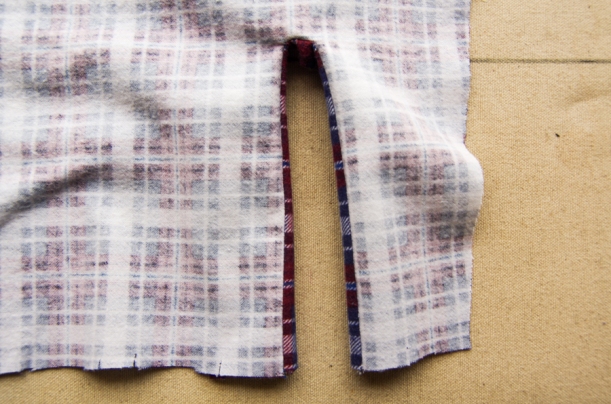
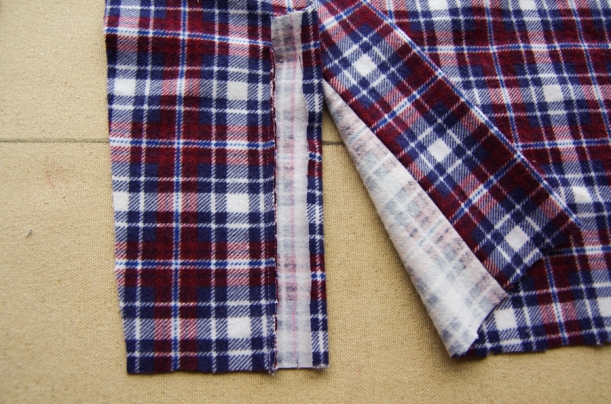
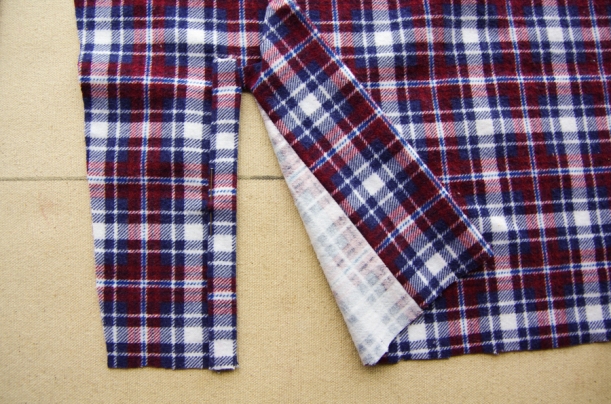
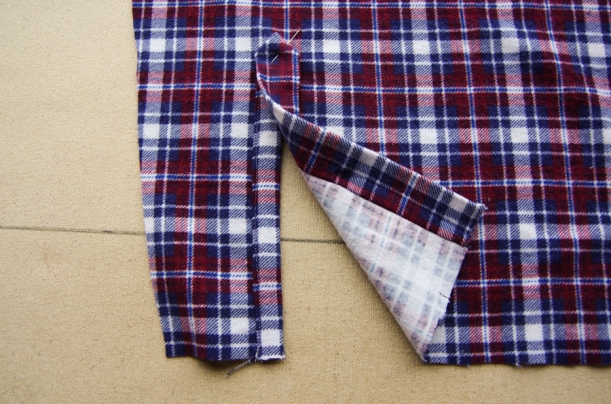
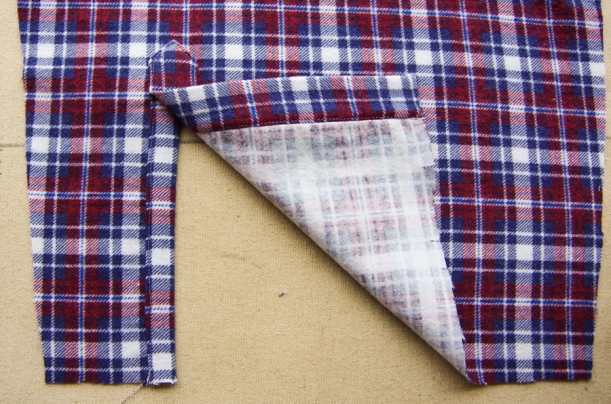
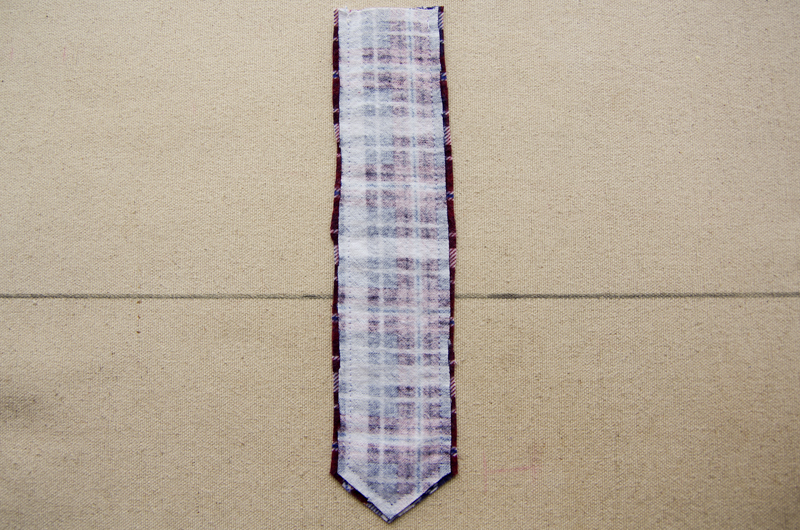
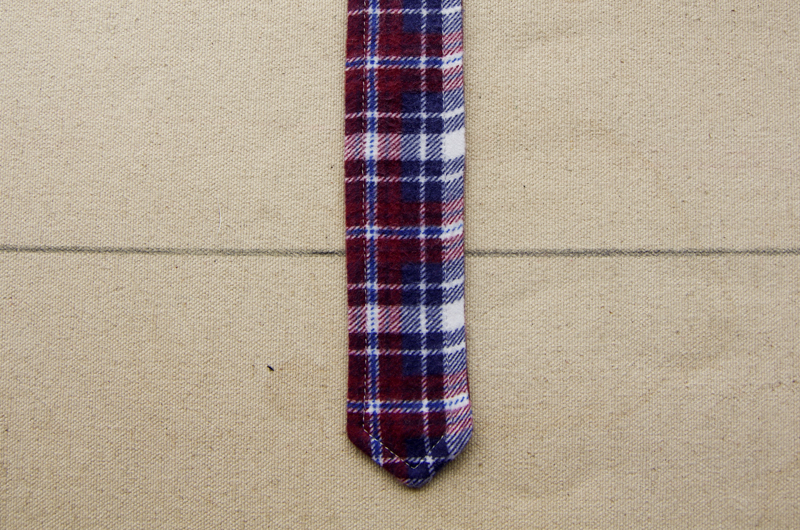
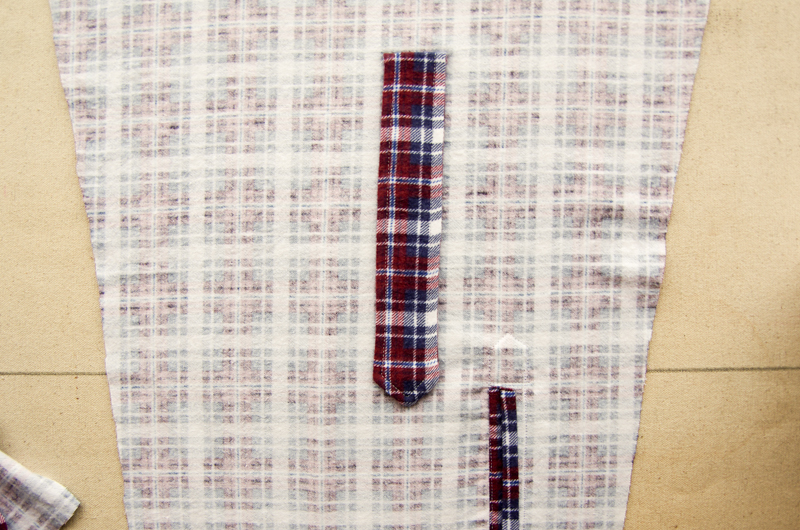
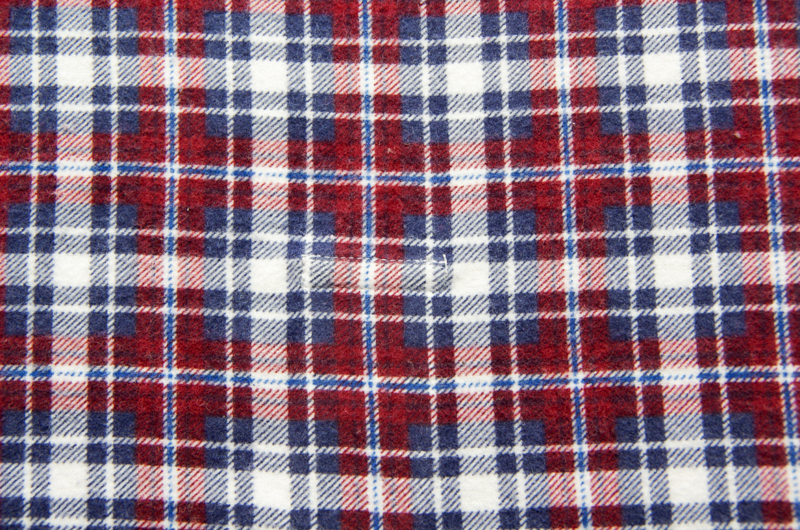
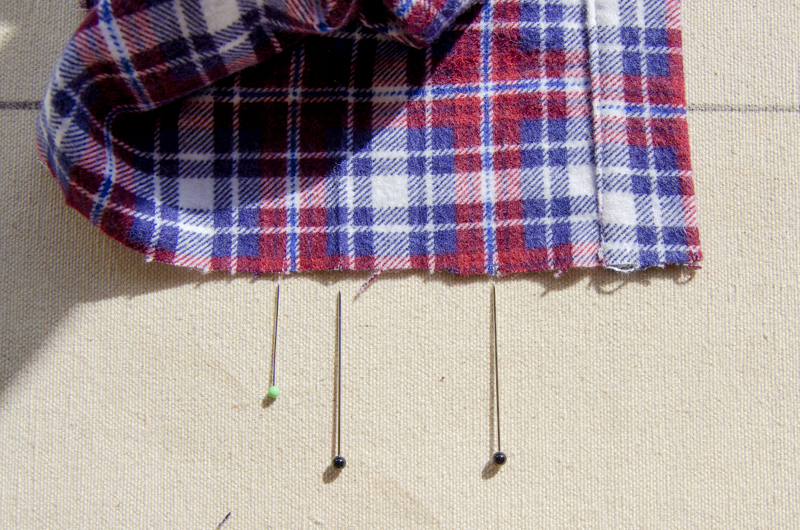
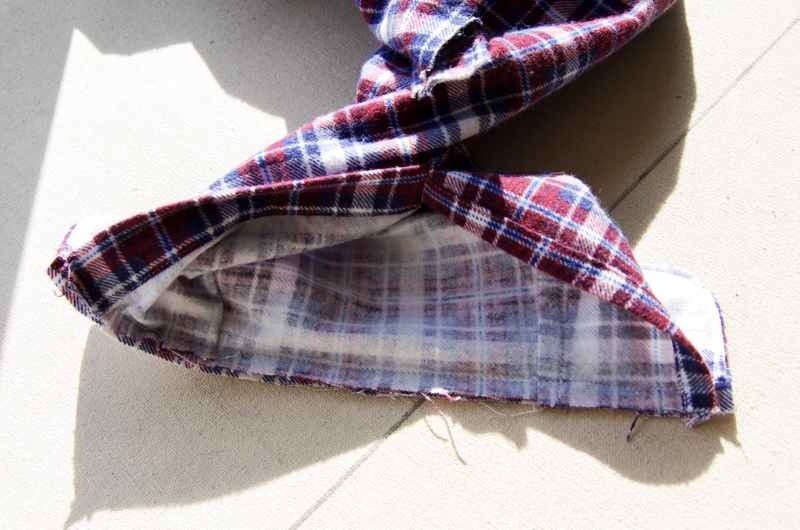
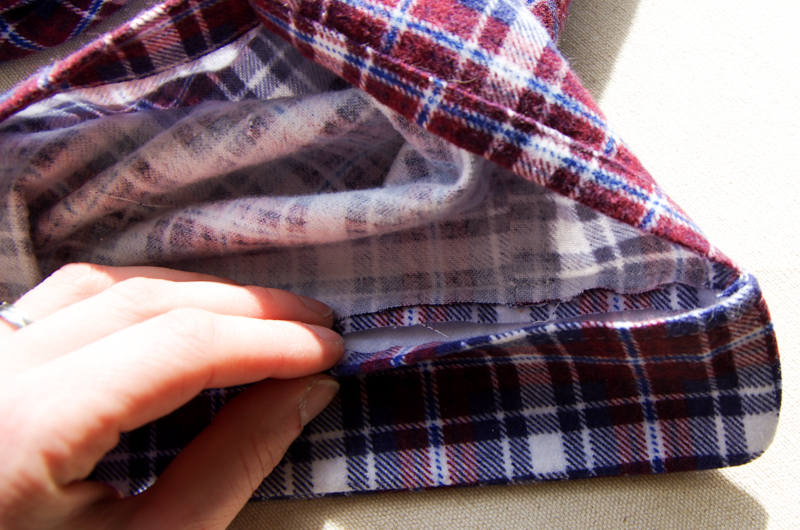
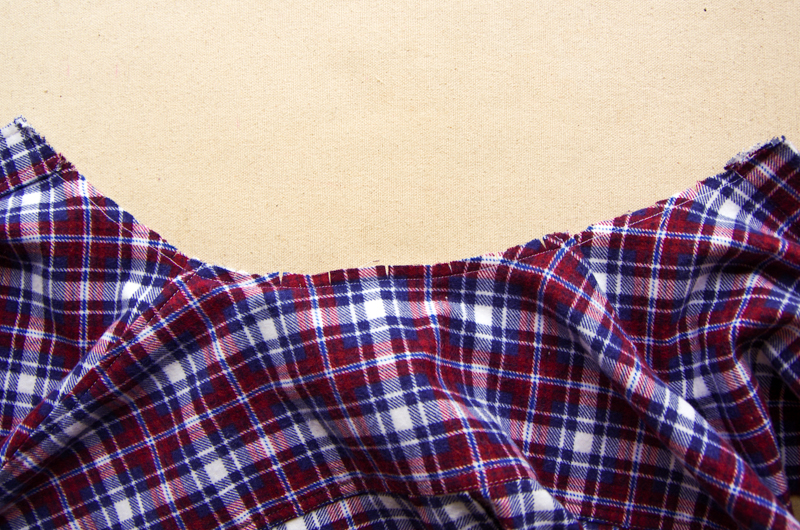
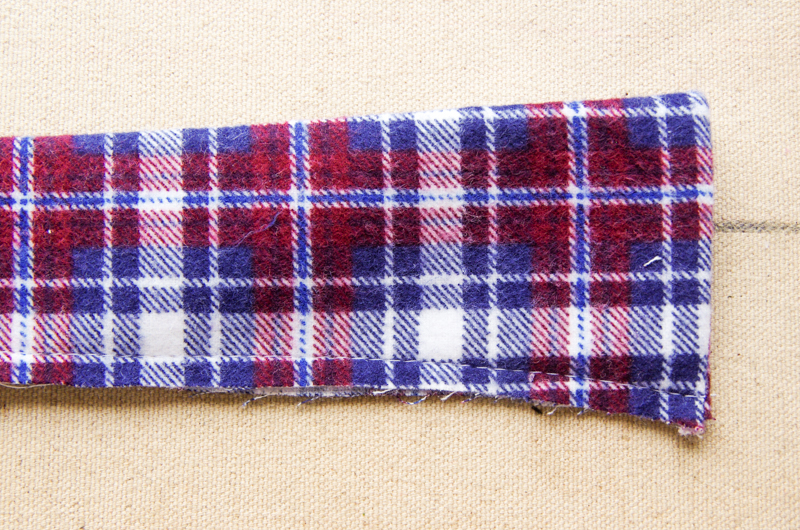
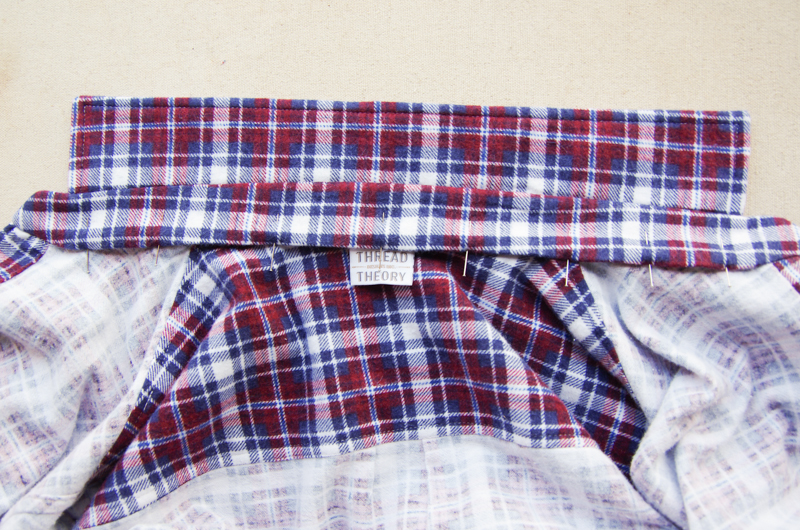
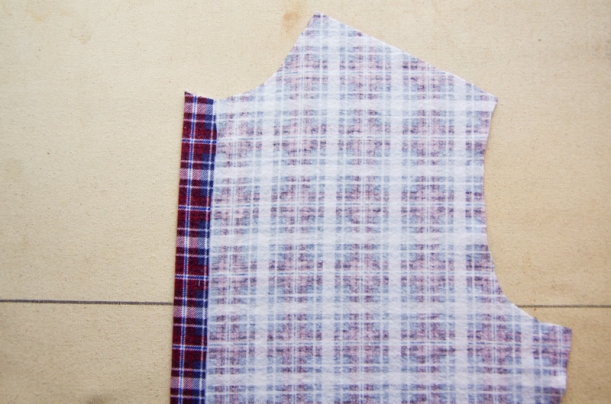
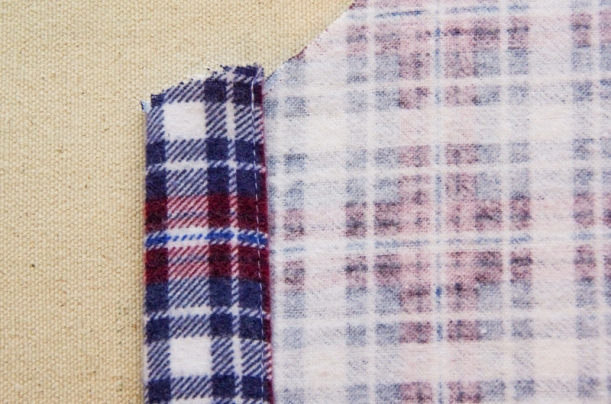
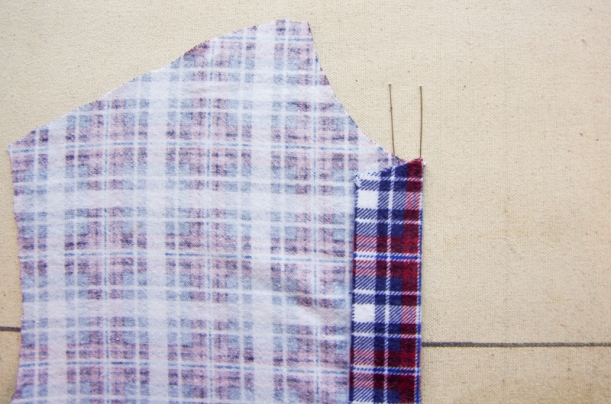
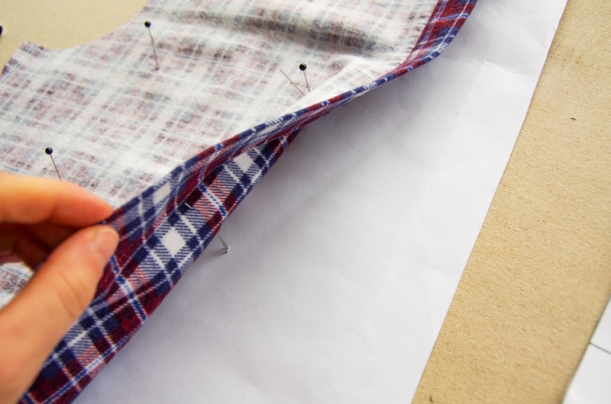
Aside from the Stonemountain & Daughter fabrics, one other fabric will be joining us for the sew-along: I have photographed process shots of the flannel shirt that I made for Matt and blogged about recently – it is a pretty low quality fabric that I purchased locally.  It is probably better suited to pajama bottoms or rag quilts but I picked it specifically because it features a printed right side and a white wrong side – perfect for clearly showing you my stitching lines in photographs.


Now that I’ve shown you my fabric choices, let’s talk about how you can make your own fabric choices:

To make a dress shirt:

  • Look for lightweight pure cottons with a tight weave.
  • Cotton Pique is the best choice for a very formal dress shirt meant to be worn to black or white tie events.
  • The fabric should iron crisply (does it wrinkle crisply when you crush the fabric in your warm hand?  This is a good indication that it will iron nicely).
  • Check that the fabric is opaque.  It is possible to make dress shirts with slightly transparent fabric because men usually wear undershirts beneath dress shirts but you will want to check with the wearer to make sure the level of transparency is comfortable for them.
  • Check out this great post that explains the various weave styles of cotton dress shirt fabric.  You’ll learn the difference between Oxford, Twill and End-on-End.

To make a casual shirt:

  • You can choose from a huge selection of fabric options for casual shirts!  Look for everything from cotton chambray to fairly thin boiled wools.  I have even seen casual shirts sewn in thin french terry fabrics (thanks to a customer who contacted me wondering if this is possible!) – a knit button up is very cool and casual but it would be quite difficult to sew detailed areas with precision when working with a lofty, stretchy knit.
  • A shirt will likely appear more casual if it features a loose weave, a unique texture, or a bold print.
  • If you love raiding the quilting section of the fabric store when sewing dresses, you might like to try doing so for a button-up shirt (if your prospective wearer is inclined to wear unique and bold prints like my Grandpa!).

To make a mock up:

  • Choose a cheap woven fabric of similar weight to your final fabric choice.
  • There are many affordable fabric choices when it comes to thin woven cottons – my favorite are used bedsheets (ratty ones from your linen closet or the thrift store) and broadcloth.  My local fabric shop often sells cuts of broadcloth (around 2m) for as little as $3-$5 CAD.


Interfacing


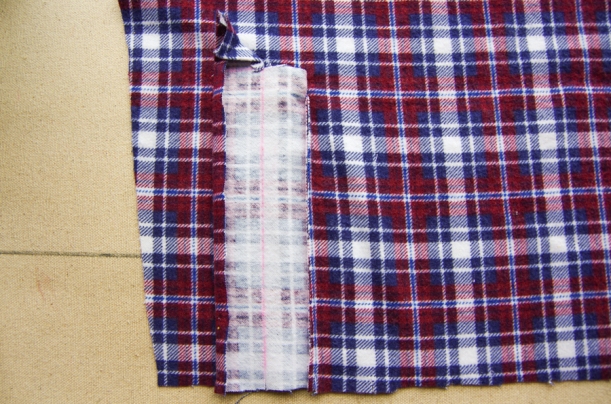
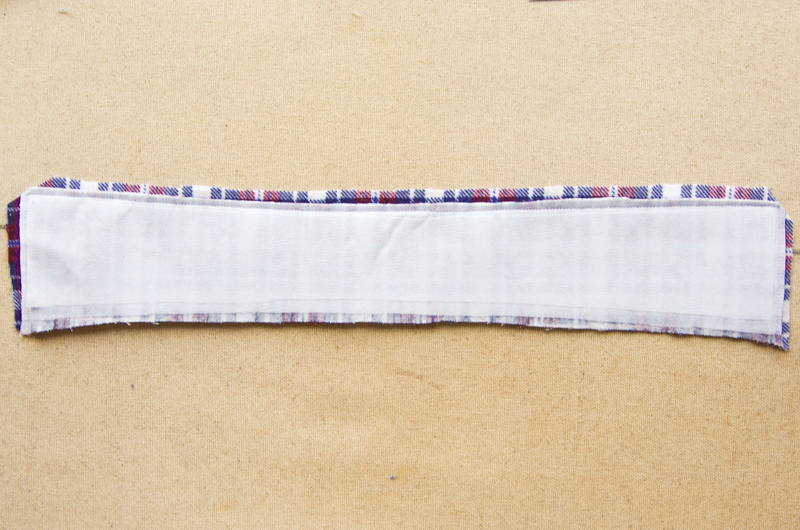
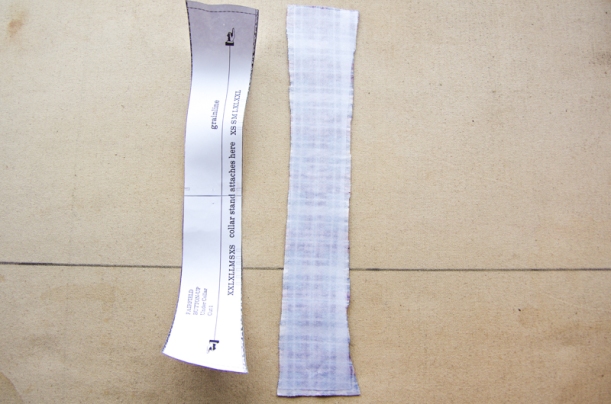
We will be interfacing the collar, collar stand and cuffs.  We will also be interfacing the button placket (only the side where the buttonholes are sewn).

Interfacing is a very important element of a button-up shirt.  In the past it was common to starch shirt collars but, since this is no longer the case, interfacing is relied upon to create a smooth, crisp, stiff look.  It is acceptable to use light interfacings on casual shirts or to even skip interfacing altogether for a very modern, pleasantly rumpled look but, it is by far more common to employ a medium weight interfacing.

I prefer fusible interfacings for shirtmaking because I like a very crisp collar.  I find fusibles (especially the Shirt Collar and Cuff Interfacing that we carry in our shop) add maximum crispness while adding minimum weight.  Just because I prefer fusibles for this situation, doesn’t mean this is the best option!  Feel free to use a sewn in interfacing or, even better, experiment with both styles!  One of my favorite shirtmaking reference books is Shirtmaking by David Coffin.  Within this book you will find that the author recommends cotton muslin as a sewn in interfacing – he sometimes even uses two layers of the muslin to create a stiffer and heavier collar.

Notions

The only other notions you will need for your shirtmaking project are buttons!  I recommend using buttons between 3/8″ and 1/2″ in diameter for a professional look.  It is very rare that a store bought men’s shirt will have buttons that are wider than 1/2″.  Lately I’ve noticed (since I have been fixated on shirts for many months now) that more ‘youthful’ brands tend to use smaller buttons with lower profiles.  When I say “low profile” I mean that the buttons are not very thick.


With this in mind, I designed the Corozo Buttons that we carry in our shop to be low profile and on the small side.  While thin plastic buttons may have a tendency to crack, Corozo buttons can be carved thinly without this risk – Tagua Nuts are extremely dense and strong.  I never see sets of shirt buttons smaller than 1/2″ in my local fabric shop so I hope these Corozo buttons with their 3/8″ diameter fill a bit of a void!  They are the perfect color to use as an accent on a casual shirt.

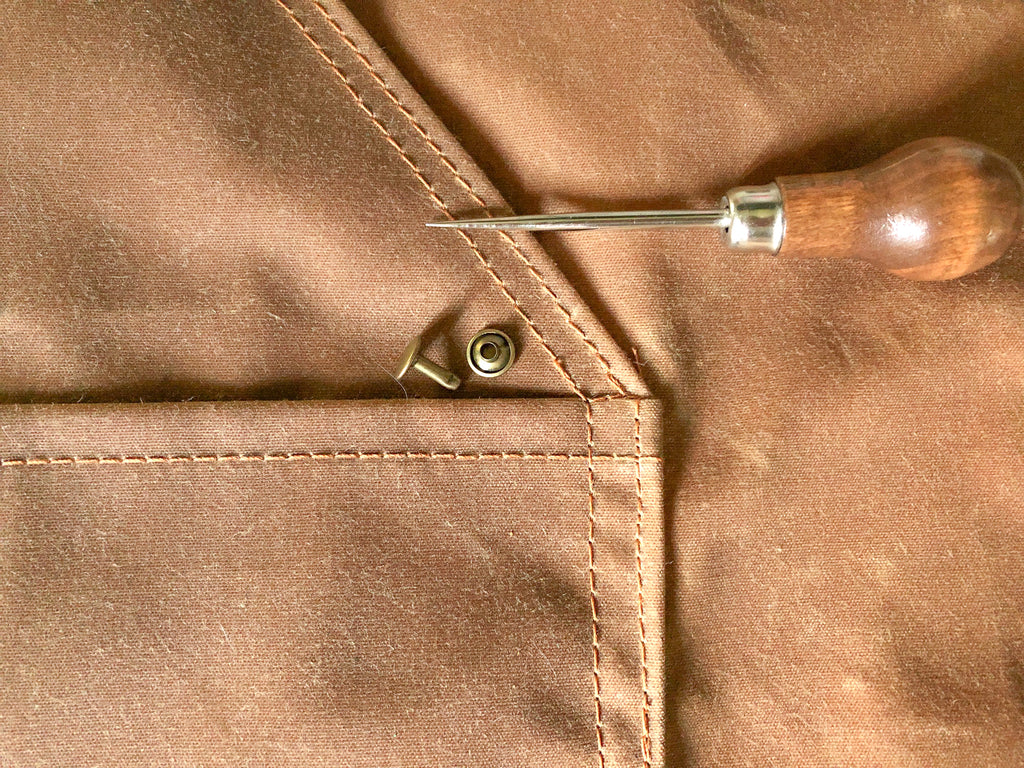
If you are sewing a dress shirt I would recommend using either a button that matches your fabric exactly or a classic ivory color.  If you would like to create a super casual look, pearl snaps are a fun option!

June 28, 2022
Fairfield Button-up Sew-Along: Day 2 - Choose your size and make a mock-up

Fairfield Button-up Sew-Along: Day 2 - Choose your size and make a mock-up

Welcome to Day 2 of the Fairfield Button-up Sew-along!  Today we are going to go into great detail about selecting a size based on our Body and Garment measurement charts.  I’ve photographed each measurement using Matt and his favorite shirt as models.

A note for newer sewists:

Within the instruction booklet I explain which measurements are the most important to take.  If you are fairly new to sewing and fitting garments, you might like to skim over the information in this post but don’t stress about it!  If you find that the information overwhelms you, don’t worry!  Just ignore all of this!

Just take the main measurements that I mention in the instructions (Chest, Shoulder Width, Waist Circumference and Neck Size).  If you pick the closest size and make no adjustments (or just some very basic adjustments, such as lengthening the sleeves), you will still end up with a shirt that fits just as nicely as a store bought shirt.  You only need to immerse yourself in the nitty gritty of measuring if you want to create a tailored fit.

A note for sewists planning to create a tailored fit:


During this sew-along I am going to create a tailored fit by making a mock-up of the pattern and then basing my pattern adjustments on the fit issues that I see when Matt wears the mock-up.  The sample that Matt is wearing in the photo above was sewn with no adjustments to the pattern so you can see it fits him fairly well straight out of the envelope.  I think there is room for a few small improvements (I may adjust the slope of the shoulders) but most of my discussion of fit will be about fit issues you might have instead.


Ok, let’s get measuring!

Measure the Wearer (and compare measurements to the Body Measurements chart:


Chest: Measure the circumference of the chest by circling the tape measure around the widest point.  Keep the tape measure horizontal (I was running back and forth between the camera on timer and Matt so I apologize if my tape measure isn’t nicely horizontal in any of these photos!).


It is usually suggested that you raise the tape measure slightly at the back so that it is sitting on top of the shoulder blades – this way you are accounting for the widest point at center front and widest point at center back.  In the photo above I am moving the tape measure up and down to find the point where the shoulder points protrude the most.


Waist:  It can be a bit difficult to find a man’s waist since there is usually little difference between the waist and hip measurements when compared to female proportions.  I like to measure at approximately navel level.  If the man you are measuring has a bit of a belly, measure at the widest point of the belly.


Hips: Don’t worry too much about this measurement – it is only for reference to make sure that the shirt will be able to button-up to the lowest button if it were to be worn un-tucked.  Circle the tape measure around the widest point of the hips/seat.


Shoulder Width: Measure across the back over the shoulder blades – place the tape measure where the shoulder blades protrude most.  If the man being measured is wearing a well fitting t-shirt I like to use the sleeve seams as an end point.  Make sure to ignore the seams if the shirt is too tight or too loose.  Measure from where you think the sleeve seams should sit.

Height:  This is a nice measurement to have for reference but isn’t especially necessary.  The length of the torso and arms are generally proportionate to height but are certainly not always so.  It is most accurate to sew a mock-up or measure a shirt (as explained below) to determine whether you will need to lengthen or shorten the arms and body of the shirt.

Measure their Shirt (and compare measurements to the Finished Garment chart):


Neck Size:  Keep the shirt buttoned up and circle your tape measure around the inside of the collar stand.  If the neck size does not match our measurement chart, don’t worry!  We will be discussing how to fix this in the next sew-along post.  Neck circumference can really vary from man to man.

For the rest of the measurements, lay the shirt flat on the ground with the back pleat spread gently open (if the shirt has a pleat).  Depending on the style of the shirt, the side seams may sit at the widest point or they may sit slightly towards the front.  If the side seams sit towards the front, measure from the natural fold at the widest point instead of the seam.


Chest Width: Measure from side seam to side seam (or from natural fold to natural fold) at the widest point of the shirt.


Waist Width: Measure from side seam to side seam (or from natural fold to natural fold) at the narrowest point of the shirt.  If the shirt is rectangular and does not have shaped side seams that curve at the waist, measure at approximately half way between the chest and hem.


Center Front Length: Measure from the neckline seam (where the collar stand is sewn to the shirt body) down the button placket to the hem.  This measurement will indicate if you need to adjust the length of the shirt body.


Shoulder Width: Flip the shirt over so the back is facing you.  Measure from shoulder point to shoulder point.  It is handy to examine how the sample shirt, our pattern, the wearer, and our body measurement chart correspond.  If our body measurement matches the wearer’s body measurement but the sample does not match our garment measurement chart, it is likely the wearer prefers less or more ease across the shoulders than our pattern includes.


Center Back Length: Measure from the neckline seam down the center back of the garment to the hem.  This measurement will indicate if you need to adjust the length of the shirt body.


Sleeve Seam: Measure from the armpit, along the seam to the end of the cuff.  This measurement will help you to determine whether you need to lengthen or shorten the sleeve.

Select a Size:

I always recommend that you sew a mock-up without any adjustments to the pattern.  Here are two examples to explain why:

  1. A body measurement does not take into account where mass is distributed.  For example, your chest circumference may be the exact same measurement as the size Medium in the Body Measurement chart but this does not necessarily mean that the shirt will fit perfectly at the chest.  If your wearer has a rounded back, shoulder blades that protrude considerably or perhaps a barrel chest, the shirt will fit him differently than it does our fit model.  You will likely want to make adjustments to the pattern.  As soon as you try the size Medium muslin on you will see exactly where you need to adjust the pattern.
  2. The wearer might have individual preferences about fit.  When you sew up the mock-up and try it on your wearer, ask for their feedback!  For example, my dad always prefers a relaxed fit across the shoulders both for comfort (loads of arm movement) and aesthetic (he prefers the shoulder seam to extend to where the shoulder curves towards the arm).  We draft our patterns and create our measurement charts assuming that the shoulder seam will extend to the end of the clavicle.  When you sew the mock up you will discover any areas that don’t fit the wearer as he prefers.  That way you are adjusting the pattern based on his fit preference rather than our fit preferences!

Sew a Mock-Up:


Fitting based on a mock-up is a very visual procedure that I find to be lots of fun – way more fun than adjusting based on math and drafting prior to making your mock-up!  I look forward to doing this with you on Friday.

I’ve used an old bed sheet from the thrift store for my mock-up.  It was the cheapest one available ($2) and it contained plenty enough fabric for this project.  I much prefer using bed sheets to buying muslin for shirt mock ups because I am giving something a second life rather than requiring fabric to be produced just for the purpose of creating a mock up.  After I’m done with the mock up I cut it up into rag-sized squares to give it a third life!


When sewing a mock-up, don’t spend lots of time on perfect topstitching or design details unless you want the practice before sewing your actual garment.  It is unnecessary to add interfacing unless you would like to test out the interfacing options on a few mock-up collars.


Since I am familiar with sewing the sleeve placket, I didn’t even bother to sew this!  I just left the slit raw.

If you would like to save time and fabric, only cut one yoke, collar and collar stand.  I used two of each item here as the pattern instructs but this isn’t necessary for a mock-up!

Once you finish your mock-up, join me on Friday to try them on the wearer and discuss fit!

June 28, 2022
Fairfield Sew-Along Button-up: Day 3 - Create a Custom Fit

Fairfield Sew-Along Button-up: Day 3 - Create a Custom Fit


Now, let’s talk about fitting!

Many months ago when I asked for your input while I was designing the Fairfield pattern, many of you gave me some insight into fitting issues you struggle with.  The main ones that you mentioned were:

  • A slim build (most patterns include too much fabric around the waist and in the sleeves for your figure)
  • A long body (most shirts are too short to tuck in comfortably)
  • An unusual neck size (thinner or thicker than most shirt patterns)
  • A rounded belly
  • Uncommon shoulder dimensions or shape (narrow, wide or rounded)

We will be addressing all of these today.  If you have a particular fitting puzzle that I haven’t gone over in the post below, please comment and I will try to help you out!


Let’s get started:


Put the mock up on your wearer.  Pin the mock up closed at center front all the way up the the collar stand.  Make sure the pins are pointed away from the wearer’s chin…ouch!

Choose a shirt size-6

Stand back and carefully examine the wearer and mock-up while they stand in a relaxed but fairly upright posture.

Most fitting reference books suggest that you address fit issues in this order

  1. Length issues (from neck to hips and then sleeves)
  2. Width issues (from chest down to the hips) and lastly
  3. Specialized alterations (such as a rounded back or belly).

I have also been taught in various fitting classes to address fit issues from largest/most obvious to smallest (while very generally sticking to the top to bottom rule but bending it if necessary).

Both approaches have worked for me in the past.  I find I change tactics depending on the garment type and the specific fit issues involved.  For example, I will use the first approach if there are very few unusual fit issues involved.  As another example, if a rounded back fit problem is quite severe, I will use the second approach because often adjusting for the rounded back will allow the strained fabric to relax and solve any length issues.

In an attempt to make this post very visual, I’ve pretended that Matt has a few of the following fit issues by pinning the shirt to make it smaller, larger, shorter or longer than it actually is.  I hope these photos help!

First we will look at the fit issue as it appears on Matt.  I like to ‘solve’ the fit issue on the muslin by cutting or pinning to visually get a grasp on how the change will look on the paper pattern.  Then it is just a matter of making the same cuts and adjustments to the paper pattern pieces.

How to fit a button up shirt (20)

When I cut the mock up apart I like to use medical tape or masking tape to hold the various pieces together.  This allows me to measure the open areas once I take the mock up off of Matt so that I can use these exact measurements when changing the paper pattern.

After each fitting explanation I’ve included resources.  These resources are blog posts that focus on one fit issue exclusively.  They go into greater detail then I have here since I am covering many fit issues at once.  Aren’t we lucky to have the internet filled with such amazing, instantly accessible resources?!

Before working with your paper pattern, make sure to draw in all seam lines!  Changes will be made from the seamline and not from the edge of the paper.

Length:


Torso

How to fit a button up shirt (1)

The hem should not become untucked when the arms are raised.  The hem shouldn’t extend beyond the bottom of the pant fly.

How to fit a button up shirt (2)

Solution:  Add or remove length to the shirt fronts, back and the placket interfacing.  Cut along the “Lengthen or Shorten Here” lines.  Overlap the pattern pieces to shorten and tape the pattern pieces to a new sheet of paper to lengthen.

Resources: Check out my tutorial on lengthening and shortening a pattern for all of the details!


Shoulder

How to fit a button up shirt (3)

The shoulder seam should meet the armhole at the end of the shoulder bone (before the shoulder begins to curve towards the arm). It is too long if it extends onto the arm.  It is too short if it causes the sleeve to pull and sits before the end of the shoulder bone.  I’ve pinned the shoulder seam so that it appears too short for Matt in the photo below:

How to fit a button up shirt (4)

Solution: You will need to adjust the shirt front, yoke, and shirt back.

Adjust the Shirt Front:  On the shirt front, cut into the pattern from the middle of the shoulder seam to the armhole seamline (3/8″ from the edge of the paper).  Cut into your armhole seam allowance slightly and leave a “hinge” of paper between the two cuts.

Here is how it looks on the mock-up:

How to fit a button up shirt (5)

And here is how it looks on the pattern:

Shoulder-length---front

  • To create a longer shoulder seam, spread the large cut open and allow the small seam allowance cut to overlap.  Tape the pattern piece to a sheet of paper to fill in the empty wedge and trim.
  • To create a shorter shoulder seam, overlap the large cut and allow the small seam allowance cut to spread open.  Tape the overlapped cut closed, straighten out the shoulder seam by drawing a new line with a pencil and trimming along this line.  Fill in the empty wedge in the armhole seam allowance by taping the pattern to a piece of paper and trimming.

Adjust the Yoke/Shirt Back: You have two choices here.

Shoulder-length---yoke

  1. Cut through the yoke pattern piece and spread it wider or overlap it (just like lengthening or shortening a pattern…but this time the cut is vertical rather than horizontal).  This adjustment is easy but it means you will also need to add or remove width to the shirt back which will change how the shirt body fits.  If you notice the muslin is too baggy or too tight, slashing along the entire shirt back will solve two fit problems at once.
  2. If you are happy with the fit of the shirt body and only want to adjust the shoulder length slash towards the armhole in the same manner as we did for the Shirt Front.  Here is how this looks on the mock-up:

How to fit a button up shirt (7)

And here is how this looks on the pattern:

Shoulder-length---yoke-2

Resources:

Note that both these tutorials use a second cut and hinge to raise the shoulder seam upwards.  This cut may seam a little fancy or confusing (which is why I don’t use it in the method above) but it will make it easier to draw a new shoulder seam because both halves of the cut shoulder seam will still match up fairly well.

Colette Patterns Albion Sew-Along: Adjusting shoulder length with a yoke

Curvy Sewing Collective: Narrow Shoulder Adjustment

Sleeve

How to fit a button up shirt (2)

The bottom of the cuff should sit where the palm meets the wrist (about 1″ below the protruding wrist bone).  Keep in mind that adjusting the fit of the shoulder can change the sleeve length so it is a good idea to fix any shoulder fit problems before finalizing the sleeve length.

Solution: Add or remove length to the shirt sleeve.  Cut along the “Lengthen or Shroten Here” line and adjust as mentioned for the torso.

Resources: Check out my tutorial on lengthening and shortening a pattern for all of the details!

Width:


Back and Chest

As I mention in the instruction booklet, choose your pattern size primarily based on the Chest circumference.  If you try the mock-up on only to find there is not enough arm movement due to strain across the back or that the fabric is pulling across the chest, the simplest solution is to pick larger pattern size.  You can then adjust the more detailed areas of the pattern (the neck size, the shoulder length, the hip width, the sleeve length) to suit the wearer.

Sleeve

We have drafted the Fairfield Sleeve to be fairly slim.  If you notice that the sleeve is too restricting when rolled up to the elbow, you might like to add width to the sleeve.  In the photo below I’ve pinned the sleeve along the seam so that it is about 1.5″ narrower than the actual Fairfield sleeve to show you how a sleeve width fit issue would appear:

How to fit a button up shirt (8)


Solution: Add up to an inch of ease by cutting horizontally across your sleeve pattern at the underarm and cutting vertically the entire length of the sleeve.  Leave a “hinge” at all four seam lines.  Clip into your seam allowances to make it possible to spread the sleeve open.  Spread the vertical cut line open the amount necessary to create some room in the sleeve.  This will cause the horizontal cut line to overlap which will shorten the sleeve cap very slightly.  Add the height back to the sleeve cap by drawing a slightly taller cap.

Here is how the vertical cut appears on the actual mock up:

How to fit a button up shirt (10)

And here are the cutting lines you would need to make on the pattern to add this extra width:

Add-room-in-sleeve

Resources:

I haven’t photographed/illustrated this adjustment thoroughly because the Curvy Sewing Collective has done a bang up job of doing so!  Their tutorials are awesome:)

Waist and Hips

The Fairfield waist curves inwards slightly to suit an ‘athletic’ or slim figure.  I have pinned the mock-up at center back in the photo below so that the shirt appears tight at the hips for Matt – this way you can see what the mock-up would look like if you needed to add width:

How to fit a button up shirt (12)

If the wearer has a fuller figure you have three choices:

Side-seam-adjustment

  1. Adjust the side seam shape so that it is straight or less curved.  This small adjustment will give the wearer a little bit more room but won’t solve any serious fit problems.
  2. Grade up to the next size at the waist and hips.  This is a great choice for figures who do not have a rounded stomach but who are stocky instead of lanky.  Their mass is distributed fairly evenly around their torso.
  3. Use our “Larger Figures” pattern. It is tricky to adjust a pattern to suit men with larger figures because men tend to carry the extra weight distributed mostly towards centre front.  This means it is necessary to angle the centre front in addition to adjusting the side seam shaping.  A button up shirt includes lots of detail at centre front so we made this adjustment for you!

Resources:

Check out our tutorial on grading between sizes – it is very easy!


Now that we have some of the basics figured out, we will move on to special fit issues on Tuesday.  These include, adjusting the neck size, adjusting for sloped or square shoulders, and adjusting for a rounded upper back.

June 28, 2022
Fairfield Button-up Sew-Along: Day 4 - Create a Custom Fit (Part 2)

Fairfield Button-up Sew-Along: Day 4 - Create a Custom Fit (Part 2)


Today we’re talking about specialized fit issues.  Not everyone will come across these issues when fitting their mock-up, but if you happen to do so, you will likely find that it is difficult to find the solution by performing a quick Google search!  There are two problems when Googling these fit issues: 1. They can be labelled a variety of names and can often be solved using a variety of manners. 2. There simply isn’t much written on fitting men’s button-up shirts on sewing blogs (at least I can’t find much!).

This post will give you my preferred solutions and suggestions and will also refer you to other resources that may contain different solutions altogether; that way you can choose the approach that works best for you.


Adjusting the Neck Size

How to fit a button up shirt (13)

When choosing a size for the Fairfield Button-up, I recommend choosing based on the body measurement chart (specifically the chest circumference) and then adjusting the neck to fit the wearer.  We measured the neck size two sew-along posts ago and can now confirm how the neck fits by examining the mock-up.  As you can see in the photo above, Matt can fit two fingers between the collar stand and his neck comfortably.  I consider this to be the correct size – any tighter and the collar stand would become uncomfortable, any looser and it would gape.

Solution:

To change the fit of the neckline on the mock up (before transferring changes to the paper pattern), I find it best to work without the collar and collar stand.  Remove these if you sewed them on or sew a mock-up without attaching these pieces to the neckline.  Stay-stitch around the neckline seam line and then clip up to the neckline through the seam allowance so that the seam allowance does not interfere with the fit.

Before making any changes to the neckline, measure the exact circumference of the neckline along the stay-stitching – measure from one finished edge to the other.

Make the neckline tighter:

Cut a strip of your muslin fabric on the bias.  Wrap it around the neckline to fill in where the neckline gapes.  The raw bias edge will be your new seam line.

Make the neckline looser:

Draw a new seam line at the base of the neck.  Take off the mock-up and stay-stitch using your pencil marking as a guide.  Clip through the seam allowance up to this new seam line and try the mock-up back on your wearer.

Make changes to the paper pattern:

Measure the length of the new seam line on the mock-up with your measuring tape.  Compare this measurement to the original measurement.  Draw the new neckline on the paper pattern so that it measures the same as the mock-up.

Now that your neckline has a new measurement, you will need to choose the collar stand and collar size that suit it – the pieces intended for your size will now be too short or long. Here is a tricky little way of finding a new collar stand size without any pattern manipulation:  Find the difference between the old and new neckline measurements.  Select the collar stand size that is also that much smaller or larger than your original neckline.

Changing-neck-size

For instance, if I were sewing a size XS and I needed to enlarge the neckline 1″:  I would measure outwards from the tip of the size XS collar stand 1/2″ in each direction which would bring me to approximately size L.  I can adjust for any discrepancies of 1/8″ or so by making the neckline 1/8″ larger to fit the collar stand or by shaving 1/8″ off of the stand itself.  I would then select the collar size L to match the new collar stand.

Resources:

Tasia of Sewaholic does a great job explaining how to enlarge your collar pieces to match your new neckline (this is a good approach if you don’t have the option to choose the next size up or down from a graded pattern).


Adjusting the Shoulder Slope

How to fit a button up shirt (14)

A common fit problem for shirts and bodices is the slope of the shoulders – chances are the wearer’s shoulders do not perfectly match the way that the pattern slopes.

If you notice strain radiating from the center front in the upper chest and from the shoulder’s widest point (as you can see in the photo above), then the wearer’s shoulders are likely more square than the pattern.  The mock-up will likely feel too tight across the upper chest.  In the photo we had Matt put his hand behind his back and pull the shirt downwards to exaggerate this problem and make the radiating lines more obvious.

If you notice pooling loose fabric just below the shoulder across the front and possibly the back, this is likely because the wearer’s shoulders slope more than the pattern.  The mock-up will appear too loose across the upper chest.

Solution:

Change the slope of the shoulder seam to match the wearer.  In the photo below I’ve cut along the shoulder seam and part of the armhole to show you how the strain lines disappear when more room is given for the square corner of the shoulder bone.  I didn’t tape thoroughly enough to properly show you that the gap tapers towards the neckline – woops!  If the wearer’s shoulders were sloped more than the pattern you would need to overlap the muslin fabric rather than spreading it open.

How to fit a button up shirt (15)

To replicate this adjustment on the pattern, measure the amount that you have spread or overlapped the muslin.  Draw in your seam lines and then angle the shoulder seam higher or lower to match the muslin measurement.

Change-shoulder-slope.jpg

Now that you’ve changed your shoulder seam you will need to fix the armhole so that it remains the same size and shape as it was before your adjustment.  Raise or lower the armhole at the armpit the same measurement that you raised or lowered the shoulder.  Draw the armhole curve to match its original shape and length as closely as possible.

Addressing Rounded Shoulders

Also referred to as: Slumping Posture, Forward Shoulders, or, when referring to fit issues on women, the fairly offensive ‘Dowager’s Hump’.

How to fit a button up shirt (17)

How to fit a button up shirt (16)

This fit problem features many names, probably because poor posture is quite common.  Many of us tend to slump forward slightly.  If the problem is only slight, you probably don’t need to adjust your pattern.  If the problem is fairly pronounced (as it has always been for Matt), you might be pleasantly surprised to find that fitting the garment to the curve will make your posture look far less rounded!  I have heard stories about older women with very pronounced humps that are almost unnoticeable due to the careful way in which they fit their blouses.

Some people like to adjust for rounded shoulders by changing the shoulder seam position to angle forward to match the shoulders.  This removes fabric that pools in the upper chest and gives a little bit more room across the upper back.  This might be a good solution for you but the solution I have witnessed while taking a couple of fitting classes seems more suitable for Matt (though I haven’t actually tried this adjustment on him yet).  The location of the most curved or protruding area of the back can differ hugely from person to person.  The ‘hump’ can be located at the base of the neck, across the shoulder blades (as it is for Matt) or anywhere in between.

For Matt, the strain in the mock up is caused just as much by his spine curving towards the neck as it is by his shoulders curving forward.  In Matt’s case there are two curves to deal with: a horizontal curve (shoulders curving forward) and a vertical curve (neck sloping forward).

While the strain noticeable in the muslin may make you think that the back is wider than the garment and you just need to add width, you will find, when you cut across the strained area, that the strain does not disappear until you let the muslin gape open.  It is necessary to add extra length to accommodate for the vertical direction of the curve.

How to fit a button up shirt (18)

Luckily, a garment that already has a seam line across the back (a yoke), is quite easy to adjust!  You can add length to the shirt along the horizontal yoke seam. You can add width to accommodate the shoulders curving forward by adding a center back seam to the yoke only.  This vertical seam also gives you a fun chance to play with stripes or plaids (you can create a snazzy chevron effect by cutting each of the yoke halves on the bias). By the way, ignore the slash across the shoulder in the photo below – this was made for a fit adjustment in our last post and does not correspond to the rounded shoulder adjustment.

How to fit a button up shirt (21)

Here are the pattern adjustments that you will need to make to echo the slashes you made in your mock up if the wearer has a similar curve to Matt:

Dowager's-hump-adjustment

Resources:

Adjusting only the shoulder seam placement – tutorial by Maria Denmark

Adjusting for a dowager’s hump (various ways) – article by Sandra Kelly

The Dowager’s Hump adjustment in action by Mainely Dad (with a center back seam rather than a yoke – this allows you to see the finished shape we are attempting to create).


Whew!  I had been looking forward to fitting our shirts because slashing a mock-up to bits has a certain destructive appeal (at least for me lol) and I enjoy this tactile and visual approach to fitting after spending most of my time manipulating patterns on the computer…but I must admit, mulling over the fitting possibilities has a been a bit of a sewing mojo destroyer!  Don’t let fitting overwhelm you.  Just pick as many adjustments as you feel you can achieve and save the rest for future garments – your shirt will still fit better than most shirts off of the store rack!  It can be all too easy to get mired in the need to over fit but we won’t do that!  We’ll charge ahead and cut into our fabric tomorrow!

June 28, 2022
Fairfield Button-up Sew-Along: Day 5 - Cut into your fabric

Fairfield Button-up Sew-Along: Day 5 - Cut into your fabric

Today is a great day for those eager to sew – we are cutting into our actual fabric at last! 

Fairfield Sew Along - matching plaids and stripes-1

The first thing I suggest when cutting out a pattern is to wash and iron your fabric.  It is tempting to skip the ironing step (especially if you’ve just pulled the fabric warm out of the dryer and it is fairly wrinkle free) but it really makes all the difference when carefully matching prints such as stripes and plaids.  A wrinkled selvage can lead you astray when folding your fabric in half and may result in your pieces becoming off grain.  Long story short, take that extra step and iron your fabric before cutting into it!

The cutting layouts included within the Fairfield instruction booklet are intended to be used with fabrics that feature either one solid color or a print that you decide not to match.

If you are working with a fabric like this, go ahead and follow along with our suggested cutting layouts!

You will notice that part of the shirt is cut on folded fabric and part is cut on a single layer of fabric.  When working with a single layer of fabric you will need to work with the wrong side facing you (the right side is against the table or floor).  Working with the fabric placed in this direction will result in a center front button placket that faces the correct direction for menswear!  The Ikat I am using has no obvious right or wrong side:

Fairfield Sew Along - matching plaids and stripes-7

Keep in mind that you will be sewing quite a few flat fell seams on this shirt – I recommend clipping notches outwards rather than snipping into the seam allowance because an intact seam allowance is needed to create a tidy flat fell seam.  Some of the seam allowances are very narrow (1/4″) so it is also safest in these cases to clip outwards (even if they won’t be sewn into a flat fell seam).

Fairfield Sew Along - matching plaids and stripes-11

If you are working with a printed fabric, lay out your pattern pieces to suit your print rather than to match our cutting layouts.  Chances are you will need to deal with one of these three challenges: Matching, design placement, or a one way layout.

Fairfield Sew Along - matching plaids and stripes-2

One Way Layout:

If your print has an obvious ‘up’ and ‘down’ you will need to place all of your pattern pieces facing in a single direction.  Our cutting layouts do not need any adjustments to work for one way prints!

Many shirt patterns suggest that you cut your cuffs and collars with the long edge of each piece aligned to the grain/selvage.  I placed the pattern pieces with the short edges aligned to the grain/selvage so that the flowers or birds (or whatever directional print you have) face the same direction as the sleeves.  The only piece that is not placed in this manner is the under collar – it is so thin that you will likely not be able to see the direction of the print and it is also mostly hidden by the collar.  If you prefer, though, you are welcome to rotate it on your fabric so it’s longest edge runs from selvage to selvage.

Fairfield Sew Along - matching plaids and stripes-3

Design Placement:

Large scale prints with motifs that are several inches wide often need a bit of special treatment and extra fabric.  If you are attempting to match the print (across center front, for example), keep in mind that the design repeats less often than a small scale print.  According to my favorite sewing reference book, Reader’s Digest, Complete Guide to Sewing, a general rule of thumb to figure out how much extra fabric you will need is: “The length of one print repeat should be added for each yard of fabric called for.”

Fairfield Button Up Shirt Test Sewing (11 of 16)

If you decide not to match the prints you can instead place your favorite elements of the print in highly visible areas.  For example, you might like to place the most interesting or most complimentary colored motif across the chest of the shirt so that it highlights the face and is very visible.  You might like to ensure that the left chest does not feature the same motif as the right chest as this can tend to look a bit strange.

Also keep in mind to avoid choosing the same motif to feature on the yoke as on the upper portion of the shirt back – this immediate repetition of the pattern always appears jarring.

When working with a large scale print I like to cut small design elements such as the sleeve placket and the collar out of the least busy areas of the fabric so that the print doesn’t overwhelm the design.  In the photo below, the main column of the sleeve placket is positioned so it avoids the main elements of the ikat print:

Fairfield Sew Along - matching plaids and stripes-6

My Nonnie did a great job of this here – she avoided any large black areas on her sleeve placket:

Fairfield Button Up Shirt Test Sewing (15 of 16)

Matching:

Common choices for men’s shirts include vertical stripes, horizontal stripes or plaids.  If you have chosen one of these you will need to do at least a small amount of pattern matching.  In my opinion, there are three levels of pattern matching:

Fairfield-Button-Up-10

  1. You can take a very careful approach to matching that creates the illusion of a seamless garment by continuing the print across two or more pattern pieces.  In the photo above you can see that I cut the yoke and shirt back to carefully make the distance between the dots continue evenly across the seam line.
  2. You can choose one element of the print to match and ignore the rest – This is what I normally do.  It creates just enough harmony to make the shirt look thought out while preventing you from loosing your mind due to the frustration of cutting out and sewing perfectly matched printed pieces!  I find, for example, that a plaid or other grid style print still looks nice if only the vertical pattern is matched, leaving the horizontal pattern to position itself more or less randomly (or vice versa).  Of course, this is a matter of taste- you might not feel the same way about plaids and grid type prints.
  3. You can choose one main area of the garment (across the center front of the shirt) to match and ignore all other areas of the garment.  As you can see in my quick plaid shirt below, the yoke, cuffs and sleeve placket are not matched but the center front is (or at least it did match until I placed the snaps in the wrong position lol).

Fairfield-Button-Up-63

Fairfield-Button-Up-79


Regardless of which ‘level’ of pattern matching you hope to achieve, here are some guidelines based on the style of print you are working with:

Stripes: Horizontal stripes usually require extra fabric while vertical stripes do not.  This is only a loose guideline – if you are working with very wide vertical stripes, you may need to get more fabric than the pattern calls for because you will need to spread pattern pieces farther apart.


Plaids: Even plaids generally take less fabric to match than uneven plaids.  When working with plaids you must pay attention to both lengthwise and crosswise matching.

Even plaid:

Shirt Sewing Tools-8

Uneven plaid:

Fairfield-Button-Up-78


Now let’s move on to the specifics of print placement.

The Procedure:

This is the order of events when you would like to create a perfectly pattern matched garment.  I’ve adapted these from my Reader’s Digest, Complete Guide to Sewing.

Stop at step 1 for vertical stripes, at step 2 if you aren’t a perfectionist (that’s where I’m stopping today!), and at step 3 if you enjoy a good puzzle and want to put your pattern matching skills to the test!

Working-with-plaids---centering

1. Centering: Decide which lengthwise stripe or bar of plaid will be at the center of the garment.  For a men’s button up shirt, this is along the button hole and button placement markings.  I find it looks nicest to choose one of the smaller bars of plaid when working with uneven plaids – it can look a bit strange to have the widest and brightest bar running down center front like a runway!  For my Ikat shirt I have made sure that the button and buttonhole markings fall on the same double pointed prong radiating from the center circle.  Note that I didn’t line up the center front with the prominent circles to avoid the runway look.

Fairfield Sew Along - matching plaids and stripes-9

Place all pattern pieces so that the center front or center back is lined up with this specific stripe or bar.  When cutting a piece on the fold (such as the back of the shirt, fold the fabric so that the centered stripe is folded exactly in half.

Working-with-plaids---dominant-crosswise-bars

2. Place the dominant crosswise bars:  This is only a concern when working with plaids or crosswise stripes.  Usually the most dominant (brightest and widest) stripe is placed at an area that flatters the body.  For example, if the wearer wanted to make his chest appear broader, you might like to place the dominant stripe across it.  If he wanted to avoid accentuating a wide waist, you would want to avoid placing the dominant stripe at waist level.

Fairfield Sew Along - matching plaids and stripes-8

Pick a notch or our “Lengthen and Shorten Here” lines as a point of reference to ensure that the dominant stripe is circling the body at the same level.

Working-with-plaids---crosswise-matching

3. Crosswise matching: This type of matching allows you to continue a plaid or horizontal stripe across two curved pattern pieces at areas you prefer – for example, you might like the plaid to continue across the chest and into the sleeve as much as possible.  This isn’t really necessary to do but it can look quite fancy if you achieve it!  In order to do this, you need to work with the seam lines rather than the seam allowances.  Draw these onto your pattern pieces.  Then place the notches along the armhole and along the sleeve cap so that they sit on the same section of plaid.  It won’t be possible to match the plaid all along the sleeve cap (near the shoulder seam for example) but it is generally most effective to match near the notches and ignore the rest of the seam.


If all of that has you a touch overwhelmed, approach your printed fabric in a different way – here is how I like to think about cutting it out if I don’t feel like messing around with much matching.

A couple tricks to reduce frustration (and as a bonus you might use less shirt fabric!):  Men’s shirts present some great opportunities for playing with prints so that you don’t have to perfectly match them and so that you don’t have to waste so much fabric between each pattern piece (arguably the worst part of matching prints).

Fairfield Sew Along - matching plaids and stripes-5

  • Cut details on the bias – the pocket and sleeve placket can both be placed randomly on the fabric at a 45 degree angle so that you can utilize some fabric scraps rather than perfectly matching them to the chest and sleeve pieces.Fairfield-Button-Up-69
  • Add a center back seam to the yoke (don’t forget to add a seam allowance) – this way you can cut it on the bias to create a fancy chevron effect. You will only need to match the small vertical center back seam instead of needing to match the long horizontal seam between the yoke and the shirt back.
  • Only cut one yoke and collar stand and two cuffs from your main fabric.  Use a contrast fabric (possibly from your scrap bin) to cut the second yoke and collar stand as well as the remaining two cuffs.  This way you will have more yardage for pattern matching the exterior of the shirt and you will have a contrast fabric on the interior of the shirt (which can give a shirt great hanger appeal!).  Here is a very old shirt – my first button-up! – that I cut in this manner (but not because I was matching plaid obviously):

Contrast cuffs.jpg


To wrap things up, here are a couple of my favorite resources for matching plaids and stripes:

I’ll be back tomorrow with a post on applying interfacing and sewing the button placket!

June 28, 2022
Fairfield Button-up Sew-Along: Day 6 - Apply interfacing, sew the placket

Fairfield Button-up Sew-Along: Day 6 - Apply interfacing, sew the placket

Today we are applying our interfacing and then we will do a bit of origami to create the button placket.

Apply Interfacing

Within the instruction booklet I mention that you can create a stiffly interfaced shirt or a softly interfaced shirt.  I’ve photographed either end of the spectrum here by using the plaid button-up as my stiff example and the Ikat button-up as my soft example

The plaid shirt features very stiff interfacing – I added one layer of our crisp Shirt Collar and Cuff interfacing (back in stock very soon!) to as many pieces as possible.  The Shirt Collar and Cuff interfacing adds a maximum level of stiffness without adding much weight.  Here is where I added it:

The Left Front button placket…

Button Up Shirt Sew-Along (1 of 81)

Both collar stands…

Button Up Shirt Sew-Along (2 of 81)

The upper collar…Button Up Shirt Sew-Along (4 of 81)

The under collar… I toyed around with the idea of using two layers of interfacing on this piece but found it to be too bulky so I later peeled off the top layer that you see pictured below – two layers of interfacing is worth experimenting with if you love the crisp collar look like I do!  Just avoid making your collar too thick since this will make it difficult to achieve crisp points.  Doubling up would work best with a less dense interfacing.

Button Up Shirt Sew-Along (7 of 81)

…and all four cuff pieces (two of which are pictured).

Button Up Shirt Sew-Along (10 of 81)

To achieve a casual softly interfaced look for the light and floaty Ikat, I interfaced as little as possible.  I used our Cotton Fusible interfacing to add a medium level of stiffness while still encouraging the fabric to drape and naturally mold to the body.  I added one layer of interfacing to the following pieces:

The Left Front placket…

Fairfield Sew Along - applying interfacing-4

One collar stand (the one without interfacing will sit against the neck) …

Fairfield Sew Along - applying interfacing-3

The upper collar (I left the under collar without any interfacing)…

Fairfield Sew Along - applying interfacing

Two of the cuff pieces (the two without interfacing will be the facings)…

Fairfield Sew Along - applying interfacing-2

Button Placket

We elected to create a button up shirt with a ‘grown-on’ button placket – this means that the placket is part of each shirt front instead of a separate rectangle of fabric that is sewn to the shirt.  We decided to draft the shirt this way because it is easier to match stripes and plaids across the most important area (center front) with fewer pattern pieces.  Also, the placket will be less bulky because there are no seam allowances enclosed within it.

To create the right front band to which the buttons will be sewn, fold the fabric with wrong sides together at the first notch.  Press along the entire length of the fold.

Button Up Shirt Sew-Along (13 of 81)

Fold one more time at the second notch so that the raw edge of fabric is enclosed.  You’ll see that the neckline will no longer have any strange jagged shapes and will now be one smooth curve.  Press along this entire fold.Button Up Shirt Sew-Along (14 of 81)

Stitch 1/8″ from the folded edge to secure the placket in place.

Button Up Shirt Sew-Along (27 of 81)

Now we are going to sew the Left Front placket – this is the one that the button holes will be added to and it is the one that we have interfaced.  Begin by folding the fabric with wrong sides together along the first notch just as we did before.  Press along the entire length of the fold.

The pins in the photo below indicate notch 2 and notch 3.

Button Up Shirt Sew-Along (19 of 81)

Fold again at notch 2 and press along the entire length of the fold:

Button Up Shirt Sew-Along (20 of 81)

Stitch 1/4″ from the folded edge of the placket (the right edge in the photo above).  Think of this as a pin tuck (a small fold of fabric that is stitched closed).

Fold the placket outwards so that pin tuck faces towards the body of the shirt and press.  You can see in the photo below that this creates a smoothly curved neckline.

Button Up Shirt Sew-Along (24 of 81)

Now stitch down the other edge of the placket (the left side in the photo above) 1/4″ from the fold so that the placket appears symmetrical.


Not too difficult, right?  (Once you wrap your head around the origami folds!)  Tomorrow we will continue to sew by adding our pockets to the chest and sewing the back shaping.  I will be launching some free pocket downloads as well, so stay tuned!

June 28, 2022
Fairfield Button-up Sew-Along: Day 7 - Pockets, Pleats and Darts

Fairfield Button-up Sew-Along: Day 7 - Pockets, Pleats and Darts

Today we will be adding the chest pocket to the Fairfield shirt front and the darts or pleat to the shirt back.


Adding a Chest Pocket

The first step to adding a pocket to the left chest front is to determine it’s placement.  You can either follow our suggested placement markings or you can pick a position that suits the wearer’s proportions.

My favorite way to transfer pattern markings from the paper pattern to fabric is to use pins (you can also use a tracing wheel and transfer paper, tailors tacks or any other method that you prefer).

Button Up Shirt Sew-Along (28 of 81)

To use pins, place your pattern on top of your fabric and stick a pin through each placement marking.

Button Up Shirt Sew-Along (29 of 81)

Flip the pattern/fabric bundle over and use the sharp points of your pins as a guide to place a second set of pins.

Button Up Shirt Sew-Along (31 of 81)

Peel the fabric off of the paper pattern piece.  This will leave you with one set of pins in the fabric and one set of pins in the paper.

Button Up Shirt Sew-Along (32 of 81)

At this point, you can mark the pocket placement with pencil or chalk (using the pins as a guide) or you can just leave the pins in the fabric until your pocket is ready to place on the shirt front.

To prepare the pocket, first fold the top of the pocket under (wrong sides together) 1/4″ and press.

Fairfield Sew Along - sewing a shirt pocket

Now fold the top of the pocket with right sides together along the notched fold line.  Press.

Fairfield Sew Along - sewing a shirt pocket-2 
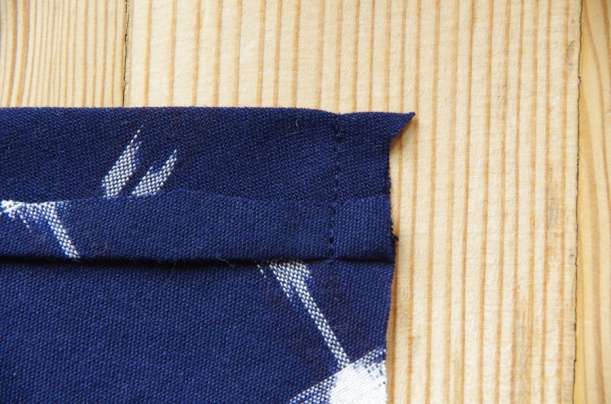
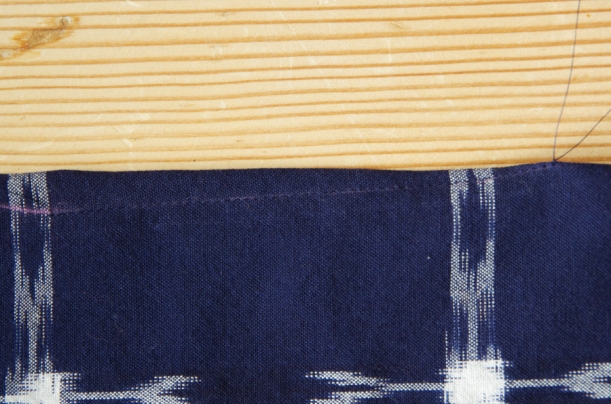
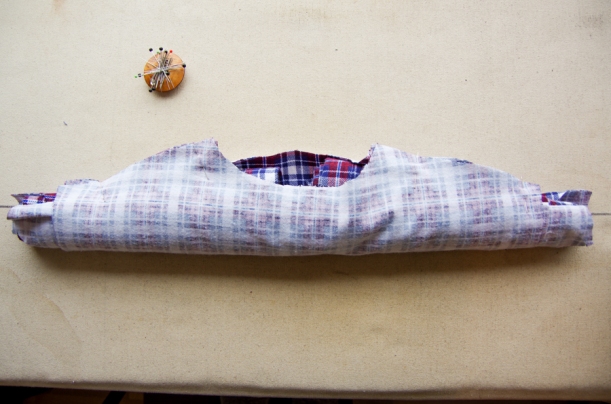
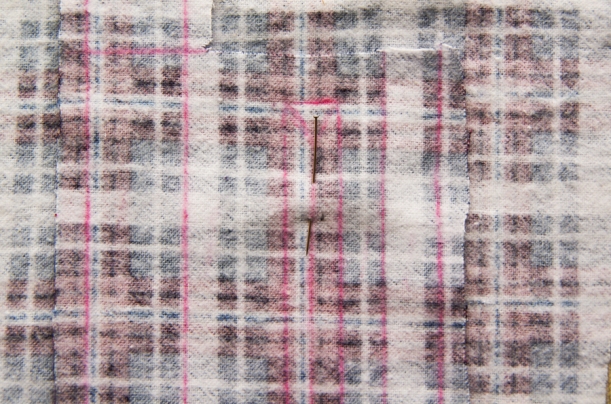
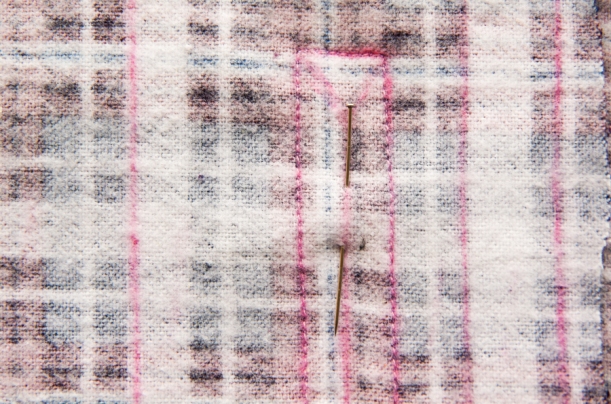
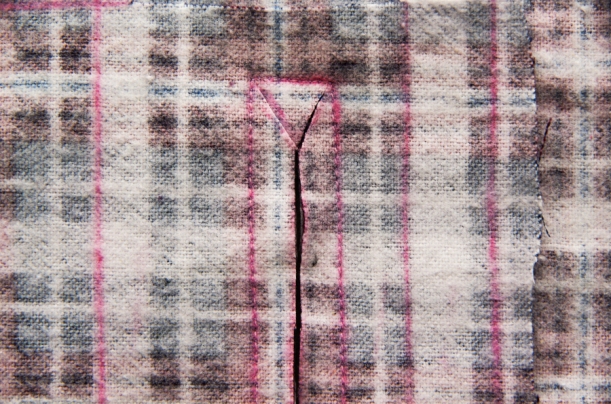
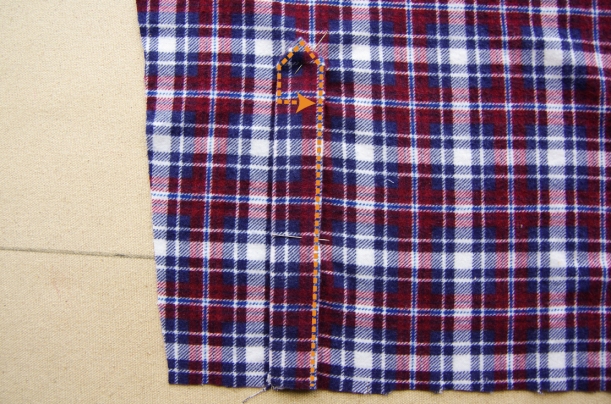
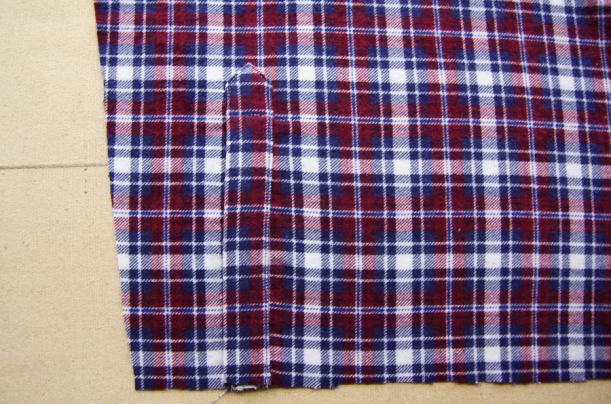
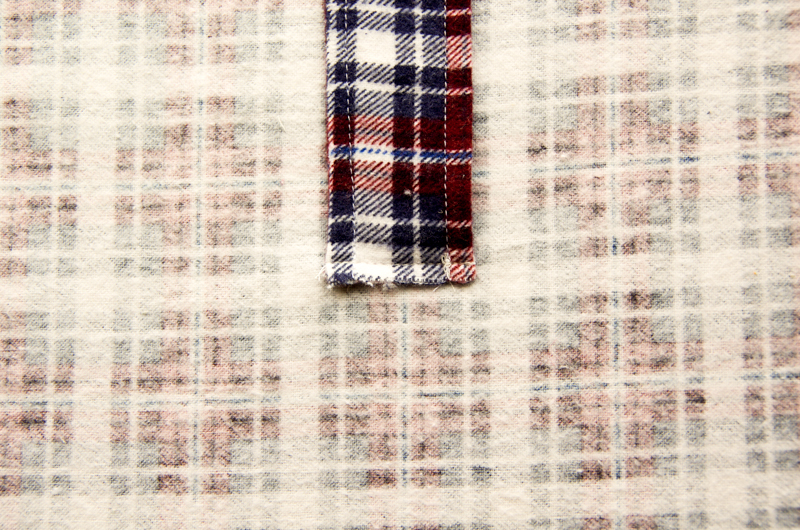
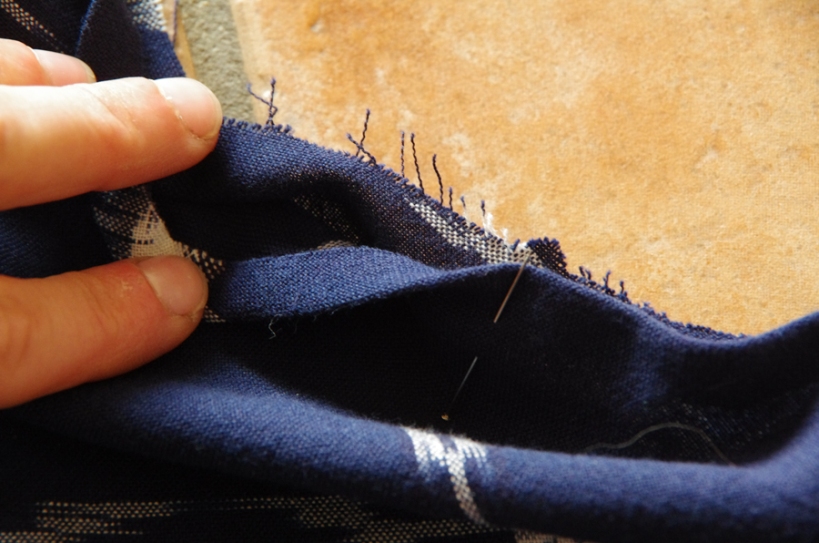
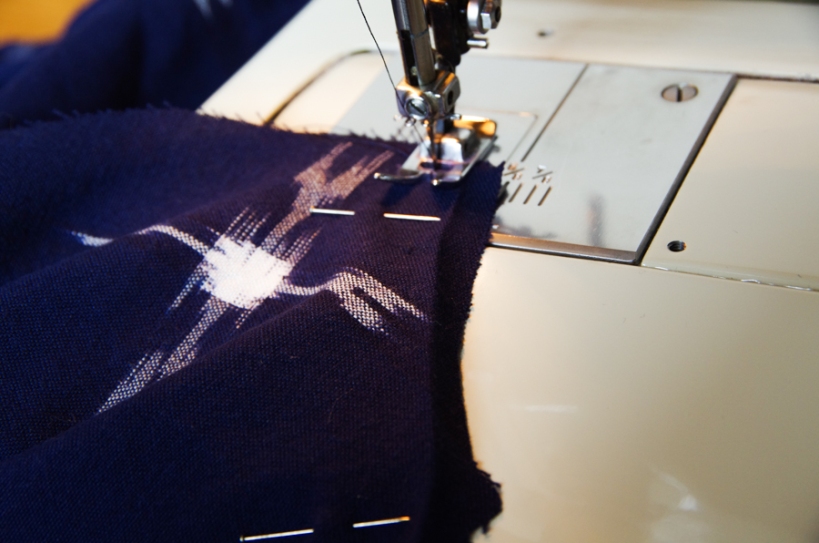
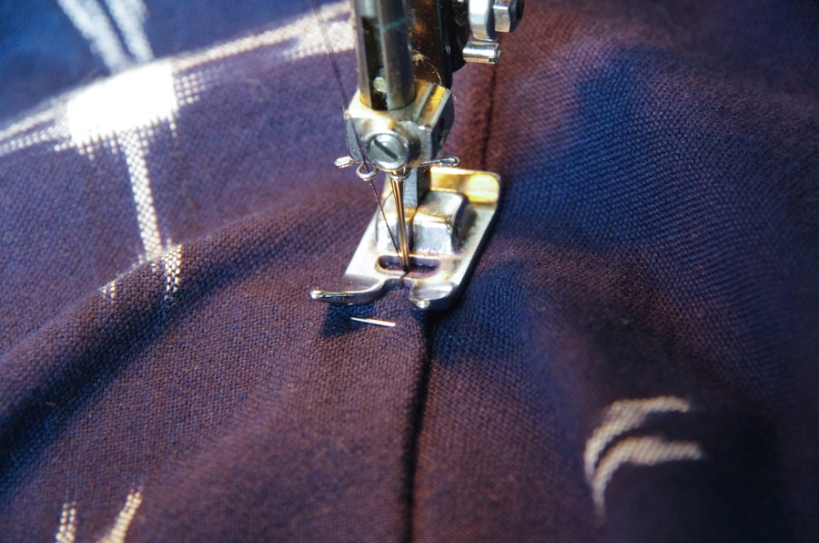
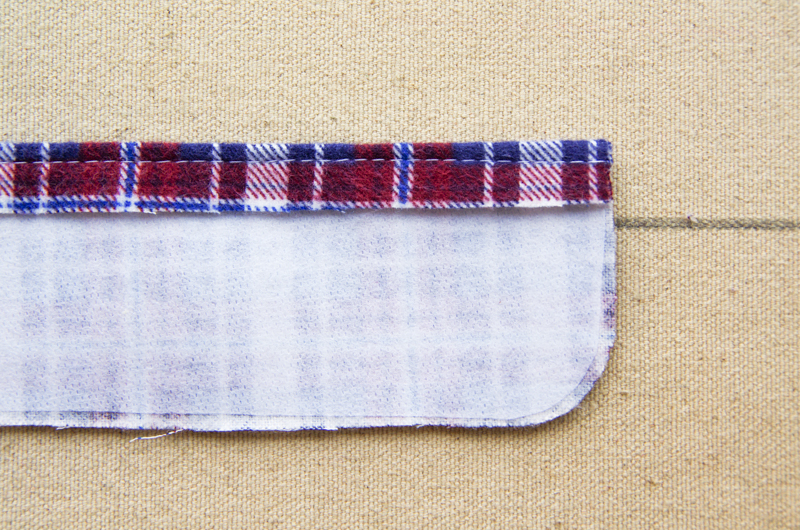
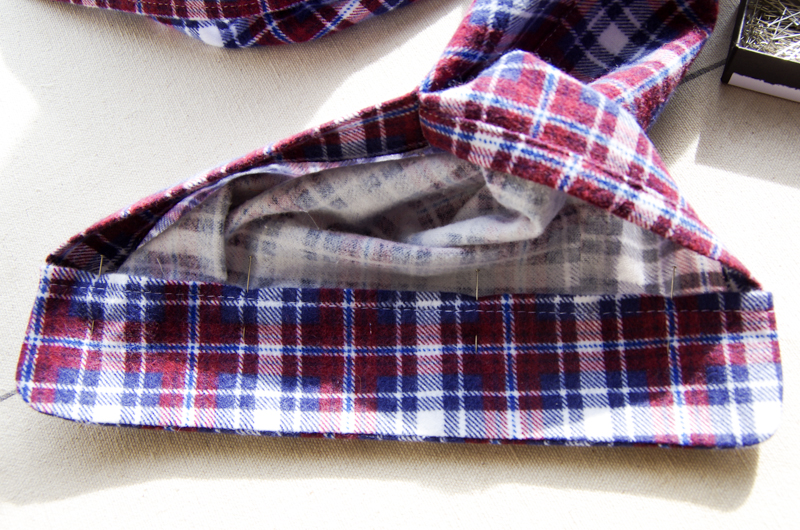
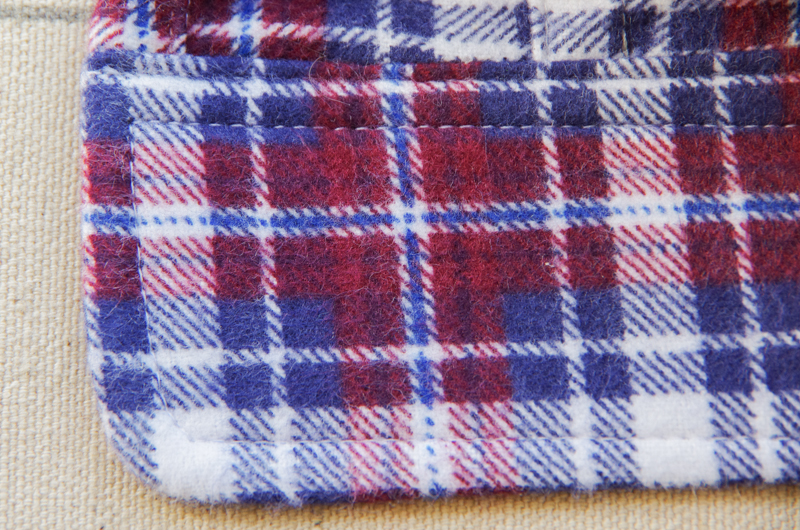
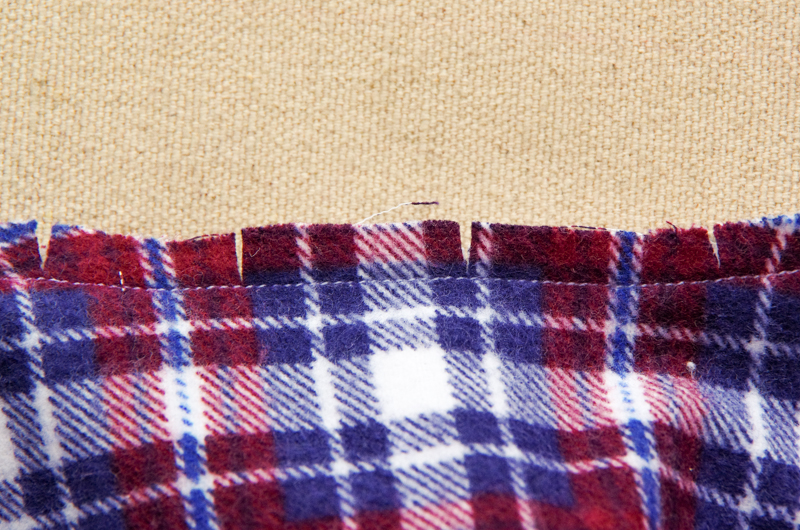
Stitch on either side of the fold using a 3/8″ seam allowance.

Fairfield Sew Along - sewing a shirt pocket-3

Trim the seam allowance to reduce bulk.

Fairfield Sew Along - sewing a shirt pocket-5

Flip the top of the pocket right sides out and carefully push out either corner until it is crisp.  Press.

Fairfield Sew Along - sewing a shirt pocket-6

Fold in the remaining seam allowances 3/8″.  Be careful to keep your seam allowances accurate because wavering allowances will cause the pocket to look noticeably misshapen.

Fairfield Sew Along - sewing a shirt pocket-7

Edge stitch along the pocket top to keep the folded fabric in place.

Fairfield Sew Along - sewing a shirt pocket-8

Place the pocket on to the shirt front using your pocket markings as a guide.  The top corners of the pocket should line up with the top two placement markings.  Position the pocket within the other two placement markings to make sure it sits straight.

Fairfield Sew Along - sewing a shirt pocket-9

Edge stitch the pockets in place – you can use a variety of stitching styles.  The two that I suggest in the instruction booklet are:

Fairfield Sew Along - sewing a shirt pocket-10

A small triangle of stitching at either corner of the pocket and one line of edge stitching.  This results in a clean, minimalist pocket that suits dressier shirts (though ‘actual’ dress shirts generally have no pockets).

Here is a close up for the triangle in each pocket corner:

Fairfield Sew Along - sewing a shirt pocket-11

Or, two rows of stitching – one row of edge stitching and one row of top stitching.  This look is best suited to more casual shirts.

Button Up Shirt Sew-Along (37 of 81)

Here is a close up of how I join the edge stitching and top stitching:

Button Up Shirt Sew-Along (38 of 81)

Sewing the Pleat (Variation 1)

Now that the pocket is finished, let’s move on to shaping the shirt back.  The pattern includes two variations – a small box pleat or two shaped darts.

To sew the pleat, work with the four notches at center back.  Position the shirt back so the right side is facing you.

Button Up Shirt Sew-Along (39 of 81)

Fold the outer notches (indicated by the green pins) inward so that they meet with the inner notches.Button Up Shirt Sew-Along (40 of 81)

Here is what your pleat will look like from the wrong side of the shirt:

Button Up Shirt Sew-Along (41 of 81)

Press the pleat and stitch across the top of the pleat to hold it in place.

Button Up Shirt Sew-Along (43 of 81)

Sewing the Darts (Variation 2)

If you have chosen to sew the darts rather than the pleat, skip the above instructions.

Mark the darts in your preferred manner (I used my pin method) and chalk or pencil in the stitching lines using a ruler to connect the dots.

Fairfield Sew Along - sewing a shirt pocket-13

Pinch the darts in half with right sides together.  The widest point of the diamond should meet and your chalk lines should be aligned.  Pin thoroughly.

Fairfield Sew Along - sewing a shirt pocket-14

To avoid a pucker at either dart end, begin stitching at the center of the dart and work outwards.  Stitch off of the fabric and tie a not (rather than back stitching).  This will eliminate the risk of creating a bubbled dart tip due to bulky back stitching.

Fairfield Sew Along - sewing a shirt pocket-18

Fairfield Sew Along - sewing a shirt pocket-19

Repeat this for the other half of the dart.

Press the darts towards center back.

Fairfield Sew Along - sewing a shirt pocket-20

Fairfield Sew Along - sewing a shirt pocket-22


Are your shirts coming along well?  They will really begin to take shape on Monday when we sew the yoke!  Have a great weekend.:)

June 28, 2022
Fairfield Button-up Sew-Along: Day 8 - The Yoke

Fairfield Button-up Sew-Along: Day 8 - The Yoke

Today we are sewing the yoke on our Fairfield Shirts.  I like to use a method that many sewists lovingly refer to as “the burrito method.”  It results in a yoke seam and shoulder seams that have no exposed raw edges.  Let’s jump right in:

Begin by attaching your yoke pieces to the shirt back.  Lay one yoke piece on your work surface right side up.  Lay the shirt back on top of it with the wrong side up.  Baste the two layers together if you like (not necessary but it’s helpful if you are trying to maintain a perfectly matched print).  Lay the last yoke on top of this with the wrong side up.  This last yoke will be your yoke facing.  It is the visible yoke in the photo below:

Button Up Shirt Sew-Along (45 of 81)

Stitch all three layers together using a 3/8″ seam allowance.

Button Up Shirt Sew-Along (44 of 81)

Grade the seam allowances so that one is 1/8″, one is 1/4″ and one is 3/8″.  This will help to reduce bulk.

Button Up Shirt Sew-Along (46 of 81)

Press both yokes upwards.

Button Up Shirt Sew-Along (48 of 81)

Edgesitch 1/8″ from the bottom of the yoke.  If you would like, you can also topstitch along this seam 1/4″ from the bottom of the yoke.

Fairfield Sew Along - burrito method-3

Now it is time to sew the shoulder seams.  To do this, let the yoke facing drop out of the way. You will only be working with two layers of fabric – the shirt front and the yoke.

Fairfield Sew Along - burrito method-7

Pin the yoke and front shoulder seams.

Fairfield Sew Along - burrito method-4

Stitch these seams using a 3/8″ seam allowance.

Fairfield Sew Along - burrito method-8

Now this is the point in to process when you will begin to understand why it is called the ‘burrito method’!  We will now proceed to wrap up our shirt so it becomes the filling and the yokes become the tortilla.  Let me explain:

Lay the shirt back onto your work surface so that the right side is up (you will be looking at the wrong side of your shirt front).  Make sure that the yoke facing is still drooping downwards.

Roll up the shirt back until you reach the yoke seam.  Roll up the shirt fronts until you are close the to shoulder seams:

Fairfield Sew Along - burrito method-9

Rolling up the shirt back will have exposed the yoke facing.  Fold it upwards and over your rolled shirt.  With a little bit of tugging you will be able to join the yoke and yoke facing shoulder seams with right sides together (and no other shirt fabric in the way).

Fairfield Sew Along - burrito method-10

Pin the shoulder seams and stitch using a 3/8″ seam allowance.  You will be stitching over top of your previous stitching line.  You can grade these seam allowances to reduce bulk too.

Fairfield Sew Along - burrito method-11

To dismantle your burrito wrap, pull all of the rolled fabric through the neckline.  You will be left with finished shoulder seams:

Fairfield Sew Along - burrito method-12

And a gorgeous interior featuring absolutely no visible seam allowances!

Fairfield Sew Along - burrito method-13

At this point you can edge stitch along the yoke shoulder seam if you would like – this is purely optional.  I like to do this extra stitching if I have decided to top stitch and edge stitch the majority of the seams.

Fairfield Sew Along - burrito method-14

And now you’ve completed a proper shirt yoke!

For this tutorial I used the same photographs that I traced to create the illustrations for our instruction booklet.  I thought it might be helpful to show you the photographed version of my instructions.  If you are stuck on any steps and want a different perspective than the photographs and illustrations provide, there are tons of excellent resources available!  Be sure to check these three out in particular:

Video Tutorial by The Sewing Arts Center (it’s very clear!)

Tutorial by Male Pattern Boldness (scroll down past the collar drafting part of the tutorial)

Tutorial by Grainline Studio for the Archer Shirt

I will be back on Wednesday to show you how to sew the sleeve plackets on to your Fairfield.  See you then!

June 28, 2022
Fairfield Button-up Sew-Along: Day 9 - The Shirt Sleeve Placket

Fairfield Button-up Sew-Along: Day 9 - The Shirt Sleeve Placket

Today we learn how to sew a shirt sleeve placket.  There are many approaches to sleeve plackets such as a simple bound edge or a delicate slit with a facing, but the tower placket is the best choice for menswear.  It is very sturdy and produces a great structured appearance.  If you examine store-bought men’s shirts you will likely struggle to find anything other than the classic tower placket on each sleeve.

Fairfield-Button-Up-31

There are a few different ways to assemble a tower placket.  In the fashion industry it is common to use two pattern pieces: The main tower (which is the part of the placket you actually see) and a separate binding piece for the inner half of the slit/vent.

At first we drafted our shirt placket in this manner but, after examination of every shirt sewing pattern that I could find (as well as an extensive search of tutorials on sewing a tower placket) it became apparent that there are more resources available in the sewing community for a different sort of tower placket – the sort that uses only one pattern piece.  We decided to switch to this style of tower placket so that it is easier for you to find help within the sewing community if it is your first time sewing a sleeve placket!

After trying both methods, I have come to the conclusion that both the two piece and one piece tower placket are equal – neither is more difficult to sew and the finished plackets appear exactly the same.  I don’t really know why the industry and the sewing community have developed two different ways to sew a shirt placket but I am curious to find out.  The only reason I can think of is that we sewists prefer to cut out fewer pieces so that we can get sewing sooner!  Probably not much of a convincing reason!  Do you have a better explanation?


My musings aside, let’s start sewing:

The key to sewing a great placket is to mark thoroughly and sew precisely as a result of your markings.

I like to mark on the wrong side of the fabric with colored chalk and a ruler.  To make my markings I pin the pattern piece to the fabric and make tiny snips with my scissors at the top and bottom of each line – make these smaller than 1/4″ so that you are snipping within the seam allowances.

Use a ruler to line up each snip and chalk in your line.  Don’t forget to chalk in the placement line on the sleeve itself!

Fairfield Sew Along - sleeve placket

Place the placket on to the sleeve so that you are looking at the wrong side of both the sleeve and the placket.  Line up the placket’s “Y” shaped marking (between line 3 and 4) with the placket placement line on the sleeve.

Notice that the Main Column of the placket is closest to the center of the sleeve and the inner placket is closest to the back of the sleeve.

Fairfield Sew Along - sleeve placket-2

Pin your placket in place by placing a couple of pins overtop of the “Y” shaped marking.

Fairfield Sew Along - sleeve placket-3

Sew the placket to the sleeve by stitching along lines 3 and 4 to enclose the “Y” shaped marking in a rectangle of stitching.

Fairfield Sew Along - sleeve placket-5

Now here’s the part that may make you a bit nervous if this is your first sleeve placket.  We are going to cut into the sleeve placket to create what is called the “vent”.  This is the slit that allows the sleeve to open up wide enough for the hand to travel through the narrow width of the cuff.

Cut up the “Y” shaped marking:

Fairfield Sew Along - sleeve placket-6

And then follow both branches of the “Y” by snipping to each corner of your rectangle of stitching.  Be careful not to clip into your stitching:

Fairfield Sew Along - sleeve placket-7

To reduce bulk and make folding your placket easier, you can trim the seam allowances that you have just created.  I like to trim to approximately 1/8″.  Leave the triangle of fabric created by the “Y” intact.  Only trim the long straight seam allowances:

Fairfield Sew Along - sleeve placket-8

Okay, trimming is done!  Let’s start the fun part – folding everything until it magically begins to look like a placket!


Fold along lines 1 and 6 – these are the two outer edges of the placket.  Press thoroughly.

If your fabric doesn’t press very crisply or if it frays easily, you might like to keep all of your folds from shifting around by dabbing a little bit of glue on the underside of the fold.  Many people like to use regular white glue sticks and a Q-tip for precision gluing.  Other people like to use double sided hem tape (which can usually be found in the notions section of your fabric store).

Fairfield Sew Along - sleeve placket-9

Clip horizontally towards line 5 so that you can free up the other seam allowance on the main column in preparation to press it over.

Fairfield Sew Along - sleeve placket-10

Now press it over and tack it in place with glue/tape if desired.

Fairfield Sew Along - sleeve placket-11

It is now time to create the attractive triangular point that is often found atop shirt sleeve plackets.  I’ve photographed two ways to do this – the first is the way I have seen in several shirt making books and tutorials.  The second way is the one that my Nonnie (my grandma) developed when she tested out our Fairfield Button-up.  We ended up including it within the instruction booklet because it makes it easier to create an even point!  That being said, her method includes smaller bits of fabric to fold…if you have have troubles with dexterity, you might like to stick the the first method:

Method 1:

Fold on a 45 degree angle so that the top right corner of the column is folded to meet the bottom left corner.  Press thoroughly and secure in place with glue/tape if desired.Fairfield Sew Along - sleeve placket-12

Fold again on a 45 degree angle so that the top left corner meets the bottom right corner.  Shift the fabric around until the point of the triangle appears centered.  Press and glue/tape in place.

Fairfield Sew Along - sleeve placket-13

Method #2:

Fold along the horizontal fold line to divide the extended portion of the main column in half.  Press and glue/tape if you would like.

Fairfield Sew Along - sleeve placket point-2

Fold both the left and right corners inwards so that they meet in the middle.  This will create an even triangular point.  Press and glue or tape if you like.  If you are not using either of these tricks to secure your folds, try temporarily pinning your triangle in place so that it doesn’t become unfolded in the following steps.

Fairfield Sew Along - sleeve placket point-3

Now our point is formed, we are ready to flip the entire placket to the right side of the sleeve.  Prepare to do this by pressing the seams where the placket joins the sleeve:

Fairfield Sew Along - sleeve placket-14

Push all of the placket fabric through the slit/vent.

Fairfield Sew Along - sleeve placket-15

Flip the sleeve so that you can view the right side.  Carefully press along the three sides of the vent so that your sleeve placket is inclined to sit moderately flat:

Fairfield Sew Along - sleeve placket-16

It’s time to finish the inner column now!  Shift the main column out of the way.

Fairfield Sew Along - sleeve placket-17

Fold along line 2 to enclose the vent’s raw edge.  Your inner column will look like binding.

Fairfield Sew Along - sleeve placket-18

Stitch 1/8″ from the edge to secure the column in place.

Fairfield Sew Along - sleeve placket-21

We can now finish the main column.  Spread it out so you are looking at the wrong side of the column.

Fairfield Sew Along - sleeve placket-22

And then fold it in half along 5 to enclose the final raw vent edge.  Press thoroughly so that the column looks even and the point looks symmetrical.

The main column is positioned directly on top of the inner column like so:

Fairfield Sew Along - sleeve placket-24

Edge stitch along the main column from the bottom of the sleeve, around the triangular point, down the other side of the column for about 1″ and then across the main column.  Stitching across the main column encloses the raw edges at the top of both your main and inner column.

Fairfield-Sew-Along---sleeve-placket-23

Give your placket a final press and admire it!

Fairfield Sew Along - sleeve placket-25

Don’t worry, by the time you get to the second sleeve it will seem much less of a mystery and you will fly through it!

Fairfield Sew Along - sleeve placket-26


Resources:

An excellent Threads magazine article that teaches how to sew a precision placket.

This video demonstrates the placket as two pieces (the main tower and the inner binding).

This Sewaholic tutorial demonstrates how a differently shaped pattern piece can also lead to a classic tower placket.


Good luck with your plackets!  Take your time and use your iron lots.  We will continue with our shirts on Friday.  See you then!

June 28, 2022
Fairfield Button-up Sew-Along: Day 10 - Attach Sleeves and Main Seams

Fairfield Button-up Sew-Along: Day 10 - Attach Sleeves and Main Seams

Today we are assembling the optional sleeve tabs and attaching the shirt sleeves to our Fairfield Button-up Shirts.  By the end of your sewing stint today you will be able to try on something that actually looks and fits like a shirt!

Let’s begin with the sleeve tabs.  They are very easy and are a great way to add a casual vibe to a button-up shirt.

Place two sleeve tab pieces with right sides together.  Stitch around all edges (except for the flat top) using a 1/2″ seam allowance.

How to Sew a Buton Up Shirt (28 of 99)

Trim and grade the seam allowances closely to reduce bulk as much as possible.  I like to trim off the excess fabric at each of the three points as well (this isn’t pictured in the photo below):

How to Sew a Buton Up Shirt (29 of 99)

Flip the sleeve tab right side out and press.

How to Sew a Buton Up Shirt (30 of 99)

Lastly, top stitch around the sleeve tab 1/4″ from the pressed edge.

How to Sew a Buton Up Shirt (31 of 99)

Repeat this process for the second sleeve tab.  Now that the tabs are assembled, it’s time to add them to both shirt sleeves!  The sleeve pattern piece includes a placement marking for the sleeve tab.  Transfer this marking to your fabric (I like to use my pin method – I place a pin through the paper pattern and both layers of fabric.  I flip the entire thing over and place a pin in the reverse direction.  I then peel off the paper pattern and make a chalk marking where the second pin has remained.)

How to Sew a Buton Up Shirt (32 of 99)

Place the sleeve tab on to the wrong side of the sleeve.  The point should face upwards and the raw flat edge should but up against the tab placement marking.  Pin to secure it in place.

How to Sew a Buton Up Shirt (34 of 99)

Stitch across the raw edge of the sleeve tab using a 1/4″ seam allowance.

How to Sew a Buton Up Shirt (35 of 99)

Flip the sleeve tab down over the stitching line and press.

How to Sew a Buton Up Shirt (36 of 99)

To enclose the raw seam allowance, we are going to sew a decorative box filled with an optional “x” of top stitching.  Stitch from wrong side of the sleeve using the edges of the tab as a guide.  The box can be as tall as you like – I’ve stitched it approximately 1/4″ tall here but you can make it 1/2″ or even taller if you like.  Stitch carefully because it will be visible on the right side of the sleeve.

How to Sew a Buton Up Shirt (37 of 99)

And that’s it for the sleeve tab (until we add the button and buttonholes later)!  Let’s attach the sleeve to the shirt body now:


Prep the sleeve pieces by folding over 1/4″ of the seam allowance to the right side of the sleeve.

Fairfield Sew-Along - Attach the sleeves (3)

Next we will pin the sleeve to the body of the shirt with right sides together.  The folded edge of the sleeve lines up with the raw edge of the shirt body.

Fairfield Sew-Along - Attach the sleeves (4)

When you add your pins, keep the folded 1/4″ out of the way.

Fairfield Sew-Along - Attach the sleeves (6)

Sew the sleeve to the armhole using a 3/8″ seam allowance.  Don’t stitch the folded fabric into your seam by accident!  I find it helps to gently and temporarily unfold it so that there is no chance of this:

Fairfield Sew-Along - Attach the sleeves (9)

Trim the smaller seam allowance (the armhole on the shirt body) to 1/4″ if you like to make it easier to create the flat fell seam.  If your fabric frays a lot like mine does, don’t trim to closely to the stitched seam or else it will weaken it.

Fairfield Sew-Along - Attach the sleeves (11)

Finish the flat fell seam by pushing the seam allowances towards the body so that the folded sleeve head seam allowance encases the body seam allowance.  Iron carefully to make sure the flat fell seam is consistent in width.  Pin your folded seam allowances in place.  I find the more pins the better at this point!

Fairfield Sew-Along - Attach the sleeves (13)Fairfield Sew-Along - Attach the sleeves (14)

Now you can stitch your tidy package of seam allowances closed so that no raw edges can escape.  In the photo below I am stitching from the right side of the shirt using a very scant 1/4″ seam allowance.  Stitching from the right side makes it simpler to stitch a consistent distance from the seam.  I have also tried stitching from the wrong side so that it is easier to see where the edge of the seam allowance package is.  You can try both ways to see which works for you!

Fairfield Sew-Along - Attach the sleeves (15)

From the wrong side of the shirt you will see a tidy package of seam allowances like this:

Fairfield Sew-Along - Attach the sleeves (16)

From the right side of the shirt you will see one line of stitching and one seam.

Fairfield Sew-Along - Attach the sleeves (17)

Your first flat fell seams on the Fairfield shirt are finished!  Now we will dive right back in to sew the next set of flat fell seams – these ones feature the seam allowances on the right side of the garment and extend all the way from the sleeve seam to the side seams.

Begin by pinning the side and sleeve seams with wrong sides together.  The seam allowances are offset – the back of the shirt has a small 1/4″ seam allowance and the front of the shirt has a full 5/8″ seam allowance.  Offset them by lining up the notches at the hem.

Fairfield Sew-Along - Attach the sleeves (18)

Here you can see the seam allowances offset and the hem notches aligned:

Fairfield Sew-Along - Attach the sleeves (21)

Sew the entire seam from hem notch to the sleeve ends.

Fairfield Sew-Along - Attach the sleeves (22)

Make sure to line up the seams at the armpit:

Fairfield Sew-Along - Attach the sleeves (23)

Press both seam allowances towards the shirt front.  Press the 5/8″ seam allowance in half so that it’s raw edge meets the raw edge of the smaller seam allowance.

Fairfield Sew-Along - Attach the sleeves (24)

Flip the entire package over towards the shirt back and pin it in place.  Stitch along the folded edge of the 5/8″ seam allowance.  Go slowly and tuck any fraying threads into the flat fell package as you go so that all you can see is the tidy fold.

I like to start at the hem and work my way towards the sleeve.  The sleeve feels a bit like stitching in a tunnel or, as my Nonnie described it, like looking down a well, but don’t worry, just sew slowly and shift your fabric often – you will get to the end of the sleeve soon!

Fairfield Sew-Along - Attach the sleeves (25)

Give your flat fell seams a final press and step back to admire how tidy and professional both the outside and inside of your shirt look!

Fairfield Sew-Along - Attach the sleeves (1)

Have a wonderful weekend!  I will be back on Monday with more of the sew-along.

June 28, 2022
Fairfield Button-up Sew-Along: Day 11 - Sew the Cuffs

Fairfield Button-up Sew-Along: Day 11 - Sew the Cuffs

Today we will be assembling and attaching our cuffs!

Let’s begin by basting the sleeve pleat.  The notches to form the pleat are labelled A and B on the sleeve pattern piece.  I’ve color coded these with large black pins in the photo below.

How to Sew a Buton Up Shirt (59 of 99)

Place the sleeve with the placket spread open and the right side facing you.  Bring notch A to meet notch B.  I’ve marked the end of the pleat with a small green pin so that you can see how wide the finished pleat is:

How to Sew a Buton Up Shirt (61 of 99)

Give the pleat a gentle press and baste across the bottom of the pleat.

How to Sew a Buton Up Shirt (62 of 99)

Ok, now we can prepare the cuff!  Place the cuff facing on your work surface with the wrong side facing you.  If you have interfaced only two of the cuff facing pieces, use the un-interfaced pieces as your facings.

Press under the top of the cuff 1/2″.

Button Up Shirt Sew-Along (66 of 81)

If you like, you can baste this fold in place to keep it very crisp and even.  You’ll need to remove this basting later so if you hate stitch ripping you could also glue this in place!

Button Up Shirt Sew-Along (67 of 81)

Place the cuff and cuff facings with right sides together.  Line up the curved bottom edges.

Button Up Shirt Sew-Along (68 of 81)

Stitch around the outside of the cuffs using a 1/4″ seam allowance – begin at the top (sew over the folded seam allowance), and stitch around the curved bottom of the cuff.  Leave the long, straight edge free of stitching.

Button Up Shirt Sew-Along (69 of 81)

Trim and grade the seam allowances to reduce bulk.  Clip triangles of seam allowance off of the curved corners:

Button Up Shirt Sew-Along (71 of 81)

Don’t turn the cuffs right side out yet (I always feel like I should at this point!).  Pin the cuff to the sleeve with right sides together.  The cuff facing will be against the right side of the sleeve.  Keep the cuff facing out of the way of your pins.

How to Sew a Buton Up Shirt (63 of 99)

Stitch the cuff to the sleeve using a 1/2″ seam allowance.  Make sure to keep your pleat pressed correctly and your cuff facing out of the way!  Below is a photo of my cuff facing kept free of my pins:

How to Sew a Buton Up Shirt (66 of 99)

And a photo of the stitched cuff/sleeve:

How to Sew a Buton Up Shirt (65 of 99)

Grade the cuff seam allowance only.  Leave the sleeve seam allowance full length and press both seam allowances towards the cuff.

How to Sew a Buton Up Shirt (67 of 99)How to Sew a Buton Up Shirt (70 of 99)

Here is the tidy package that you will have created!

How to Sew a Buton Up Shirt (69 of 99)

Pin the cuff facing in place over your seam.  If you like, you can baste it in place instead of pinning – this will ensure precision in the next step!

How to Sew a Buton Up Shirt (71 of 99)

From the right side of the cuff, edge stitch across the top of the cuff (remove the basting afterwards if you basted!).How to Sew a Buton Up Shirt (72 of 99)

Now finish your cuff by top stitching around the entire cuff (1/4″ from the cuff edge).

How to Sew a Buton Up Shirt (75 of 99)

And we are done for the day!  On Wednesday we will add our collar and on Friday we will finish our shirts.

How are your shirts looking?  Please comment if there are any unclear steps for you – I would be happy to elaborate:).

June 28, 2022
Fairfield Button-up Sew-Along: Day 12 - The Collar

Fairfield Button-up Sew-Along: Day 12 - The Collar

Today’s post will cover the last big hurdle when sewing a button up shirt: the collar. Let’s begin:

First, let’s stay stitch along the shirt neckline using a scant 1/4″ seam allowance.  This stay stitching serves two purposes: 1) It prevents the neckline from stretching out as we work with it and 2) it allows us to clip into the seam allowances without the fear of fraying beyond the allowance.

Button Up Shirt Sew-Along (72 of 81)

Clip every 1-2″ along the neckline up to your stay stitching.  This will allow you to lay the neckline out flat and fairly straight.

Button Up Shirt Sew-Along (73 of 81)

Now to assemble the collar:

Pin the upper collar and under collar with right sides together.  You will notice that the under collar is very slightly smaller than the upper collar – this is to provide enough room in the upper collar for the collar to curve gently over the collar stand.

Button Up Shirt Sew-Along (74 of 81)

Stitch around the two sides and the long top edge of the collar using a 1/4″ seam allowance.  Leave the bottom of the collar (where the collar attaches to the collar stand) free of stitching.

Button Up Shirt Sew-Along (76 of 81)

Grade the seam allowances and trim the corners to reduce bulk.

Button Up Shirt Sew-Along (77 of 81)

Turn the collar right side out and press.  When I press collars I like to gently push out the corners with a point turner (or chopstick) and then ever so slightly roll the seam towards the under collar.  This will ensure that the seam doesn’t roll to the upper collar during later steps.

Button Up Shirt Sew-Along (78 of 81)

Pull the two remaining raw edges so that they are even and the upper collar is relaxed and slightly bubbled.  Baste the raw edge closed using a 1/4″ seam allowance.

Button Up Shirt Sew-Along (81 of 81)

Finish prepping your collar by top stitching 1/4″ from the collar edge around the two sides and the top of the collar.  Don’t forget to complete this step!  I have forgotten to do this a couple of times and forgot to take a photo of the stitching this time.  I don’t know why this step slips by me so frequently!  Here’s a photo of a finished collar so you can see the 1/4″ top stitching:

Fairfield-Button-Up-40

Now we can attach our collar stand and collar to the shirt!  Exciting!

Pin one collar stand (the interfaced stand if you only interfaced one of the two collar stands) to the shirt neckline, right sides together.  Align the notches with center back and the shoulder seams.  The collar stand should extend exactly 1/4″ beyond either end of the shirt neckline (this is the seam allowance).

Fairfield Sew Along - sew a shirt collar

Stitch across the neckline using a 1/4″ seam allowance:

Fairfield Sew Along - sew a shirt collar-3

Grade the seam allowances (I trimmed the neckline seam allowance and left the collar stand allowance whole).  Press the allowances towards the collar stand.

Fairfield Sew Along - sew a shirt collar-4

Pin the collar to the collar stand so that you can see the upper collar.  The under collar will be against the right side of the collar stand.  The collar will fit between the two notches.

Fairfield Sew Along - sew a shirt collar-5

Baste the collar in place using a 1/4″ seam allowance.

Fairfield Sew Along - sew a shirt collar-6

Prepare the remaining collar stand by pressing under the 1/4″ seam allowance along the bottom of the stand (this is the part that attaches to the shirt).

Fairfield Sew Along - sew a shirt collar-7

Pin the remaining collar stand atop the collar so that the right side of the collar stand faces the upper collar.

Fairfield Sew Along - sew a shirt collar-8

Begin at one end of the collar stand exactly where the stand extends beyond the shirt placket.  Stitch around the collar stand using a 1/4″ seam allowance and end exactly at the other shirt placket.

Fairfield Sew Along - sew a shirt collar-10

Here’s how it looks from more of a distance:

Fairfield Sew Along - sew a shirt collar-11

Complete the collar by carefully pinning the folded edge of the collar stand over your neckline seam.  I like to use quite a few pins for this job to make sure the collar stand won’t slip or stretch.

Fairfield Sew Along - sew a shirt collar-12

You can choose at this point to baste the collar stand fold in place and then stitch from the right side of the garment or you can stitch from the wrong side of the garment.  I usually stitch from the wrong side of the garment because Matt wears his shirts open at the collar – this means the most visible stitching is either tip of the collar stand on the insiderather than the outside.

Either way, edge stitch 1/8″ from the collar stand edge around the entire stand.  If you like, you can tuck a garment tag into your collar stand bottom before you edgestitch:

How to Sew a Buton Up Shirt (94 of 99)

Finish your collar by giving it a thorough press.  I like to encourage the collar to shape nicely by pressing on a tailor’s ham so that the collar rolls over gently and the collar stand takes the rounded shape of the wearer’s neck.  You can see the bend in my collar in the photo below:

Fairfield Sew Along - sew a shirt collar-13

I encourage you to explore a different method of creating a shirt collar with each shirt you make.  There are many interesting methods, a few of which are well documented online.  They all use the same pattern pieces so you can work with all of them while sewing up a batch of Fairfield Shirts.  Pick the one that suits you best or meld together your favorite elements of each for your own unique method!

Here are some resources for different collar construction methods:


How did it go?  Does your collar look super professional?  I hope you are proud of yourself!  This is some pretty fiddly and precise sewing you have accomplished!

June 28, 2022