
Sew-along with us!
Perhaps you'd like some company while you sew? We've sewn up each of our patterns and photographed each step along the way. Find the pattern you're after in the filter drop down below left.
Sew-Alongs
Camas Blouse Sew-Along: Day 9 - Closures and Styling
We’re on the home stretch! Today we are sewing on our closures and I will show you my new Camas Dress and Cardigan in action! On Friday I will show you a parade of Camas Blouses that have been popping up all over the internet. I hope yours will be included in the parade – to be sure that it will, email me photos at info@threadtheory.ca.
Adding Closures

There are many ways to finish off the Camas Placket – some of which are detailed in the instruction book and some of which I will mention today. Here are the ways I’ve come up with. Maybe you have thought of others?
- Add buttonholes to the right placket (if you were wearing the blouse) and sew corresponding buttons to the left placket.
- Add snaps – I especially like pearl snaps!
- Sew the buttons through both plackets to create false buttons. You could optionally topstitch the placket closed before doing this to avoid any chance of gaping or peek-a-boos.
- Topstitch the placket closed and avoid any closures. This would be a very clean, minimalist look.
- Leave the placket open to create a cardigan.
- Add a tie belt made from self or contrast fabric to accompany buttons as a blouse or dress or use only the belt (no other closures) to create a robe style cardigan.
For the two garments that I sewed throughout the sew-along, I chose to leave one without closures and added false buttons and a tie belt to the other. Here is how I added false buttons without stitching the placket closed:

I topstitched the inner placket in place before addressing the issue of closures (as you can see in the last sew-along post). This differs slightly from the instruction booklet where I instruct you to stitch the two plackets together while topstitching.

Place the right placket (if you were wearing the blouse) over the left placket and pin together. Make sure the hem is even.

Mark your button placement on the right placket. If you are sewing the pattern without lengthening it you can use the button placement markings from the pattern piece. If you have lengthened the blouse as I have here, you will need to determine the button placement yourself. You can follow the spacing provided on the pattern (6.35 cm/ 2.5″) or choose your own. It might be a good idea to try on the blouse so you can see where the top button should be placed.
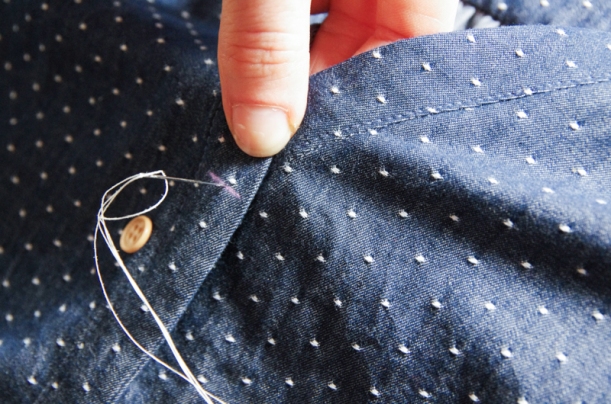
Pierce your needle through both plackets when stitching each button in place. Follow mytutorial on sewing on a button if you are often frustrated by hand sewn buttons popping off!
And you’re done! WOOT!!! Wear that gorgeous Camas for your Valentine’s festivities…or…you might find yourself grabbing it from your closet just about every day because it is so comfortable :).
Here are my finished Camas garments:

Meet the Camas shirt dress! I sewed this using a lovely dotted cotton chambray fromStylemaker Fabrics.

I lengthened the Camas as I instructed in our post on Camas mods. I kept the side seam very straight to get the slim silhouette I was imagining.

I also lengthened the sleeves slightly so I could roll them up to create cuffs:
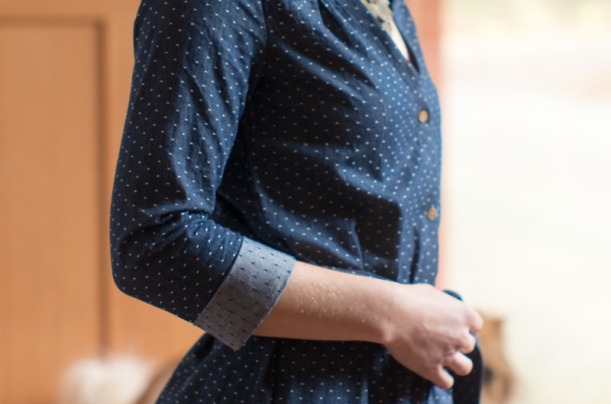
The buttons I used are tiny little 3/8″ shirt buttons made from Tagua Nut. You will be finding those in our shop when we launch an upcoming menswear pattern – the button up shirt! I really like the creamy color for casual shirts like this one. I find that these thin buttons with their subtle engraving look more subtle and professional than the thick shirt buttons that I often find in my local fabric shop.

When I lengthened the blouse pattern I kept the original hem curve. I really like how this shaping looks on a shirt dress!

I created a belt out of two strips of self fabric. I didn’t bother with belt loops – I had originally intended to add thread chain belt loops but when I tied the belt around my waist I felt those were really unnecessary. The fabric does not shift or slip so there was no reason to require thread loops to keep the belt in place.

Since this shirt dress is sewn using a woven fabric with pretty much no drape (I know, this is NOT what I recommended in the fabric selection post!) I find the neckline rides up and gapes a little. I tried moving around by calling our pup, Luki, to test how the dress provided coverage despite the fact that it doesn’t want to sit flat against my neckline. I think it provides tolerable coverage:

It’s a bit annoying that I have to pull the dress back down over my chest after I move my arms up though. I think this problem would not occur if the fabric had more drape and wanted to match the contours of my body.

When planning to sew this version of the Camas in a woven, I raised the underarm seam and used a smaller seam allowance at the elbow to accomodate for the fabric having no stretch. I detailed how to do this in our post on sewing with woven fabrics. I didn’t make any other fit adjustments despite the fact that I have a very broad back and straight shoulders. Looking at the photo below I can see I probably needed to add 1/2″ of width across the back. This is a pretty standard adjustment for me. I haven’t done this for past Camas Blouses that I have sewn using knits because I did not notice a problem with the fit across the back. Even with this woven version, the problem is exceptionally minimal – I have full arm movement and only notice a small amount of tightness when I put my arms directly in front of me. I don’t think it’s something I’m very worried about!

Now I’ll show you the second blouse I made during the sew along! This one was sewn as an open front cardigan.

I used the super soft Canadian-made black interlock fabric that we carry in our shop for the front of the cardigan and the sleeves. It makes a nice spring cardigan because it is quite light weight.

For the yokes I used a sweater knit featuring a black and brown herringbone design that I had left over in my scrap bin from another project.

For the back of the blouse I used a polyester chiffon with a romantic floral print. I had made it into a simple kimono in the past but didn’t do a very nice job of sewing it so I recut it to use in this project instead. I’m glad I can finally wear this fabric because I think the print is so pretty!
As you can see, I changed the back hemline shape so that it makes a very dramatic swoop. I showed you how to do this in the Camas modification post. I also lengthened the sleeves as we discussed in that post.

I think this cardigan will be very versatile in the spring and summer. It can be worn over dresses or over jeans and a t-shirt. The interlock makes it feel comfy and casual while the chiffon dresses it up without making the cardigan too delicate (since it is a tightly woven poly chiffon that doesn’t seem prone to snags and can be put through the wash and dryer). Plus I can wear it with outfits that suit black OR brown – this makes any garment a win in my opinon!

I look forward to seeing and hearing about your Camas successes and modifications! I hope you enjoyed the sew-along. Thanks for joining me :).
Belvedere Waistcoat Sew-Along: Day 1 - Supplies

It's time to begin our Belvedere Waistcoat sew-along!
During this sew-along I will be completing two waistcoats - one that requires an intermediate level of skill and one suited to beginner menswear sewists. In addition to following along with the Belvedere instruction booklet we will be trying out a variety of fitting methods and adding some bespoke details to our waistcoats. Best of all, we will be finished on June 9th which means you will have lots of time to wrap up your waistcoat to give to your Dad on Father's Day (June 18th)!
Here is our schedule:
Day 1: Gathering your supplies (and Belvedere Waistcoat Supplies Kit launch!)
Day 2: Choosing a size and thoughts on fitting
Day 3: Customizing Part 1 - Belt and Pockets
Day 4: Customizing Part 2 - Hem, Neckline, Collar
Day 5: Cut out your fabric
Day 6: Apply interfacing and sew darts (plus learn how to create a tailored front!)
Day 7: Assemble the lining
Day 8: Sew the welt pockets (or add patch pockets)
Day 9: Finish the waistcoat fronts
Day 10: Assemble the waistcoat back
Day 11: Add buttons
Day 12: The Belvedere Parade
Ready for all of this?! Let's dive in:
Supplies

A waistcoat can consist of up to three different co-ordinating fashion fabrics: The front, the back and the lining.
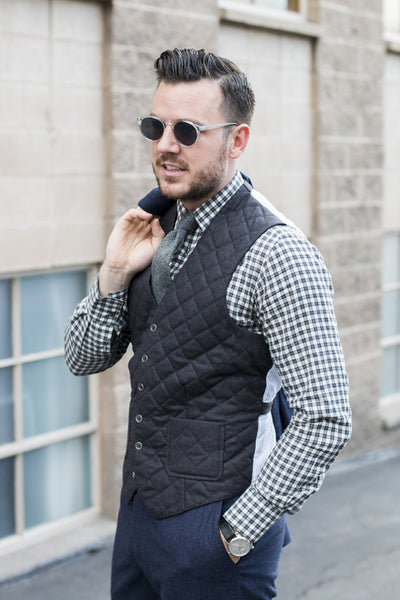
Quilted waistcoat front: Articles of Style: Not your Grandma's Quilt

1. The Front: There are very few rules to follow when choosing this fabric! Depending on the style you are hoping to achieve you can select from a huge variety of fabric types. Choose a wool suiting for a classic waistcoat to pair with trousers for formal events. Use a wool tweed for a winter waistcoat that pairs nicely with trousers or jeans. Or use a canvas fabric (such as the hemp and cotton canvas from our shop (this is what Matt is wearing in these photos!) for a summery waistcoat perfect for weddings. Other great choices could include linen, silk, textured upholstery fabric, or even a thick and fairly stable knit! Choose whatever fabric you would like to showcase. If you are sewing welt pockets on your waistcoat, limit your choice to something that is not too bulky, does not fray exceptionally, and presses well. If you are skipping pockets, don't worry about those limitations!

2. The Back: There are several approaches to choosing a waistcoat back fabric - choose a statement fabric, a neutral fabric or the same fabric as your waistcoat front. If you have opted for a neutral waistcoat front you could add a 'surprise' back as I have for Matt's waistcoat. Choose a slippery acetate or Bemberg lining material so that it sits nicely under a suit jacket. If you have used a statement tweed or silk for your waistcoat front, choose a neutral lining material for your vest back that will coordinate nicely with the wearer's trousers. If the waistcoat will be worn casually, without a suit jacket, it is common to use the same material as the front instead of lining fabric or you can opt for a contrast fabric that is not slippery since it doesn't need to sit nicely under a jacket. For instance, I sewed my Dad a waistcoat with a wool knit front and a cotton canvas back (which I waxed with Otter Wax!). I didn't get any great photos of the back - I will do so at a later point and share them with you since I love how rugged the waxed back looks!
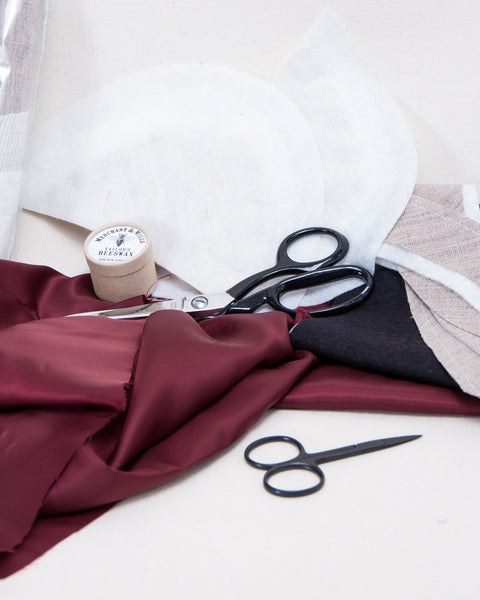
3. The Lining: Select a good quality slippery lining material that will not catch on the wearer's shirt. My favorite is Bemberg (a type of rayon lining) but acetate or silk lining will do nicely as well! While it is important to choose a strong lining fabric when sewing a suit jacket, there are very few pressure points for a waistcoat lining (because there are no sleeves) so delicate silk linings are an option.

Okay, now that our fabric choices have been made, let's talk about structure and notions! The entire Belvedere Waistcoat front is interfaced to create a beautifully crisp garment.
The idea behind interfacing is to attach a crisp and stable fabric to your main fashion fabric to change the way that your fashion fabric behaves. For example, wool suiting tends to sag and stretch out over time; when you attach a fabric that is not prone to stretching out you will prevent your wool from looking limp, worn and sad after years of wear! Another example is silk - it is usually thin and without much body. A waistcoat front made of one layer of thin silk dupioni would likely ripple and cave when the wearer moves. It may also be quite weak and rip at the buttonholes. Adding a stronger and stiffer interfacing to the back of the silk would add more body and strength to the silk.
Because you will be interfacing a large area of fabric, it is important to pick a good quality stabiliser that suits your fabric choice and also your skill level. Here are some great pairings:
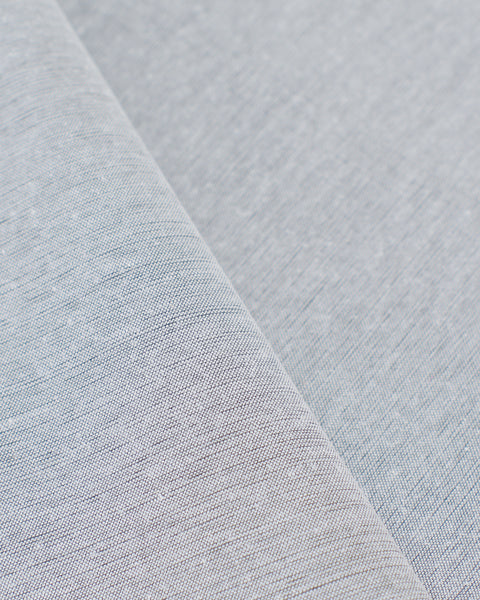
Wool fashion fabric: Use a wool canvas or hair canvas sew in stabiliser if you are proficient at padstitching. No idea what padstitching is? I will be covering this later in the sew-along! Choose a medium to heavy weight fusible such as cotton interfacing if you would prefer an easier solution. Fusible interfacing has glue dots on one side that are melted to your fashion fabric with the heat from an iron. Test the fusible on a scrap of wool to make sure that the glue adheres to your wool.
Silk fashion fabric: Sew in silk organza by basting it to the seam allowances. Or, choose a light weight fusible but be sure to test the glue on a scrap of silk to make sure that the glue doesn't soak through or create the appearance of visible dots on the right side of the fine silk.
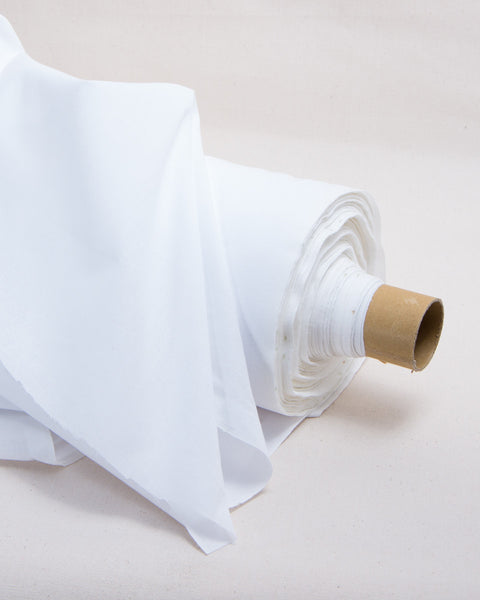
Canvas fashion fabric: Most medium weight fusible interfacing will pair nicely with canvas. Make sure to pre-shrink both your canvas and your interfacing because cotton canvas, in particular, is prone to shrinking! Even if you don't plan to machine wash your finished waistcoat, it is a good idea to pre-shrink fabrics because they could still shrink without washing. For example, you will be doing LOTS of pressing while sewing your waistcoat with a hot and steamy iron. This will shrink your canvas if it has not been pre-shrunk. Pre-shrinking fabric could include washing and drying it (sometimes several times until it stops shrinking) or thoroughly steaming it with an iron.
 Image from Tolemans 1hr Drycleaning.
Linen fashion fabric: Linen is notorious for refusing to remain fused to fusible interfacings. The end result is the appearance of 'bubbles' where the interfacing and linen have detached. I would recommend using a sew-in medium weight interfacing when working with linen. Baste the interfacing in place within the seam allowances.
Lastly, it's time to choose your buttons! There are many styles you could select for your waistcoat buttons but generally I would suggest choosing ones that are between 1/2" to 5/8" in diameter.

The ones pictured on Matt's waistcoat are 5/8" and are quite low profile making them a nice neutral choice.
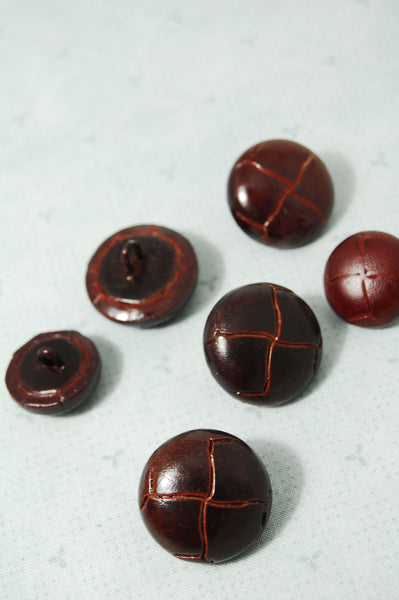
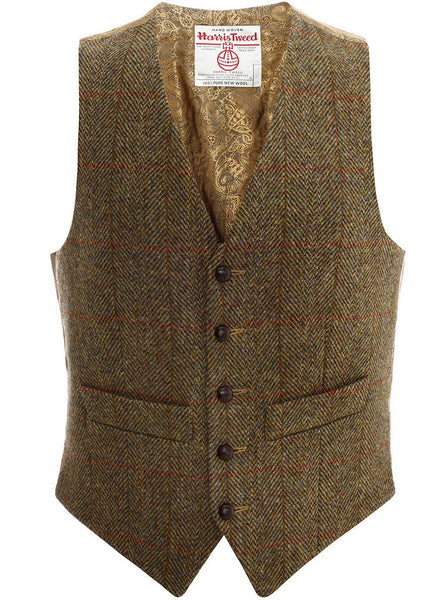
I find that the more thick and textured your waistcoat fabric is, the more likely the waistcoat is to suit bulky or unusual buttons. Harris Tweed waistcoats, for example, often feature quite large braided leather buttons.
Now that I've overwhelmed you with all of my thoughts on material choices, let me simplify things by introducing the brand new Belvedere Waistcoat Sewing Supplies Kit!

I assembled all of my favourite materials to line, back and stabilise your waistcoat so that the only need to choose your waistcoat front fabric. The linings in this kit would pair splendidly with wool suiting but also works nicely with canvas (as pictured on Matt), silk or linen. The interfacing included is my favorite 100% cotton fusible interfacing which will work nicely for wool or canvas materials (as I mentioned above, I wouldn't recommend a medium weight fusible for silk or linen!).

The main lining fabric featured in this kit is a delicious high end burgundy Bemberg. I've included enough to line the inside and create the back of the waistcoat. I've also included a paisley acetate lining that you can use to create a show-stopper waistcoat back or keep as a hidden special touch inside your pocket bags.

You can choose to buy the kit with or without the PDF pattern. The PDF pattern is offered at a discounted price when purchased with the kit!
In addition to the Belvedere kit, the shop includes a great selection of tailoring fabrics. The burgundy lining materials are both available by the 1/2 m (paisley and solid) and, of course, my favourite cotton fusible interfacing is also available.
There are three new tailoring materials just added yesterday: Two stabilisers (wool and horse hair) and one lining.
I will be testing out my bespoke menswear tailoring skills by padstitching wool canvas to one of the sew-along waistcoats. I've added both wool canvas (left) and hair canvas (middle) to our shop so that you can join me! I may even use the hair canvas to build up the chest area...we'll see how ambitious I am!
I've also added a second Bemberg lining to our shop! If you prefer subtle pin stripes over bold burgundy, this is the Bemberg for you. This striped Bemberg is traditionally used as a suit jacket or coat sleeve lining. I purchased it from my favourite tailoring supplier (a lovely Italian gentlemen based in Ontario who sells predominantly to bespoke tailors) who proudly told me he is the only supplier of striped Bemberg sleeve lining in Canada. I was surprised by this statement for several reasons: What is special about striped sleeves? Why are Bemberg stripes desirable? After a little bit of Googling I soon discovered that bespoke tailors are often frustrated by how difficult it is to source good quality traditional sleeve lining. A striped sleeve lining used to be a sign that your suit jacket was traditionally tailored and not mass produced. It is more cost effective for large scale manufacturers to use one lining material for the sleeves and body of a jacket so the use of contrasting sleeve linings set the bespoke tailor apart from their industrial competition. In addition to this distinction, sleeve linings must be exceptionally smooth and strong to allow the wearer to slip their jacket on easily and to bend their arm fully without risk of tearing the material. Using a contrast Bemberg sleeve lining frees the bespoke tailor to use a more delicate lining material (patterned silk, for instance) for the jacket body.

I hope you learned something today and that you are looking forward to creating your Belvedere Waistcoat! I'll leave you with a list of my favourite waistcoat construction resources.
- A Youtube video by Professor Pincushion which is very approachable for beginners. Learn everything about sewing a Simplicity vest pattern from reading the pattern envelope to adding easy faux welt pockets.
- A video class by Gentleman Jim suitable for intermediates. It costs $24.95 US which might seem pricey compared to free Youtube videos but I found it to be well worth the money! The pace is easy to follow and Gentleman Jim is so lovely to listen to! He is full of opinions and tricks for efficient sewing practices which are just as valuable as the waistcoat sewing instruction. It felt nice to pay directly for all of the work he put in to making the video.
- A large series of videos suitable for beginner or intermediate sewists detailing EVERY step to create a waistcoat. This series by The Sewing Guru is lengthy and detail oriented. I found the pace to be far too slow for my needs but this is a huge advantage if you are new to sewing! You will have every question answered.
- A blog post that gives a peek inside the process of fully tailoring a waistcoat. This post created by Rory Duffy of Handcraft Tailor (who I featured on the blog two weeks ago) is an interesting glimpse into the process but doesn't fully instruct. I would recommend avoiding this post if you are fairly new to sewing (it might be overwhelming!) but it is educational and interesting if you are looking to delving in to at least a few of the tailoring techniques that he uses.
Belvedere Waistcoat Sew-Along: Day 2 - Fitting
 Today we will be examining the Belvedere size chart and then discussing a few fitting options that you can pursue to create a waistcoat that is beautifully tailored to the wearer's proportions. If you have already looked through the instruction booklet you will notice that I go in to a fair amount of detail about measuring and a few fit adjustments. I have elaborated further on these below and I've also attempted to phrase my instructions differently. I always attempt different phrasing during sew-alongs in case you are finding a step within the pattern instructions difficult to understand...different phrasing may make things click for you!
Step 1: Take Body Measurements
To choose your pattern size, begin by taking accurate measurements of the wearer. Have him put on the shirt and trousers he will most likely wear with his waistcoat. Next, have him stand tall with good posture and a relaxed body (no sucking in the tummy artificially!).
Chest
Circle your tape measure under the arms so that it is around the widest part of the chest. Make sure that it is sitting horizontally. If you notice that the tape measure is sitting under the protruding shoulder blades, it is acceptable to raise the tape measure slightly on the back only so that it is across both the fullest part of the front chest and the fullest part of the shoulder blades.

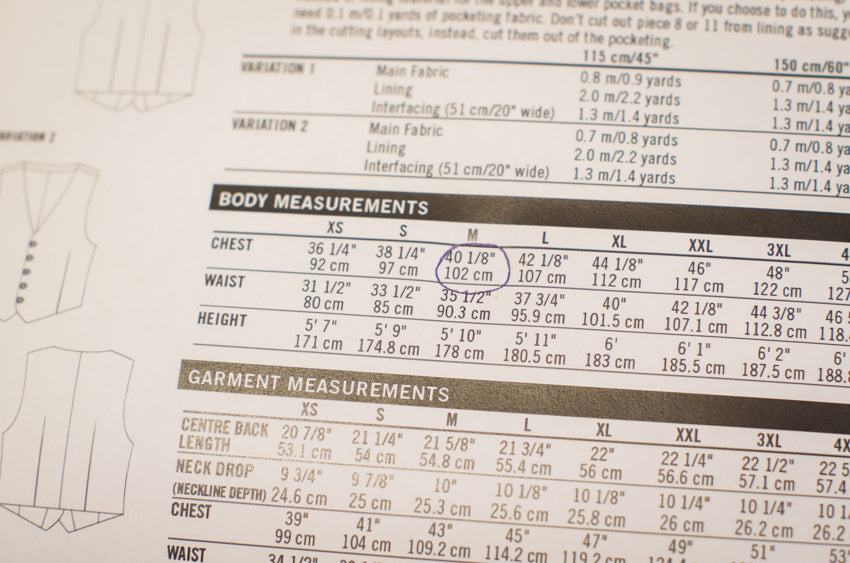
Examine the Body Measurement chart and circle the closest chest measurement. Circle the larger measurement if you are between sizes.
Waist
Now circle the waist with your tape measure in the same manner. It can sometimes be difficult to determine the waist position as it is not always the narrowest point depending on the man's proportions. Measure at approximately navel level.

Circle the waist measurement in the Body Measurement chart. If it falls under a different size than your chest measurement, don't worry, it is easy to use both sizes! This is called "grading between sizes." I have made a tutorial on how to do this (featuring our Jedediah Pants).

If you are intimidated by grading between sizes and would prefer to stick to a single size, it is perfectly okay to do this (as long as your chest and waist measurements are no more than two sizes apart). Just choose the larger size. For example, if the wearer's chest measurement is 40 1/8" and his waist measurement is 33 1/2", cut out the size M pattern. You will be able to adjust your actual waistcoat near the end of the construction process by taking in the side seams if the chest or waist is a bit too roomy. In our example the waist would be too roomy so you would need to take in the side seams.
Height
The Belvedere is drafted proportionately which means that the larger sizes don't only get wider, they also become slightly longer. The heights selected for each size are based on a census of a large number of the German population (where our patternmaking software is developed). How tall is your wearer? Even if the wearer matches the height listed under his size, there is a good chance you will need to adjust the length of the pattern. This is because a properly fitted waistcoat should extend to the bottom of the trouser waistband and the rise of the wearer's trousers might be different than the one we drafted for! Which takes us to our next step...
Step 2: Analyse Garment Measurements
Centre Back Length
The Belvedere has been designed to cover the waistband of dress trousers which traditionally have a high (navel level) rise. We have given the centre back length of the finished waistcoat in the garment measurement chart so that you can compare the pattern length to the length that you need to suit your wearer's trousers. If the waistcoat will be worn with jeans or lower rise trousers, it will need to be lengthened so that it fully covers the waistband. Even if you make no other fit adjustments, I highly recommend performing this simple one so that the wearer can enjoy a waistcoat perfectly tailored to his outfit...this is hard to come by when shopping for ready-made waistcoats! Here is how to check the length of the pattern compared to the wearer's measurements: With the wearer dressed in the trousers he will most often wear with the waistcoat, place the measuring tape so that it extends from the top of the spine (where the base of the shirt collar stand sits) to the bottom of the waistband.

Look at the Centre Back Length in the Garment Measurement Chart. Does the measurement you took differ from the one in the chart? If so, check out our tutorial on adjusting length later in this post!

Neckline Drop
The Neckline Drop is an important measurement if the wearer plans to pair his waistcoat with a suit jacket or blazer. He will likely want the waistcoat to peek out from under the suit jacket along the neckline.
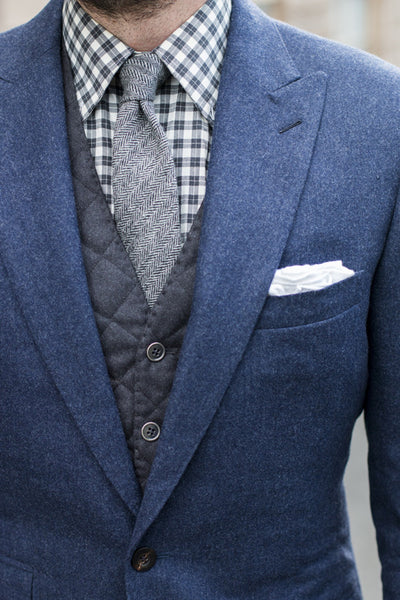
(Image from Articles of Style)
The Belvedere has been drafted to include a moderately cut neckline which looks smart and modern worn without a suit jacket. It would also be a great match for most 1 and 2 button suit jackets.

If the wearer will usually be wearing suit jacket with a high neckline (a 3 button suit jacket for instance), have him put on his suit jacket with it completely buttoned up. Measure from the base of the neck down the centre front.

Does the Belvedere neckline extend below the suit jacket? You will need to raise it so it is at least 2" higher than the suit if you would like it to be visible! We will discuss how to do this during the next post (during which we customise the style of our waistcoats).
Ease
The last two measurements to discuss are the Chest and Waist measurements listed in the Garment Measurement chart above. I have just added these to the chart so that you can determine the amount of ease (room for things like breathing and movement) the wearer will have. As I mentioned earlier, the order of construction I have used for the Belvedere will allow you to play around with ease when you are very close to being finished the waistcoat! You will be able to try it on the wearer and take in the side seams or let them out slightly (using the large 5/8" seam allowance) to create a close fitting garment that hugs the wearer in a very flattering way.
Step 3: Fit to Unique Proportions
Now that we've determined base measurements, let's talk about fitting the pattern to unique proportions. Male proportions can differ hugely. Our size chart is suited to average to slim men with just a hint of an athletic figure (which means slightly broad shoulders, a narrow to average waist, and average to lanky proportions). If your waistcoat wearer has a full tummy or stocky build you might need to make some adjustments. Here are a few common areas that may need adjustments before you begin to sew! Please comment if I've missed an alteration that you would like me to help you with!
Tall (or average with plans to wear low rise pants)
You will need to lengthen the following pattern pieces: Front, Back, Front Lining, Back Lining, Front Facing. 
Determine how much length you need to add with the following equation: Your Centre Back Length measurement - the Centre Back Length Measurement found within the Garment Measurement chart = Amount you need to add. Cut along each "Lengthen and Shorten Here" line and place the pattern piece over a new piece of paper. Tape the cut pieces to the paper and extend the lines, smoothing a little if necessary. Cut out your newly lengthened pattern piece.

See a more detailed tutorial (using the Jedediah Pants) here!
Stocky/Broad Figure
The Belvedere features some nice details to fit to the body's curves. Even though men generally feature straighter figures then women, most still do feature distinct curves. Stocky body types will have far less pronounced curves than average or athletic bodies. The curved areas include the small of the back and the waist.
If your wearer has a very rectangular or full figure you will probably notice that there is no curve along the small of the back and not much difference between the chest and the waist or hip measurements. You might like to decrease the curves drafted in to the Belvedere so that there is more room for the fullness of your wearer's figure. It is quite easy to do this! Just draw and sew straighter lines for the centre back seam and the darts. Here is an example illustration. You could keep more curve or remove more curve depending on the shape of the wearer's body.

Full Stomach
Waistcoats are notoriously tricky to fit to rounded stomachs because they are already so closely fitted, there is no room for the fabric to blouse over the roundness of the belly. To combat this problem, rotund men (and now all fashion conscious men) have left their bottom button undone for over 100 years. This tradition of leaving the bottom button open (on both suits and waistcoats) is said to have stemmed from the rotund Edward VII's practice. There are several other theories but this is the story most commonly accepted by menswear enthusiasts. The problem of fitting a waistcoat to a round belly is alleviated by adding more room at the waist, be it through leaving a button open or making adjustments to the pattern. Here are two approaches - an easy and a more difficult option:- Sew 5 buttons and leave the 5th open. Use the button layout for Variation 2 which features five functional buttons. If the waistcoat is worn with the 5th button open the wearer is both very stylish and gives themselves more ease in the waist and hips.
- Angle the centre front: If the wearer's belly sits roundly at centre front the waistcoat would look baggy and ill fitted if you added more room at the side seams because you only really need more room at the front. The Body measurements are likely 3 or more sizes apart (for example, the chest measurement is a size S and the waist is a size XL. All other proportions suit size S). Using the size S pattern, cut in to the pattern from the armhole to create a hinge at the dart point. Pivot the centre front so that it angles outward causing the armhole cut to overlap. Angle the centre front until you have added enough room for the size XL waist measurement. Draw in a little bit of extra armhole length at the shoulder seam and side seam to accommodate for the overlap (since the armhole length needs to match the Back side seam). You will notice that the angle of the shoulder seam and neckline also changes; you may need to make an adjustment to both of these so that they are closer to the original angle. Adjust the size of the dart to also be the original size. These adjustments cause all of the extra room to be added as close to the centre front as possible. I would highly recommend sewing up at least one mock up to tweak the fit since this is a large change to the way this waistcoat is shaped.

Very Thin or Very Thick Arms (or average with a style preference)
The shape and depth of a waistcoat armhole can vary greatly based on style preference and also to suit the wearer's proportions. You can raise or lower the armhole if your wearer has thin or thick arms. I drafted the Belvedere to have quite large and deeply curved armholes so that they fit like this:
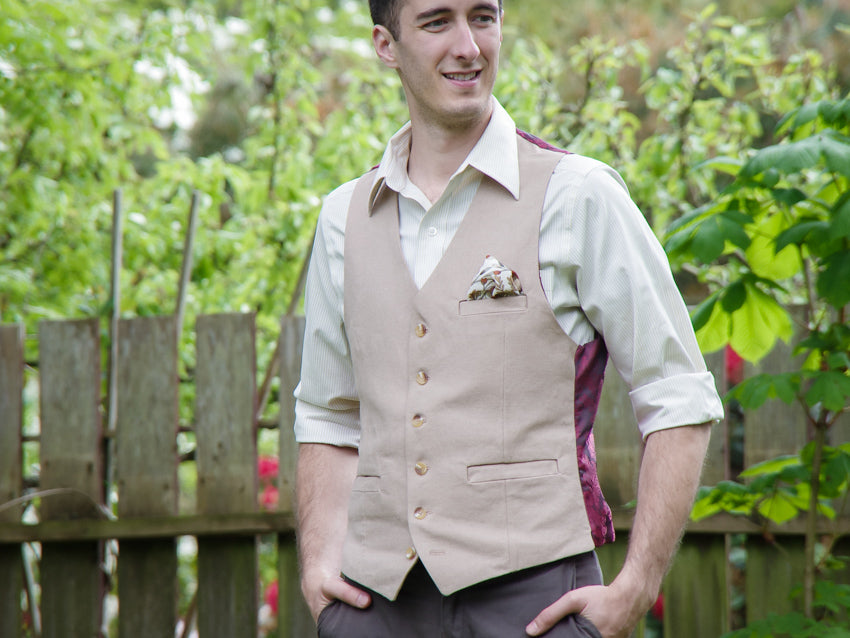
If you would like to alter this curve, you can do so by drawing a new curve along the Front, Back, Front Lining and Back Lining pattern pieces. Make sure the waistcoat and corresponding lining curves match in length and shape so that they sew together easily. 
Square or Sloped Shoulders, Round or Straight Posture
The shoulder seam of a well fitted waistcoat should sit very flat against the body and should sit along the top of the wearers shoulder. If your wearer has very sloped or square shoulders you may need to adjust the angle of the shoulder seam (on the waistcoat Front, Back, Front Lining, Back Lining, Front Facing and Back Facing). You can add or remove the extra to the underarm to keep the armhole the same size. Here is a diagram to show you the change for square shoulders:
Adjustment for square shoulders.
For sloped shoulders you do not need to make changes to the pattern pieces. You can take in the seam while you are sewing the waistcoat (baste the seam and try it on the wearer). If your wearer has over erect or very rounded posture, you might need to angle the shoulder seam backwards or tilt it forwards. Since the Belvedere includes large 5/8" seam allowances you likely don't need to make adjustments to the pattern and can instead work within the seam allowance by adjusting while you sew. Sew your seam something like this for rounded posture (and the opposite for overly erect posture).

Adjustment for overly erect posture (angle the seam towards the back).
The wearer is a woman!
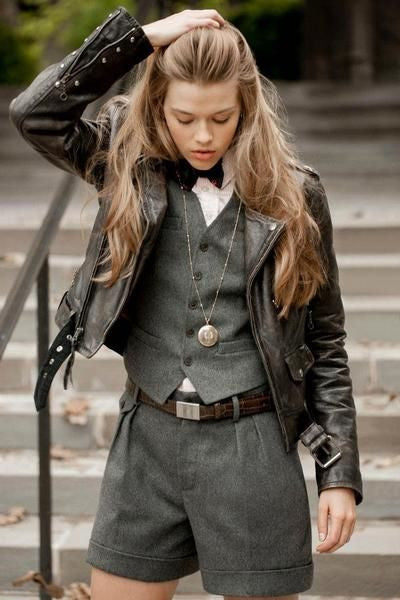
I have already received quite a few requests to draft a Belvedere for women. I don't have any plans to do so at this time but you should give it a try! I'll be sewing one of the sew-along waistcoats for myself so we can see how the ideas I've listed below work out in reality. I've created a Pinterest board featuring some great looks for inspiration too! Here are a few thoughts on adjusting this menswear pattern to suit female curves. Your approach will likely be different depending on the size of the chest in proportion to the waist:
Small Chest: For small chested women only small adjustments may be needed. Choose the waistcoat size based on the woman's chest measurement and then adjust the shoulders, waist and hip by taking them in. Increase the curve of the centre back seam, the size and curve of the darts, and the curve of the side seam to suit the wearer's figure. Since many women have more sloped shoulders and thinner arms than men, it may be necessary to raise the underarms and increase the slope of the shoulders. When sewing the darts it may be necessary to lower the point to make sure that it sits slightly below the bust point.

Don't worry, this isn't as daunting as it looks in the diagram! Just cut out the waistcoat pattern and baste or pin the seams together so you can try it on the woman's body. You can then pinch and sew your changes in a very visual, step-by-step way!
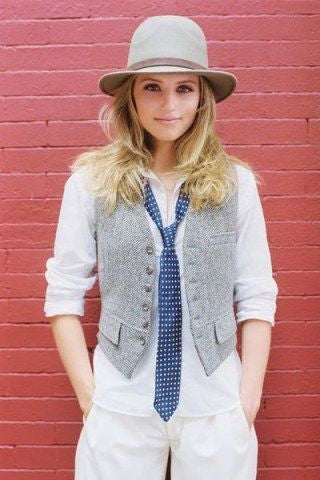
Larger Chest: This is quite a bit trickier and I must emphasise that I have only tried this as a thought experiment (not with a real fit model or mock up). Choose the waistcoat size based on the wearer's chest measurement and grade between sizes to suit the waist measurement. The curve of the bust will cause the armhole to gape so it is necessary to reduce the size of the armhole by adding a dart. Since adding an armhole dart is not often an attractive design feature, it's time to bust out the princess seams! Pinch out the gaping armhole to create a dart. You can cut out a quick mock up and use pins to pinch the dart to suit the wearer exactly. Now extend the darts to meet near (but not directly on) the bust point and curve to create a flattering princess seam. Here is a rough approximation of the curve but you will want to adjust the shape to suit the wearer's figure:

On Wednesday I will have some fun tutorials and pattern downloads ready for you so that you can customise your Belvedere to your heart's content. Stay tuned for patch pockets, a collar tutorial and belt options!
Oh, and if I've overwhelmed you with all of this talk about fitting, please take a deep breath ignore the bulk of this post. Keep in mind that when you shop for clothing at a store you are buying something that has had no fit adjustments to suit the wearer. If you sew up the Belvedere with just one of these fit adjustments (such as adding a bit of length) you will end up with a garment that is better tailored to the wearer than a store bought waistcoat! That's what makes sewing awesome!
Belvedere Waistcoat Sew-Along: Day 3 - Customising
They're here: Two of the Belvedere Waistcoat add-ons that you have been waiting for!
I have added two free downloads to our shop featuring adjustable belts and patch pocket styles. I had been planning to cut out our fabric today and to share several tutorials (as I mentioned in Monday's post) but I've bitten off considerably more than I can chew so I'm going to share these add ons in smaller segments. The cinching belts and pockets are available today and I will continue with some photo tutorials tomorrow. I hope that this slightly slower approach will work for you! It will certainly work better for me (I'm a tad square eyed from staring at the computer for so long over the last three days).
Add a cinching belt
 In our Belt Add-on download you will find a classic narrow belt that can be cinched using belt hardware and a rugged alternative featuring wide tabs that would look great on a casual canvas waistcoat. Would you like to add one of these to your waistcoat? I will be adding one of each to the two waistcoats I am making for this sew along!

We've also added gorgeous gun metal finish narrow waistcoat belt hardware to the shop that will suit a formal waistcoat with a silky Bemberg or acetate back beautifully.
This hardware is 3/4" wide which is narrower than the 1" cinching belt that I've included in the pattern. This width has purposely been chosen so that your lining material will be gathered by the hardware when it is threaded through the slots. The bulk added by the gathering helps the slippery fabric grip so that the cinched waistcoat will hold in place when tightened. I also think the gathered lining material looks very elegant!
If you are sewing your cinching belt from a bulkier fabric such as wool or canvas I would recommend finding a different style of hardware that is 1" wide and features a locking mechanism (such as serrated teeth). I have been on the lookout for this style of hardware to add to the shop and will let you know if I manage to find some!
Here is an excellent review of various store bought waistcoats and their corresponding cinching belts on the menswear fashion blog Well Dressed Dad. Read this through before you choose your buckle style so that you can be sure to create a belt that not only looks attractive but also functions as it should!
Add patch pockets
 Patch pockets are a great option for casual waistcoats. You will commonly see these on waistcoats worn without a suit jacket; if you are sewing a formal waistcoat however, I would recommend using welt pockets or no pockets at all. The pocket shapes included in our download give you two options to choose from that can greatly change your overall look!
Have a look at this inspiring selection of waistcoat photos to view similar pocket styles in action.
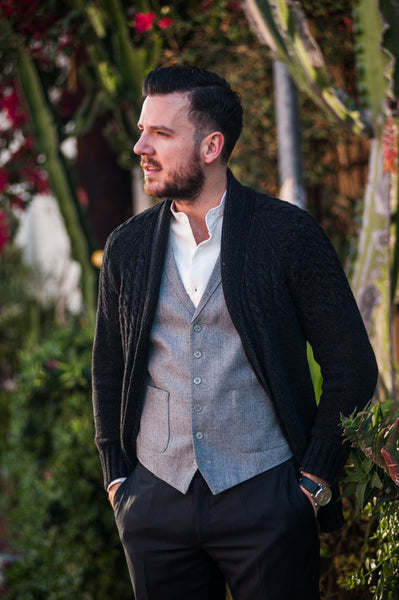
Photo from Articles of Style: A Guide to Men's Vests and Waistcoats
I'll be back tomorrow with more tutorials! In the meantime, I hope you enjoy playing around with design ideas now that you have these extra pattern pieces in your hands!Belvedere Waistcoat Sew-Along: Day 4 - Customising Part 2
Let's continue with our Belvedere Waistcoat customisation today!
I've printed and assembled my PDFs, if you haven't done this already, now is the time! Check out our PDF assembly tutorial for help with this.
Okay, let's get our rulers out and dig in...
Change the shape of the hem
While most waistcoats feature angle points at centre front, you are not limited to this conventional shape! It is very easy to alter your Belvedere to feature a straight hem or to have round points.

To adjust our hem we will be working with the Front, Front Facing and Front Lining pieces. For small adjustments to the points you likely won't need to make changes to the lining piece but for larger adjustments, such as a removing the angle to create a straight hem, you will need to adjust this third piece. First I'll show you how to create rounded points:

Always begin pattern adjustments by drawing in your seam lines. We will be making the changes to the seam lines and then will add seam allowances back on. The seam allowances included in this pattern are 5/8". I just measured in 5/8" from the paper edge at various points and then connected the dots. Above you can see the Front and below you can see the Facing and Lining. I only added the seam lines to the relevant area that we are going to be working on.

Grab a French curve ruler or find a curved object (a cup, egg cup or small bowl for instance) and use it to draw the shape that you would like. If you can't find something to trace along you can try drawing your curve freehand!

Begin by marking the curve on the Front and then mark the same curve on the Facing so that they will match perfectly when you sew them together.

Since our curve was small enough that it intersected with the original seamline before reaching the right hand edge of the facing we do not need to make changes to the lining. If you draw a long gradual curve you would need to continue it on to the lining piece. Now let's add our seam allowances back on!

Measure out 5/8" from your new seamline at various points and mark with dots. Connect all of the dots.

Now you can trim off the pointed tip along your seam allowance and you're ready to use your customised pattern! To make a larger change to the hem such as removing the point entirely so that the hem extends in a straight line across the front begin by once again drawing in your seamlines...this time along the entire hem and up the side seam and centre front. You can see in the photo below that I did not extend my seamline up centre front very far...this ended up being a mistake as you will see very soon! I've included it in this post so you can see how easy it is to accidentally switch to using the edge of the pattern piece and not the seamline...its actually a lot more fool proof to just fully cut off your seam allowances entirely when working with a pattern.

Use a ruler to draw your new hem angle. Position the ruler so it begins at the bottom of the side seam (the seam line, not the edge of the paper). You can still create a slight angle as I have done or you can make your line completely horizontal by making sure it is at a right angle to the grainline. You can shape the centre front corner so that it is pointed or rounded. I'm showing you how to do a rounded corner here. Begin by extending the centre front so that it no longer angles to the right. You will need to glue or tape your pattern piece to another piece of paper for this extension. Now watch out, here is where I make my seam allowance mistake! Can you see what I'm doing wrong in the photo below?

I've extended the straight line downwards using the pattern piece edge rather than the seamline! Now, when I go to draw my curved corner with my french ruler I am drawing it from the seamline to the outside edge. If I were to sew the hem like this the curve would be a different shape from the one I am drawing. Don't worry, I will fix this in a moment!

Now it is time to add in our seam allowances. You can see my corrected seamline in the photo below (the yellow line) and my added seam allowance (the green line).

We are ready to transfer these changes to the lining and facing!

Place the lining on top of your altered waistcoat front and trace the alteration. If you can't see your line through the paper you could cut off the extra paper and place the front on top of the lining so that the armholes and side seams match. Then cut off the lining where it extends below the front pattern piece. Repeat this process for the facing:

Now let's change up the shape of the neckline using the same techniques!
Change the height and shape of the neckline
If you would like to raise the neckline and add another button to your waistcoat, here is how to go about doing this.

We will be using the Front and Front Facing pieces.

Draw in your seamlines along the entire neckline and shoulder seam. Position a large sheet of paper underneath your pattern piece and tape or glue it in place.

Use a ruler to extend the centre front (no need to measure right now, just draw a line 5 or so inches long so you have lots of room to work).

Measure the distance between the existing button markings (2 1/4").

Add a new button marking 2 1/4" above the top button.

Use a french curve ruler (or freehand) to replicate the curves of the neckline. You can choose to keep them the same as the existing neckline or you can alter them to suit the style you would like (more v-shaped or more scooped).

Taper your new neckline so that it meets the original one before the shoulder seamline.

Add your seam allowance back on:

And now transfer your changes to the Facing so that it matches the shape of your new neckline.

And voila, you are ready to sew a seven button waistcoat!
Add a collar
Last, but certainly not least, I'll show you just how easy it is to add a shawl collar to the Belvedere - I've done this change to the pattern free hand (using only my measuring tape and a pen) to show you that you don't even need to have fancy rulers to do this. The shawl collar we are drafting will look like this: 
Notice that it does not extend around the back of the neck making it easy to draft, super easy to sew, and comfortable to wear under a suit jacket.

We will be working with the Front and Facing pieces.

Begin by drawing in the neckline seamline. You might like to draw the shoulder seamline as well.

Now sketch in your finished collar shape beginning just above the top button and curving up the the shoulder seam. This sketch is not actually part of your revised pattern piece, it is just a way to help you visualise the finished collar shape.

When you are happy with the shape of your collar, you can use this handy technique to mirror it so that it is positioned correctly on your pattern piece. Measure from the seamline to the edge of your collar sketch.

Next, measure the same distance out from your seamline to find the position of the actual collar edge. Do this at various points the entire length of the collar and then connect the dots.

The top edge of the collar will be sewn in to the shoulder seam so it needs to match the angle of the shoulder seam when the collar is folded as it will be when the waistcoat is finished.

Sorry for my messy sketching lines! Without the aid of a ruler they don't look very smooth...if yours are a bit wobbly too just keep smoothing them out until you are happy with how they look. And remember we have nice large 5/8" seam allowances to work with so if you can cut and sew straighter than you can draw you will be able to hide any wobbles within your allowances! Let's add those allowances back on:

And finally, we must add what will actually be the visible side of the collar to the Facing pattern piece:

I can't wait to sew one of my waistcoats using this shawl collar design! If you would like to try a different collar style, here is a couple of tutorials for you to check out:
- How to draft a notched collar - a succinct tutorial on The Thread
- How to draft a full shawl collar with extension to meet at centre back - a very clear tutorial on "In the Mood for Couture"
Belvedere Waistcoat Sew-Along: Day 5 - Cut out your fabric
It's time to cut out our fabric! Here are my materials for the two Belvedere Waistcoats that I will be making. I'm creating Variation 1 without any alterations for my Granddad to wear on a cruise next Fall. It will look so nice with his navy blue suit!

I'll be using this 100% wool suiting remnant that I bought from my favorite sewing store in Victoria, B.C. - The Makehouse. I think the soft grey with white pinstripes will pair perfectly with the materials from our Belvedere Waistcoat Supplies Kit. The second waistcoat (that I will be sewing is for myself) will be Variation 2 paired with many of the the customisation that we discussed this week! This remnant is a very thick wool which I also purchased from The Makehouse. I will be trying out a few tailoring techniques using the new tailoring supplies that we have in our shop: striped Bemberg lining, wool canvas stabilizer and hair canvas.

I've photographed a number of tips as I cut out Variation 1:

Tip #1: Make sure that your pattern grainline is perfectly aligned to the grainline of your fabric. Don't just eyeball it! Measure from one end of the grainline to the selvedge of your fabric.

Now move your measuring tape to the other end of the grainline to check to see if you have the same measurement. Adjust your pattern piece until you do!

Tip #2: If you are adding welt pockets to your waistcoat and are working with a striped or patterned material you will need to pattern match your welt pieces. To do so, I like to cut out the edge of the welt placement markings on the waistcoat Front.

I can see that a white stripe is lined up with the left edge of the window.

Now cut out the corresponding window in the welt pattern piece (this is the side marked "This side closest to centre front." I ensured that the right edge of the welt was aligned with a white pin stripe.
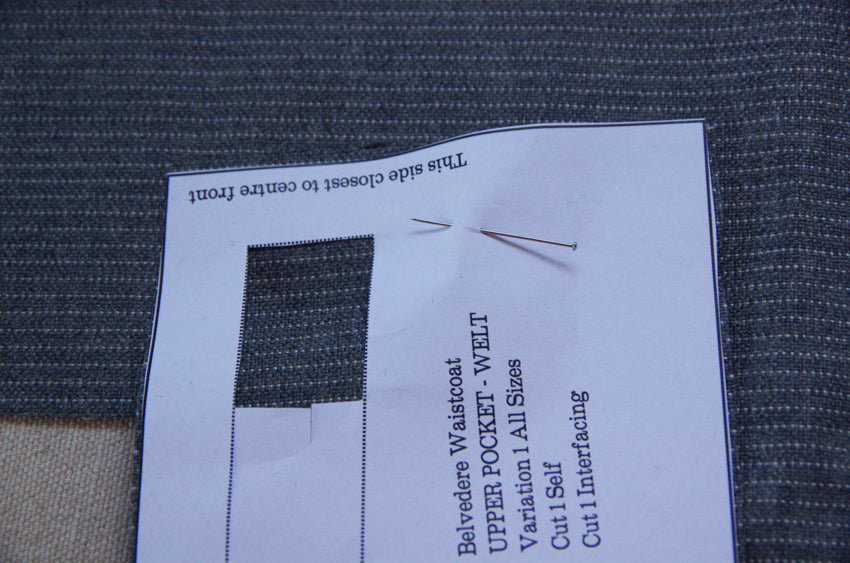
After you cut out your welt pieces keep them pinned to the paper pattern piece. Since most wools do not have an obvious wrong side it can be very easy to lose which direction the welt should go! I keep my pieces pinned until the moment that I sew them to the waistcoat front.

Tip #3: When working with moderately slippery fabrics such as the paisley acetate lining that I am using for my waistcoat back I like to fold the lining in half with selvedges together (as per usual) and then press the fold VERY crisply. This makes the two layers of lining far less likely to become misaligned.

Above you can see the layout that I used when cutting a contrast waistcoat back (instead of using the same material that I used for the lining. I managed to slip the pocket linings on to this piece too and had loads of material to spare.

Tip #4: When working with VERY slippery fabrics like Bemberg lining I find pins to be my best friend. I pin the pattern piece to the lining material thoroughly and I also pin around the pattern piece. This second set of pins really helps to prevent the fabric from twisting as you cut. Many people use rotary cutters to cut slippery fabrics like this but, despite the fact that I bought a huge mat and good blade as part of my required materials at fashion school I have never really got the hang of using them.

When cutting with scissors you may notice that, despite your best efforts, the fabric just refuses to take the shape of the pattern piece! When cutting a lining it is important to be very accurate. You can see that I have cut approximately 2 mm too wide on my neckline in the photo above. Make sure to re-trim any accesses like this or you will likely notice that your lining seems baggy and prone to peeking out at the neckline and armholes. If anything it is better to cut your lining slightly too small. Here I have re-trimmed this problem area:

Tip #6: There is a good chance you will need far less interfacing than our instruction booklet recommends! We always create our interfacing cutting layouts for 20" wide interfacing since a number of interfacing brands are actually this narrow. The cotton interfacing that we include in the Belvedere Waistcoat Supplies Kit and stock by the half metre in our shop is 60" wide. I only needed 0.67 m for this size large waistcoat.

I hope you have a nice weekend! My next post on Monday will be all about interfacing - my Granddad's waistcoat will be fused as per our instruction booklet and my waistcoat will involve a bit of padstitching. See you then!
Belvedere Waistcoat Sew-Along: Day 6 - Apply interfacing and sew darts (plus learn how to create a tailored front!)
I'm really excited about today's post because we are going to add structure and shaping to our waistcoats...and I've kicked it up a notch from the instruction booklet and tried out a few tailoring techniques to share with you!
Are you ready to try your hand at pad stitching, working with hair canvas and shaping with steam? No? Don't worry, we'll cover the standard approach to interfacing and darts first...and you will wind up with a beautiful waistcoat that will look dressy enough for any occasion. The advantage of the tailoring techniques that I've tested out later on in this post is that they will allow your waistcoat to look just as fresh and structured ten years from now as it will when the wearer tries it on for the first time.
Apply Interfacing
Let's begin with the standard approach (don't apply your interfacing right now if you are working with a bulky wool and would like to try your hand at tailoring...instead, read the rest of this post!).

Lay out your waistcoat front pieces so wrong sides are facing up. Press thoroughly if there are any creases in your fabric.

Place the fusible interfacing pieces on top of your fabric and melt the glue by pressing with lots of steam. Make sure you press for a long enough period to thoroughly melt the glue dots. Also apply interfacing to the welt pieces if you are sewing Variation One. Now it's time to mark the pattern details on to our waistcoat fabric pieces:
Mark Details
I have two different methods to show you - one involving pins and one involving a needle and thread. My favourite method for transferring dart, buttonhole and pocket markings is to use pins.

I place pins on the relevant points through both layers of fabric and the paper pattern piece. Points include the tip of the darts, the widest point of the darts, the button placement markings and all four corners of each pocket.

I then flip the three layers and poke another set of pins in the opposite direction (using the first set of pins as a guide for placement).

Next I pull the fabric off of the paper pattern pieces so that one set of pins remains with the paper and the other set remains with the fabric.

I use the pins as reference points to fill in the marking lines with chalk.

A more traditional approach to marking pattern details is adding tailor's tacks with needle and thread. Thread a needle with a double strand of thread (in a contrast colour so you can see it easily!).

Poke your needle through the paper and both fabric layers. Bring the needle back up through all layers. Here is a view of the underside (it's a loop!):

You can do this a couple of times if you like so that there are loops on each side.

Separate the paper and fabric pieces gently.

Snip the threads between each layer.

And here is the end result:

Fill in the lines with chalk if you would like.
Sew Darts
Using your freshly made markings, it is time to sew the darts on the waistcoat front, front linings, back and back linings. Fold the darts in half and begin stitching at the hem:

Stitch all the way until the point and simply stitch off of the fabric (without backstitching).

You will be left with a tail of thread. Tie this thread in a knot by hand. This technique will reduce the amount of bulk and potential bubbling at the point of the dart.

Here is the finished dart on the waistcoat front:

From the right side of the waistcoat, press the bulk of the dart towards the side seam. Don't try to press the entire waistcoat flat since the purpose of the dart is to add curved shaping to the waistcoat front (see how the fabric ripples near the side seam?).
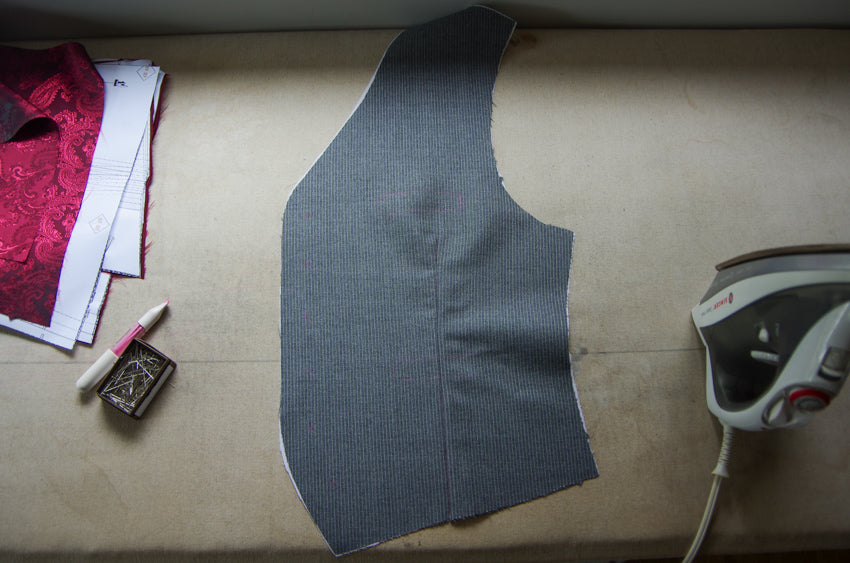
Repeat this process for the front linings:
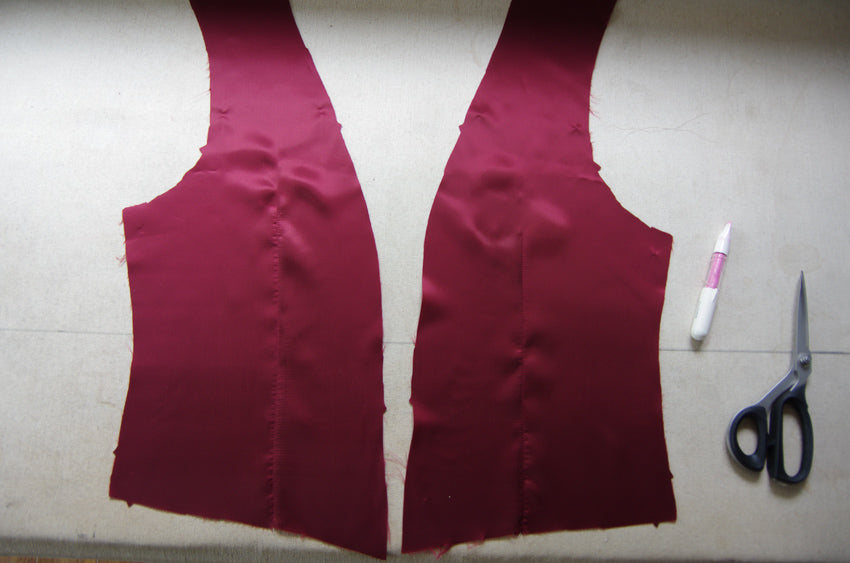
But this time press the bulk of the dart towards center front. This will reduce the overall bulk so that your dart is not very visible on the right side of the waistcoat.

If you are adding the free download for a narrow cinching belt, this is the time to sandwich it in to the waistcoat back darts. With or without this belt, sew the waistcoat back darts and press the bulk towards the side seam.

Sew the waistcoat back lining darts and press the bulk towards the centre back.

And now you are ready to add your facings to the lining pieces! We will be covering this tomorrow. If you would like to venture in to a few tailoring techniques with me, read on, otherwise, see you tomorrow!
Tailoring the waistcoat fronts
I am experimenting with two resources to tailor my waistcoat fronts. I want to be clear that I took construction classes in design school that taught us some excellent techniques but we never ventured in to tailoring. It is something that I have been very curious about for years and have read about often...but I haven't really applied what I have learned! Today I am doing this at last. If you are proficient at tailoring and notice mistakes or omissions, please don't hesitate to point them out to me! I would love to hear your opinions so that I can learn more! I hope you enjoy learning a few of these techniques with me:

Let's begin by sewing a simplified couture dart suitable for lofty wool fabrics. If you are working with a thin suiting or other material that is not especially bulky, you can sew the dart as per normal and press it to one side. I actually sewed the sample below in school but never applied it to any of the garments we drafted in class.

The dart above may look ridiculously complicated but the concept is simple - we are trying to distribute the bulk of the dart evenly so that it is not visible from the right side of the garment. Lofty wools can show a ridge where the dart is positioned unless you take some preventative measures. Since the darts on the Belvedere are very narrow, the full trimming and pressing technique shown above won't work (it's next to impossible to trim down the middle of the dart almost to the point).

To simplify the process but still distribute the bulk at the point of the dart over a larger area I cut a square of wool measuring approximately 1.5" X 1.5".

I positioned it centred underneath the point of the dart. I then followed my original dart stitching line to secure it to the dart.

I trimmed as far as possible down the center of the dart and pressed it open. I then pressed the rest of the dart flat.

From the right side of the garment you can see that there is no obvious dimple at the point of the dart because the added square distributes the wool 1.5" around the dart point. Now that the dart has been sewn, it is time to apply the structure. You will notice that this is a different order of construction from the steps above! Sew-in canvas stabiliser is too bulky to apply to the wool and then sew the dart. The darts must be sewn on the wool and the stabiliser separately and then the two layers are attached together.

I am following along with the very succinct and clear tailoring instructions found wihtin the 1976 edition of the Reader's Digest Complete Guide to Sewing. If you are ever able to get your hands on a copy of this book I HIGHLY recommend it. It is by far my most valuable sewing resource. The older editions of this book (such as this 1976 version) also include a great section on tailoring for men specifically. I believe newer copies do not include this. Click on the photographed images to enlarge and read the pages that I'm referring to.


Even though the waistcoat that I'm tailoring is actually for me (yay!), I've decided to add a chest piece as per the instructions within the "Sewing for men and boys" section of this book since this chest piece is an important aspect to sewing a tailored garment for men. The layers of stabilizing fabric fill in the hollow typically found under a man's shoulder. I must note that I think I also have this hollow...I don't know if chest pieces are typically added to tailored women's waistcoats and blazers but I think it will be a nice addition to mine!

Here is my wool canvas stabiliser with the dart sewn:

Lay this interfacing piece on top of the waistcoat front so wrong sides are together.

Mark the roll line if you have added a collar to your waistcoat. This is the line where you will fold your collar over to make the facing visible. It should end just above the top buttonhole.

Baste the stabiliser to the wool along the roll line. Just catch the wool so that your stitches are not visible from the right side of the garment. Please note that you would normally be better off using a thread colour that matches your self fabric. I've used a contrast colour (black) so that my stitches are easier for you to see.

Now it is time to pad stitch the entire stabiliser to the waistcoat front. Make long stitches through the stabiliser and just catch the under layer of wool (stitches should not be visible from the right side). Do not stitch within the 5/8" seam allowances because we will be cutting in to these later.

Instead of creating large pad stitches on the collar, roll the collar over your hand and stitch small chevrons that encourage the fabric to shape to the curve that you have created.


Cut 5/8" seam allowances off of the stabilising wool canvas so that your seams and seam allowances will not become stiff and bulky.

Fix your stabiliser to your wool by catch stitching around the entire perimeter.

To prevent stretching out and sagging even more, you can apply twill tape to a number of areas. The common placement is along the roll line of the collar (so that it does not extend in to the collar but is instead placed beside the collar on the waistcoat front) and down the front of the waistcoat. I only applied it to the roll line because I did not have 1/4" twill tape (I only had 5/8" twill tape) so I thought mine would be too bulky to curve along centre front.

Stitch around the entire length of twill tape. Make sure to trim the tape so it does not extend in to the seam allowances.

Use a very steamy iron and a seam roll or tailor's ham to shape the collar. Since my collar is a very narrow shawl collar (rather than something wider) the shaping did not make a large impact. I wound up steaming the fabric and shaping the hot fabric with my hands to get any sort of visible curve:

Now that structure is added to the waistcoat front it is time to fill in some indents. To create a chest piece it is recommended that you use stiff and resilient horse hair canvas. If you wanted softer structure you could use the same wool canvas that you used for the rest of the waistcoat front stabilising job.

Cut a small curve as shown above (use the Reader's Digest image photographed earlier as an example).

Cover the first layer with a larger curve that extends the entire length of the armhole.

Cover the first two layers with the largest curve as pictured above.

Pad stitch all layers in place ensuring that your stitches are not visible from the right side of the waistcoat. Note that you can add as many layers of stabiliser as necessary to fill in the cavity between the shoulder and chest (the Reader's Digest book actually suggests one more layer than I used.)

Finally attach the chest piece to the waistcoat front more securely by catch stitching along the roll line and side seam.

And there you have it! May I present to you my first, from scratch, tailored waistcoat front! Any tips for me? Head to our shop to find wool stabilising canvas (the main brown fabric that you see here as a stabiliser), and hair canvas (which (I used to create the chest piece).
Belvedere Waistcoat Sew-Along: Day 7 - Assemble the Lining
Today is a fairly quick step in the sewing process but it is one that can cause a bit of confusion for people who are not familiar with working with facings paired with a lined garment. These photos should make the process quite clear!

Begin by stitching the centre back seam on both the back and back lining. Place each set of backs with right sides together, pin and stitch the curved seam using a 5/8" seam allowance.

Since the centre back seam features a curve it is necessary to clip in to the seam allowances so that they can spread open and lay flat when you press the seam. When working with delicate lining fabrics be careful not to clip too close to the stitching or snag your fabric as you may cause a run or hole.

Press the seam allowances open.

From the right side of the waistcoat back and back lining, examine the curved seam to make sure it has been pressed nicely and no creases or puckers are visible (touch it up with the iron a little if necessary).

Now let's attach the facings to the front lining! We will be sewing two opposite curves together which can be a little bit finicky.

Pin thoroughly. I like to match the two sets of notches first, place pins at each notch and then work towards the shoulder seam and hem. I place my final pins between the two sets of notches.

Stitch the seam using a 5/8" seam allowance. Since this is a very pronounced curve you will need to clip in to your seam allowances thoroughly. I like to make triangular clips on the facing first.

And next I make triangular clips on the lining. Stagger your triangles so that the lining and facing seam allowances are never cut in the same spot - this allows your seam to remain strong.

Press the seam allowances towards the lining. I prefer to press from the right side of the fabric. This is what the pressed seam will look like from the wrong side:

Now we must sew the back facing to the back lining.

Begin by staystitching along the back lining neckline using a scant 5/8" seam allowance. Staystitching prevents this curve from stretching out when you are sewing it to the facing and also allows you to clip the seam allowance so that you can relax the curve:

Pin the back facing to the back lining with right sides together.

At first glance it may look like the back facing is way too long to match the curve of the lining neckline, don't worry, they are exactly the same length along the seamline! The 5/8" seam allowance and opposing curves create this optical illusion. I like to begin by pinning the back facing and lining together at centre back. I then pin in each direction towards the shoulder seam.

You can see that it is necessary to straighten out the concave curve of the lining. Good thing we clipped the seam allowances to make this possible!

Begin stitching at one shoulder seam and work towards the other. If you are a bit nervous about stitching this curved seam you can start at centre back and work towards either shoulder seam in the same manner that you pinned. This way you are breaking the long curve in to two smaller and more manageable curves.

And here is what your finished seam will look like!

Clip in to the facing seam allowance to allow it to relax.

Press the seam allowance towards the lining.

Now you can set aside your assembled lining pieces since on Friday we will be working with the waistcoat fronts once again as we add our pockets.
Belvedere Waistcoat Sew-Along: Day 8 - Welt Pockets (or add alternative patch pockets)
Today we add the welt pockets to our waistcoat fronts or, if you are sewing variation 2 with no packets, you can sit back and relax! At the end of this post I will show you how to create the rounded corner patch pocket that I created as a free pattern download to add on to the Belvedere. There are two patch pocket shapes available in the download and they feature the same construction methods.
If you have been attempting to follow along with the sew-along schedule, I apologise for the adjustments I have been making to it over the last two weeks! I had been trying to adjust by one day maximum so you wouldn’t be left twiddling your thumbs while you waited for me but I simply couldn’t fit everything in last week and had to delay Friday’s post until today. I hope this didn’t upset your plans for the weekend! On the bright side, delaying the sew-along allowed me to complete brand new samples for the entire Parkland Collection of patterns! We had a wonderful photoshoot on Sunday with my parents and grandparents so there will be some fresh garments and photos for you to view on our website once Matt has finished editing them!
Ok, let’s move on to our welt pockets:

We will be using the templates, the welts, pocket facings and pocket bags.

During an earlier sew-along post we marked our welt placement on the waistcoat fronts. You might need to refresh your chalk lines if they became worn while you sewed the darts – do so by placing the templates on the right side of your waistcoat front and tracing around them.

Cut open the window in the welt pattern piece (just cut the paper, do not cut your fabric pieces!). This will allow you to trace the welt outline on to the wrong side of the welt fabric.

Place the welt and waistcoat front with right sides together. Align your markings by poking through your welt fabric with pins at each corner and/or lift up the welt edges to peek at the markings below:

If you are attempting to pattern match stripes, it is important to be very finicky with your welt placement. I’ve always been quite terrible at matching stripes but this is how I try to do so:

I pin my piece in place and fold down the fabric along the seamline to see if the stripes continue along the seam without breaking…of course, it is necessary to stitch very accurately to ensure this remains the case!
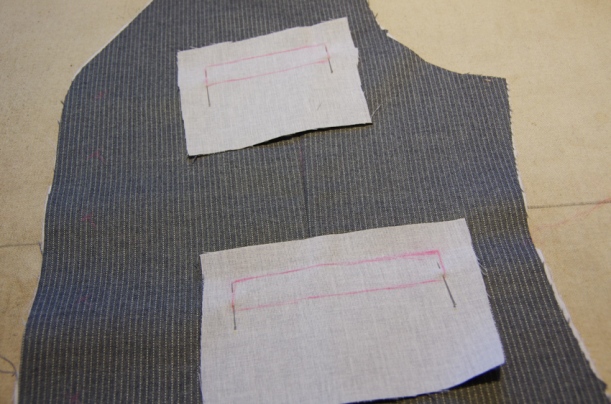
Now that your welt pieces are pinned to the waistcoat front, prepare your sewing machine by reducing the stitch length so that it is quite short. This short stitch length will slow you down to ensure that you stitch accurately and it will also make your pocket corners stronger.

Stitch along the two long sides of the welt rectangle. Try your best to begin and end your stitching exactly at the rectangle corners. If you stop to early or extend your stitching too far your finished welt may pucker or refuse to sit squarely later on.


After stitching I like to do some preemptive pressing to make things easier on myself later on. The more pressing you do at this point, the easier it will be to press the welt in to shape later. Begin by pressing the top of the welt down:

And then press the bottom of the welt up:

Now comes the slightly intimidating part…it is time to cut through all layers of your fabric to create windows in your waistcoat front!

Cut through the middle of the welt by poking your holes through the center and snipping towards either edge. Stop about 1/2″ before the end of the welt and snip two diagonal lines to create a “Y”. Cut very precisely so that the points of the “Y” end exactly at each backstitch. Again, precision here will lead to a nicely shaped welt without any puckering.
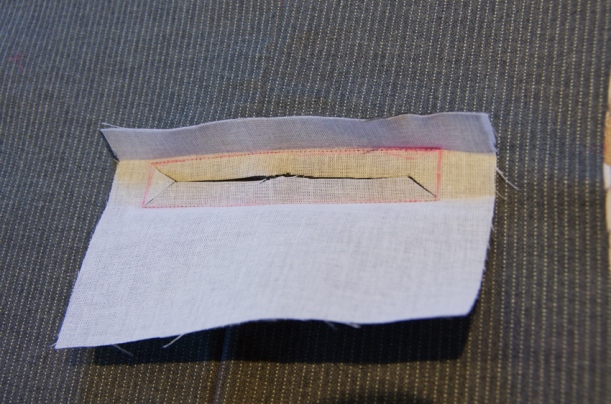
Now that the welt window has been opened, it is possible to push the welt fabric through your slice so that it is on the wrong side of the waistcoat front:


Flip your waistcoat front to the wrong side so that you are once again looking at your welt:

It’s time to do some more pressing! Can you tell how important pressing is to create a professional looking welt? It is essential!
 Underneath the lower part of your welt you will see two seam allowances. Press these open.

This helps to reduce bulk and allow the bottom of the welt to appear crisp.

Press the top and the two narrow sides of the welt along the seamline but do not press the bottom any more.

At this point you will have a crisp open window on your waistcoat front. We are now ready to fill it with the welt!

Fold the bottom of the welt upward to cover the open window and then fold downward again so that the raw edge is once again pointing towards the waistcoat hem:

Press the welt so that the fold sits evenly along the top of the window:
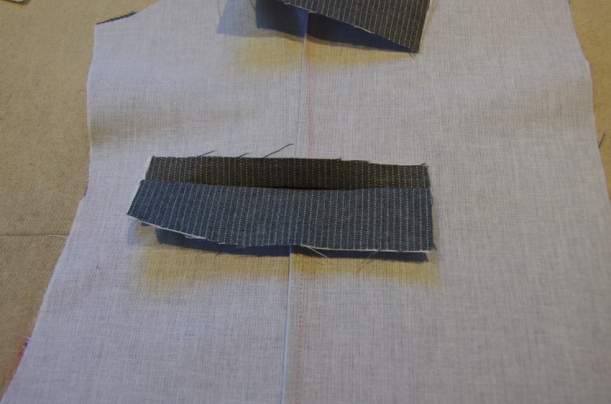
From the right side of the waistcoat your welt will appeal almost finished!

To secure the sides of the welt, fold back the waistcoat front to reveal the welt seam allowance and a tiny triangle of fabric that you created when you cut the “Y” earlier.

Stitch through the triangle and seam allowances:

Repeat this step for the other side of the welt.

When stitching these triangles in place it is important to ensure they are pulled taught but do not pull too hard. As you can see on my chest pocket, I pulled the triangle too far to the left which caused the grainline of my welt to become slightly skewed. The stripes are perfectly pattern matched along the bottom of the pocket but then they are pulled to the left near the top of the pocket…woops!
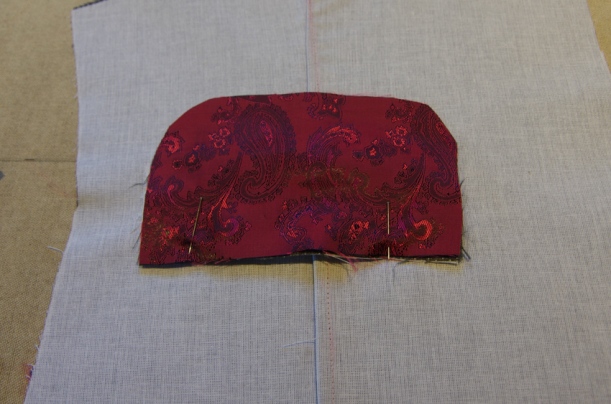
Now that the welt is complete (congratulations!), it is time to attach the pocket bag. Place the pocket bag on top of the welt with the right side of the pocket bag facing the wrong side of the waistcoat. The bag should be upside down so that the straight edge is lined up with the bottom of the welt.

Stitch the pocket bag to the bottom of the welt – I like to place the waistcoat on my sewing machine with the right side up and the front folded out of the way so that the welt seam allowance is visible.

Press the pocket bag down so that it sits in its final position:

Lay the pocket facings on top of the pocket bags and pin them to the welt and pocket bag seam allowances (don’t catch the waistcoat front with your pins).

Stitch around the sides and bottom of the pocket facing using a 5/8″ seam allowance (you do not need to be precise with your seam allowance here, as long as you are closing up the sides and bottom of the pocket so that your phone and change can’t fall out!).

The top of the pocket bag is still completely open. To close this up, lay your waistcoat with the right side facing you and fold the waistcoat down out of the way. This will expose the welt seam allowance and the top of the pocket bag:

Stitch through all layers (but not the waistcoat front):

You are left with a fully closed pocket bags and three finished welt pockets!

Give them one more press from the right side of the waistcoat front to make them appear as flat and crisp as possible. And now give yourself a pat on the back!
If you would like to add our free patch pocket pieces to your waistcoat front for a more casual look, here is how to do so:

Place your pockets and linings with right sides together. Pin across the top of the pocket and stitch using a 5/8″ seam allowance. Leave a gap in the middle (backstitch either side of this gap), so that you can use it to flip the pocket right side out later.

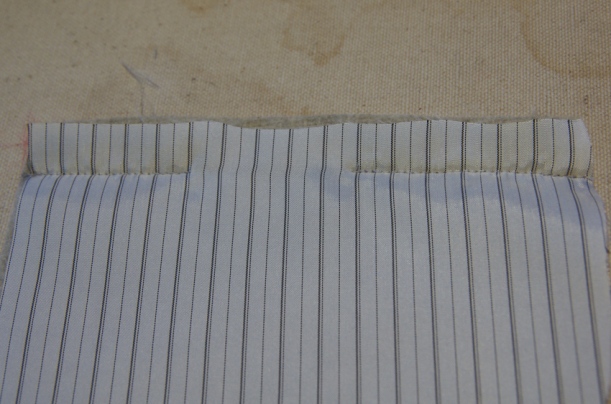
Pull the pocket lining downward so that it is even with the bottom of the pocket. Press along the notched fold line at the top of the pocket.

Stitch around the sides and bottom of the pocket using a 5/8″ seam allowance:

Clip triangles out of the seam allowances along the curved bottom corners.

If you are working with fairly thick fabric, thoroughly trim all seam allowances to reduce bulk as much as possible.

Flip the pockets right side out through the hole that you left in the lining. Press the pockets thoroughly.
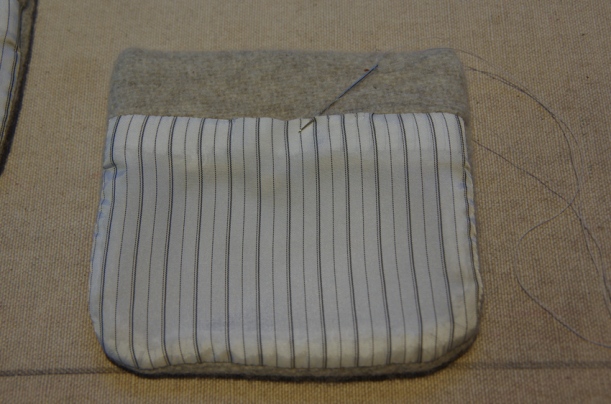
Handstitch the hole in the lining closed.

Determine the position of your patch pockets by using the welt pocket markings as a guide. I like to hold the waistcoat front up to the wearer and pick a position that suits the wearer best. Keep in mind that your pockets will look best if the grainline matches the waistcoat front – this means that the front edge of the pocket should be parallel to the waistcoat centre front.

Stitch the pockets in place using topstitching or you can opt to invisibly handstitch them from a clean and minimalist look.
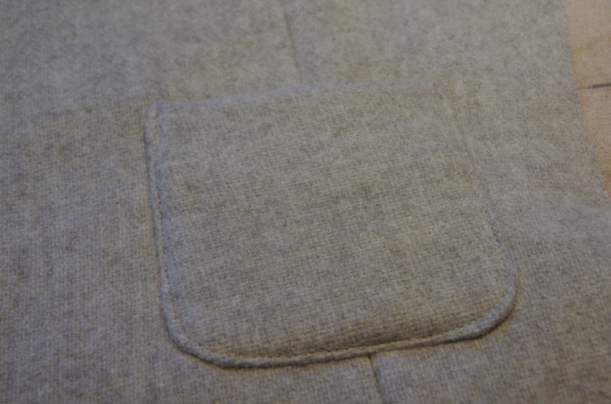
It’s as easy as that!
During our next post we will be finishing the waistcoat fronts by attaching the lining. I find that to be a very satisfying step so I’m looking forward to it!
Belvedere Waistcoat Sew-Along: Day 9 - Finishing the Front
Today we will be attaching the lining and facing to the Belvedere Waistcoat fronts. If you are sewing Variation 1, the first step is to create the side seam vents. These vents can actually be added to either variation if you would like a little bit more room for movement. The vent expands to create a larger circumference around the stomach while you sit, bend or simply have a full belly after a large meal!

Begin by cutting a small rectangle of fusible interfacing measuring approximately 2″ X 3″. Apply this to the wrong side of the lining at the bottom of each side seam. This will help add rigidity to the lining fabric so that the vent appears crisp and flat when finished.

Pin the waistcoat front to the lining with right sides together.

Beginning at the side seam notch, stitch across the 5/8″ seam allowance. When you get to the seamline, place your needle down in to the fabric and pivot around it. Stitch an angled line towards the hem notch.

Trim along your stitching so seam allowances are 1/4″ or less to reduce bulk. Clip up to your stitching at the corner.
Regardless of whether you are sewing Variation 1 or 2, it is now time to sew the hem, front and neckline seams. If you have added the vent, begin stitching at the hem notch. If you have not added the vent, begin stitching at the side seam. Stitch along the hem, pivot at the angled point and then stitch up the front until you reach the shoulder.
To prevent the lining and facing from rolling to the right side when your waistcoat is worn, understitch as far as possible along the hem and front.

To understitch, work from the right side of the garment and stitch the facing and lining to the seam allowance. Your stitching should be 1/8″ from your original seam.

It won’t be possible to understitch around the angled point at the hem. Simply stitch as far as possible and backstitch. Then you can continue a new line of understitching along the hem.

Trim one seam allowance shorter than the other and thoroughly clip in to the seam allowance along curves. Also clip across corners to reduce bulk.

Next we will close up the armhole. With raw edges of the fabric even and right sides together, pin the front and lining together along the curve of the armhole. Match the dart. Depending on the fabrics that you are using, you may notice that the lining has stretched out or that your wool front has shrunk during the sewing process. Not to worry! Lay out the lining so that it flat and equal in size (or slightly smaller) than the waistcoat front. Trim off the 1/8″ or so excess along the curve of the armhole. This will help to prevent the lining from peeking out on the right side of the waistcoat at the armhole.

Stitch the armhole curve using a 5/8″ seam allowance.

It is necessary to thoroughly trim the seam allowances and clip in to the curves since the armhole curve is so exaggerated. These clips will allow the fabric to sit smoothly when the garment is flipped right side out.

And now it is time! Let’s flip the waist coat front right side out!

Do this by reaching in to the open side seam.
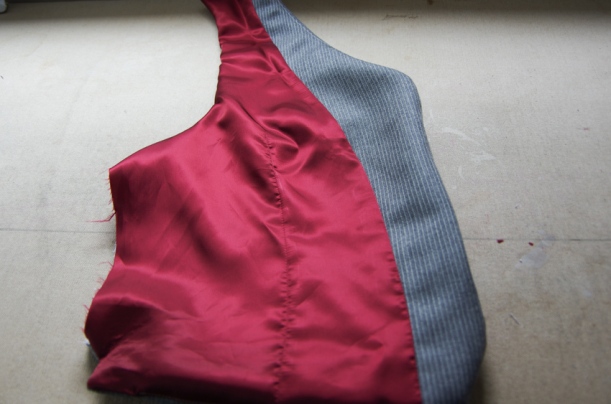
Now give the front a very thorough press.

Are you proud of how beautiful your finished front looks? I hope so!

Tomorrow we will add on the back and our waistcoats will be VERY close to finished!
Belvedere Waistcoat Sew-Along: Day 10 - Assembling the Back
Today we all but finish our waistcoats! By the end of this post the back and back lining will be completely attached to the waistcoat fronts so that buttonholes and buttons will be the only remaining step.
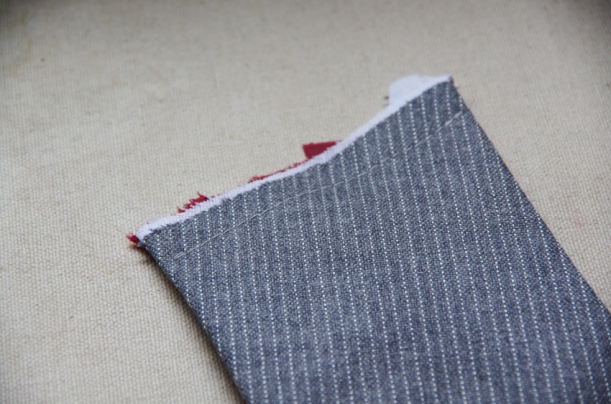
Prepare your waistcoat fronts by basting the open shoulder and side seams closed. This way the layers won’t shift around when you attach the back.
If you have drafted a partial shawl collar as I did in an earlier sew-along post, you will need to fold it over and stitch it in place before attaching your waistcoat back.
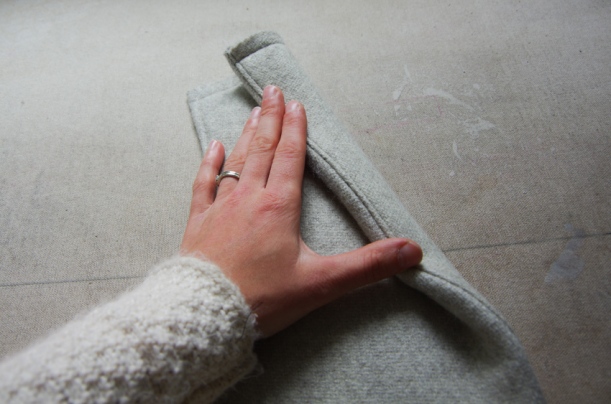
My fabric choice is unusually thick, so your collar will look much smoother and more flat when you fold it over. Do not press the folded roll line (it looks best when it is softly folded), just pin and then stitch the collar in place along the shoulder seam.

I handstitched the collar to the waistcoat front to keep it secure during my next sewing steps…I plan to take out this stitching once the waistcoat is finished, I just did this to reduce the bulk of the collar and maintain the shape of the collar even when the waistcoat is crumpled up and being pulled through the hem hole later (you’ll see what I mean in a bit!).
Also, I didn’t mention this during the post where we drafted the collar or where we understitched along the waistcoat front: You might like to stop your understitching just below your last button and leave the neckline without understitching. When you fold over the collar the facing becomes the visible part of the collar so your understitching is front and centre! The understitching also prevents the seam from being pressed slightly to the underside of the collar (in fact, it encourages the seam to roll towards the facing which makes it more visible. If I were to sew another vest with this style of collar I would make sure to stop my understitching before the top button. As it is, this chunky wool waistcoat will have other visible topstitching (on the tabs and at the armholes) so hopefully the understitching doesn’t look too out of place. I’m sorry if you now have to pick out some unwanted understitching, I should have thought to mention this sooner!
Ok, with the collar ready to go, let’s move on to another feature I’ve added to the waistcoat I am sewing for myself – the tabs found in our free add-on pattern pieces. Scroll down until you see the pinstriped waistcoat if you have not chosen to add these tabs.
Place each pair of tabs with right sides together and stitch around the long and pointed edges.

Trim the seam allowances and corners thoroughly.

Flip the tabs right side out.

Press them thoroughly and topstitch around the perimeter (I used 1/4″ topstitching but it is up to you what you use!). You could skip topstitching for a clean finish if you preferred.
Place the tabs on the waistcoat back at the narrowest point of the waist.

Baste them in place within the seam allowance.

Now you are ready to proceed with adding the waistcoat back to the fronts as per the instruction booklet!

Lay the waistcoat back (not the back lining) on your work surface right side up. Lay the fronts on top of the back so that right sides are together. Pin along the shoulder and side seams.

Baste along the shoulder and side seams using a scant 5/8″ seam allowance. Now is a perfect time to try the waistcoat on the wearer to check for fit! If you notice gaping along the back armhole you can experiment by taking in the shoulder or side seam. If you notice more or less room is needed at the waist (with the fronts pinned closed) you can take in our let out the side seam.

With any small fit adjustments done, it is now time to add on the back lining! Place the waistcoat back on to your work surface so the wrong side of your fronts are visible. Lay the back lining on top so that the wrong side is facing up. Pin along the shoulder seams, the neckline and the side seams.

Stitch the shoulder, neckline and side seams by following your basting stitches. To stitch the shoulders and neckline, begin by stitching one shoulder seam towards the neckline. Stop when you feel the neckline edge of your waistcoat front. Pivot your needle and stitch around the back neckline. Pivot once again when you feel the second waistcoat front edge and then finish by stitching along the second shoulder seam.

The only remaining openings are now the armholes and the hem. Pin the back and lining armhole seams together. You will need to shift the waistcoat fronts out of the way and stretch out the larger back armholes.

Stitch the armholes from shoulder seam to side seam.

The armholes feature a strong curve so it is necessary to clip these seam allowances carefully. You should also clip the neckline seam allowances to help this curve sit nicely when the waistcoat is flipped right side out.

Now the only step remaining is to stitch the hem. We will be leaving a gap between one of the darts and the centre back seam so that the waistcoat can be flipped right side out. Stitch from one side seam to the dart and backstitch. Stitch from the other side seam to the centre back and backstitch. If you are working with unusually thick fabrics you may need to leave a larger opening than this.
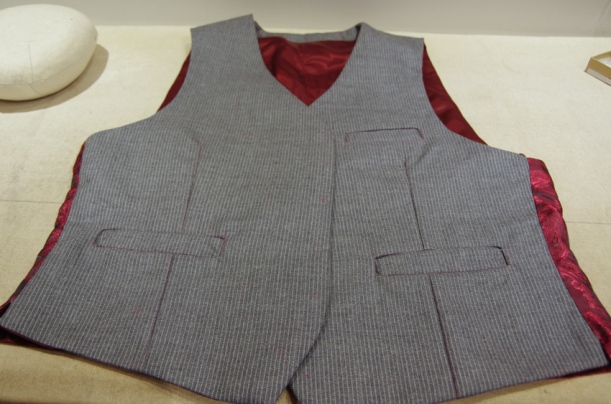
Trim the hem seam allowances and corners. Now fish the entire waistcoat through that hole and press the side seams, neckline, shoulder seams, armholes and hem thoroughly!

Close up the hem by hand. And while you do so, you may find that your carefully pressed waistcoat has become a cat bed (it seems as though she can sense when I’m going to be standing still and hand stitching for a while).
Now, we’re ready to add the buttonholes to the waistcoat front, the corresponding buttons and perhaps a label to the neckline!
Belvedere Waistcoat Sew-Along: Day 11 - Adding Buttons
This marks the final Waistcoat Sew-Along post! Today you get to try on your finished waistcoat!

All that remains is to sew our buttonholes and stitch on our buttons. I will run through how to do this as per the instruction booklet but first, based on a few emails from you guys, I’ve assembled ideas to help you avoid buttons…but really, I highly encourage you to try your hand a buttonholes because they aren’t that difficult and are essential for an elegant and classic waistcoat. As you can see, button alternatives are quite a statement and only work for certain situations:

Another idea is to close the waistcoat with ties or buckles. I couldn’t find any examples of this style of closure for menswear but I have added our Lazo Trousers buckles to the waistcoat I am making for myself so you can see how this idea could look in reality!

To add regular buttons and buttonholes:

Begin by refreshing or freshly making your buttonhole markings. If you are sewing Variation 1 you will be stitching 6 buttonholes and for Variation 2 you will be stitching 5. This is really a matter of preference though – you could change the spacing of the buttonholes and reduce to three or four if you desired!
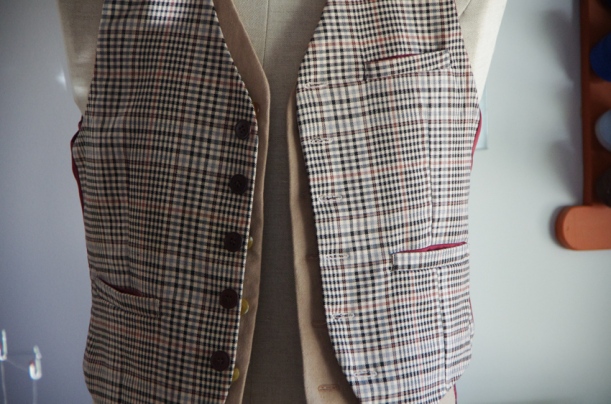
The buttonholes will be on the left hand side of the waistcoat (if you were wearing the garment). You can see I have a stack of examples on my dress form to prove this button and hole placement! I guess that’s what happens when you sew endless samples for a pattern, you end up with more waistcoats than any one person could wear.
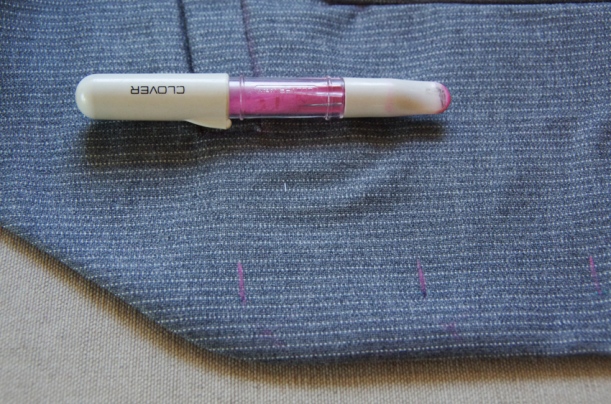
Position them approximately 3/8″ to 1/2″ from the edge of the waistcoat front…you can choose your distance based on the fit you would like to achieve. Stitching them closer to the edge of the waistcoat will give your wearer a little bit more room while stitching further from the edge will create a more snug fitting waistcoat.

Choose a buttonhole size that is slightly longer than the diameter of your buttons. This makes it easy for the wearer to button and unbutton his waistcoat. Check out this Craftsy article to determine exactly what size of buttonhole you need.

I like to stitch around my buttonholes twice to create tidy and dense rows of stitching…of course, this can really depend on how your individual sewing machine and buttonhole stitching mechanism functions.
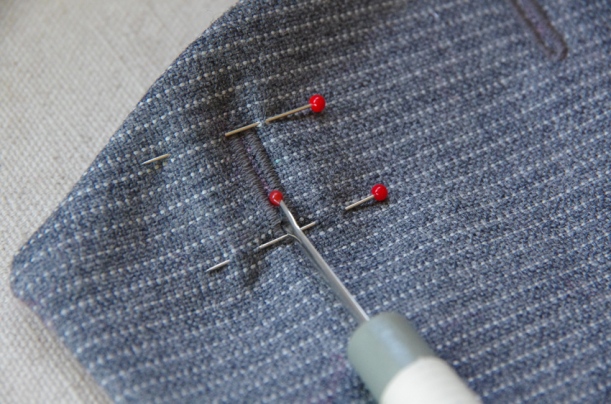
Slice open the buttonholes using a seam ripper with pins placed across either end of the buttonhole to prevent your seam ripper from slicing too far.
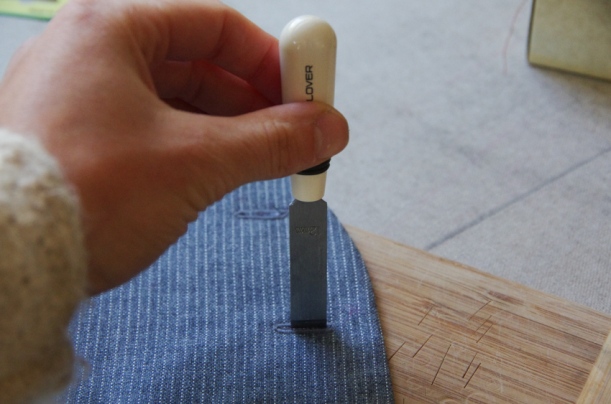
Alternatively, you can use a buttonhole chisel and cutting board. You could even snip with delicate buttonhole scissors.

Stitch your buttons on to the right hand side of the waistcoat (if you were wearing the garment) so that they correspond to the buttonholes. I like to re-check my markings by overlapping the waistcoat fronts and placing a pin through the buttonhole. This way I can be sure the button will line up perfectly with the hole.
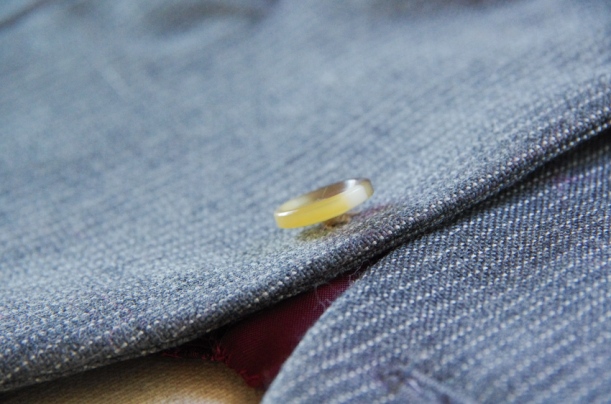
You might like to check out my tutorial about sewing on a button – I explain how to use beeswax to strengthen your thread and how to make a thread shaft for a strong button that is slightly raised from the garment fabric so that it is easy to use.
If you have sewn the tabs on to your waistcoat, add buttonholes to the tabs and then a total of four buttons to the waistcoat back. Position one set so they match the tab buttonhole without cinching the waistcoat back.

Place the other set so that they cinch the waistcoat back just enough to add some extra shaping.
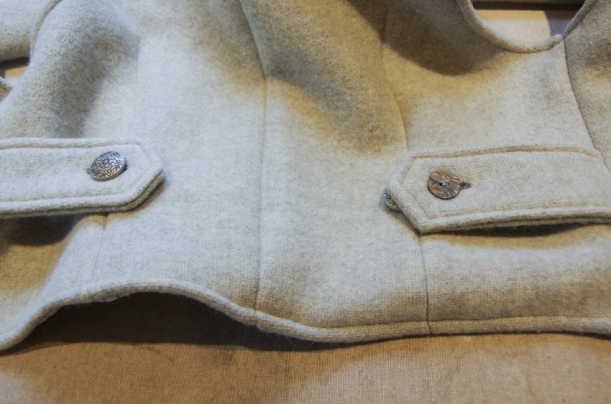
You can see the cinched version on the left hand side of the photo above and the relaxed version on the right hand side.

And that’s it! With a final press and perhaps a handstitched label on the back facing, your waistcoat is finished!

I will be sharing a parade of Belvedere Waistcoats on the blog next Friday, June 16th in honour of Father’s Day. Would you like your Belvedere in the parade? Email me at info@threadtheory.ca with photos or comment below with a link to your blog, Instagram or Facebook post. Alternatively, use #belvederewaistcoat on Social Media to share your finished project.

I can’t wait to see what you have created! Thanks for sewing along.


