Sew-along with us!

Perhaps you'd like some company while you sew? We've sewn up each of our patterns and photographed each step along the way. Find the pattern you're after in the filter drop down below left.

Fairfield Button-up Sew-Along: Day 14 - The Parade

Fairfield Button-up Sew-Along: Day 14 - The Parade

Stonemountain Fairfield Shirt

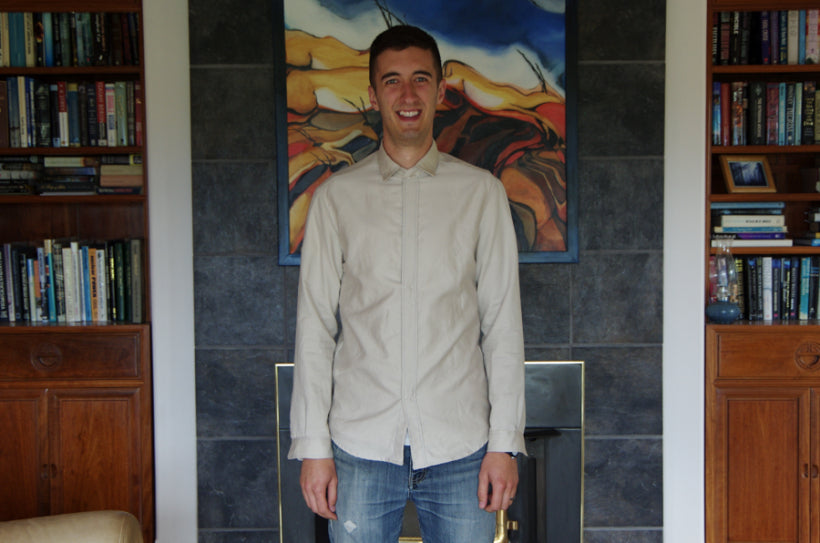
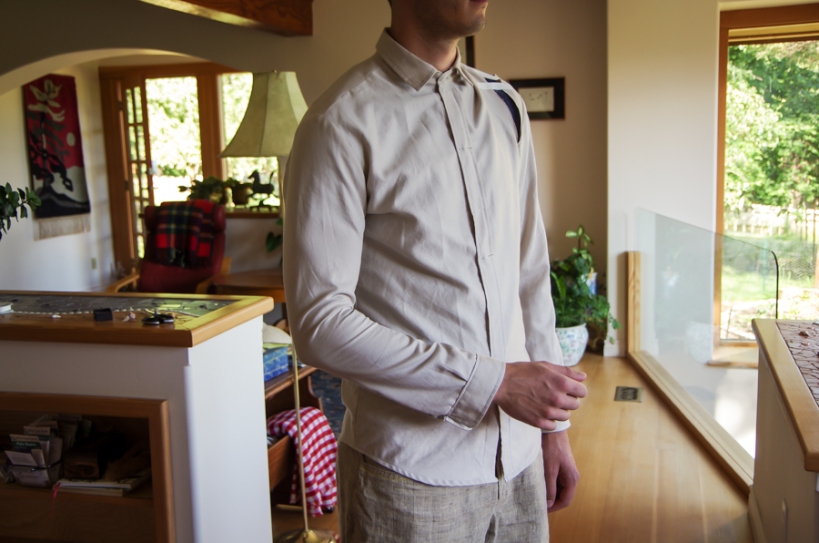
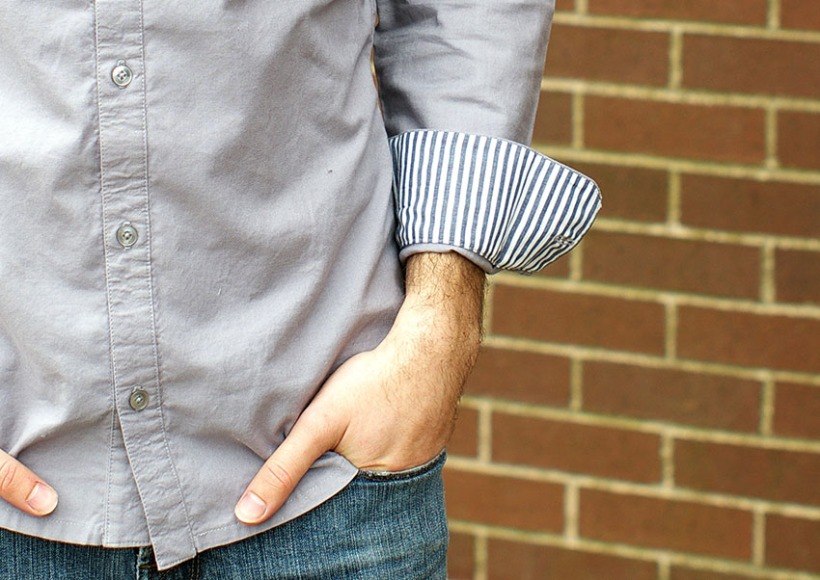
Today I want to show you an inspiring selection of Fairfield Button-up Shirts sewn by you as well as the finished Ikat Fairfield that I sewed during our sew-along.

Stonemountain Fairfield Shirt-3

Matt really loves this print and I think the indigo blue looks lovely with his brownish/blue eyes.

Stonemountain Fairfield Shirt-6

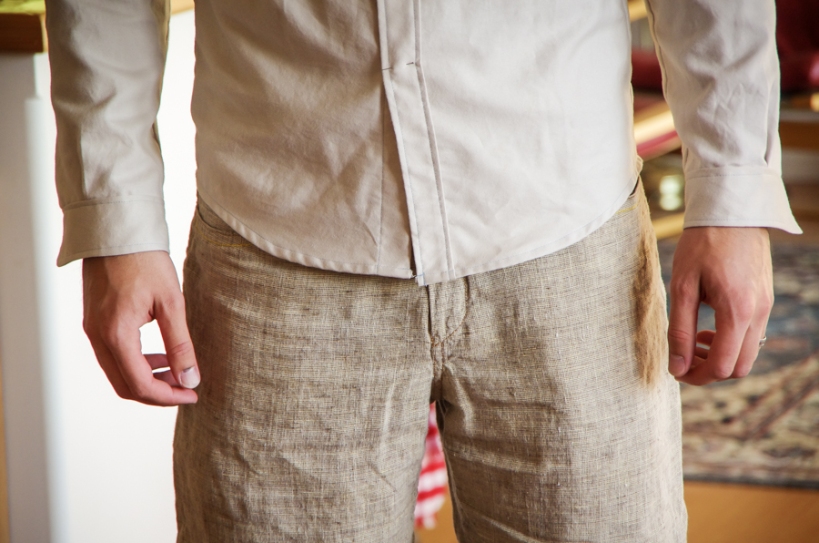
I’m really happy with the casual look that the contrast Tagua Nut buttons gave to the shirt.  The amber color looks very summery against the blue – like the sun against a blue sky!

Stonemountain Fairfield Shirt-13

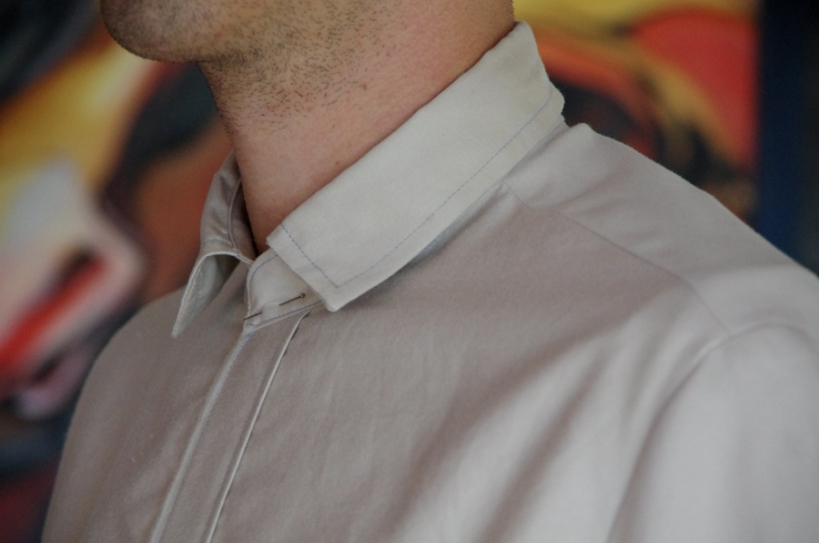
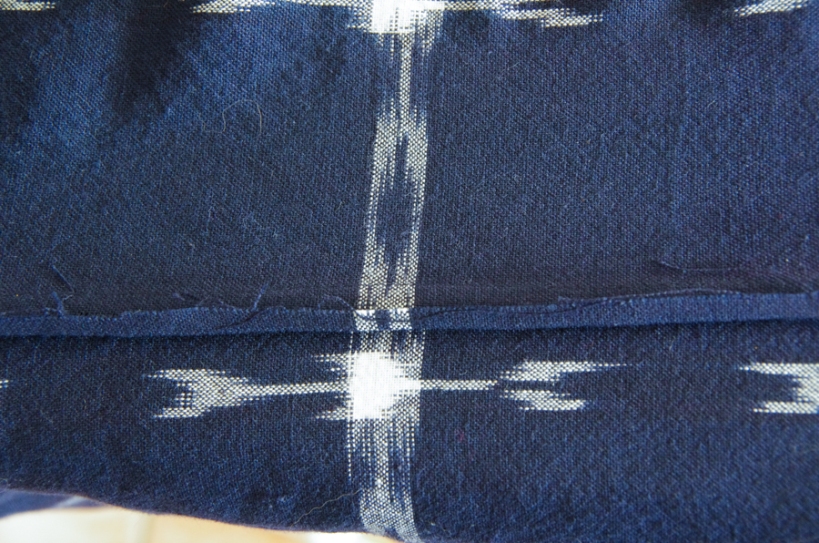
I decided to sew the buttons on by forming a cross with my shirt to echo the print of the fabric (usually I sew two horizontal lines when working with four hole buttons…sort of like train tracks).  I’m not sure if this echoing of the motif is too subtle that it is virtually unnoticeable.  I notice it though!

Stonemountain Fairfield Shirt-4

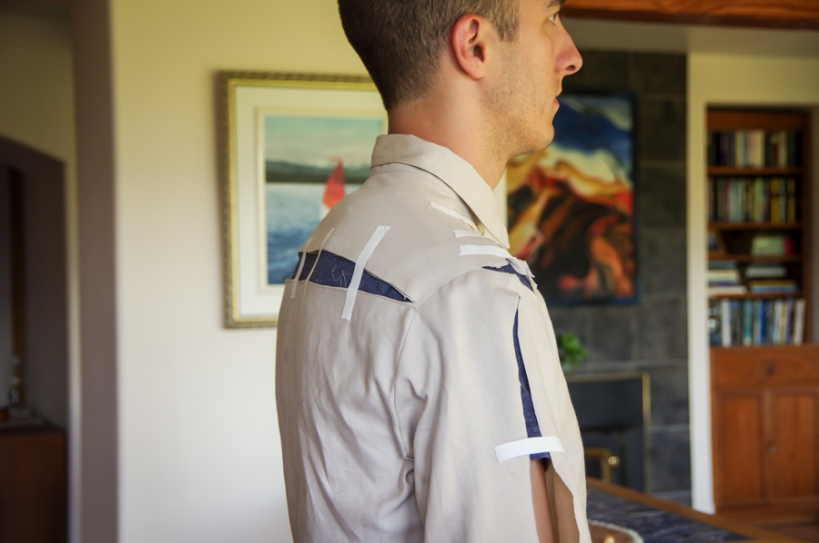
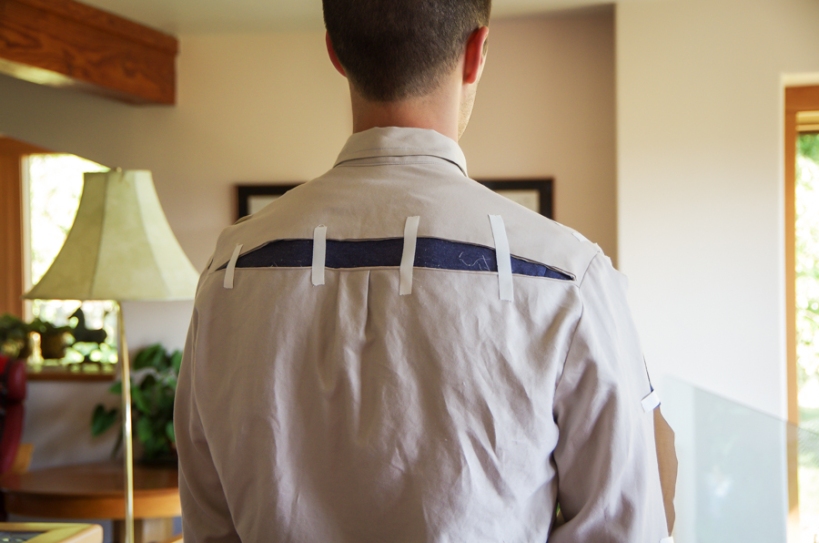
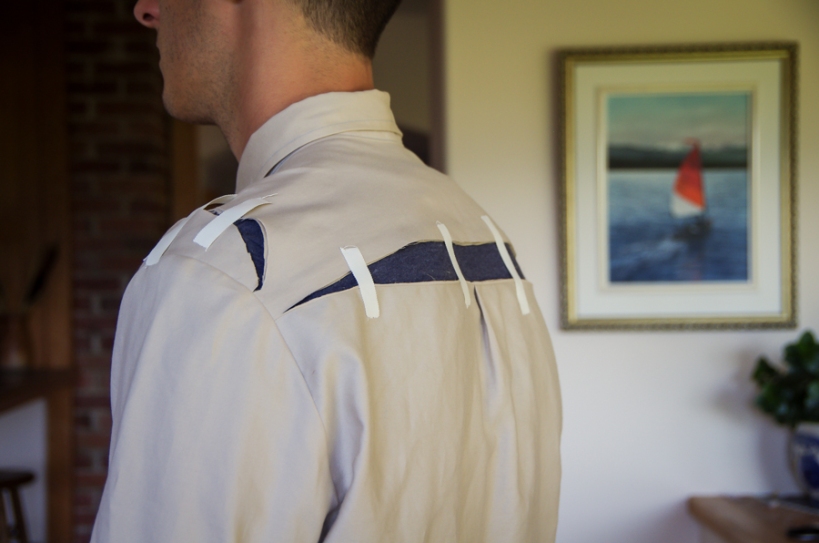
Matt really likes how the print placement worked out on the back yoke.  I’m glad I decided against placing the yoke on the bias.  I think the print was just a bit too large in scale for this cutting technique to have been effective.  I’m pretty pleased that the print matches along the collar and yoke at center back!

Stonemountain Fairfield Shirt-7

With all the shirt sewing that I’ve been doing lately, Matt’s closet is beginning to look quite fresh and full!  I have been choosing his fabrics with a general theme of “blue and bright” since last winter his wardrobe had become almost exclusively dull brown and olive green.  The influx of a few bright colored items has made a huge difference!  I might do a photo shoot of his new shirt wardrobe soon – all of the prints and colors look really nice together.
Stonemountain Fairfield Shirt-12

Now, the best part of this blog post – it’s time to show off your Fairfield Shirts!

Plaid Fairfield Shirt

_ym.sews_ achieved beautifully crisp cuffs and excellent print placement for her plaid Fairfield.  I love the careful use of contrast fabric for the cuff facing, collar stand and yoke facing!
Anniversary Fairfield Shirt

tiny_needles whipped up this Fairfield so quickly!  It was the first Fairfield Button-up that I saw in the wild after our pattern release.  Her boyfriend wore this very dapper shirt for their anniversary celebrations.

Fairfield Button up featuring sleeve tabs

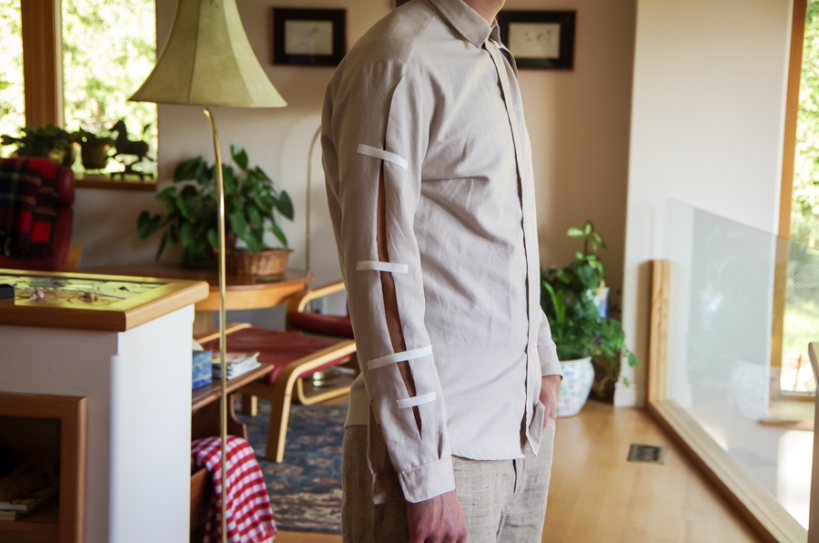
One of our test sewers, Sarah, sewed this fresh and summery Fairfield for her husband.  I like how the sleeve tabs add such versatility to this shirt.  With the sleeves full length it looks very dressy but with the sleeves rolled up it takes on an airy and comfortable vibe that could easily work with brightly colored shorts!

Fairfield Button up with contrast yoke and pocketAfter completing her first Fairfield Button-up, Sarah immediately cut out another one – this time for her brother!  She had a lot of fun playing around with the stripes (she added a seam down center back) and she added some hidden froggy details.  Isn’t the frog peaking out of the front pocket such a great idea?!  She added a lining to the pocket to achieve this detail.

Fairfield Shirts by you

These three Fairfields have been sewn by bego_aguilera_caballero, Ana, and sewing_dutch.  The whimsical print on Begoña’s shirt is just lovely (especially with those dreamy houseplants as a backdrop). Ana sewed the band collar (available in our Alternate Collars free download) on her green linen shirt.  The band collar and linen are a match made in heaven!  Lastly, the subtle floral yoke adds such hanger appeal to Becca’s shirt.  She also sewed a striped grosgrain ribbon down the right front of her shirt which adds structure (for stronger buttons) and the perfect contrast if the top button is left undone.
Scared Stitchless Fairfield Shirt

And last, here is a great example by scaredstitchless of how much fun you can have when sewing a wearable mock-up!  Quilting cottons provide a limitless palette of bold colors and unique prints.  I’m impressed that she managed to find perfectly matched orange buttons!
Thank you, everyone, for joining me on the Fairfield Sew-along and for sharing your Fairfield photos by emailing me or by using #fairfieldbuttonup !  It’s been a thrill to see how smart your shirts look.  If anyone has wrapped up their shirt to give on Father’s Day, I look forward to hearing about the grand reveal!

June 28, 2022
Jedediah Sew-Along | Getting Started

Jedediah Sew-Along | Getting Started

To get started for the Jedediah Pants Sew-along, please refer to the following links to gather everything you need to sew this pattern.
From our haberdashery here are some tools and notions that would be helpful for this project:


The Jedediah Pants Sew-Along will be separated into 5 segments for easy to follow, step-by-step images, and tutorials:

1. Front and back pockets

2. Finishing seams using bias binding and the flat felled seam method (back yoke, inseams, and side seams)

3. Sewing a fly zipper

4. Belt loops and waistband

5. Hem and cuffs


For inspiration check out #Jedediahpants on Instagram and our community Pinterest board


June 23, 2022
Jedediah Sew-Along | Front and back pockets

Jedediah Sew-Along | Front and back pockets

To assemble the front and back pockets you will need:
(1) Pants Front 
(2) Pants Back
(3) Pocket Facing 1
(4) Pocket Facing 2
(5) Back Pocket
(10) Pocket Lining
Fold under the long, straight edges of the Pocket Facing 1 and Pocket Facing 2 pieces 5/8" (1.6 cm) to the wrong side. Press.
Pin the Pocket Facing pieces to the Pocket Lining matching notches and raw edges, making sure all pieces are lying completely flat.
TIP: If you are using a decorative lining, match the pocket facing pieces to the wrong side of the pocket lining fabric. This way, the decorative side of the pocket lining will be right side out when fully assembled.
Edgestitch along the folded edges of the pocket facing pieces.
Baste within the seam allowances around the remaining edges of the pocket facing pieces, securing the pocket facing pieces to the pocket lining.
With right sides together match the pocket to the front pant leg. Align the angled edge of the pocket facing 2 piece with the angled edge of the front pant. Stitch at 5/8" (1.6 cm) and finish the seam allowances together.
Open along the seam with the right sides facing up. Press the seam allowances towards the pocket.
Understitch along the pocket facing, catching the seam allowances underneath. 
Sew the bottom of the pocket lining using a French seam. Fold the pocket lining along the notches, with the wrong sides together. NOTE: if you are using a decorative pocket lining match the right sides of the pocket lining together. Stitch along the bottom of the pocket lining from the centerfold to the edge of the facings at 3/8" (1 cm). Trim the seam allowances to 1/8" (0.3 cm).
Turn the pocket lining out so that the pocket facings are enclosed in the pocket lining. Press along the bottom edge of the pocket lining. Stitch along the bottom of the pocket lining at 1/4" (0.6 cm) to secure the interior raw edge.
Fold the pocket to the wrong side of the front pant leg, aligning with the waist and side seam edges. Baste the top and side edges to the pant front, matching notches, to keep the pocket positioned correctly.
OPTIONAL: Topstitch along the pocket opening.
Finish the top edge of the back pocket pieces. If you haven’t done so already, transfer decorative pocket stitching markings to your pocket pieces (or design your own!). You could use a normal polyester thread or a thicker topstitching thread to stitch your design.
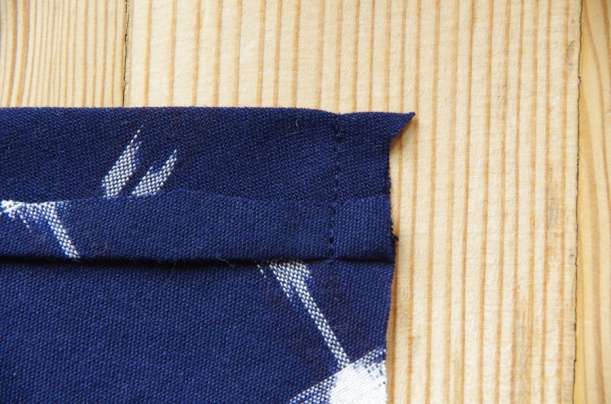
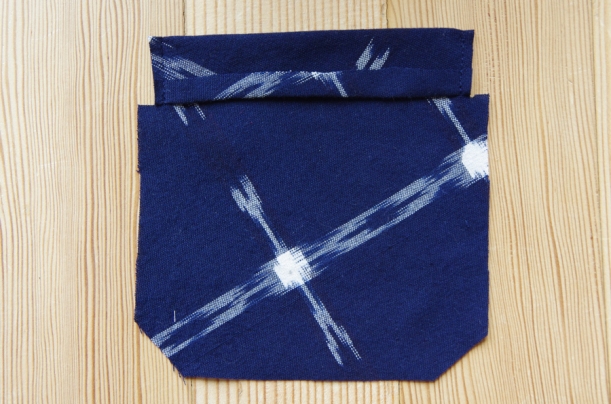
Fold each back pocket along the topmost notched fold line with the right sides together. Sew at 5/8" (1.6 cm) through both layers. Trim your seam allowance to 1/4" (0.6 cm).
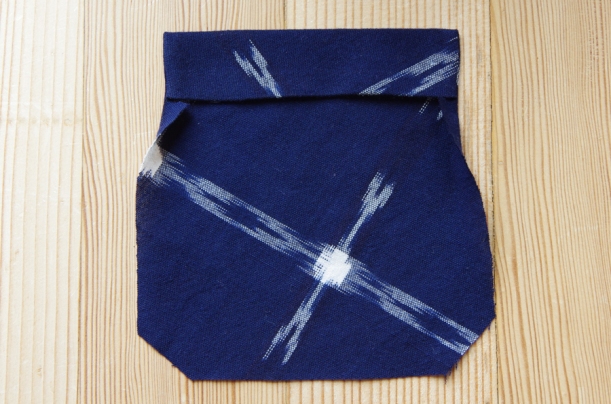
Turn the pocket right side out. Use a point turner to create crisp corners at the top of the pocket.
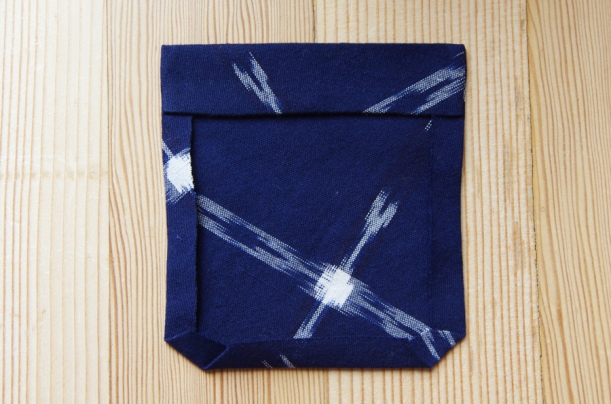
Press the remaining seam allowances to the wrong side of the back pocket pieces at 5/8" (1.6 cm). Press neatly. 
Stitch at 1/2" (1.3 cm) along the top edge of the back pocket to secure the top edge.
Line up the back pockets with the markings on the back pant. Pin pocket carefully in place (be sure to have the correct pocket on the corresponding pant leg so that the decorative stitching points in the right direction). Edgestitch around the pocket. Form a triangle of stitching at both top corners for reinforcement.
You have completed the pockets for the Jedediah Pants! Take a well-deserved break before diving into the next session.
June 23, 2022
Jedediah Sew-Along | Finishing seams (back yoke, inseams, and side seams)

Jedediah Sew-Along | Finishing seams (back yoke, inseams, and side seams)

To assemble the pants legs and create the seam finishes shown in this section of the sew-along please get ready:
  • Front pant
  • Back pant
  • Back yoke
  • Scissors
  • Bias binding (optional)
For the back yoke and inseams, we will be using a flat felled seam to finish the seam allowances. Refer to the diagram in your instruction booklet for step-by-step illustrations.
With wrong sides together, match one back yoke to one back pant aligning notches. Stitch at 5/8" (1.6 cm). Press the seam open.
This step is very important to pay attention to. Trim ONLY THE LOWER seam allowance edge to 1/4" (0.6 cm). Do not trim the top seam allowance edge.
Press both seam allowances toward the back pant leg. Fold the TOP seam allowance edge around the LOWER trimmed seam allowance edge, securing the raw edges. The top seam allowance will now be about 3/8" (1 cm) wide. Edgestitch along the pressed folded edge to finish the seam.
Variation 1: Shaping the pant legs (see diagram in the booklet)
Lay out both Pant Leg Fronts with right sides together on your ironing board. Use the iron (with lots of steam) to stretch the areas indicated in the instruction booklet. By stretching these areas, and keeping the indicated areas short, the pant legs will better fit the contours of the leg and there will be less easing involved when sewing the side seam and inseams. Repeat for the back pant legs.
Your inseams and outseams will look slightly rippled as shown, but the seam will match up easier for the front and back legs.
Match the front and back legs together at the inseam. Finish the seam using a flat felled seam.
SIDE SEAMS OPTION 1: 
With right sides together, match the front and back pant legs at the side seams, matching notches. Sew the seam, easing in any excess. Finish the seam allowances together and press towards the back leg.
SIDE SEAM OPTION 2:
With right sides together, match the front and back pant legs at the side seams, matching notches. Sew the seam, easing in any excess. Press open the seam allowance. 
Bind the seam allowances with contrast or color to create an interesting detail on rolled cuffs. Use store-bought 1/4" (0.6) double-fold bias binding or make your own using a thin cotton fabric.
TIP: To reduce bulk at the hem, only bind the seam allowances to the hem fold line. 
Place a bar tack or rivet just below 5/8" (0.6 cm) at the top of the pocket opening.
Extend bar tack from the side seam towards the center front at the point where the pocket opening edge meets the side seam.
June 23, 2022
Jedediah Sew-Along | Sewing a fly zipper

Jedediah Sew-Along | Sewing a fly zipper

In this section, we will be sewing a fly zipper. Sewing a fly zipper can be challenging in that there are several steps and it is important to follow notches and markings exactly so that the zipper (and waistband in later steps) will line up correctly.
Drink some water, take some deep breaths and let's get started!
Before we begin please have ready:
  • Zipper
  • Zipper shield
  • Scissors
  • Fusible tape (optional)
  • Marking pen and ruler

Double-check that all markings are transferred from your pattern to your front pant legs at the center front and the waist edge.

Finish the crotch seams and fly facing edges before you sew up the seat seam. Options include serging, zig-zagging, or binding.
Tip: If you are using a bulkier material you may want to avoid using binding for the seat seam — this is a better treatment for lighter weight pant fabrics.
Serging or zig-zagging the entire seam and then strengthening the seam using topstitching (this step is included later on in the instructions) will create a stronger and less bulky finish for these close-fitting pants.

Starting at the center back yoke, pin the two pant legs together along the crotch seam ensuring that all seams and notches match. This is quite tricky where the flat fell back yoke seam meets up and may take several tries.
Stitch until 1/2" (1.3 cm) below the zipper placement mark at the center front. Check that your seams line up nicely and reinforce this seam by stitching over it one or two more times (this is an area that needs to be very strong). Refrain from pressing this seam until you are finished sewing your fly.
Fold fly facing extensions under and press as follows (see the diagram in the instruction booklet and the image above for reference):
The Left Front (if you were wearing the pants) will act as the TOP, the most visible part of the fly. Fold and press the left front fly extension to the wrong side at the notch FURTHEST from the curved fly facing edge.
The Right Front (if you were wearing the pants) will be BEHIND the Left Front and will be folded and pressed at the notch CLOSEST to the curved fly facing edge. This will create a smaller facing and a 1/4" (0.6 cm) extension.
Apply interfacing to one of the zipper shield pieces.
With the right sides together match the two zipper shield pieces along the curved edges. Stitch along the long curve at 5/8" (1.6 cm). 
Grade and clip the curves.
Turn the zipper shield right side out and press neatly. Serge or bind the remaining long edge.
Position the zipper shield so that the curved edge is facing towards the right and the serged or bound edge is to the left.
With the zipper facing up, place the zipper on the zipper shield. Match the edge of the zipper tape with the finished edge of the zipper shield.
Using a zipper foot, stitch along the LEFT side of the zipper close to the zipper teeth.
TIP: I find it easier to install zippers using a zipper that is a longer length than stated in the materials section. Using a longer zipper makes it easier to move the zipper pull out of the way when sewing. If using a longer zipper, match the bottom of the zipper with the bottom of the zipper shield. Let the top of the zipper tape and zipper pull extend beyond the top of the zipper shield.
TIP: Instead of using pins, use fusible tape to keep the zipper in place. 
 
Using a zipper foot, edgestitch the zipper and zipper shield to the RIGHT FRONT PANT fly extension. Line up the pressed edge of the fly extension on top of the zipper and close to the zipper teeth. Sew to the circle zipper placement mark on the front pant. Make sure the zipper stop is lined up with the zipper placement mark, even if the zipper extends over the top of the pants. (If using a longer zipper, the zipper will extend over the top of the pants).
With the right sides facing you, set up the fly as it will look when it is finished (with 1/4" (0.6 cm) overlap). Place a pin through the right and left front at the center front to keep the pieces in this position.
Turn the pants around so you are looking at the wrong side of the RIGHT FRONT PANT. Lay the zipper flat (you will be looking at the underside of it) with the curved fly facing and zipper shield extended out. 
Fold the zipper shield out of the way (as shown).
With the right sides together, line up the right-hand side of the zipper tape with the finished edge of the LEFT FRONT fly extension. Use a zipper foot to stitch the zipper to the FLY EXTENSION ONLY. Make one line of stitching close to the zipper teeth, then make another closer to the edge of the zipper tape.
Turn the pants so you are once again looking at the right side. Use chalk or tape to mark your fly topstitching. Mark the topstitching 1" (2.5 cm) away from the folded edge, down the fly extension, and curved in toward the top of the crotch seam.
Fold the zipper shield out of the way once more – be very careful not to catch this during the next step.
Following the markings, you made in the previous step, topstitch along the LEFT FRONT catching the zipper and fly extension underneath. 
Fold the zipper shield back under the zipper to its intended position and bar tack for 3/8" (1 cm) through all layers where shown. This area is often under a lot of pressure on casual pants.
UNZIP THE FLY ZIPPER and make sure the zipper pull is farthest away from the top of the pants.
Switch back to your regular presser foot. Within the seam allowance, at the waist edge, stitch horizontally over the zipper AND zipper teeth several times to create a new zipper stop. Do this on the LEFT FRONT and RIGHT FRONT. Test the new zipper stops by closing the zipper and making sure the zipper pull does not go past the stitching.
Trim off the excess zipper tape.
You have successfully created a zipper fly! Do a little celebration dance for getting through all these steps. 
OPTIONAL: Now that your fly is finished, press the seat seam allowances to one side. Topstitch the seam allowances in place to create a fake flat felled seam. To make this look even more convincing, you could edge stitch along the seat seam as well.
June 23, 2022
Jedediah Sew-Along | Belt loops and waistband

Jedediah Sew-Along | Belt loops and waistband

This part of the sew-along is the last lengthy and involved segment to completing the Jedediah pants. For this part please have ready:
  • Belt loops
  • Waistband + waistband interfacing
  • Bias binding (optional)
  • Pants
  • Button
  • Seam ripper or buttonhole making tool
Iron the three belt loop pieces as follows: Fold each long edge in 3/8" (1 cm) towards the center of the strip of fabric. Press. Fold the strip in half to enclose raw edges and press again (just as you would to make binding). Topstitch along either edge to form a flat belt loop piece.
Cut each strip in half to create six belt loop pieces (you will only be needing five, so look through the pieces and choose the five with the nicest topstitching).
Line each belt loop up with the top edge of the pants with the right sides together (there is no proper right side for the belt loops – choose the side where the topstitching looks nicest). Place the belt loops as illustrated (two in the front, 3 in the back) in the instructions booklet or match the position of the loops on a favorite pair of trousers. Baste the top edge in place.
Apply fusible interfacing to the wrong side of the waistband piece. 
Press the waistband in half with the wrong sides together, then open flat.
NOTE: If you are not using binding to finish the waistband edge in later steps you can either:
  • Press under one long edge to the wrong side at 3/8" (1 cm). 
  • Finish one long edge with a serge or zig-zag stitch
Open up the waistband and pin one edge of the waistband to the pants with the right sides together. The waistband should extend 5/8" (1.6 cm) past both ends of the pants. Stitch the waistband and pants together, easing in the excess pants material.
Grade the pants seam and the belt loops and press the seam upward into the waistband.
Apply binding to the other long waistband edge.
Sandwich the pants between the right sides of the folded waistband so that the waistband is closed with the right sides together and the pant material is tucked out of the way inside of this sandwich. This way, the corner of the waistband can be sewn without catching the pants.
Starting at the folded waistband edge, sew at 5/8" (1.6 cm), pivot at the waistband corner, and sew across the waistband edge that has been sewn to the pants for 1-2 inches (3-4 cm). Trim corners and grade excess seam allowance up to the point where you finished stitching.
Turn the waistband corner right side out and press so the corner is crisp. Where the stitching ends at each corner, unfold the bound edge of the inner waistband and press flat.
Pin both layers of the waistband in place with the inner waistband lying unfolded from the stitched corner onwards (as shown). From the right side of the pants, topstitch along the lower edge of the waistband.
With belt loops still pointed down, stitch across the loop 3/8" (1 cm) below where it has been sewn into the waistband.
Flip the belt loop up and loosely curl the top edge under 1/4" (0.6 cm).
Stitch across the top of the belt loop several times to secure it to the waistband.
Add a buttonhole to the center of the left front waistband. Start the buttonhole 1/2" (1.3 cm) from the edge of the waistband.
Hand-sew a button to the right front waistband above the zipper teeth.
June 23, 2022
Jedediah Sew-Along | Hem and cuffs

Jedediah Sew-Along | Hem and cuffs

The final steps to completing the Jedediah pants! You don't need any tools for this section, just the pant legs.
Try the garment on the soon-to-be wearer to check length prior to hemming. Press the hem up 3/4" (2 cm) and again 3/4" (2 cm) to enclose the raw edge.
Stitch 1/8" (0.3 cm) away from the folded hem edge.
If you are sewing the Pants Variation you are DONE! Give your garment a final press and your pants are ready to wear! 
Roll up the cuff 3/4" (2 cm) (at the edge of hem) and again 1 1/2" (4 cm). Press. Stitch in the ditch along the inseam and out-seams to keep the rolled cuff in place.
Your shorts are DONE! Give them a final press and they are ready to wear!
June 23, 2022
Mahle Tie Sew-Along

Mahle Tie Sew-Along

A well-sewn tie is a deceptively easy project with a very professional result. The beauty of sewing a custom tie is that the options to personalize are limitless! Pick a novelty print, very special silk, a fashion fabric that matches the partner's dress, or a vintage fabric that holds a special memory. The finished result will be a treasured piece that showcases the unique fabric choice and elevates a business or special occasion outfit!
To get sewing a custom tie with us, first, download your Mahle Tie pattern. Head to our PDF pattern tutorial if you are unfamiliar with using digital patterns...don't worry, it isn't difficult!
Next, take your time collecting your materials:
You will need:
• 1 yard (1.1 meters) of medium weight silk, rayon, linen, lightweight cotton, or wool
• 1 yard (1.1 meters) of sew-in wool or wool/nylon blend interlining
• Silk thread
• Hand sewing needle
• Microtex or fine point sewing machine needle (for sewing silk or rayon fabric)
• Beeswax
• OPTIONAL FOR QUILTING COTTON OR SIMILAR FABRICS: 1/4 yard (0.2 m) lightweight interfacing or canvas lining
• OPTIONAL: Source your interlining materials from a vintage tie. To do this, carefully take the tie apart by ripping out the center seam. Gut the tie, trim the interlining and canvas pieces to size, and then use them as the inner material for your tie.
If you are sourcing from a store-bought tie, gather the canvas interfacing and interlining.
Trim the inner materials to match the pattern pieces for your size tie.
Cut the pattern pieces out of fabric and lining on the bias. 
It is easiest to cut out your bias pieces if using a striped fabric as shown, but if you are using a print or solid color carefully measure from the selvedge to the grainline and use as many pattern weights as needed to keep the pattern piece on the bias. 
The shell pieces are the blade, neck, and tail pieces.
Trim the outer four edges of the blade tip lining and tail tip lining pieces 1/4" (0.6 cm). Do not trim the bottom straight edge.
Center the blade tip lining onto the blade with right sides together.
Shift the blade tip lining and blade so that the left raw edges are aligned.
     
Stitch, using a 1/4" (0.6 cm) seam allowance, along the outer and diagonal edges towards the blade tip lining point, stopping 1/4" (0.6 cm) from the point.
Pull the blade tip lining over to the other side of the blade aligning the right raw edges.
    
Pin. An intentional bubble will form on the blade because it is wider than the blade tip lining.
     
Push the bubble out of the way so it stays at the point and doesn’t get stuck in the outer and diagonal edges. To make sure you don't accidentally sew the bubble, sew with the lining side up.
       
Stitch, again with a 1/4" (0.6 cm) seam allowance, along the outer and diagonal edges together towards the tie point. Your stitch line will match up with the previous stitch line.
Pinch the bubble at the blade point, and fold it in half, matching the diagonal edges.
     
Stitch across the blade point bubble using a 1/4" (0.6 cm) seam allowance. The stitch will end up being perpendicular to the diagonal stitch lines. Start by placing your sewing needle down in the center of the stitch line, leaving the bobbin and needle thread tails long and towards the back of your sewing machine. Gently pull on the thread tails when you start stitching. Stitch forward first until your stitches match the lining stitch lines. Then, backstitch off of the fabric. Tie the thread tails together to secure the stitch.
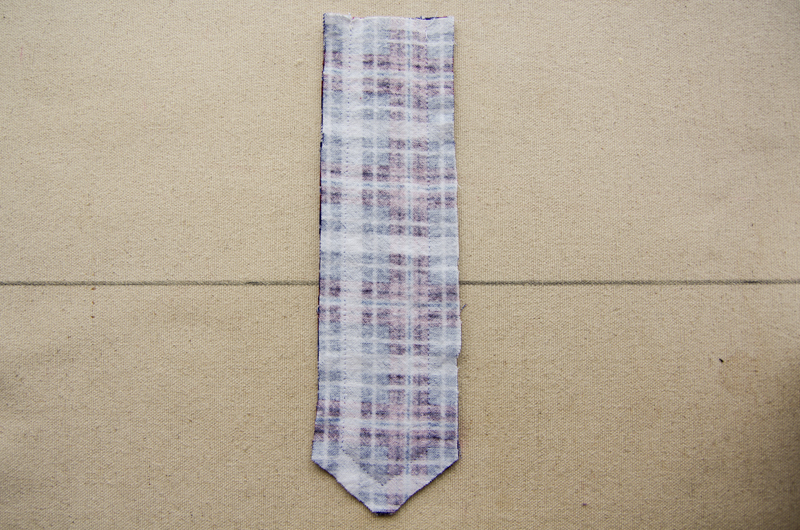
Turn the blade and blade tip lining pieces right side out. Do not trim or grade the seam allowances as the seam allowances are narrow and could fray easily depending on your choice of fabric. Press neatly in place. Repeat for the tail and tail tip lining.
With the right sides together, match the neck piece to the blade piece. Align the short edges to be perpendicular as shown in the picture, this will keep the bias grain going in the same direction. Stitch using a 1/4" (0.6 cm) seam allowance.
Repeat for the tail and neck piece. Press the seam allowances open.
Assemble your interlining pieces by abutting the short edges together and stitching them together with a wide zig-zag stitch.
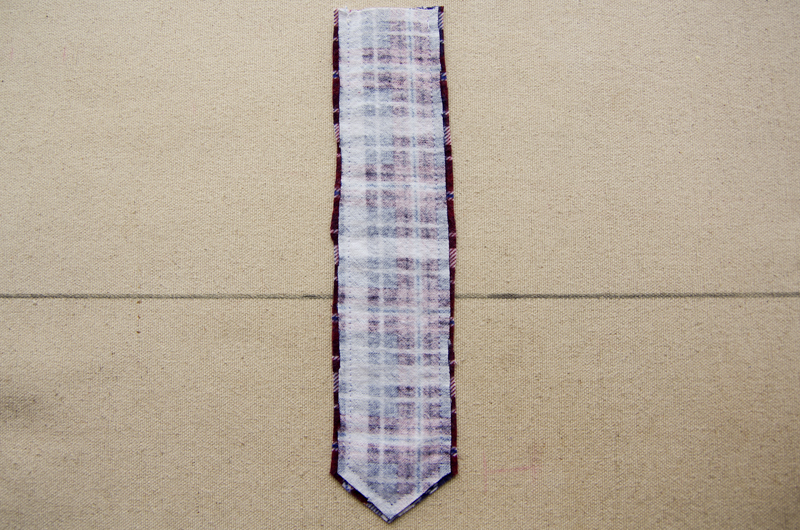
At the blade tip, insert the canvas interfacing in between the layers of the blade and blade tip lining. Use a point-turner tool to get the tip of the interfacing to match up with the blade tip. The interfacing should be aligned with the blade shell fabric.
Next, insert the interlining into the blade and tail tips, matching the points.
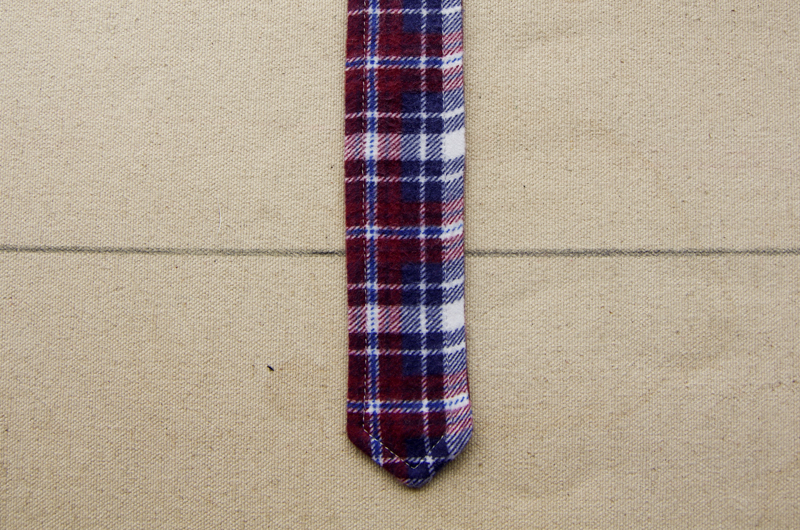
Fold the long outer edges of the tie to the wrong side at 1/4" (0.6 cm). Press.
Fold the outer edges of the tie to the wrong side once more, aligning the pressed edges to meet in the center of the tie. They can also overlap slightly, but no more than a scant 1/4" (0.6 cm). Press in place. To keep the fabric from stretching or warping on the bias when pressing, rather than sweep your iron across the fabric, carefully lift, move, and place your iron along the length of the fabric.
Fold both long edges of the keeper loop to the wrong side, meeting in the center. Press.
     
Fold the keeper loop in half once more aligning the long folded edges. Press. Edgestitch along the folded edges at a scant 1/4" (0.6 cm) seam allowance.
Measure up the center of the blade to just before the neck seam. Unfold the seam allowance.
Fold the keeper loop in half aligning the short edges.
   
Insert the keeper loop into the blade opening at the measured point. Stitch the short edges of the keeper loop to the blade seam allowance, stitching within the blade seam allowance.

Fold the blade seam allowance back in place and press. No stitches will be visible from the exterior of the tie.
Using silk thread and a hand sewing needle, hand-sew the center seam of the tie using the slip stitch technique as follows:
      
Cut a long strand of thread so that you can sew the seam together in one go. This will help to keep the natural fluidity of the finished tie. Run your thread through beeswax to prevent your thread from knotting up while sewing.
       
Begin at the tail end by backstitching a few times to anchor your thread. Sew along the seam creating long and loose slip stitches, about 1/2" (1.3 cm) apart. Be very careful that you are only sewing the seam together and not stitching into the tie front.
Once you get to the end of the seam, anchor your stitching using several backstitches. The first backstitch you create leave as a long loop, about 1" (2.5 cm) in length. Make the remaining few backstitches as normal. This loop may be awkward at first but will adjust in tension as the tie is worn and rolled over time.
If you added the keeper loop, now you will finish and secure the loop to the tie.
Press the keeper loop open so that it is flat and centered over the tie seam.
Using your hand sewing needle and silk thread tack the short folded edges of the keeper loop to the back of the tie, being careful not to stitch through to the tie front.
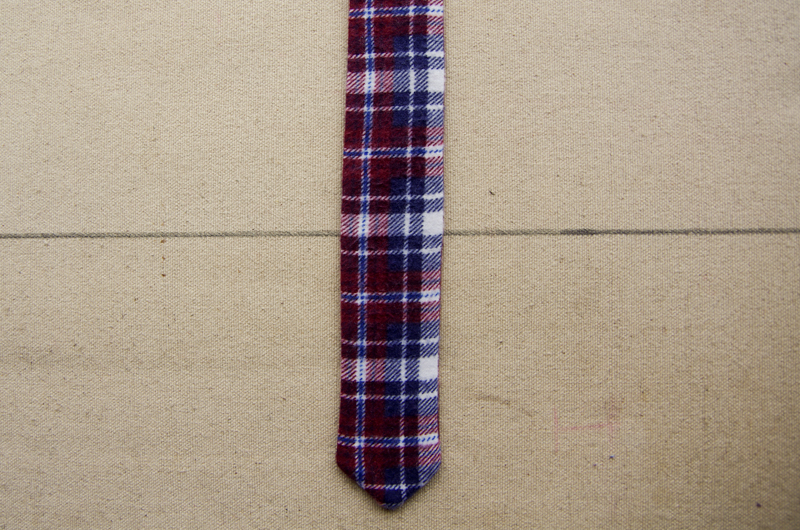
Give your tie a final press and you are done! Match your Mahle tie with a favorite button-up shirt or special occasion outfit as a stylish and sentimental fashion statement. 
May 31, 2022
Timberland Henley Sew-Along: Neckband, Sleeves, Hem

Timberland Henley Sew-Along: Neckband, Sleeves, Hem

For this portion of the sew-along please have ready the front, back, sleeves, and neckband pieces.
Finish the raw edge of the front and back hem using a serge or zigzag stitch.
Fold the hem to the wrong side of the front at 3/4" (1.9 cm). Press.
Pin in place.
Using a single straight stitch, or double needle straight stitch, sew the hem in place. Repeat for the back hem.
TIP: Before folding the hem, make a basting stitch along the hem allowance line, using a straight stitch and long stitch length. This will make it easier to fold along the curved edge of the hem. Instead of using pins, use fusible tape to keep the hem allowance in place.
With the right sides together match the front and back at the shoulder seams. 
Pin and stitch. Finish the seam allowances together and press towards the back.
Variation 1 Henley Neckband:
Fold the neckband in half with the wrong sides together aligning notches. Press.
Variation 2 Scoop Neckband: 
With the right sides together, match and stitch along the short edges of the neckband so that the strip of the neckband becomes a loop. Press the seam open. 
Fold the neckband in half with the wrong sides together aligning notches. Press.
All variations:
With the right sides together match the neckband to the neckline. Stitch. Finish the seam allowances together.
Variation 1 Henley Neckband:
The center front most edge of the neckband should extend past the placket about 5/8" (1.6 cm).
Fold the corner to the wrong side of the placket and wedge it under the seam allowance. Give it a good press. 
Topstitch along the front neckline to keep the neckband seam allowances in place. Use a long straight stitch or a zig-zag stitch.
Add twill tape or bias binding to the back neck and shoulder seam allowances following the instructions.
With right sides together and notches aligned, match and sew the sleeves to the armholes. Finish the seam allowances together. Press the seam allowances towards the body.
With right sides together, notches and underarms aligned, match the front and back together at one side seam. Sew the seam using a zig-zag, stretch stitch, or serge. Press the seam allowances towards the back.
Hem the sleeves.
Tack down the side seam allowances at the hem.
Make sure to trim all threads and give your garment a good press. 
May 17, 2022
Timberland Henley Sew-Along: Placket #1

Timberland Henley Sew-Along: Placket #1

Variation 1: Henley Placket
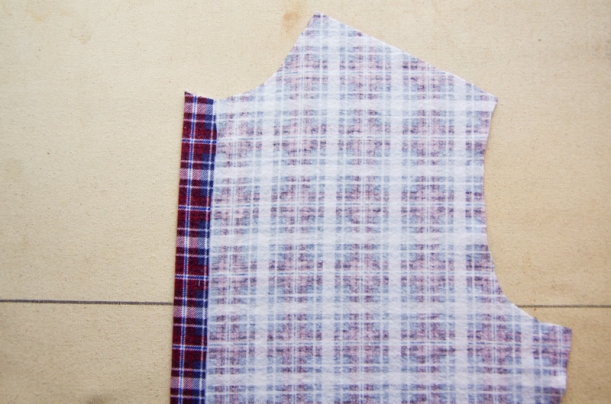
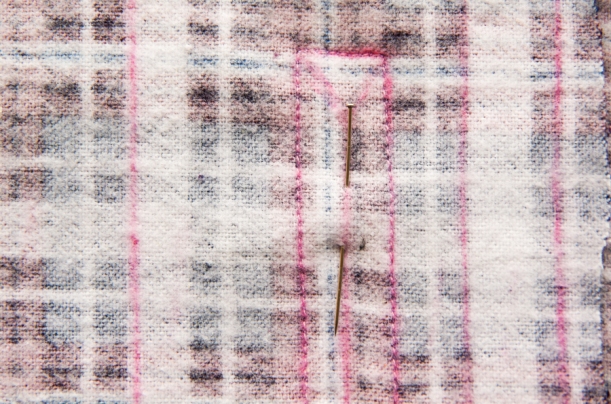
Following the manufacturer’s instructions, apply fusible interfacing to the wrong side of the two placket pieces. Transfer all markings to the front neckline for the placket.
TIP: Before stitching the placket, baste around the rectangle marking at the center front using a straight stitch. This can help you get perfectly straight lines and corners when sewing the placket in later steps.
Match the two placket pieces to the center front at the markings.
Match the right sides of the placket pieces to the wrong side of the front.
Using a straight stitch, sew the placket pieces to the front. Start at the neckline and stitch down to the bottom edge of the front rectangle marking. 
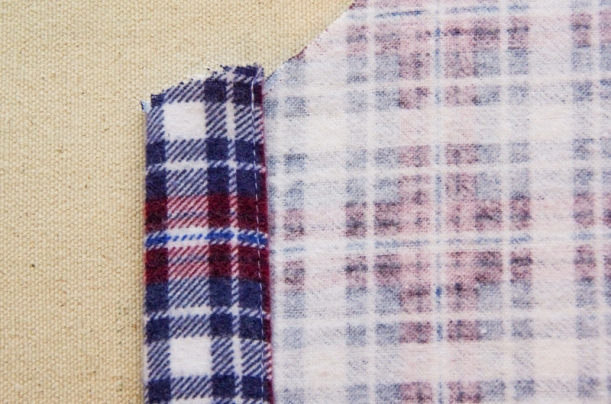
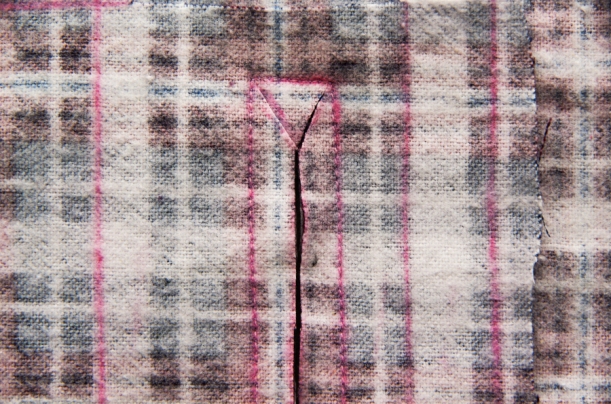
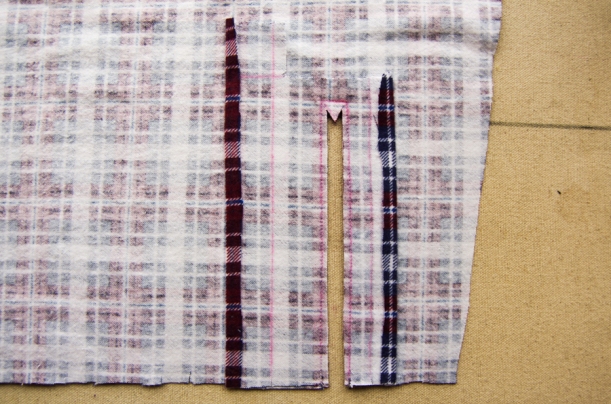
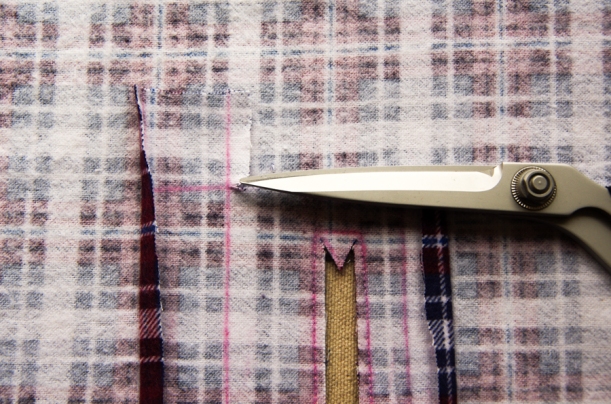
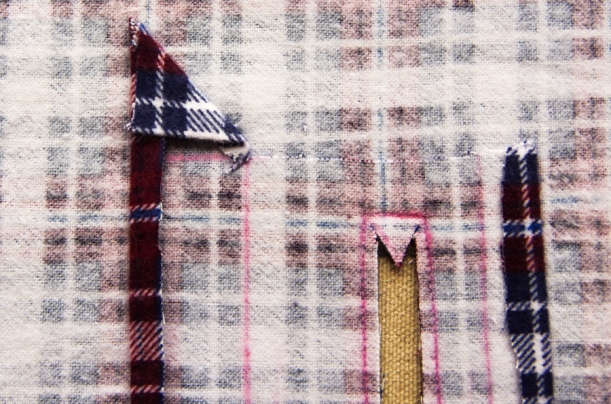
Press the long edges of each placket piece to the wrong side at 1/2" (1.25 cm). Cut the front fabric onlyalong the centerline. Cut from the neckline to the tip of the triangle marking. Clip from the tip of the triangle at an angle to the end of each placket stitch line, creating a short triangle flap. Be very careful to not clip the placket fabric, or clip past the placket stitch lines
TIP: Clip a taller triangle piece than what is marked by cutting down the center front to about 3/4" (1.9 cm) before the placket stitch lines. Making a taller triangle piece can be helpful when folding this piece in later steps, especially if you are using a lightweight knit
Fold the placket pieces in half, sandwiching the seam allowances.
Push the bottom edges of the placket to the right side of the front through the opening.
Lay the front right side facing up, and position the placket pieces so that the right placket is overlapping the left placket. The placket pieces should overlap each other evenly at 1" (2.5 cm). Re-press the placket pieces if needed so they overlap evenly.
Using a needle and thread, baste the placket pieces in place. Using a slip stitch, sew the folded outer edges of each placket to the stitch lines.
Topstitch along the basted edges of each placket stopping just before the end of the placket stitch line.
Tidy up the bottom of the placket pieces. Clip the bottom edge of the left placket piece to about 3/8" (1 cm). Fold under the bottom edge of the right placket piece so no raw edges are exposed. Press.
Using a needle and thread, slip stitch the bottom edge of the front opening (the top of the triangle cut out) to the placket.
Using a needle and thread, stitch the bottom of the right placket in place, securing it to the front.
On the right side bottom of the placket, use a straight stitch to stitch a square and decorative “X” to reinforce the placket.
May 17, 2022
Timberland Henley Sew-Along: Pocket and Placket #2

Timberland Henley Sew-Along: Pocket and Placket #2

For this portion of the sew-along have ready the front, two front placket pieces, and the chest pocket.
Press the top edge of the front pocket to the wrong side 1" (2.5 cm).
Using a straight stitch, stitch 3/4" (1.9 cm) down from the folded edge.
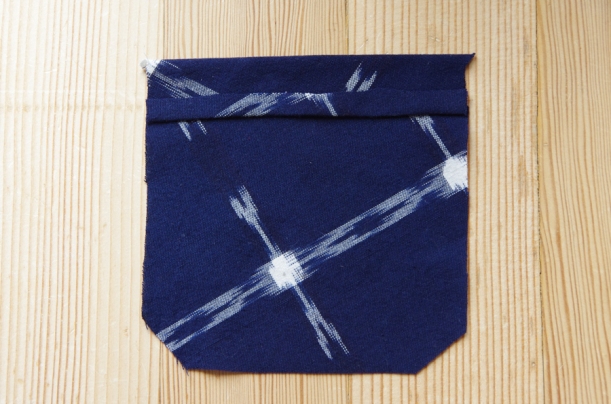
Press under remaining front pocket edges 5/8" (1.5 cm). Reduce bulk if desired by trimming corners and even seam allowances to 3/8" (1 cm) or narrower.
Line up the front pocket with the markings on the front. Pin. 
Using a straight stitch, edgestitch around the front pocket. For reinforcement, stitch narrow triangles at the top corners of the front pocket opening. Do this by pivoting at the corners, stitching a few stitches along the top fold of the front pocket, pivot, and stitch at an angle towards the edgestitch line.
Transfer all markings to the center front neckline for the placket.
Cut from the neckline to the tip of the triangle marking. Clip from the tip of the triangle at an angle to the end of each placket stitch line marking, creating a short triangle flap. Be very careful to not clip past the marking lines.
TIP: Clip a taller triangle piece than what is marked by cutting down the center front to about 3/4" (1.9 cm) before the placket stitch lines. Making a taller triangle piece can be helpful when folding this piece in later steps, especially if you are using a lightweight knit.
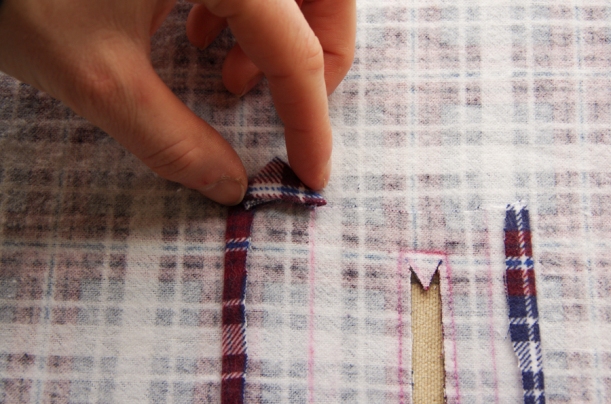
Fold the placket pieces in half lengthwise, matching the long edges, and press.
With the right sides together match the placket pieces to the front of the placket opening.
Using a straight stitch, stitch from the neckline down to the bottom of the rectangle placket marking at 1/2" (1.25 cm).
Finish the seam allowances together using a zig-zag, serge, or stretch stitch.
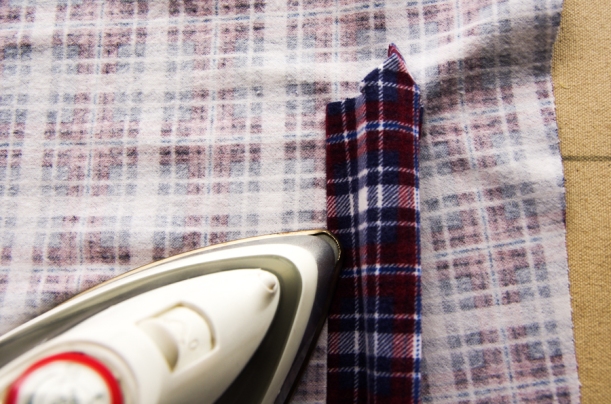
Press the placket pieces towards the center front. 
Press the triangle flap and bottom edges of the placket pieces to the wrong side of the front.
With the right side facing up, overlap the right placket piece with the left.
Neatly press and make sure they are evenly overlapped.
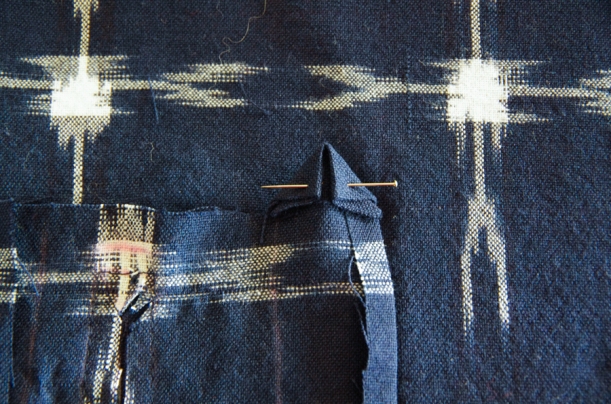
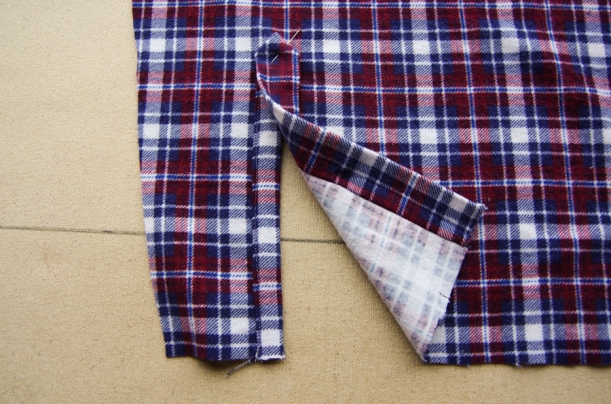
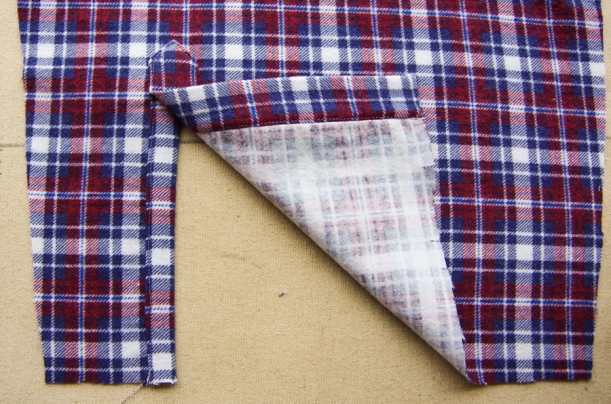
Lift up the hem of the front to expose the triangle cut-out and the two bottom edges of the placket pieces. Pin and stitch the layers together using the fold line created from pressing the triangle flap as a stitch guide.
Finish the edges together using a zig-zag, serge, or stretch stitch.
(view from the wrong side of the front)
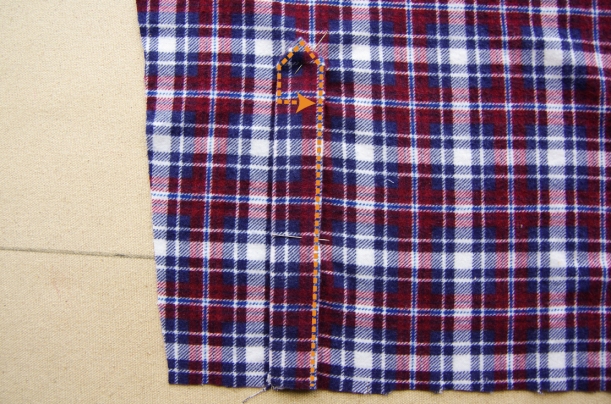
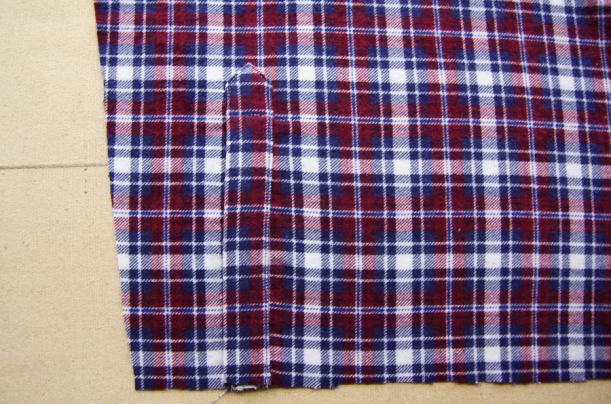
Optional: To keep the seam allowances in place, topstitch around the placket opening making sure to catch the seam allowances underneath.
May 17, 2022
Timberland Henley Sew-Along Day 1: Gathering Materials

Timberland Henley Sew-Along Day 1: Gathering Materials

The Timberland Henley, the newest member of our Parkland Collection and women's version of the Strathcona Henley, is a casual everyday wear garment to add to your wardrobe. This pattern comes in two variations, has a scoop neckline, and a curved hem that is lower in the back. You can choose between long or short sleeves, chest pockets, or add a Henley placket to the front neckline. In our sew-along, we will go over detailed instructions on how to assemble a Henley placket in two ways. 
To begin, pick which variation you would like to make. Then, pick your size.

Please refer to your instruction booklet on how to take your measurements and determine which size works best for you. You can also refer to our Woodley Tee Sew-along where we go into similar detail on which measurements to account for, and which ones you can adjust on the pattern. 

If you need to lengthen or shorten the pattern, it is very important to use our lengthen/shorten lines provided on the front and back pattern pieces. Due to the curvature of the hemline, it is best to make adjustments at the lengthen/shorten lines to keep the correct shape of the hem. 


Fabric

When choosing fabric for your Timberland Henley, we highly suggest picking out a cozy light to medium-weight knit fabric that will soften over time. A medium-weight knit will be easier to sew with, especially if you are planning to make the Henley placket detail. A lightweight knit fabric may be a little trickier to sew with but could make for a perfect summer lounge tee. If you are not sure what type of fabric to look for, think of your favorite t-shirt that you already own and check the fabric weight and content. 


When designing the Timberland Henley, we had a vision of a traditional Henley shirt made in waffle knit fabric that could be a great stand-alone or layering piece. Waffle knit fabrics tend to be more available in cooler weather seasons. For our photo sample, we used a waffle knit from Blackbird Fabrics that unfortunately sold out quickly. We hope they bring it back for next fall/winter ;)
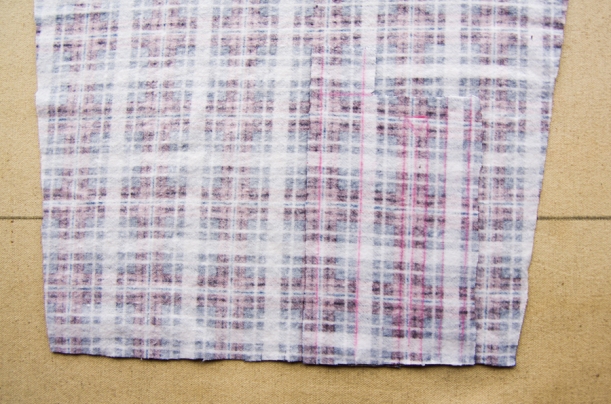
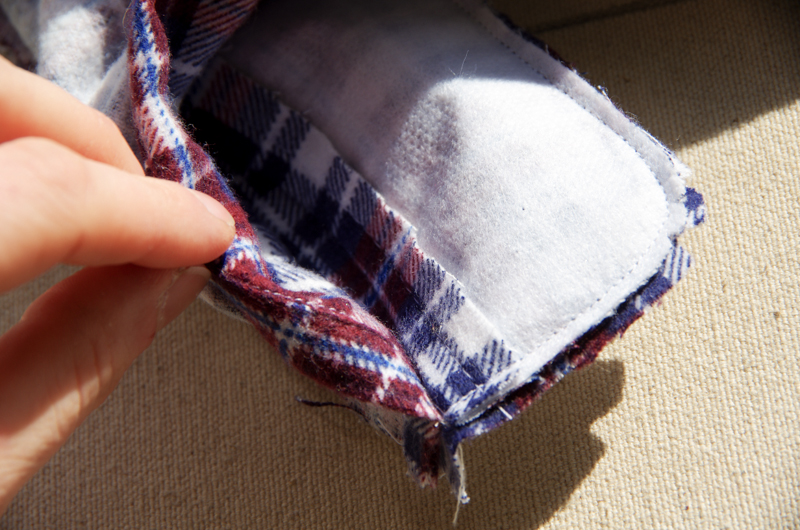
 

Here are some recommendations for online stores that are currently carrying waffle knit fabrics:

Organic cotton waffle knit from I See Fabric

Cotton/spandex waffle knit from Style Maker Fabrics

Here are some non-waffle knit fabrics that are also great for creating the Timberland T-shirt variation:

Hemp/organic cotton jersey knit from Blackbird Fabrics

Mid-weight cotton jersey from Style Maker Fabrics


Some fun bold stripe cotton interlock fabric from Blackbird Fabrics


Optional: Use a matching or contrast ribbing for the neckband of your Timberland Henley or t-shirt. Check your favorite fabric store for their rotating stock on ribbing fabrics. Pictured here is ribbing from Blackbird Fabrics


The only hardware needed for the Timberland Henley is snaps or buttons for the placket variation. You can choose to use sew-on snaps, set-in snaps, or buttons.

Getting Started:

Before our next installment of the Timberland Henley Sew-along refer to our previous tutorials and posts about helpful tips to set up your sewing machine, get your sewing space ready, and how to cut out your pattern pieces from knit fabric:

How to sew with knits

Check out these tools and accessories from our Haberdashery that could help create your Timberland Henley:

March 26, 2022