

Sew-along with us!
Perhaps you'd like some company while you sew? We've sewn up each of our patterns and photographed each step along the way. Find the pattern you're after in the filter drop down below left.


Sew-Alongs

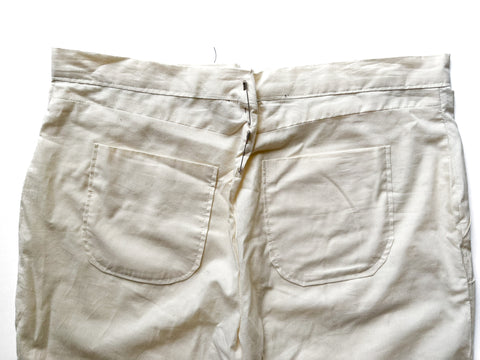
Jutland Pants Sew-along: Day 3- Assemble Front Legs


Jutland Pants Sew-along: Day 4- Assemble the Back Legs


Jutland Pants Sew-along: Day 5 - Sew Inseams and Sideseams


Jutland Pants Sew-along: Day 6: Sew the Fly


Jutland Pants Sew-along: Day 7 - Belt Loops and Waistband

Alternatively, you could make a tube sewing with a 3/8" (1 cm) seam allowance and right sides together, flip and then press before topstitching. This method would be best for lighter fabrics, as flipping the tube right side out can be frustrating when using heavier twills or denim!


sides together (there is no proper right side for the belt loops –
choose the side where the topstitching looks nicest). Baste the belt loops to the waistline at 1/2" (1.3 cm)


Jutland Pants Sew-along: Day 8 - Hem and Finishing Details
Stitch 1/8" (0.3 cm) away from the folded hem edge.


Morden Work Pants Sew-along: Day 1 - Gathering Supplies

Welcome to the Morden Work Pants Sew-along! I (Adrianna) look forward to guiding you through the process to create your own rugged and beautifully fitted work pants! To create the Morden Work Pants I highly recommend you gather together a few specialty tools and trusted hardware. These will prevent unneccessary struggle when working with bulky seams and rugged material. Here I will walk you through the different things that you may need to install hardware, sew bulky seams, and embellish your pants.
Useful Tools

- Tailor's Clapper: A tailor's clapper is a great tool to add to your sewing space if you don't have one already. The clapper helps to set seams when pressing to give a nice clean finish. You can also use the clapper on bulky seam areas to flatten the fabric so it will get under your presser foot easier.

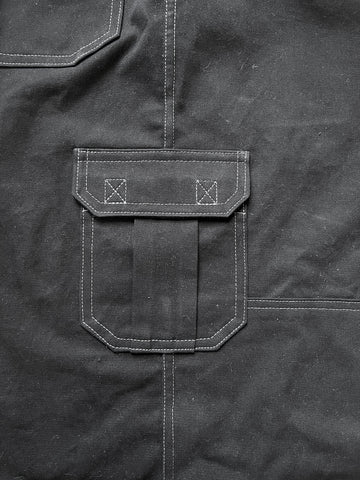
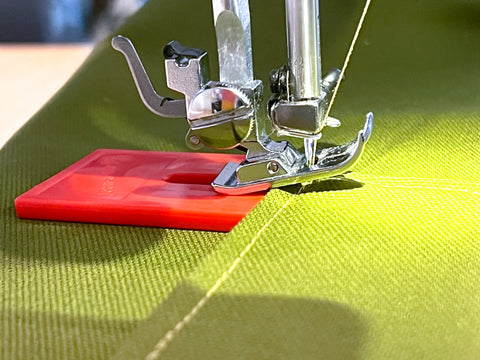
- Seam Jumper: The seam-jumper or Jean-a-ma-jig tool is crucial to sewing over bulky seams on a home sewing machine, even heavy-duty machines. The Jean-a-ma-jig helps to raise the presser foot when stitching so it doesn't get caught on a seam ridge. When sewing my pairs of Morden Work Pants I used this tool not only on seams but for stitching the Variation 1 back pockets to the back. I will show in more detail how I used the tool later on in the Sew Along!
HARDWARE

- Button: A no-sew jeans button measuring 1/2"-1".
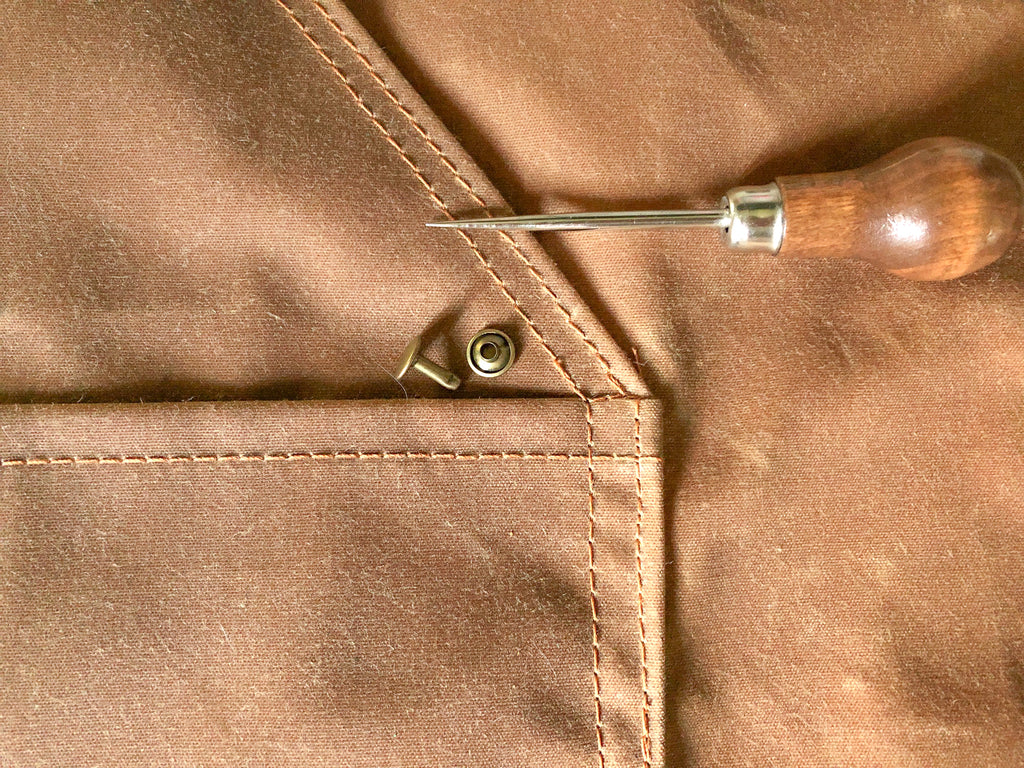
- Pocket rivets: Rivets are optional if you are using a fabric other than denim since you could also just bar tack very securely at these pressure points but I don't think rivets are optional if you are sewing with denim. They are essential to creating the classic strength and appearance of jeans. Closet Core, Core Fabrics, and Kylie and the Machine have wonderful hardware kits that include zippers, buttons, rivets, and tools to install them.


- Optional tools to apply rivets: Some other tools you may use for installing hardware are a rubber mallet, which can be found anywhere from your local fabric or hardware store; and a rivet setter. Rivet setters tend to be a bit more pricey and harder to come across, but if you plan to use hardware details often, this may be a good investment as it is the easiest way to install hardware!

Essential Notions

- Metal-toothed Zipper: If you can not find the size recommended in the instruction booklet, a longer zipper will do just fine! I will be showing you how to shorten the zipper during the sew-along. We carry 7" and 8" jeans zippers in our shop.

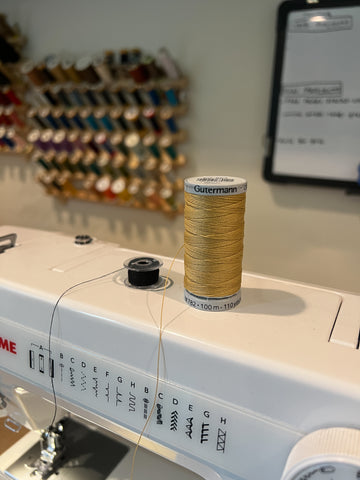
- Thread (Regular and Top-stitching): You will need regular polyester thread (which is stronger than cotton) to match the color of your denim and thicker topstitching thread in a pleasing contrasting color. Some of our test sewers successfully sewed their entire jeans using Gutermann Extra Strong Thread which is not quite as thick as topstitching thread. This allowed them to skip the hassle of re-threading their machine each time they needed to topstitch. My machine is never very happy when sewing with thick thread (it binds up when I backstitch) so I prefer to switch back and forth to ensure that my seams are strong and backstitched securely before I topstitch them. If using topstitching thread it is important to only use topstitching thread on the needle side of your machine, and regular thread in the bobbin. Most machines do not handle well with topstitching thread in the bobbin.
FABRIC
- If you are creating these pants for casual everyday wear, choose trouser-weight wovens (light to medium weight) such as twill, denim, canvas, and gabardine.
- Alternatively, use materials suited to the intended use of the pants. For example, for hiking, mountain biking or outdoor work wear pants choose water-resistant cotton or synthetic blends designed for active wear (such as Ripstop).
Here is some inspiration for fabrics and colors pulled from some of our favorite fabric stores mentioned below!


- Pocketing: You will need pocket lining fabric such as broadcloth, quilting cotton, or other strong, tightly woven cotton or cotton blends. If you are making your Morden Pants out of a heavier fabric you can also use the pocket lining fabric to make the fly facing.

Fabric Sources
Canada
Fabrications Ottawa - a great online shop that includes a stock of Cone Mills US-made S-gene denim in multiple weights!
Blackbird Fabrics - an online shop just across the water from me! Caroline often has a nice selection of denim in stock and occasionally gets in a supply of coveted Cone Mills.
Core Fabrics - Heather-Lou is known for her excellent women's jeans patterns. She stocks jean-making kits including all the notions you need and high-quality denim. They often sell out fast but you might be in luck snagging a non-stretch kit in particular since these are less in demand than the stretch denim needed for her Ginger Jeans pattern.
Simplifi Fabric - An online shop completely focused on organic and ecologically friendly fabrics! They have a great selection of denim and canvas.
USA
Stylemaker Fabrics - An organized selection of denim in various weights and amounts of stretch.
Britex Fabrics - They have a few very well-priced Japanese selvage denim that is worth a peruse!
Bolt Fabric Boutique - They have a range of canvas, denim, twill, and water-resistant fabrics that are always stocked.
Fancy Tiger Crafts - A nice array of denim from various manufacturers - all well-labeled so you can compare the differences. I like the US-made bull denim choices in particular. Bull denim is dyed after weaving to produce a uniform colour (whereas regular denim features an indigo warp thread and white weft thread).
Harts Fabric - A comprehensive selection of quite affordably priced denim. I especially like the look of the wide denim which would save a lot of fabric when cutting out men's larger sizes.
UK
Merchant & Mills - A large range of high-end denim very suitable for men's jeans - you might like to make a mock-up first due to the price point of these quality fabrics!
Empress Mills - Some very affordable denim in a variety of weights. A great way to test out a pair of jeans without a huge investment!
Croft Mill - Another selection of affordable denim and some interesting choices including prints, pre-washed, broken twill weave, extra wide, etc.
Preparations
Before we continue with the sew-along, make sure to pre-wash your fabric. If using denim, I recommend washing it with a cup of vinegar on fairly high heat to set the indigo dye and pre-shrink/pre-soften the denim...unless, of course, you are a denim enthusiast who wants to sew up a pair of raw denim jeans! In that case, you'll want to keep them stiff and saturated with dye by avoiding washing at all!
If you are using a pre-treated fabric or specialty outerwear fabric, such as water resistant canvas, you do not need to wash your fabric. Instead, follow the fabric care guides for your fabric.

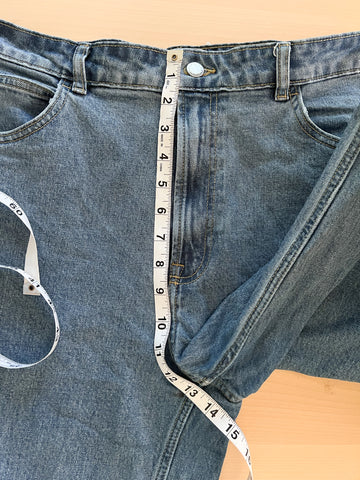
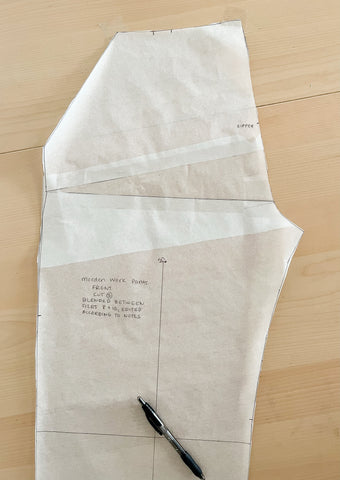
Morden Work Pants Sew-along: Day 2 - How to Fit Your Morden Work Pants
- Adjusting inseam length
- A front rise or back rise adjustment may be needed if you have a longer or shorter torso, or more or less fullness in those areas than the pattern allows for.
- Taking in or letting out at the waistband
- Tapering or widening the leg opening
- Blending between sizes
In this post, I will walk you through how I made adjustments to my pattern to get the best fit.
HOW TO MEASURE YOUR GARMENT


FIND YOUR SIZE

ADJUSTING THE PATTERN


FITTING THE MUSLIN


Morden Work Pants Sew-along: Day 3 - Pockets, pockets, pockets!
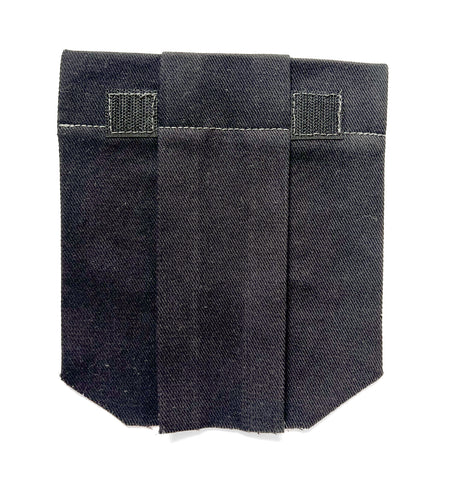
COIN POCKET


BACK POCKETS


ATTACHING POCKETS TO THE BACK LEG


Morden Work Pants Sew-along: Day 4 - Assemble Back Pant
ATTACH BACK YOKE


SEW BACK SEAT SEAM


ATTACH GUSSET


ATTACH LOWER BACK


VARIATION 1 ONLY: ATTACH BACK HEM REINFORCEMENT


Morden Work Pants Sew-along: Day 5 - Assemble Fronts & Tutorial to Add Removable Knee Pads!
FRONT KNEE DARTS


VARIATION 1 FRONT KNEE PATCH


REMOVABLE KNEE PAD CONSTRUCTION


Morden Work Pants Sew-along: Day 6 - Front Pockets
FINISH FACING PIECES

ATTACH FACINGS TO POCKET LININGS


ATTACH THE FRONT OUTER POCKETS
Match the front outer pocket to the front at the slanted pocket opening edge. Position your pieces so that the right side of the front is facing up. Match the facing side of the outer pocket to the front. This will be the right side together with the front and the pocket facing, but the wrong side of the lining.
Stitch together at 5/8" (1.5 cm)

Press the outer pocket and seam allowances away from the front along the seam. If using a bulky fabric, trim and grade the seam allowances.

Fold the outer pocket to the wrong side of the front, along the seam. Neatly press the pocket opening edge so that it is a straight line and not curved or wobbly in any parts. It also is best to press the seam slightly to the wrong side so that you don't see the seam from the right side of the fabric.
Using topstitching thread, edgestitch along the pocket opening through all layers. Next, topstitch along the pocket opening through all layers to create a double row of stitching.

FINISH POCKET LININGS WITH A FRENCH SEAM
**For this section, when referring to "right" or "wrong" sides I will only be referencing the pocket lining, not the facing pieces. This is to make matching the pieces together hopefully less confusing!
Fold the outer pocket up and away from the front. Position your pieces so that you are seeing the wrong side of the front and the right side of the outer pocket lining.

Now you are going to match the front inner pocket lining to the outer pocket lining. With the right sides together, match the lining pieces together at the long straight edges and bottom edges.

Stitch around the edges at a 1/4" (6 mm) seam allowance.
Trim the seam allowances so that they are even and there are no stray threads.

Flip the lining pieces to be wrong sides together. Neatly press the seams.
Stitch again along the edges, this time at 3/8" (9 mm) making sure to encase the raw edges of the fabric from the previous step.

You now have perfectly sewn front pockets finished with a French seam! The reason for the specific "right" and "wrong" sides of the fabric, is so that if you are using a fun, printed fabric for the lining, you can see the lining as shown in the picture below!
Position the pockets into place and baste around the waist and side seam edges to secure the pocket for the next steps.

FINISH THE POCKET LININGS WITH A STITCH AND SERGE
Finish the long straight edges of the inner pocket facings.

Since I am using a heavy fabric I am choosing to leave the finished edges flat instead of folding them under.
With the inner pocket lining pieces facing the right side up, match the wrong sides of the facings to the right side of the linings. Match the side and bottom edges.
Edgestitch along the finished edge of the facing pieces to secure them to the linings. Baste along the bottom and side edges.

Repeat the same steps for the outer pocket facings and lining pieces.

With right sides together match the outer pocket to the front along the angled edge. Stitch together at 5/8" (1.5 cm).

Trim and grade the seam allowances.

Press the outer pocket and seam allowances away from the front.
Understitch along the outer pocket catching the seam allowances underneath.

Fold the outer pocket all the way to the wrong side of the front.
Using topstitching thread, edgestitch and topstitch through all layers along the angled edge.

Now fold the outer pocket away from the front pant. With right sides together match the inner pocket and outer pocket together along the bottom and straight edges.
Stitch together at 5/8" (1.5 cm) and then finish the seam allowances together.


Fold the pocket pieces into place and make sure everything is laying nicely with the right sides facing up.

Baste along the waist and side seam edges through all layers to keep the pocket bags in place.
